Easy Greek Salad Quick and Tasty Recipe Guide

Looking to whip up a quick and tasty meal? This Easy Greek Salad is your answer! With fresh veggies and zesty dressing, it’s perfect for lunch or dinner. In this guide, I’ll walk you through all the simple steps, from picking the best ingredients to serving it with flair. Say goodbye to boring meals, and let’s make a salad that bursts with flavor! Keep reading to get started.
Ingredients
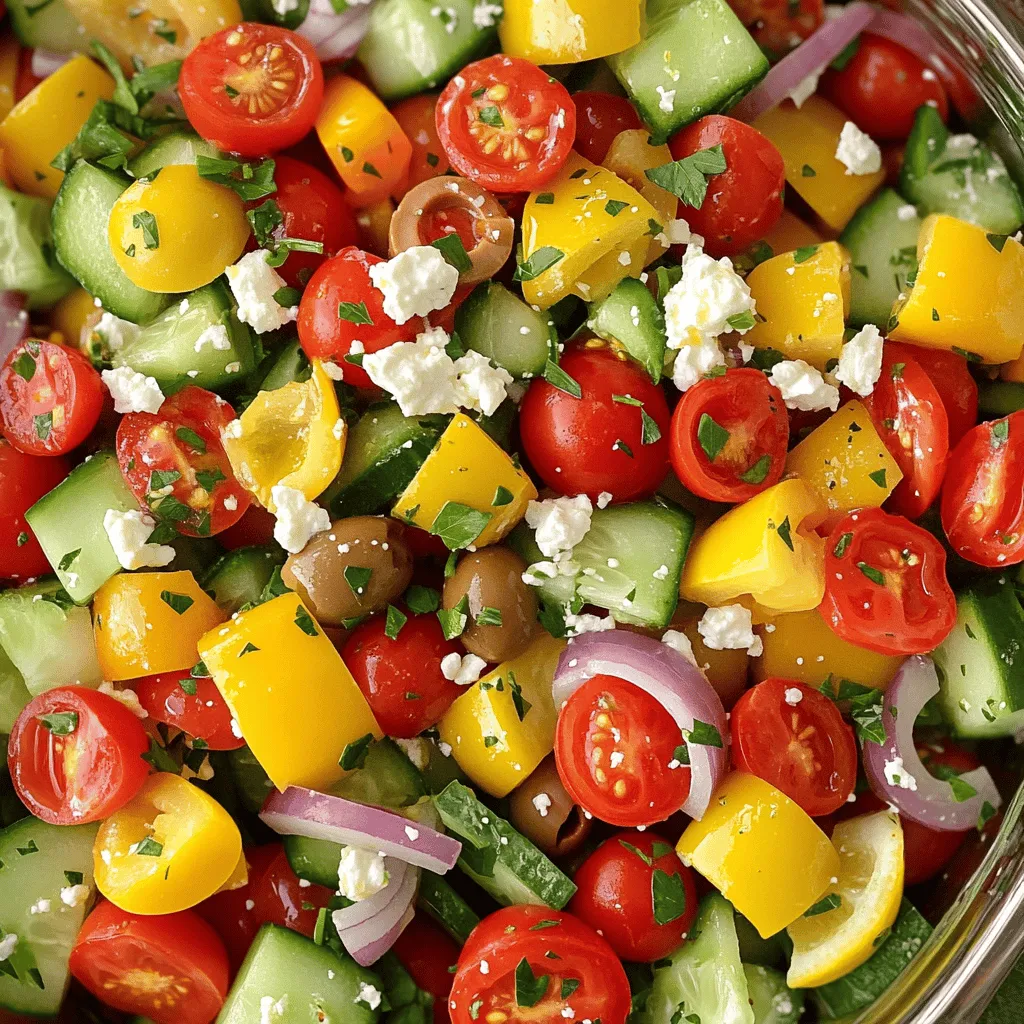
List of Ingredients for Easy Greek Salad
To make a tasty Easy Greek Salad, you need:
– 2 cups cherry tomatoes, halved
– 1 medium cucumber, diced
– 1 red bell pepper, diced
– 1 yellow bell pepper, diced
– 1/2 red onion, thinly sliced
– 1 cup Kalamata olives, pitted and halved
– 1 cup feta cheese, crumbled
– 3 tablespoons extra virgin olive oil
– 2 tablespoons fresh lemon juice
– 1 teaspoon dried oregano
– Salt and freshly ground black pepper to taste
– Fresh parsley, finely chopped (for garnish)
Tips for Selecting Fresh Produce
When you shop for your salad, look for bright colors. Choose firm tomatoes, crisp cucumbers, and vibrant bell peppers. Check for any bruises or soft spots on the produce. For onions, select ones that feel heavy and have a dry outer skin. Fresh herbs like parsley should smell strong and look bright. This will make your salad taste better!
Alternative Ingredients/Substitutions
If you can’t find some ingredients, don’t worry! You can swap cherry tomatoes for regular tomatoes. Any cucumber can work if you can’t find the one you usually buy. You can use green bell peppers instead of red or yellow. If you prefer a different cheese, try goat cheese or even a dairy-free option. Just keep the flavors fresh and bright.
Step-by-Step Instructions
Preparation of Vegetables
To start, prepare the vegetables. First, take 2 cups of cherry tomatoes and cut them in half. Next, grab 1 medium cucumber and dice it into small pieces. Then, take 1 red bell pepper and 1 yellow bell pepper, and dice them both. These colors make the salad bright! Now, slice 1/2 a red onion thinly. Lastly, measure out 1 cup of Kalamata olives, pitting and halving them.
Making the Salad Dressing
Now, it’s time to make the dressing. In a small bowl, combine 3 tablespoons of extra virgin olive oil and 2 tablespoons of fresh lemon juice. Add in 1 teaspoon of dried oregano. Then, sprinkle in a pinch of salt and freshly ground black pepper. Whisk them together until the dressing is nice and smooth. This dressing adds a burst of flavor to your salad.
Combining Ingredients
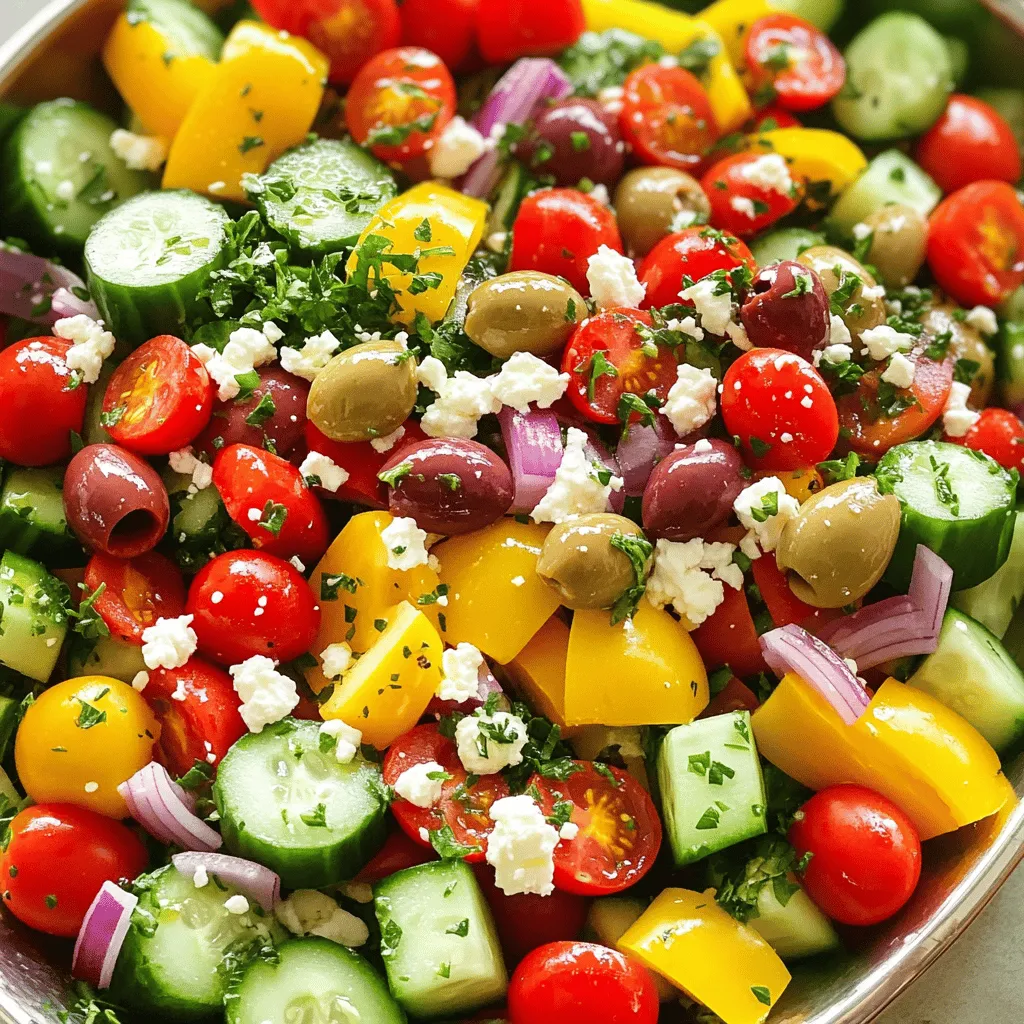
In a large mixing bowl, add your prepared vegetables. Toss in the halved Kalamata olives. Drizzle the dressing over the veggies. Use a large spoon to gently mix everything. You want all the veggies coated! Next, sprinkle 1 cup of crumbled feta cheese on top. Give it one last soft toss to mix in the feta without breaking it. You can serve this salad right away or chill it in the fridge for about 15 minutes. This waiting lets the flavors blend perfectly. Enjoy your Mediterranean delight!
Tips & Tricks
How to Serve for Maximum Flavor
To get the most flavor from your Easy Greek Salad, serve it chilled. This enhances the crispness of the veggies. Add the dressing just before serving. This keeps the salad fresh and crunchy. You can also sprinkle fresh herbs, like parsley or mint, right before serving. These herbs add a pop of color and extra flavor.
Time-Saving Tips for Quick Prep
To save time, prep all your veggies first. Use a sharp knife for quick chopping. Cherry tomatoes and cucumbers are easy to cut. You can buy pre-diced bell peppers and onions at the store too. Another great tip is to make the dressing in advance. Store it in a jar and shake it before use. This way, you can whip up your salad in minutes.
Presentation Ideas for Serving
For a beautiful presentation, use a large, shallow bowl. This lets the colors shine. Layer the ingredients rather than mixing them. Start with a base of greens, then add the colorful veggies on top. Finish with crumbled feta and a drizzle of dressing. You can add lemon wedges on the side. This not only looks nice but also allows guests to add more flavor if they wish. For a final touch, a sprinkle of fresh parsley adds a lovely contrast.

Variations
Mediterranean Additions: Other Ingredients to Try
You can easily switch up your Greek salad. Try adding artichoke hearts, capers, or even roasted red peppers. These ingredients add more flavor and texture. You might also want to include some fresh arugula or spinach for added greens. This keeps the salad vibrant and exciting.
Vegan and Vegetarian Options
If you want a vegan Greek salad, skip the feta cheese. Instead, use avocado or tofu for creaminess. You could also try vegan feta, which tastes great. This way, you still enjoy a rich flavor without any dairy. For vegetarians, the original recipe works perfectly, so feel free to add extra feta.
Flavor Enhancements: Herbs and Spices
Herbs and spices can make your salad pop. Fresh dill or mint adds a lovely twist. You can also sprinkle in some paprika for warmth. If you like a kick, add red pepper flakes. These simple changes make your salad unique and full of flavor. With these variations, you’ll never get bored of your Greek salad again!
Storage Info
Best Practices for Storing Leftovers
To keep your Easy Greek Salad fresh, place it in an airtight container. This helps to lock in flavors and prevent spoilage. If you have leftover dressing, store it separately. This way, the salad won’t get soggy. When you want to eat it again, just mix the dressing in fresh.
How to Keep Ingredients Fresh
Store your vegetables in the fridge. Keep cherry tomatoes on the counter for better flavor. Cucumbers and bell peppers do well in the crisper drawer. To keep feta cheese fresh, wrap it in parchment paper and then place it in a container. You can also add a little olive oil to keep it moist.
Shelf Life of Ingredients
Most ingredients last about 3-5 days in the fridge. Cherry tomatoes may last up to a week. Cucumbers and bell peppers generally stay fresh for about 5 days. Feta cheese, when stored well, can last up to 2 weeks. Always check for signs of spoilage before using.
FAQs
What is the best way to make homemade Greek salad dressing?
The best homemade Greek salad dressing is simple and fresh. You need three key ingredients: olive oil, lemon juice, and oregano. Start with three tablespoons of olive oil. Then, add two tablespoons of lemon juice. Sprinkle in one teaspoon of dried oregano. Mix these well in a bowl. You can add salt and pepper to taste. This dressing is tasty and brightens the salad.
Can I make Easy Greek Salad in advance?
Yes, you can make Easy Greek Salad in advance. Prepare the salad without the dressing. Store it in the fridge for up to a day. When you’re ready to eat, drizzle the dressing over the salad. This keeps the veggies crunchy and fresh. If you add the dressing early, the salad may get soggy.
What are the nutritional benefits of eating Greek salad?
Greek salad is packed with nutrients. It is low in calories but high in vitamins. The fresh vegetables provide fiber and hydration. Feta cheese adds protein and calcium. Olive oil offers healthy fats. Eating Greek salad can support heart health and aid digestion. It’s a great choice for a light meal.
How can I customize this recipe for dietary restrictions?
You can easily customize this recipe. For a vegan option, skip the feta cheese. Use a different cheese or leave it out entirely. If you’re gluten-free, this recipe is already safe. For nut allergies, ensure the olives are safe. You can also swap out veggies based on your taste or what you have.
What to serve with Greek salad for a complete meal?
Greek salad pairs well with many dishes. It is great with grilled chicken or fish. You can serve it with pita bread for a filling snack. A side of hummus also complements the salad nicely. For a hearty meal, add some quinoa or couscous. This combination makes a balanced and tasty dinner.
Easy Greek Salad is simple and fun to make. You learned about fresh ingredients, tips for prep, and ways to serve. Consider adding your favorite items like olives or chickpeas for variety. Store leftovers properly to keep them fresh longer. Remember, Greek salad packs great flavor and nutrition. You can make it ahead and customize it for your needs. Enjoy creating your perfect salad!


![- 1 perfectly ripe avocado - 1 cup canned chickpeas, thoroughly rinsed and drained - 4 slices of hearty whole-grain bread - 1 tablespoon creamy tahini - 1 tablespoon fresh lemon juice - 1 garlic clove, finely minced - Salt and freshly cracked pepper to taste - 1 teaspoon olive oil - Fresh cilantro or parsley, finely chopped, for garnish This list includes all the key items for a delicious chickpea avocado toast. The ripe avocado brings creaminess, while canned chickpeas add a nutty flavor and protein. Whole-grain bread serves as a hearty base, making this meal filling and healthy. The tahini, lemon juice, and garlic enhance the taste, giving it a zesty kick. For seasoning, salt and pepper balance the flavors, and a drizzle of olive oil adds richness. Don't forget the fresh herbs for color and freshness. This chickpea avocado toast is not just simple but also packed with nutrition. For the complete recipe, check out the Full Recipe section. 1. Start by taking your ripe avocado. Cut it in half and remove the pit. 2. Use a fork to mash the avocado in a medium bowl. Aim for a creamy texture but keep some small chunks. 3. In another bowl, mix the rinsed chickpeas with tahini, lemon juice, minced garlic, salt, and pepper. 4. Use a fork to lightly mash the chickpeas. You want a mix that is chunky and smooth. 5. Gently fold the mashed avocado into the chickpea mix. Make sure they blend well. Taste and adjust with salt and pepper if you want. 1. Heat a non-stick skillet over medium heat. Add the olive oil to the skillet. 2. Place the slices of whole-grain bread in the skillet. Toast each side until they are golden brown, about 2-3 minutes per side. 3. Once toasted, take the bread out of the skillet. 1. Spread the chickpea-avocado mixture generously on each slice of bread. Let it mound on top for a nice look. 2. If you like spice, sprinkle red pepper flakes over your toast. 3. Garnish with finely chopped cilantro or parsley for extra color and flavor. For the complete recipe, visit the [Full Recipe]. To make the best avocado mash, select a ripe avocado. Look for one that gives slightly when you press it. This means it is ready to use. Overripe avocados can taste bitter, so choose wisely. For a perfect texture, mash the avocado with a fork. Leave some small chunks for a nice bite. The mix of smooth and chunky adds character to your toast. For golden toast, there are a few great methods. You can use a skillet or a toaster. If you want a crispy side, the skillet is best. Heat some olive oil and toast the bread until golden brown. This takes about 2-3 minutes per side. If using a toaster, set it to a medium setting. Check the bread to avoid burning. The goal is a crispy outside with a soft inside. Presentation matters! Serve your toasts on a wooden board or a bright plate. This makes the meal look more inviting. Add fresh tomato or radish slices on the side. They add color and freshness to the plate. For a fun touch, you can also sprinkle extra herbs on top of the toast. Enjoy your Chickpea Avocado Toast Delight with these simple yet effective serving ideas. {{image_4}} To make your chickpea avocado toast even better, add spices and herbs. - Spices: Try cumin for a warm taste. Smoked paprika adds a smoky note. You can also add curry powder for an exotic twist. Each spice brings its own charm. - Herbs: Fresh herbs can change the whole dish. Basil gives a sweet touch. Mint adds freshness. Chives offer a mild onion flavor. Experiment with what you love best. You can switch up the toppings to make your toast unique. - Vegetables: Sliced radishes add crunch. Cherry tomatoes give a sweet burst. Thinly sliced cucumber keeps it refreshing. You can also add arugula for a peppery kick. - Cheese: If you enjoy cheese, sprinkle feta for a tangy touch. Goat cheese also works well, adding creaminess. For a vegan option, try cashew cheese. It melts beautifully and tastes great. Choosing the right bread can change your toast game. - Gluten-free options: If you need gluten-free bread, look for brands made from almond flour or chickpeas. They hold up well and taste good too. - Different types of bread: Sourdough offers a tangy flavor. Rye bread has a hearty taste. Whole wheat adds fiber. Experiment with your favorites to find the best fit for your chickpea avocado toast. For the complete recipe, refer to the Full Recipe section. To keep your chickpea avocado toast fresh, store it in an airtight container. You can place it in the fridge for up to two days. Avoid stacking the toasts to prevent sogginess. Keep the chickpea-avocado mixture separate if possible. This helps maintain the texture of the bread. When reheating, use a skillet instead of a microwave. This method helps keep the toast crispy. Heat the skillet over medium heat and place the toast in it. Warm for about one minute on each side. Check for warmth, but do not overheat, as this can make the toast tough. You can freeze the chickpea-avocado mixture, but not the toast. Place the mixture in a freezer-safe container. It can last for up to three months. When ready to use, thaw it in the fridge overnight. Mix it well before spreading on fresh toast. This method keeps the flavors intact. For the full recipe, check the earlier sections. Enjoy your meal! What are the health benefits of chickpeas and avocados? Chickpeas and avocados pack a punch of nutrition. Chickpeas are high in protein and fiber. They help keep you full and support digestion. Avocados are rich in healthy fats and vitamins. They boost heart health and provide energy. Together, they make a great team for a healthy meal. How do I know if my avocado is ripe? To check if an avocado is ripe, gently squeeze it. It should feel slightly soft but not mushy. Look for a darker skin color, but remember, not all avocados change color the same way. If the stem comes off easily and is green underneath, your avocado is ripe and ready to enjoy. Can I make this recipe vegan? Yes, this recipe is already vegan! It uses chickpeas and avocados, which are plant-based. The tahini adds creaminess without any animal products. You can enjoy this meal guilt-free. How to adjust the recipe for larger servings? To serve more people, simply double or triple the ingredients. For example, use two or three avocados and two cups of chickpeas. Just make sure you have enough bread for everyone. This dish is easy to scale up for gatherings or meal prep. What can I use instead of tahini? If you don't have tahini, you can use almond butter or sunflower seed butter. Both will add creaminess and flavor. You could also skip it entirely if you prefer a lighter taste. Alternatives for chickpeas or gluten-free bread options? If you cannot use chickpeas, try white beans or black beans. They offer similar texture and flavor. For gluten-free bread, look for gluten-free whole-grain options at your store. You can also use lettuce wraps for a low-carb choice. For the full recipe, check out the Chickpea Avocado Toast Delight! This blog post covered how to make a tasty chickpea-avocado toast. We explored key ingredients, like ripe avocados and chickpeas, plus seasonings that add flavor. The step-by-step instructions make it easy to prepare, toast, and serve. We also shared tips for perfecting your mash and variations to try. Remember, you can store leftovers and even freeze the mixture for later. Enjoy experimenting and savoring this healthy dish! Your kitchen adventure can lead to delicious meals every time.](https://joymealplan.com/wp-content/uploads/2025/07/272c5bbc-f1a7-4dd0-b647-af222511af36-768x768.webp)
![To make delicious Rainbow Veggie Wraps, gather these fresh ingredients: - 4 large whole wheat tortillas - 1 cup of your favorite hummus - 1 cup shredded carrots - 1 cup red bell pepper, thinly sliced - 1 cup cucumbers, julienned - 1 cup purple cabbage, shredded - 1 ripe avocado, sliced - 1 cup fresh spinach leaves - 2 tablespoons sesame seeds (optional) - Salt and pepper to taste - Fresh herbs like cilantro or basil for garnish (optional) Each ingredient brings unique flavors and colors to your wraps. Whole wheat tortillas provide a healthy base. Hummus adds creaminess and taste. Shredded carrots offer crunch and sweetness. Red bell pepper adds vibrant color and a mild flavor. Cucumbers bring a refreshing crunch, while purple cabbage adds a nice texture. Avocado gives a creamy richness. Fresh spinach leaves add nutrition and color. You can sprinkle sesame seeds for extra crunch. Optional toppings like fresh herbs enhance the taste and look of your wraps. A pinch of salt and pepper brings all the flavors together. For the full recipe, check out the entire section. Start by washing all your vegetables. This keeps them fresh and clean. First, rinse the cucumbers, carrots, red bell pepper, purple cabbage, and spinach under cold water. Pat them dry with a clean towel. Next, slice the cucumbers into thin sticks. Shred the carrots and purple cabbage using a grater. For the red bell pepper, cut it into thin slices. Lastly, slice the ripe avocado carefully to avoid any bruising. When you are ready to spread the hummus, take a large spoonful. Place it in the center of each tortilla. Use the back of the spoon to spread it evenly. Leave about an inch of space from the edges. This helps to fill the wrap without making a mess. Now it's time to build your wrap. Start by laying a handful of fresh spinach leaves in the center of each tortilla. Next, add a layer of shredded carrots, followed by the red bell pepper slices. Then, place the cucumber sticks, shredded cabbage, and avocado slices on top. Lightly sprinkle salt and pepper over the veggies to boost their flavor. If you like, add some sesame seeds for a crunchy texture. To roll your wrap, begin at one end. Tuck the filling tightly as you roll towards the other end. Be sure to fold in the sides as you go. This helps keep all the tasty fillings secure. Once you have rolled all the wraps, grab a sharp knife. Cut each wrap in half diagonally. This shows off the bright, colorful layers inside. Now, arrange your cut wraps on a serving platter. If you want, sprinkle some fresh herbs like cilantro or basil on top for a lovely touch. Try this full recipe to enjoy a fresh and flavorful meal! You can swap or add veggies based on what you have. Here are some ideas: - Use zucchini or yellow squash for a different taste. - Try radishes for a crunchy bite. - Sweet potato adds natural sweetness when roasted. - Bell pepper colors can change based on what’s fresh. For spreads, think outside the box: - Guacamole gives a creamy touch. - Tzatziki adds a fresh, tangy flavor. - Try a spicy hummus for a kick. Make your wraps look great for any gathering. Cut them into smaller pieces for easy sharing. Arrange them on a colorful plate. You can also use a large platter and create a rainbow effect with the veggies. Add fresh herbs on top for a pop of color. Pair your wraps with tasty dips: - A simple yogurt sauce works well. - Try a spicy salsa for heat. - Peanut sauce can add a nice twist. For a fun touch, serve the wraps with toothpicks. This makes them easier to grab and enjoy. For the full recipe, check out the Rainbow Veggie Wraps section. {{image_4}} You can make these rainbow veggie wraps even more exciting. Adding protein boosts flavor and fills you up. Grilled chicken, shrimp, or tofu works great. Just slice them thin and layer them in the wrap. You can also mix in herbs and spices. Fresh cilantro or basil adds a tasty kick. Want a bit of heat? Add sliced jalapeños or a dash of hot sauce. For a zesty touch, try a sprinkle of lemon juice or a bit of garlic powder. These small changes can turn a simple wrap into a flavor explosion. These wraps are easy to adjust for different diets. If you need gluten-free options, use gluten-free tortillas. Many brands offer great taste without gluten. For a vegan version, skip the chicken or shrimp. The fresh veggies and hummus keep it tasty and filling. If you want lower calories or low-carb options, swap the tortilla for lettuce leaves. This keeps the wraps light and fresh. You can also reduce the hummus or use a low-calorie spread. These tweaks help you enjoy the wraps while sticking to your goals. For the complete recipe, check out the [Full Recipe]. To keep your Rainbow Veggie Wraps fresh, store them in a sealed container. Wrap each one in parchment paper or plastic wrap. This helps prevent them from drying out. If you make wraps in advance, place a paper towel in the container. This will absorb excess moisture and keep them crisp. If you want to meal-prep, assemble the ingredients without rolling them. Store the veggies and hummus separately. When ready to eat, just spread the hummus and roll. This keeps everything fresh and tasty. You can keep your wraps in the fridge for about three days. After that, they may start to lose their crunch and flavor. Check for any signs of spoilage like a sour smell or slimy texture. If you see these signs, it's best to throw them away. Enjoy your wraps while they are still fresh for the best taste! To make your Rainbow Veggie Wraps more filling, you can add proteins or grains. Here are some suggestions: - Grilled chicken for a meaty option - Tofu or tempeh for a plant-based choice - Quinoa or brown rice for hearty grains - Chickpeas or black beans for extra fiber These ingredients not only add bulk but also enhance the flavor and nutrition. Yes! You can prepare Rainbow Veggie Wraps ahead of time. Here are some tips to make it easy: - Prep all your veggies a day before. Store them in airtight containers to keep them fresh. - Spread hummus on the tortillas and stack them in the fridge. Just add the veggies when you’re ready to eat. - Roll the wraps tightly and wrap them in plastic for easy storage. This way, you can enjoy your wraps without much hassle. Rainbow Veggie Wraps pair well with various sides and drinks. Here are some ideas: - Fresh fruit salad for a sweet touch - Crispy sweet potato fries for a fun crunch - A light soup, like tomato or vegetable, to warm up your meal - Sparkling water or herbal tea for a refreshing drink These options complement the flavors of the wraps and make for a balanced meal. These rainbow veggie wraps are easy and fun to make. We covered the key ingredients, their preparation, and how to assemble each wrap. I shared tips on ingredient swaps and how to make your wraps look great. You can also try different flavors and adapt the recipe for various diets. When stored correctly, these wraps stay fresh and tasty. Now, get creative and enjoy making these vibrant, healthy meals!](https://joymealplan.com/wp-content/uploads/2025/07/35a6ca00-0a2a-4347-b538-1c234b42866c-768x768.webp)

![To make a tasty loaded baked potato salad, you need the right mix of ingredients. Here’s the list you’ll need: - 4 large Russet potatoes - ½ cup sour cream - ½ cup mayonnaise - 1 cup shredded sharp cheddar cheese - 1 cup cooked and crumbled turkey bacon or turkey sausage - 4 green onions, chopped - ½ teaspoon garlic powder - ½ teaspoon onion powder - Salt and pepper to taste - Optional: 1 cup diced tomatoes Russet potatoes are great because they are fluffy and hold up well. The sour cream and mayonnaise create a creamy base that brings all the flavors together. Cheese adds richness, while turkey bacon or sausage gives a nice savory touch. Don’t forget the seasonings! Garlic powder and onion powder add depth. You can adjust the salt and pepper to fit your taste. If you want a fresh bite, toss in some diced tomatoes. For the full recipe, check out the [Full Recipe]. Enjoy making your loaded baked potato salad! You can cook your potatoes in two ways: using a microwave or an oven. The microwave is quick. It takes about 10-15 minutes. Just wash the potatoes well and poke holes in them. This helps steam escape. If you choose the oven, it takes longer, about 45-60 minutes. Preheat it to 200°C (400°F). For the best texture, let the potatoes cool a bit after cooking. This way, they stay firm when you cut them. Cut the potatoes into bite-sized cubes, leaving the skin on. The skin adds a nice texture and flavor. Now, let’s make the dressing. Start with ½ cup of sour cream and ½ cup of mayonnaise. Combine them in a large bowl. These two create a creamy base. Then, add ½ teaspoon each of garlic powder and onion powder. Mix well. Taste the dressing and adjust the salt and pepper to your liking. You can also add more spices if you wish. It’s time to put it all together. Add the cubed potatoes to the bowl with the dressing. Now, add 1 cup of shredded sharp cheddar cheese and 1 cup of cooked, crumbled turkey bacon. If you want some fresh flavor, toss in half of the chopped green onions. Gently mix everything so that the potatoes get coated well with the dressing. Make sure all flavors spread evenly throughout. If you like, you can add 1 cup of diced tomatoes for extra freshness. Transfer the salad to a serving bowl and sprinkle the rest of the green onions on top. Cover the salad and chill it in the fridge for at least an hour. This allows the flavors to meld together nicely. You can find the Full Recipe in the earlier section. To make the best loaded baked potato salad, avoid common mistakes. First, don’t rush the cooking of your potatoes. If undercooked, they remain hard. Overcooked potatoes turn mushy. Test them with a fork; they should be tender but firm. Another mistake is not adjusting seasonings. Everyone has different tastes. Start with the basic amounts, then taste as you mix. Add more salt, pepper, or garlic powder until it feels just right. You want a balance that brings out the flavors. Serving your salad well makes it even more enjoyable. Use a bright bowl to attract the eye. You can line the bowl with crisp lettuce leaves. This adds color and freshness. Garnishes enhance visual appeal. Try sprinkling extra cheese on top. Chopped green onions add a nice touch. For a burst of color, diced tomatoes look great too. These small details make your dish pop and impress guests. {{image_4}} You can easily adapt this recipe for different diets. For a dairy-free option, use vegan sour cream and mayo. There are many brands that taste great and work well. For a gluten-free version, just check that all your ingredients are certified gluten-free. Most potatoes, sour creams, and cheeses are already gluten-free. This way, you can enjoy this dish without worry. You can change the flavors of your Loaded Baked Potato Salad by adding new ingredients. Try adding cooked chicken, shrimp, or even tofu for protein. You can also toss in different veggies, like bell peppers or corn, for extra crunch. Thinking outside the box can inspire new tastes. For a spicy kick, add jalapeños or hot sauce. If you love herbs, mix in fresh dill or parsley for a fresh twist. You can also explore flavors from other cuisines. Imagine a barbecue twist with smoked paprika or a Mediterranean flair with olives and feta. The options are endless, so get creative and make it your own! For the complete recipe, check out the Full Recipe section above. To keep your Loaded Baked Potato Salad fresh, store it in the fridge. Use an airtight container to keep moisture in and odors out. This salad will stay good for about 3 to 5 days. It’s best to eat it within this time for optimal flavor and texture. If you have leftovers, you can enjoy them cold or warm. If you prefer to reheat, the best way is to use the microwave. Heat it in short bursts, about 30 seconds at a time. Stir it well after each burst to ensure even heating. Always check that the salad is hot all the way through. When reheating, avoid letting it sit out too long to keep it safe to eat. You can easily prepare this salad in advance. First, cook and cool the potatoes. Then, mix the dressing and store it separately. Combine them just before serving. This keeps the potatoes fresh and firm. You can store the salad in the fridge for up to three days. Just remember to cover it tightly to keep it fresh. Yes, you can! While Russet potatoes are classic, you can use Yukon Gold or red potatoes. These options add a different texture and flavor. Yukon Golds are creamy, while red potatoes hold their shape well. Experimenting with different types can bring new life to your salad. Loaded Baked Potato Salad pairs well with grilled meats, like chicken or steak. You can also serve it with burgers or hot dogs for a fun cookout. For a lighter meal, try it with a fresh garden salad or grilled veggies. The flavors complement each other nicely, creating a balanced plate. Absolutely! To add heat, you can stir in diced jalapeños or a splash of hot sauce. Adding spicy cheese, like pepper jack, can also kick up the flavor. If you want a smoky touch, try adding chipotle powder. Feel free to adjust the heat to suit your taste! For the full recipe, check out [Full Recipe]. You’ve learned how to make a great Loaded Baked Potato Salad. We covered the right ingredients, preparation methods, and unique variations. Remember, that making this dish is all about balance—flavors, textures, and presentation. Keep experimenting with new ideas and tips to create your perfect salad. Don’t hesitate to adjust ingredients to fit your diet or spice it up. Enjoy every bite, and share your results!](https://joymealplan.com/wp-content/uploads/2025/06/ae05b21a-4cc0-4914-b0ca-5616115dbf5d-768x768.webp)