Easy Homemade Beignets Quick and Simple Recipe

Craving warm, fluffy beignets? You’re in the right place! In this post, I’ll share my easy homemade beignets recipe that anyone can master. With simple ingredients and quick steps, you’ll have delicious treats ready in no time. Get ready to impress your friends and family with these tasty bites. Let’s get started on our journey to making perfect beignets at home!
Why I Love This Recipe
- Deliciously Light and Fluffy: These beignets are incredibly airy, making each bite a delightful experience that melts in your mouth.
- Easy to Make: This recipe is straightforward and doesn’t require any special skills, perfect for both beginners and seasoned bakers.
- Perfect for Any Occasion: Whether it’s a weekend brunch or a festive gathering, these beignets are always a hit and bring joy to any table.
- Customizable Toppings: While powdered sugar is classic, you can easily add your own twist with different toppings like chocolate or fruit preserves.
Ingredients
Dry Ingredients
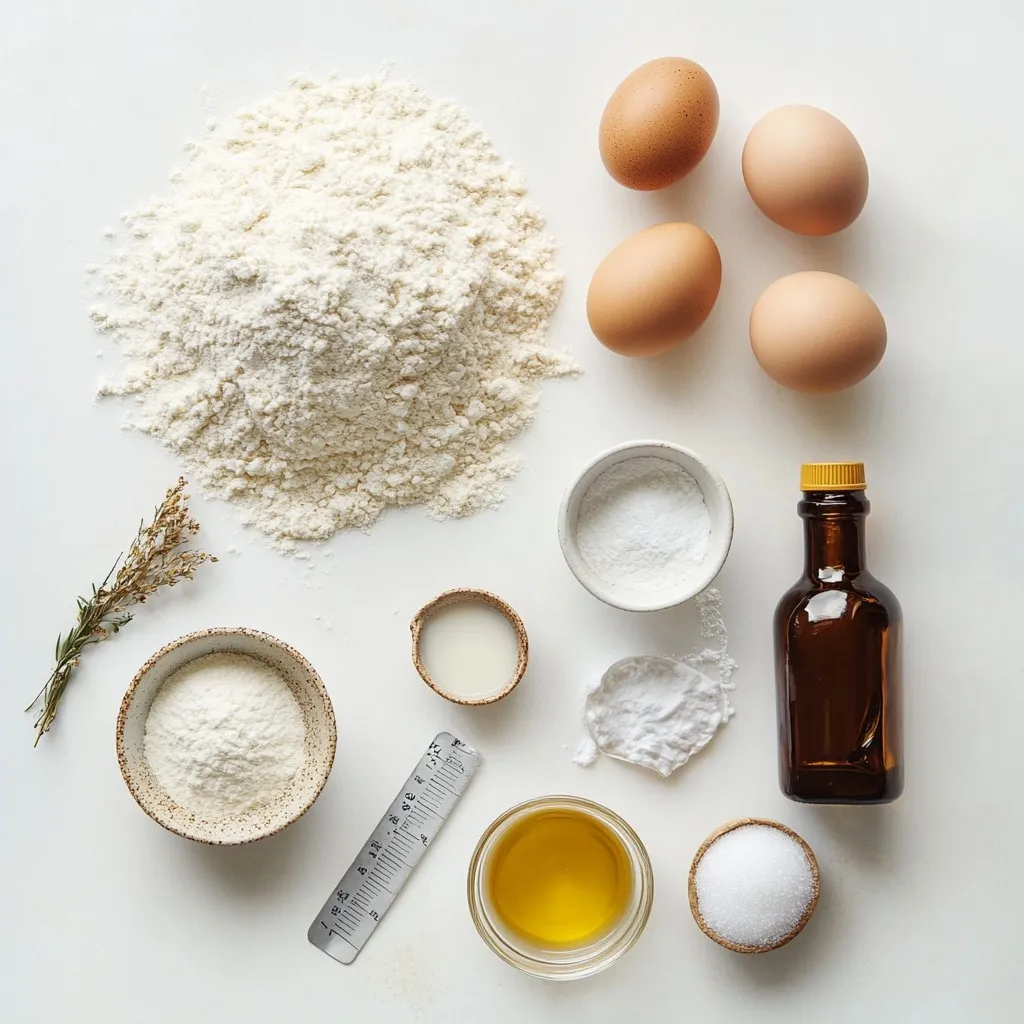
For the dry mix, you need:
– 2 cups all-purpose flour
– 1/4 cup granulated sugar
– 1 tablespoon baking powder
– 1/2 teaspoon salt
Wet Ingredients
For the wet mix, gather:
– 2 large eggs
– 3/4 cup whole milk
– 1 teaspoon vanilla extract
Additional Items Needed
You will also need:
– Vegetable oil for frying
– Powdered sugar for dusting
These ingredients are simple yet essential. They come together to create the delightful flavor and texture of beignets. The flour gives structure, while the eggs and milk add richness. The sugar brings sweetness, and the baking powder helps them rise. Frying in hot oil creates that crispy outside. Dusting with powdered sugar gives that classic touch we all love.

Step-by-Step Instructions
Preparing the Dough
To make your beignet dough, start with dry ingredients. In a large bowl, mix 2 cups of all-purpose flour, 1/4 cup of sugar, 1 tablespoon of baking powder, and 1/2 teaspoon of salt. Whisk them well until blended. In another bowl, crack 2 large eggs. Beat them until smooth. Add 3/4 cup of whole milk and 1 teaspoon of vanilla extract to the eggs. Whisk the mixture until it is well combined.
Now, pour the wet mixture into the dry ingredients. Stir gently with a spoon until they just come together. The dough will be a bit sticky. Turn it out onto a lightly floured surface. Knead the dough gently for about 1 minute. You want it smooth, so don’t overdo it.
Rolling and Cutting the Beignets
Next, roll out the dough. Use a rolling pin to flatten it to about 1/4 inch thick. Make sure the surface is floured to avoid sticking. Once rolled out, grab a sharp knife or pizza cutter. Cut the dough into squares, roughly 2×2 inches in size. You can make them larger or smaller, depending on your preference.
Frying to Perfection
Now it’s time to fry your beignets. Heat vegetable oil in a deep pot or fryer to 350°F (175°C). Use a thermometer to check the heat. Carefully drop a few dough squares into the hot oil. Be careful not to crowd the pot. Fry them for about 2-3 minutes on each side. You want them golden brown and puffy.
Once they are done, use a slotted spoon to lift them out. Place the beignets on a plate lined with paper towels to drain. While they are still warm, dust them generously with powdered sugar. Make sure they are well coated for that classic sweet touch. Enjoy your delicious homemade beignets!
Tips & Tricks
Ensuring Perfect Texture
To get the best texture for your beignets, follow these tips:
– Use fresh baking powder. Old baking powder may not rise well.
– Mix the dough until just combined. Overmixing can make the beignets tough.
– Knead lightly. Just one minute is enough to smooth the dough.
These steps help keep your beignets soft and fluffy.
Techniques for Frying
Frying beignets takes a bit of care. Here’s how to get it right:
– Heat the oil to 350°F (175°C). Use a thermometer for accuracy.
– Don’t overcrowd the pot. Fry a few at a time for even cooking.
– Flip them gently. This helps achieve a nice, golden color on both sides.
These techniques ensure your beignets cook evenly and stay soft inside.
Serving Suggestions
Serving beignets can be fun and creative. Here are some ideas:
– Dust them with powdered sugar right after frying. This adds sweetness.
– Stack the beignets high on a pretty plate. It makes a great display.
– Offer a small bowl of extra powdered sugar for dipping. It makes them even more fun to eat!
These serving tips make your beignets look tasty and inviting. Enjoy your sweet treat!
Pro Tips
- Perfect Temperature: Ensure your oil is at the correct temperature (350°F or 175°C) for even frying; use a thermometer for accuracy.
- Don’t Overcrowd: Fry in small batches to prevent the temperature from dropping, ensuring your beignets fry evenly and become fluffy.
- Freshness is Key: Serve the beignets warm for the best taste; they are most delightful when enjoyed straight from the fryer.
- Creative Toppings: Experiment with flavored sugars or dips like chocolate or caramel for a fun twist on the classic beignet.

Variations
Flavor Additions
You can add fun flavors to your beignets. Try mixing in spices like cinnamon or nutmeg. You can also add chocolate chips or lemon zest to the dough. These little twists will make your beignets unique and tasty. You could even add a splash of almond extract for a lovely nutty flavor.
Different Coatings
While powdered sugar is classic, you can explore other coatings. Try a cinnamon-sugar mix for a sweet crunch. You can also dip them in melted chocolate for a rich treat. For a savory twist, sprinkle some sea salt on top. Each coating gives your beignets a new twist.
Alternative Cooking Methods
Frying is traditional, but you can bake beignets for a healthier option. Preheat your oven to 375°F (190°C). Place the dough squares on a baking sheet. Bake for about 10-12 minutes until golden brown. You can also use an air fryer. This method gives you crispy beignets with less oil. Just set your air fryer to 350°F (175°C) and cook for about 6-8 minutes.
Storage Info
Storing Leftovers
Store leftover beignets in an airtight container. This keeps them fresh and soft. You can keep them at room temperature for up to two days. If you want them to last longer, put them in the fridge. They will stay good for about a week.
Reheating Instructions
To reheat your beignets, use the oven. Preheat the oven to 350°F (175°C). Place the beignets on a baking sheet. Heat them for about 5 to 10 minutes. This makes them warm and crispy again. You can also use a microwave. Just heat them for about 15 to 20 seconds. They won’t be as crispy, but they will still taste great.
Freezing Beignets
You can freeze beignets for later. First, let them cool completely. Then, place them in a single layer on a baking sheet. Freeze them for about an hour. This stops them from sticking together. After they are frozen, transfer them to a freezer bag. They can stay in the freezer for up to two months. When you’re ready to eat them, thaw them overnight in the fridge before reheating. Enjoy fresh-tasting beignets whenever you want!
FAQs
Can I make beignets ahead of time?
Yes, you can make beignets ahead of time. I recommend preparing the dough and cutting it into squares. Wrap the squares in plastic wrap and store them in the fridge for up to 24 hours. When you are ready to fry them, just take them out and let them sit at room temperature for about 30 minutes. This helps them rise better when you fry them.
What can I substitute for whole milk?
If you need a substitute for whole milk, there are a few options. You can use almond milk, soy milk, or oat milk. These will work well in the recipe. If you want a creamier texture, try using half-and-half or heavy cream, but mix it with some water to thin it out.
How do I know when the oil is hot enough for frying?
To check if the oil is hot enough, use a thermometer. The right temperature is 350°F (175°C). If you don’t have a thermometer, you can drop a small piece of dough into the oil. If it sizzles and rises to the top, the oil is ready. Frying at the right temperature ensures your beignets are crispy and not greasy.
Making beignets is fun and easy when you follow these steps. You learned about the right ingredients, how to prepare and fry them, and tips for the best results. Don’t forget the fun variations and how to store extras. Your next batch of beignets can impress anyone. Enjoy the process and taste the delicious rewards! Happy cookin

Delightful Homemade Beignets
Ingredients
- 2 cups all-purpose flour
- 0.25 cup granulated sugar
- 1 tablespoon baking powder
- 0.5 teaspoon salt
- 2 large eggs
- 0.75 cup whole milk
- 1 teaspoon vanilla extract
- to taste amount vegetable oil for frying
- to taste amount powdered sugar for dusting
Instructions
- Start by combining your dry ingredients: In a large mixing bowl, whisk together the all-purpose flour, granulated sugar, baking powder, and salt until they are thoroughly blended.
- In a separate bowl, prepare your wet ingredients: Beat the eggs until fully mixed, then add in the whole milk and vanilla extract. Whisk until you achieve a smooth mixture.
- Gradually introduce the wet mixture into the dry ingredients, stirring gently. Mix until just combined; the texture of the dough will be slightly sticky.
- On a clean, lightly floured surface, transfer your dough. Knead it gently for about 1 minute, just long enough to smooth it out without overworking it.
- Roll the dough out to about 1/4 inch thickness. Utilize a sharp knife or pizza cutter to cut the dough into squares, roughly 2x2 inches in size.
- In a deep pot or fryer, heat vegetable oil to 350°F (175°C). Carefully drop in a few dough squares at a time, avoiding overcrowding to ensure even frying.
- Fry the beignets for approximately 2-3 minutes on each side, or until they achieve a lovely golden brown color. Use a slotted spoon to remove them and let them drain on a plate lined with paper towels.
- While still warm from the fryer, generously dust the beignets with powdered sugar, ensuring they’re beautifully coated.


![To make these tasty bites, you will need: - 1 can (16.5 oz) refrigerated pizza dough - 1/4 cup granulated sugar - 1 tablespoon ground cinnamon - 2 tablespoons unsalted butter, melted - 1/2 cup powdered sugar - 1-2 tablespoons milk - 1/2 teaspoon vanilla extract These ingredients come together to create soft, sweet bites that everyone loves. The pizza dough is a quick and easy base. It makes these treats simple to prepare. You can add some fun twists to your cinnamon roll bites with these extras: - Chopped nuts (like pecans or walnuts) - Raisins or dried cranberries - A pinch of nutmeg for warmth - Cream cheese for a richer glaze These options let you customize the flavor. Each addition adds a new layer that makes the bites even more special. If you are missing an item, don't worry! Here are some easy swaps: - Use crescent roll dough instead of pizza dough. - Swap brown sugar for granulated sugar for a deeper flavor. - Try coconut milk or almond milk in the glaze. - Use vanilla bean paste instead of vanilla extract. These substitutions keep the recipe flexible. You can still enjoy delicious cinnamon roll bites, even with changes. For the full recipe, check out the Full Recipe section and get ready to bake! First, preheat your oven to 375°F (190°C). This helps the bites cook evenly. Next, prepare your baking sheet. You can grease it with non-stick spray or line it with parchment paper. This makes it easy to clean up later. Take your refrigerated pizza dough out of the can. Place it on a clean surface that has some flour on it. Use a rolling pin to flatten the dough. Aim for about 1/4 inch thick. This thickness ensures the bites cook well and stay soft inside. In a small bowl, mix together granulated sugar and ground cinnamon. Use 1/4 cup of sugar and 1 tablespoon of cinnamon. Stir until they blend well. This mixture will give your cinnamon roll bites their sweet flavor. Brush melted butter all over the rolled-out dough. Make sure to cover every corner. Next, sprinkle the cinnamon-sugar mixture on top of the buttered dough. Roll the dough from one end to the other tightly. Pinch the seams closed to keep the filling inside. Slice this log into bite-sized pieces, about 1 inch thick. Place these pieces cut side up on the baking sheet. Bake them for 12-15 minutes until they are golden brown. While the bites bake, prepare the glaze. In a bowl, whisk together powdered sugar, 1-2 tablespoons of milk, and 1/2 teaspoon of vanilla extract. Mix until smooth. You can add more milk if you want a thinner glaze. Once the bites are baked, let them cool for a few minutes. Drizzle the glaze over the warm bites for a sweet finish. Enjoy your Easy Cinnamon Roll Bites! For the full recipe, check out the details above. When you want to make cinnamon roll bites fast, start with refrigerated pizza dough. It cuts down on time and effort. Here are a few more tips: - Prep your ingredients first: Measure out your sugar and cinnamon before you start. This makes mixing quick. - Roll out dough in advance: You can roll out the pizza dough and store it in the fridge for a few hours before baking. This saves time when you're ready to bake. A good glaze makes your cinnamon roll bites shine. For the best glaze: - Mix the glaze while the bites bake: This way, your glaze is ready when the bites come out of the oven. - Use warm bites for glazing: Drizzle the glaze on warm bites. This helps it soak in and makes it more tasty. - Adjust the milk: Add milk slowly to your powdered sugar. This way, you get the right thickness for your glaze. Even simple recipes can have pitfalls. Here are a few things to watch out for: - Don’t skip the butter: Brushing melted butter on the dough is key for flavor. It also helps the cinnamon-sugar stick. - Avoid cutting too thick: If your bites are too thick, they may not bake evenly. Aim for about 1 inch in thickness. - Check for doneness: Keep an eye on the oven. If they brown too much, they may taste burnt. Look for a golden color instead. Using these tips can help you make perfect cinnamon roll bites every time. For the full recipe, check out the earlier section. {{image_4}} You can change the flavors in your cinnamon roll bites. Try spreading Nutella on the dough before rolling. This adds a rich chocolate taste. You can also use apples. Just slice apples thinly and mix them with the cinnamon-sugar. This gives the bites a warm, fruity twist. Another option is to add nuts. Chopped pecans or walnuts add a nice crunch and flavor. While the basic glaze is tasty, you can mix it up. Try a cream cheese glaze for a rich flavor. Just blend cream cheese with powdered sugar and milk. This adds a tangy touch. You could also use melted chocolate. Drizzle it on top for a sweet, chocolatey finish. If you want something lighter, a lemon glaze works well. Mix powdered sugar with lemon juice for a refreshing zing. Serving matters, too! Try putting the bites in small paper cups. This makes them easy to grab. You can also serve them with a side of fruit. Berries or sliced bananas pair nicely with the bites. For a fun twist, serve them with ice cream. A scoop of vanilla on the side takes these bites to the next level. You can find the full recipe to explore even more ideas! To keep your leftover cinnamon roll bites fresh, place them in an airtight container. This helps prevent them from drying out. You can store them at room temperature for up to two days. If you want to keep them longer, I recommend refrigerating them. They will stay good for about a week in the fridge. Just make sure the container is sealed well. When you're ready to enjoy your leftover bites, reheating is key. The best way to reheat them is in the oven. Preheat the oven to 350°F (175°C). Place the bites on a baking sheet and heat for about 5-7 minutes. This method keeps them warm and soft. You can also use the microwave. Just place them on a microwave-safe plate and heat for about 15-20 seconds. This option is quicker, but they may not be as crispy. If you want to save your cinnamon roll bites for later, freezing is a great choice. Allow the bites to cool completely before freezing. Arrange them in a single layer on a baking sheet and freeze them for about an hour. Once frozen, transfer them to a freezer bag. This helps keep them from sticking together. They will last for about three months in the freezer. To enjoy them later, just thaw them in the fridge overnight and reheat as mentioned earlier. To make cinnamon roll bites from scratch, use simple ingredients. You need pizza dough, sugar, cinnamon, and butter. Roll out the dough and brush it with melted butter. Mix sugar and cinnamon, then sprinkle it over the buttered dough. Roll it up tightly and slice it into pieces. Bake until golden and drizzle with glaze. For a full recipe, check the [Full Recipe]. Yes, you can use other types of dough. Biscuit dough or crescent roll dough works well too. Each dough gives a different texture and taste. Just follow the same steps for rolling and baking. Feel free to experiment and find your favorite! Cinnamon roll bites last 2-3 days at room temperature when stored in an airtight container. For longer freshness, keep them in the fridge for up to a week. You can also freeze them for up to a month. Just thaw and reheat when you want to enjoy them again. The best toppings include a sweet glaze, nuts, or fresh fruit. You can drizzle chocolate on top for a rich flavor. Try adding cream cheese frosting for extra sweetness. Get creative and personalize your toppings to match your taste! These cinnamon roll bites are simple and fun to make. We explored key ingredients, step-by-step methods, and helpful tips. You learned about variations that can spice up your bites and storage tips to keep them fresh. In the end, these bites bring joy and flavor to any meal. I encourage you to try them, experiment with flavors, and share them with your loved ones. Enjoy every sweet bite!](https://joymealplan.com/wp-content/uploads/2025/06/5638649d-06f4-4a87-baea-a139396a3567-768x768.webp)


