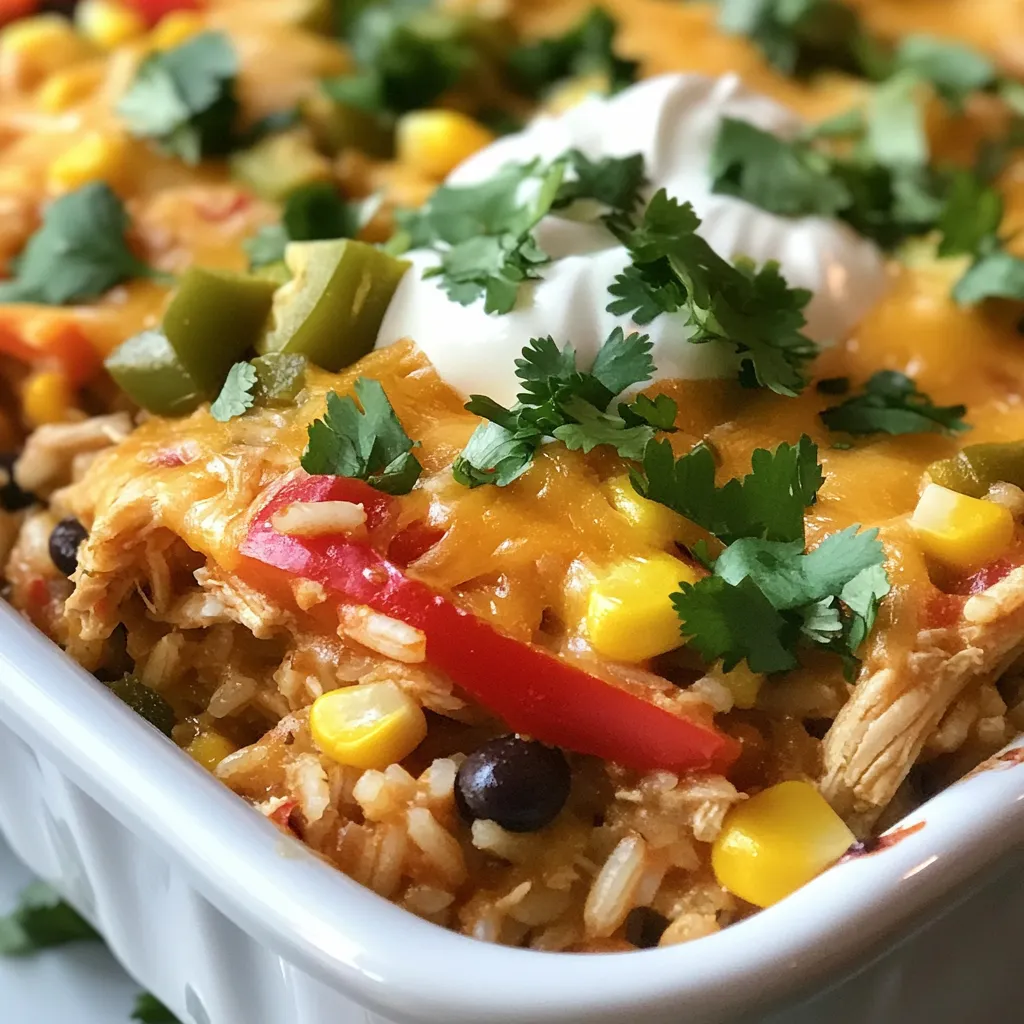
Looking for a simple, tasty meal that brings the whole family together? Look no further! This Fajita Chicken Casserole is easy to make and packed with flavor. With tender chicken, colorful veggies, and a cheesy topping, it’s sure to satisfy everyone at the table. Get ready to dive into a mouthwatering recipe that takes just a few steps to whip up. Let’s get cooking!
Why I Love This Recipe
- Flavor Packed: This casserole is a delightful explosion of flavors, combining the savory taste of chicken with the freshness of bell peppers and spices.
- Easy to Prepare: With simple steps and minimal prep time, this dish is perfect for busy weeknights or meal prepping for the week ahead.
- Family-Friendly: The combination of cheese, chicken, and rice makes it a hit with both kids and adults, ensuring everyone leaves the table satisfied.
- Customizable: You can easily swap ingredients based on your preferences, such as using different proteins or adding extra veggies.
Ingredients
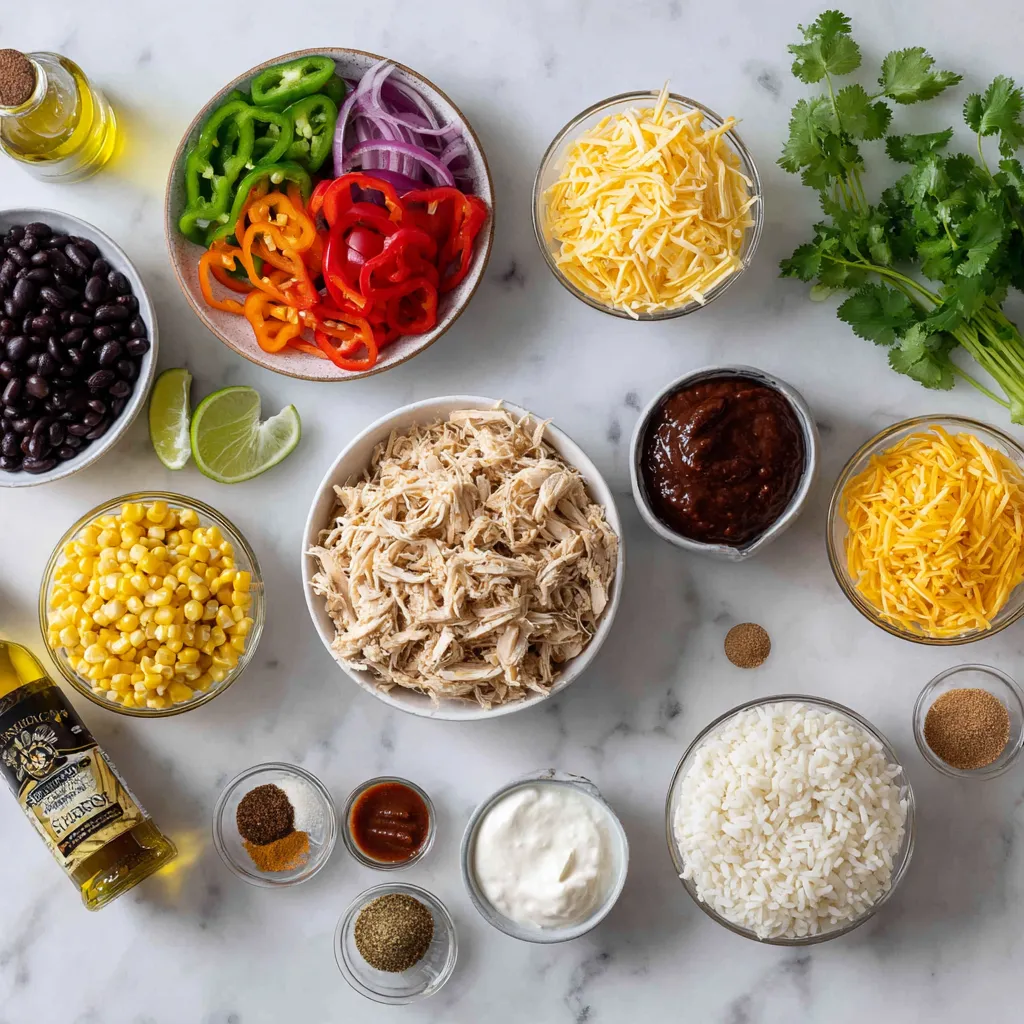
Main Ingredients
– 2 cups cooked chicken, shredded
– 1 cup bell peppers (mix of red, green, and yellow), sliced
– 1 medium onion, thinly sliced
– 2 cups cooked brown rice
– 1 can (15 oz) black beans, rinsed and drained
Spices and Seasonings
– 1 teaspoon ground cumin
– 1 teaspoon chili powder
– 1/2 teaspoon garlic powder
– 1/2 teaspoon onion powder
Toppings
– 1 cup shredded cheddar cheese
– 1 cup sour cream
– Fresh cilantro, chopped
This Fajita Chicken Casserole is a great dish to make. It is simple and tasty. You can use cooked chicken you have at home. Shredded chicken works best here. I like to mix different bell peppers for color. They add sweetness and crunch.
Next, add sliced onion. It brings flavor that pairs well with chicken. Cooked brown rice makes this meal filling. It also adds texture and fiber. Black beans are a must. They are rich in protein and add a nice creaminess.
For spices, use ground cumin and chili powder. They give warmth and depth. The garlic and onion powders add extra flavor without much effort. This blend makes the dish really pop.
For toppings, I always choose cheddar cheese. It melts nicely and adds richness. Sour cream is a must for creaminess. Finally, don’t forget fresh cilantro for color and taste. It really ties everything together.
With these ingredients, you can create a dish that everyone will love. It is hearty and full of flavor, making it a perfect meal for the whole family.
Step-by-Step Instructions
Preparation Steps
– Preheat the Oven: Set your oven to 350°F (175°C). This helps the casserole cook well.
– Sauté the Vegetables: Heat 2 tablespoons of olive oil in a large skillet over medium heat. Add 1 cup of sliced bell peppers and 1 thinly sliced onion. Cook for 5-7 minutes. Stir often until the veggies soften and smell great.
Mixing and Assembling
– Combine Ingredients: In a big bowl, mix 2 cups of shredded cooked chicken, the sautéed veggies, 2 cups of cooked brown rice, 1 can of rinsed black beans, 1 cup of corn, and 1 cup of salsa. Add 1 teaspoon of ground cumin, 1 teaspoon of chili powder, 1/2 teaspoon of garlic powder, and 1/2 teaspoon of onion powder. Stir until everything is well mixed and coated.
– Assemble the Casserole: Grease a 9×13 inch baking dish with a bit of olive oil or non-stick spray. Pour the mixed filling into the dish. Use a spatula to spread it out evenly.
Baking and Serving
– Baking: Place the dish in the oven and bake for 25-30 minutes. Look for bubbly cheese with a golden color.
– Cooling and Garnishing: Take the casserole out of the oven. Let it cool for about 5 minutes. This helps it set a bit. Before you serve, sprinkle fresh chopped cilantro on top for added flavor and color.
Tips & Tricks
Cooking Tips
– Ensuring Chicken is Tender: Use leftover chicken for the best flavor. Shredded chicken stays moist and mixes well in the casserole. If you don’t have leftovers, poach fresh chicken in broth. This keeps it juicy.
– Vegetable Sautéing: Sauté bell peppers and onions until soft. This takes about 5-7 minutes. Use medium heat and stir often. You want them tender but not mushy. This adds a nice texture to the dish.
Serving Suggestions
– Presentation Ideas: Serve the casserole straight from the dish for a cozy feel. For a fancier look, plate portions individually. Add a dollop of sour cream on top for flair.
– Garnishing Options: Fresh cilantro on top brightens the dish. Lime wedges on the side add zesty flavor. You can also sprinkle some extra cheese for richness.
Health Considerations
– Gluten-Free Options: Make this casserole gluten-free by using brown rice and checking the salsa label. Most salsas are gluten-free, but it’s good to double-check.
– Keto-Friendly Variants: To lower carbs, skip the rice and use cauliflower rice instead. This keeps the dish filling without the extra carbs. You can also cut down on beans for a lighter meal.
Pro Tips
- Choose Your Chicken Wisely: For the best flavor and texture, use rotisserie chicken or leftover grilled chicken. This adds depth to the casserole without extra cooking time.
- Customize Your Spice Level: Adjust the salsa and spice powders according to your taste. If you like it spicy, consider adding diced jalapeños or a sprinkle of red pepper flakes.
- Make it Ahead: You can assemble the casserole a day in advance. Just cover it tightly and store it in the fridge until you’re ready to bake it, making it a perfect option for meal prep.
- Leftover Magic: This casserole is great for leftovers! Reheat in the oven or microwave, and consider topping it with fresh avocado or a squeeze of lime for a refreshing twist.
Variations
Ingredient Substitutions
You can easily swap out the chicken in this casserole. Try using ground turkey or beef. Plant-based proteins also work well. They give you a tasty, hearty dish.
Changing the vegetables can add fun flavors. Use zucchini, mushrooms, or spinach for a twist. You can also add black olives for extra depth.
Flavor Enhancements
If you love heat, add jalapeños or pour in some hot sauce. This adds a spicy kick and makes it exciting. You can also mix in corn and avocado. They add a nice Southwest flair and boost the taste.
Serving Size Adjustments
Need to feed more people? Simply double all the ingredients. Use a bigger baking dish to hold it all. This way, everyone gets a serving.
If you want less food, make single servings. Use smaller dishes or ramekins. This keeps it easy and perfect for one or two.
Storage Info
Refrigeration
To store your fajita chicken casserole, let it cool first. Place leftovers in an airtight container. This keeps the flavors fresh and the dish safe. In the fridge, it lasts about 3 to 4 days. If you want to enjoy it later, freezing is a great option.
Freezing
For freezing, use a freezer-safe container. Make sure to wrap it well to prevent freezer burn. You can also use plastic wrap and foil for extra protection. The casserole can stay good in the freezer for up to 3 months.
When reheating, take the casserole out of the freezer and let it thaw in the fridge overnight. To warm it up without losing flavor, preheat your oven to 350°F (175°C). Bake it for about 25 minutes until hot. For a quick option, you can also microwave individual portions. Just cover them to keep moisture in.
FAQs
Common Questions
Can I use raw chicken in this recipe?
No, raw chicken won’t cook well in this dish. You should use cooked chicken. This makes the casserole safe to eat and tasty.
What can I substitute for brown rice?
You can use quinoa, cauliflower rice, or white rice. These options work well and still taste great.
How spicy is this dish with the salsa?
The spice level depends on the salsa you choose. Mild salsa gives a light kick, while hot salsa brings more heat.
Cooking and Preparation Queries
Can I make this casserole ahead of time?
Yes, you can prepare the casserole a day before. Just cover it and place it in the fridge. Bake it when you’re ready to eat.
What types of cheese work best for this recipe?
Cheddar is a great choice, but you can also use Monterey Jack or pepper jack. These cheeses melt well and add nice flavors.
Dietary Questions
Is this recipe suitable for a low-carb diet?
This recipe is not low-carb due to the brown rice and beans. You can skip these ingredients to make it fit a low-carb plan.
Can I make this dairy-free?
Yes, you can swap sour cream and cheese for dairy-free options. Look for plant-based cheeses and yogurt for a tasty alternative.
This post taught you how to create a tasty chicken casserole. We explored ingredients, cooking steps, and variations. I shared tips for healthy options and how to store leftovers. You can make this dish your own with different proteins or spices. Enjoy making it your way and share it with friends! Cooking should be fun and simple. You now have the tools to impress at your next mea


