Fresh Tomato Bruschetta Flavorful and Easy Recipe
. To store unused tomato mixture, place it in an airtight container. This keeps the mix fresh for up to two days. If you have leftover bruschetta, avoid adding toppings until you're ready to serve. This prevents the bread from getting soggy. For the bread, store it in a paper bag. This helps maintain its crispness. Avoid plastic bags, as they trap moisture and make the bread soft. If you want to keep the bread fresh longer, freeze it. Just slice the bread before freezing for easy use later. You can freeze the tomato mixture and the bread separately. This helps keep each part fresh. To freeze the tomato mix, pour it into a freezer-safe bag. Remove excess air before sealing. When you're ready to eat, thaw the mixture overnight in the fridge. For the bread, place it in the oven at 350°F (175°C) for about 10 minutes to restore its crunch. Enjoy your bruschetta within three days for the best taste. Over time, the tomatoes may lose their fresh flavor. Look for signs of spoilage like discoloration or an off smell. If the bread feels soft or stale, it’s time to toss it. By following these simple storage tips, you can extend the life of your delicious bruschetta. Enjoy it fresh and vibrant every time! The best breads for bruschetta are Italian baguette or ciabatta. Both have a nice crust that crisps up well. You can also use sourdough for a tangy flavor. Choose a bread that is sturdy enough to hold the toppings. Yes! You can prepare the tomato mix a few hours ahead. Just store it in the fridge. This lets the flavors blend. Toast the bread right before serving for the best crunch. Keep the bread and topping separate until you serve. To serve more people, double the recipe. Use multiple loaves of bread. You can also make several batches of the tomato mix. It’s easy to scale up. Just remember to toast the bread in batches to keep it crisp. Bruschetta is best served fresh. The toasted bread should be warm. The tomato mix can be at room temperature. This combo gives a nice contrast. Serve it right after you assemble it for the best taste. Bruschetta pairs well with simple sides. Think of a light salad or soup. A fresh arugula salad works great. You can also serve it with olives or cheese. These add nice flavors and textures to your meal. In this post, we explored making bruschetta from fresh ingredients like ripe tomatoes, basil, and garlic. You learned how to prepare these components and create the perfect toast. We also covered tips for storage and common mistakes to avoid. Finally, I shared variations for different seasons and diets. Bruschetta is simple, fun, and a delightful treat. Enjoy experimenting and finding your favorite flavors!](https://joymealplan.com/wp-content/uploads/2025/07/10355497-7bd2-4922-b413-5484ea4e8a3f.webp)
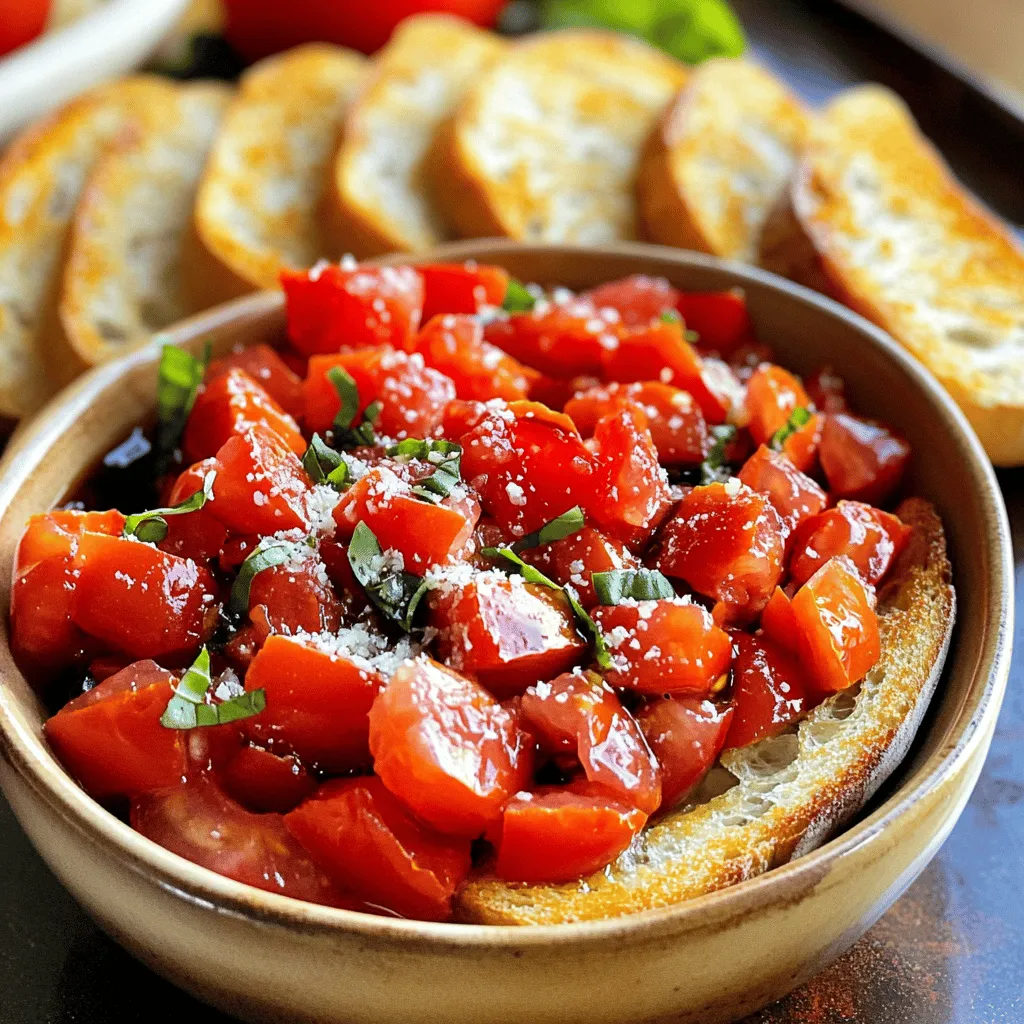
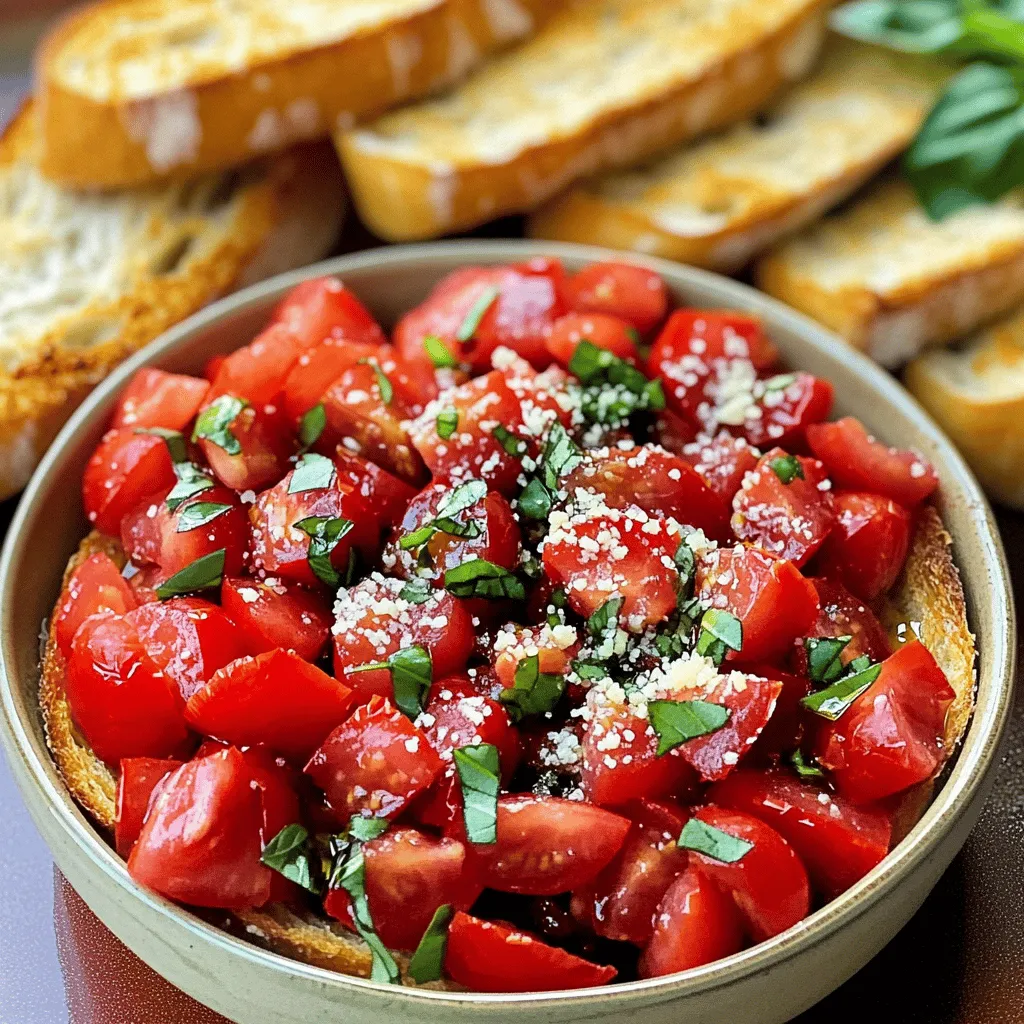
Craving a delicious, fresh bite? This easy recipe for Fresh Tomato Bruschetta is your answer! With vibrant ripe tomatoes, fragrant basil, and a crunchy toast base, every bite bursts with flavor. I’ll guide you through selecting the best ingredients, mastering preparations, and elevating this classic dish with simple tips. Ready to impress your friends and family? Let’s dive in and create the perfect bruschetta together!
Ingredients
Fresh Ingredients Needed
– Ripe tomatoes: Choose tomatoes that feel heavy for their size. The skin should be smooth and slightly shiny. Look for deep color, which shows good ripeness. Heirloom tomatoes have great flavor, but any ripe variety will work.
– Fresh basil: Wash the basil leaves gently and pat them dry. For the best taste, chop them just before using. You can store leftover basil in a jar of water in the fridge, covered loosely with a bag. This keeps it fresh longer.
– Garlic: Use fresh garlic cloves for the best taste. You can choose between white or purple garlic. To prepare, peel the cloves and mince them finely for even flavor distribution in your mix.
Optional Add-ons
– Balsamic vinegar: Use high-quality balsamic for a rich flavor. You can also try different vinegars like red wine or apple cider vinegar for a twist. Each adds a unique taste to your bruschetta.
– Parmesan cheese: Look for aged Parmesan as it has a stronger flavor. Grate it finely for easy melting over the warm bread. Pecorino Romano is a tasty alternative if you want something sharper.
– Honey: Adding honey can balance the acidity in the tomatoes. A small drizzle enhances the flavor without being too sweet. You can also use agave syrup if you prefer a vegan option.
Step-by-Step Instructions
Preparation
To start, gather your ingredients for the tomato mixture. You will need ripe tomatoes, fresh basil, and minced garlic.
– How to prepare the tomato mixture:
1. Dice the tomatoes finely. Remove seeds if you want less juice.
2. Chop the basil leaves roughly. This helps release their oils.
3. Mince the garlic well. You want it to blend into the mix.
4. In a bowl, mix these ingredients. Add balsamic vinegar and olive oil.
5. Season with salt and black pepper. If you like, add honey for sweetness.
6. Toss gently and let it rest for ten minutes. This lets the flavors blend.
– Tips for perfecting the garlic and basil incorporation:
– Use fresh garlic for the best taste. Dried garlic lacks flavor.
– Tear the basil leaves instead of cutting them. This keeps the flavor strong.
– Mix well but do not over-mix. You want to keep the tomatoes intact.
Toasting the Bread
Next, it’s time to toast the bread. You want it golden and crispy.
– Best practices for achieving the perfect texture:
1. Preheat your oven to 400°F (200°C).
2. Lay out your bread slices on a baking sheet.
3. Brush each slice lightly with olive oil. This helps with crisping.
4. Bake for about 5-7 minutes. You want them golden brown.
– How to flavor the bread before toasting:
– Use garlic oil if you like a stronger flavor.
– Sprinkle some salt on the bread for added taste.
– You can also add herbs like oregano before toasting.
Assembling the Bruschetta
Now, let’s put everything together. This is where the magic happens!
– Techniques to layer the toppings effectively:
– Start with the toasted bread. This is your base.
– Spoon the tomato mixture generously onto each slice.
– If you like, add grated Parmesan cheese on top. It adds a nice touch.
– Serving instructions for optimal presentation:
– Serve the bruschetta on a nice platter.
– Garnish with whole basil leaves around the edges.
– Drizzle balsamic reduction for a pretty finish.
This simple recipe brings fresh flavors together. Enjoy the taste of summer with every bite!
Tips & Tricks
Flavor Enhancements
To amplify the taste of your bruschetta, focus on the seasonings. A sprinkle of sea salt brings out the natural sweetness of the tomatoes. Freshly cracked black pepper adds a bit of heat. You can also try adding a pinch of red pepper flakes for some zing.
For vinegars, balsamic is a classic choice, but other options work well too. Try red wine vinegar for a sharper taste. Apple cider vinegar can add a nice fruity note. Each vinegar gives a unique twist to the dish.
Storage Recommendations
When storing leftover bruschetta, keep the tomato mixture and bread separate. Place the mixture in an airtight container in the fridge. It lasts about two days, but the flavor will fade. For the bread, wrap it in foil or a paper bag. This keeps it from getting too soft or stale.
To keep your fresh ingredients longer, store tomatoes at room temperature. Avoid the fridge, as cold can ruin their taste. Basil should stay in a glass of water, like a flower bouquet. Cover it loosely with a plastic bag to keep it fresh.
Common Mistakes to Avoid
One common pitfall is using overripe tomatoes. They can make your bruschetta mushy. Choose firm, ripe tomatoes for the best texture.
Another mistake is toasting the bread too long. It should be crisp but not burnt. To avoid soggy bread, add the tomato topping just before serving. This keeps the bread crunchy and delicious.

Variations
Seasonal Variations
You can change bruschetta based on the season. In summer, add fruits like peaches or strawberries. These juicy fruits mix well with tomatoes and basil, creating a fresh twist. You can also use colorful bell peppers for crunch.
In winter, try roasted veggies. Roasted butternut squash or sweet potatoes give a warm feel. They add sweetness and depth. You can even use spiced apples for a fun touch.
Dietary Alternatives
If you need gluten-free options, use gluten-free bread. Many stores sell tasty gluten-free baguettes or ciabatta. This way, everyone can enjoy bruschetta.
For vegan modifications, skip the cheese or use a plant-based cheese. You can also add more veggies for extra flavor. Consider using avocado for creaminess.
Creative Toppings
Bruschetta is not just about the classic tomato mix. Try different toppings like artichokes or olives for a twist. You can also add roasted garlic for a rich flavor.
Pair bruschetta with various cheeses like goat cheese or feta. These cheeses add creaminess and tang. For meat lovers, prosciutto or salami works great too. The salty flavors enhance the dish.
Storage Info
Refrigeration Guidelines
To store unused tomato mixture, place it in an airtight container. This keeps the mix fresh for up to two days. If you have leftover bruschetta, avoid adding toppings until you’re ready to serve. This prevents the bread from getting soggy.
For the bread, store it in a paper bag. This helps maintain its crispness. Avoid plastic bags, as they trap moisture and make the bread soft. If you want to keep the bread fresh longer, freeze it. Just slice the bread before freezing for easy use later.
Freezing Options
You can freeze the tomato mixture and the bread separately. This helps keep each part fresh. To freeze the tomato mix, pour it into a freezer-safe bag. Remove excess air before sealing.
When you’re ready to eat, thaw the mixture overnight in the fridge. For the bread, place it in the oven at 350°F (175°C) for about 10 minutes to restore its crunch.
Shelf Life Expectancy
Enjoy your bruschetta within three days for the best taste. Over time, the tomatoes may lose their fresh flavor. Look for signs of spoilage like discoloration or an off smell. If the bread feels soft or stale, it’s time to toss it.
By following these simple storage tips, you can extend the life of your delicious bruschetta. Enjoy it fresh and vibrant every time!
FAQs
What is the best type of bread for bruschetta?
The best breads for bruschetta are Italian baguette or ciabatta. Both have a nice crust that crisps up well. You can also use sourdough for a tangy flavor. Choose a bread that is sturdy enough to hold the toppings.
Can I make bruschetta ahead of time?
Yes! You can prepare the tomato mix a few hours ahead. Just store it in the fridge. This lets the flavors blend. Toast the bread right before serving for the best crunch. Keep the bread and topping separate until you serve.
How can I adjust the recipe for a crowd?
To serve more people, double the recipe. Use multiple loaves of bread. You can also make several batches of the tomato mix. It’s easy to scale up. Just remember to toast the bread in batches to keep it crisp.
Is bruschetta served hot or cold?
Bruschetta is best served fresh. The toasted bread should be warm. The tomato mix can be at room temperature. This combo gives a nice contrast. Serve it right after you assemble it for the best taste.
What are some common sides to serve with bruschetta?
Bruschetta pairs well with simple sides. Think of a light salad or soup. A fresh arugula salad works great. You can also serve it with olives or cheese. These add nice flavors and textures to your meal.
In this post, we explored making bruschetta from fresh ingredients like ripe tomatoes, basil, and garlic. You learned how to prepare these components and create the perfect toast. We also covered tips for storage and common mistakes to avoid. Finally, I shared variations for different seasons and diets.
Bruschetta is simple, fun, and a delightful treat. Enjoy experimenting and finding your favorite flavors!
. To store unused tomato mixture, place it in an airtight container. This keeps the mix fresh for up to two days. If you have leftover bruschetta, avoid adding toppings until you're ready to serve. This prevents the bread from getting soggy. For the bread, store it in a paper bag. This helps maintain its crispness. Avoid plastic bags, as they trap moisture and make the bread soft. If you want to keep the bread fresh longer, freeze it. Just slice the bread before freezing for easy use later. You can freeze the tomato mixture and the bread separately. This helps keep each part fresh. To freeze the tomato mix, pour it into a freezer-safe bag. Remove excess air before sealing. When you're ready to eat, thaw the mixture overnight in the fridge. For the bread, place it in the oven at 350°F (175°C) for about 10 minutes to restore its crunch. Enjoy your bruschetta within three days for the best taste. Over time, the tomatoes may lose their fresh flavor. Look for signs of spoilage like discoloration or an off smell. If the bread feels soft or stale, it’s time to toss it. By following these simple storage tips, you can extend the life of your delicious bruschetta. Enjoy it fresh and vibrant every time! The best breads for bruschetta are Italian baguette or ciabatta. Both have a nice crust that crisps up well. You can also use sourdough for a tangy flavor. Choose a bread that is sturdy enough to hold the toppings. Yes! You can prepare the tomato mix a few hours ahead. Just store it in the fridge. This lets the flavors blend. Toast the bread right before serving for the best crunch. Keep the bread and topping separate until you serve. To serve more people, double the recipe. Use multiple loaves of bread. You can also make several batches of the tomato mix. It’s easy to scale up. Just remember to toast the bread in batches to keep it crisp. Bruschetta is best served fresh. The toasted bread should be warm. The tomato mix can be at room temperature. This combo gives a nice contrast. Serve it right after you assemble it for the best taste. Bruschetta pairs well with simple sides. Think of a light salad or soup. A fresh arugula salad works great. You can also serve it with olives or cheese. These add nice flavors and textures to your meal. In this post, we explored making bruschetta from fresh ingredients like ripe tomatoes, basil, and garlic. You learned how to prepare these components and create the perfect toast. We also covered tips for storage and common mistakes to avoid. Finally, I shared variations for different seasons and diets. Bruschetta is simple, fun, and a delightful treat. Enjoy experimenting and finding your favorite flavors!](https://joymealplan.com/wp-content/uploads/2025/07/10355497-7bd2-4922-b413-5484ea4e8a3f-300x300.webp)


![To make whipped feta dip, you need some key ingredients: - 1 cup crumbled feta cheese - 1/2 cup softened cream cheese - 1/4 cup creamy Greek yogurt - 2 tablespoons extra virgin olive oil - 1 tablespoon fresh lemon juice - 2 cloves garlic, minced finely - 1 teaspoon fresh thyme leaves (or 1/2 teaspoon dried thyme) - Salt and black pepper to taste These ingredients create a smooth and creamy base. The feta gives it a salty taste. The cream cheese and yogurt add richness. Olive oil adds a nice touch of flavor. Lemon juice brightens the dip, while garlic and thyme add depth. Toppings can elevate your dip and add color. Here are some great options: - Halved cherry tomatoes - Pitted olives - A sprinkle of fresh herbs Adding these toppings not only enhances the taste but also makes your dip look beautiful. Fresh herbs like parsley or basil pair well with feta's flavor. You can customize this dip with some easy swaps. If you want a lighter dip, use low-fat cream cheese or yogurt. For a vegan version, try using cashew cream instead of cream cheese. You can also use fresh herbs like oregano or dill in place of thyme. These changes let you enjoy the dip while fitting your taste or dietary needs. For the full recipe, you can refer to the recipe section above. Start by gathering your cheese ingredients. You need crumbled feta, cream cheese, and Greek yogurt. In a large bowl, mix them together. Make sure the cream cheese is soft. This helps it blend well. Use a spatula to combine them first. This step makes blending easier later. Next, grab your electric mixer or food processor. Blend the cheese mixture on medium speed. This should take about 2-3 minutes. You want it to be smooth and creamy. If you see lumps, keep blending. The goal is to make it fluffy. After blending, add olive oil, lemon juice, minced garlic, and thyme. Sprinkle in some salt and pepper. Blend again until everything is mixed well. Taste your dip and adjust seasoning if needed. When ready, transfer it to a nice bowl. Make a small well in the center and drizzle olive oil. For a pretty touch, add halved cherry tomatoes, olives, or fresh herbs on top. Serve it with pita chips or fresh veggies. Enjoy this creamy delight! For the full recipe, check out the Whipped Feta Delight Dip. To get the best texture, start with room-temperature cream cheese. It mixes better. Use a mixer or food processor for a smooth finish. Blend the cheeses for 2-3 minutes. This gives you a light and fluffy dip. If you want it creamier, add more yogurt or olive oil. The key to great flavor lies in your seasonings. Fresh garlic adds a strong kick. I love using fresh thyme. It brings a nice herbal touch. A squeeze of lemon juice brightens the dip. Taste as you go; adjust salt and pepper to your liking. If you want a little heat, add a pinch of red pepper flakes. Serve your whipped feta dip with crispy pita chips. Fresh veggies like carrots and cucumbers are great too. For a fun twist, use crusty bread. Garnish with cherry tomatoes or olives for color. This adds a nice pop to your dish. Explore different serving bowls to make it look fancy. You can find the Full Recipe above for more details. {{image_4}} To create a Mediterranean twist, add sun-dried tomatoes and black olives. These ingredients bring a burst of flavor that pairs perfectly with feta. You might also include fresh basil or mint for a refreshing note. Serve this dip with warm pita bread or crunchy veggies for a delightful snack. If you love heat, consider adding red pepper flakes or diced jalapeños. This will give your dip a fiery kick. You can also mix in a splash of hot sauce for an extra layer of flavor. Try serving with spicy tortilla chips or crispy celery sticks for a fun twist. For a vegan version, swap the feta and cream cheese for silken tofu and nutritional yeast. Blend them together with olive oil and lemon juice. This mix creates a creamy base that tastes great. Add your favorite herbs and spices for added flavor. Serve with fresh veggies for a healthy snack. Explore the [Full Recipe] to make your own whipped feta dip and customize it with these variations! To store whipped feta dip, place it in an airtight container. This keeps moisture out and flavors in. Make sure to press plastic wrap directly onto the dip before sealing the container. This extra layer helps prevent air from changing the dip's taste. You can enjoy whipped feta dip cold or warm. If you prefer it warm, gently heat it in the microwave. Start with 15 seconds, stir, and then heat in short bursts. Be careful not to overheat; you want it creamy, not hot. Whipped feta dip lasts about 4 to 5 days in the fridge. Check for any off odors or mold before using it. If it smells sour or looks different, toss it out. Freshness is key for this tasty dip! The best way to serve whipped feta dip is with a variety of dippers. I love using crispy pita chips, fresh veggies, or crusty bread. You can also pair it with crackers for added crunch. Place the dip in a nice bowl and drizzle some olive oil on top. Add colorful toppings like cherry tomatoes or olives for a pop of color. This makes the dip look great and taste even better. Yes, you can make whipped feta dip ahead of time. It stays fresh in the fridge for up to three days. Just store it in an airtight container. When you’re ready to serve, give it a quick stir. This keeps it creamy and smooth. If it thickens, add a little olive oil or yogurt to loosen it up. This way, you save time when guests arrive. If your dip is too salty, don't worry. You can fix it! Add a little more cream cheese or Greek yogurt to balance the salt. Blend it well to mix. You can also add a splash of lemon juice. This brings freshness and brightens the flavor. If you’re in a pinch, a pinch of sugar can help too. Taste as you go, so you get the flavor just right. We explored all about whipped feta dip, from essential ingredients to fun variations. You learned how to create a creamy dip that impresses friends. Remember, you can customize toppings and even make vegan options. Proper storage keeps your dip fresh and tasty. With these tips, whipping up this dish is easy and fun. Enjoy sharing your whipped feta dip at your next gathering. Trust me, it’s a crowd-pleaser!](https://joymealplan.com/wp-content/uploads/2025/07/35a48388-1c52-4076-af09-d3ade9d891c4-768x768.webp)

![- 1 cup fresh spinach, finely chopped - 1 cup canned artichoke hearts, well-drained and chopped - 1/2 cup cream cheese, softened to room temperature - 1/2 cup sour cream - 1/2 cup mozzarella cheese, freshly shredded - 1/4 cup Parmesan cheese, finely grated - 2 cloves garlic, minced - 1 teaspoon fresh lemon juice - Salt and freshly ground black pepper to taste - 1/4 teaspoon red pepper flakes (optional) - Tortilla chips or freshly sliced baguette for serving The ingredients for creamy spinach artichoke dip come together easily. You can choose fresh or canned artichokes. I prefer fresh spinach for flavor, but both work well. Cream cheese gives the dip its base, making every bite rich and smooth. The sour cream adds tanginess. For that cheesy pull, I use mozzarella. Parmesan adds a salty bite that brightens the whole dish. I always add fresh garlic for depth. A splash of lemon juice lifts the flavors, making them pop. Salt and pepper balance the dish. If you like heat, use red pepper flakes. They add a nice kick without overwhelming the flavors. Serve with tortilla chips or a sliced baguette for dipping. Each bite of this dip is a creamy, cheesy delight. For the full recipe, check the section above. Preheating your oven to 350°F (175°C) is key for this dip. This step makes sure your dip cooks evenly. You want it to bubble and get a nice golden color. Skipping this step can lead to an uneven bake. In a large bowl, mix together the cream cheese, sour cream, mozzarella, and Parmesan. Use a spatula or a hand mixer to blend until smooth. This creates a rich and creamy base. The cream cheese must be soft for easy mixing. Make sure there are no lumps. A smooth texture makes the dip great for dipping. Next, gently fold in the chopped spinach and artichoke hearts. Add in the minced garlic, lemon juice, salt, pepper, and red pepper flakes if you like some heat. Stir carefully to mix everything well. This is where the magic happens. The flavors of spinach and artichokes blend to create a delicious combination. Now, spoon the mixture into a baking dish. Spread it evenly to create a uniform layer. Place the baking dish in the preheated oven and bake for 25 to 30 minutes. You want to see bubbling around the edges and a light golden top. This means your dip is ready. Once baked, let it cool for a few minutes before serving. This short wait allows the flavors to meld beautifully, making it taste even better. For the Full Recipe, visit the provided link. To get that smooth and creamy dip, mix your cheeses well. Start with softened cream cheese and sour cream. This helps avoid lumps. Use a spatula or hand mixer to blend everything until it's nice and smooth. When you add spinach and artichokes, fold them in gently. This keeps the dip fluffy and creamy. Want to kick up the flavor? Add more garlic! You can use three or four cloves if you love garlic. Fresh herbs like basil or parsley also boost taste. A sprinkle of cayenne pepper adds a fun kick. Experiment with Italian seasoning for a unique twist. Each addition brings new flavor layers to your dip. Serve your dip warm for the best experience. When it comes out of the oven, let it cool for a few minutes. This allows the flavors to blend well. Serve it hot with tortilla chips or sliced baguette. The warmth makes it extra inviting and tasty. For a lovely touch, sprinkle some extra Parmesan on top before serving. {{image_4}} You can make this dip lighter by swapping some ingredients. Use low-fat cream cheese and sour cream for a healthier twist. Greek yogurt is another great choice. It adds creaminess without the extra fat. You won't miss the full-fat versions. Plus, you still get that rich taste you love. Want to change up the flavor? Try adding different cheeses. Cheddar or gouda can give it a fun kick. You can also mix in spices like cumin or paprika. These simple tweaks can make your dip unique. Don’t be afraid to experiment. Each time, you can create a new favorite. For a vegan version, replace dairy products with plant-based alternatives. Use cashew cream or tofu for the cream cheese. You can also use coconut yogurt instead of sour cream. Nutritional yeast gives it a cheesy flavor. These swaps keep the dish creamy while being vegan-friendly. Enjoy delicious flavors without the dairy! For the full recipe, check out [Full Recipe]. Store leftover dip in an airtight container. This keeps the dip fresh and tasty. Place it in the fridge within two hours of serving. For longer storage, you can freeze it. Use a freezer-safe container and label it with the date. Make sure to leave some space for expansion when freezing. To reheat your dip, use an oven or a microwave. In the oven, preheat to 350°F (175°C). Place the dip in a baking dish and cover it with foil. Heat for about 15-20 minutes, or until warm. In the microwave, heat in short bursts of 30 seconds, stirring in between. This way, you keep the dip creamy and avoid a rubbery texture. The dip lasts about 3-4 days in the fridge. Make sure it is sealed well. If frozen, it can last up to 2 months. To enjoy the best flavor, eat it within this time. Always check for any off smell or change in texture before eating. Yes, you can make this dip ahead of time! Prepare the dip and store it in the fridge. Use an airtight container to keep it fresh. You can make it a day before your event. Just remember to bake it right before serving. If you want to reheat it, warm it in the oven until it's hot and bubbly. This dip pairs well with many snacks. Try serving it with: - Tortilla chips - Fresh vegetable sticks like carrots and celery - Sliced baguette - Pita chips These options add crunch and freshness. They also bring out the creamy flavor of the dip. You can bake this dip in a slow cooker! First, mix all the ingredients as usual. Then, place the mixture in the slow cooker. Cook it on low for about 2 to 3 hours. Stir it occasionally to keep it smooth. This method makes the dip perfect for parties, as it stays warm and ready to enjoy. For the full recipe, check out the complete guide above. This creamy spinach artichoke dip is easy to make and fun to share. We covered the key ingredients and detailed step-by-step instructions to guide you. Remember to adjust flavors and textures to your liking, and don’t hesitate to explore variations. Whether making it healthier or trying vegan options, there’s a version for everyone. Store any leftovers properly, and reheat to enjoy it warm again. With this recipe, you are set for tasty gatherings and comfy nights in. Enjoy your delicious creation!](https://joymealplan.com/wp-content/uploads/2025/07/4577691d-75b4-487d-8cf6-776305dcf758-768x768.webp)