Garlic Butter Chicken and Potatoes Sheet Pan Delight

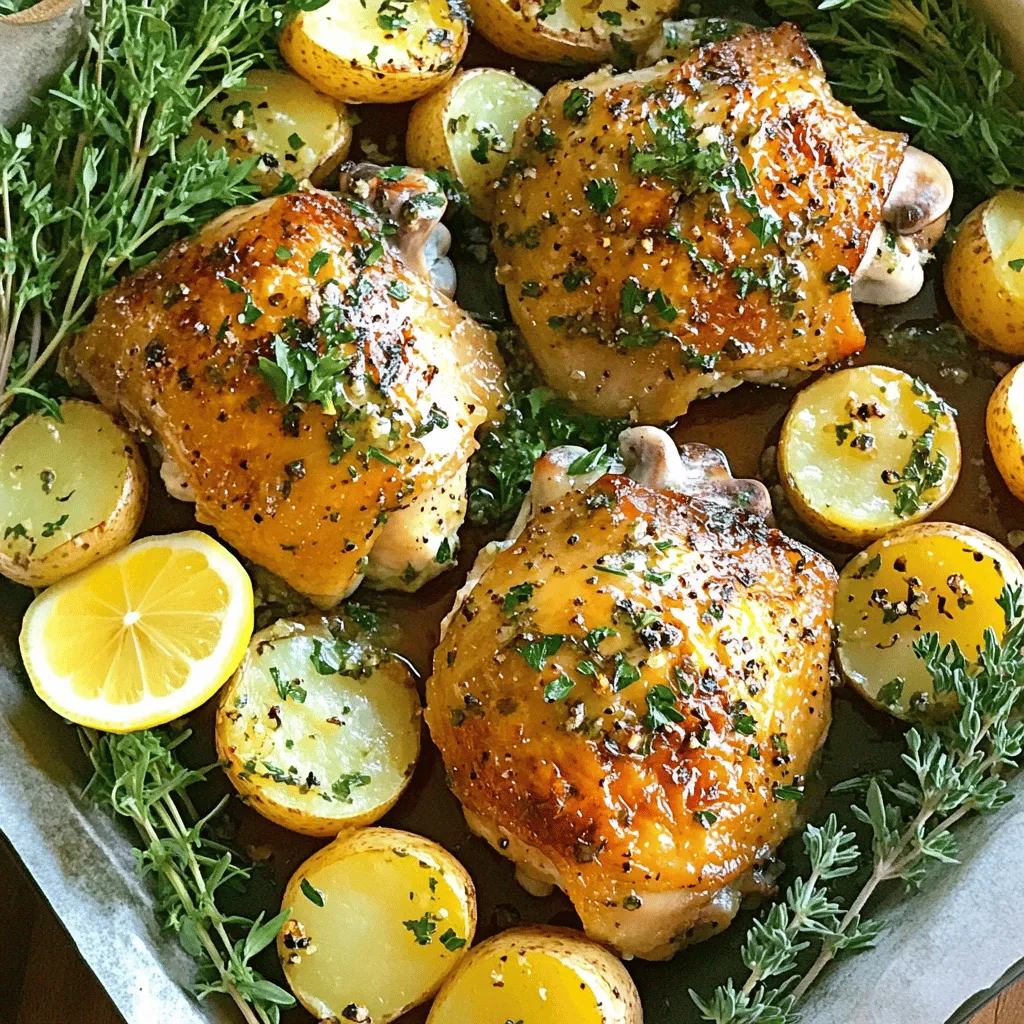
Ready for a mouthwatering dish that’s easy to make? My Garlic Butter Chicken and Potatoes Sheet Pan Delight will change your weeknight dinners. With tender chicken thighs, crispy baby potatoes, and a rich garlic butter marinade, this recipe is packed with flavor. Plus, you’ll only need one pan! Let’s dive into making a meal your family will love. Trust me; it’s a dinner win you can’t miss!
Ingredients
Main Ingredients
– 4 boneless, skinless chicken thighs
– 1 lb baby potatoes, halved
– 6 cloves garlic, minced
– 2 tablespoons fresh rosemary, finely chopped
– 1 tablespoon fresh thyme, finely chopped
– 1/2 cup unsalted butter, melted
– 1 tablespoon olive oil
The main ingredients bring joy to your kitchen. Chicken thighs are juicy and flavorful. Baby potatoes add a nice texture. Garlic and herbs provide aroma and depth. Butter and olive oil enhance richness.
Seasoning and Flavor Enhancers
– Salt and freshly cracked black pepper, to taste
– 1 teaspoon smoked paprika
– 1 tablespoon freshly squeezed lemon juice
Seasoning is key to making every bite amazing. Salt and pepper boost the dish’s taste. Smoked paprika adds a subtle warmth. Lemon juice brightens the flavors and balances richness.
Optional Garnishes
– Fresh parsley leaves, chopped
Garnishing with fresh parsley is optional but recommended. It adds color and freshness. A sprinkle before serving makes your dish pop visually. Plus, it adds a fresh taste that makes everything better.
Step-by-Step Instructions
Preparation Steps
– Preheat your oven to 400°F (200°C). This ensures even cooking for your dish.
– In a large bowl, whisk together melted butter, minced garlic, chopped rosemary, thyme, lemon juice, smoked paprika, salt, and pepper. This mixture creates a tasty garlic butter marinade.
Marinating the Chicken
– Toss the chicken thighs in the garlic butter marinade. Make sure they are fully coated for maximum flavor.
– I suggest marinating the chicken for about 15 minutes at room temperature. This short time adds a lot of taste.
Preparing the Potatoes
– Take halved baby potatoes in another bowl. Drizzle olive oil over them.
– Season with salt and pepper. Toss well to coat every piece evenly. This will make the potatoes flavorful and crispy.
Assembling the Sheet Pan
– Grab a large sheet pan. Place the marinated chicken thighs in the center.
– Scatter the seasoned potatoes around the chicken. Make sure everything has space for even cooking.
– Drizzle any leftover garlic butter marinade over both the chicken and potatoes. This adds more rich flavor.
Cooking
– Roast the chicken and potatoes in the oven for 30-35 minutes.
– The chicken should reach an internal temperature of 165°F (74°C). The potatoes should be tender and golden brown.
– Stir everything halfway through cooking. This helps ensure even browning and cooking for both the chicken and potatoes.
Tips & Tricks
Ensuring Flavorful Chicken
Marinating chicken is key to great flavor. The garlic butter mix seeps into the meat, making it juicy. I suggest marinating for at least 15 minutes. If you have time, marinate for up to an hour. This allows the flavors to develop deeper.
Achieving Perfect Potatoes
To check for tenderness, pierce a potato with a fork. It should glide in easily. For a golden brown finish, spread the potatoes out on the pan. This helps them get crispy. Turn them halfway through cooking for even browning.
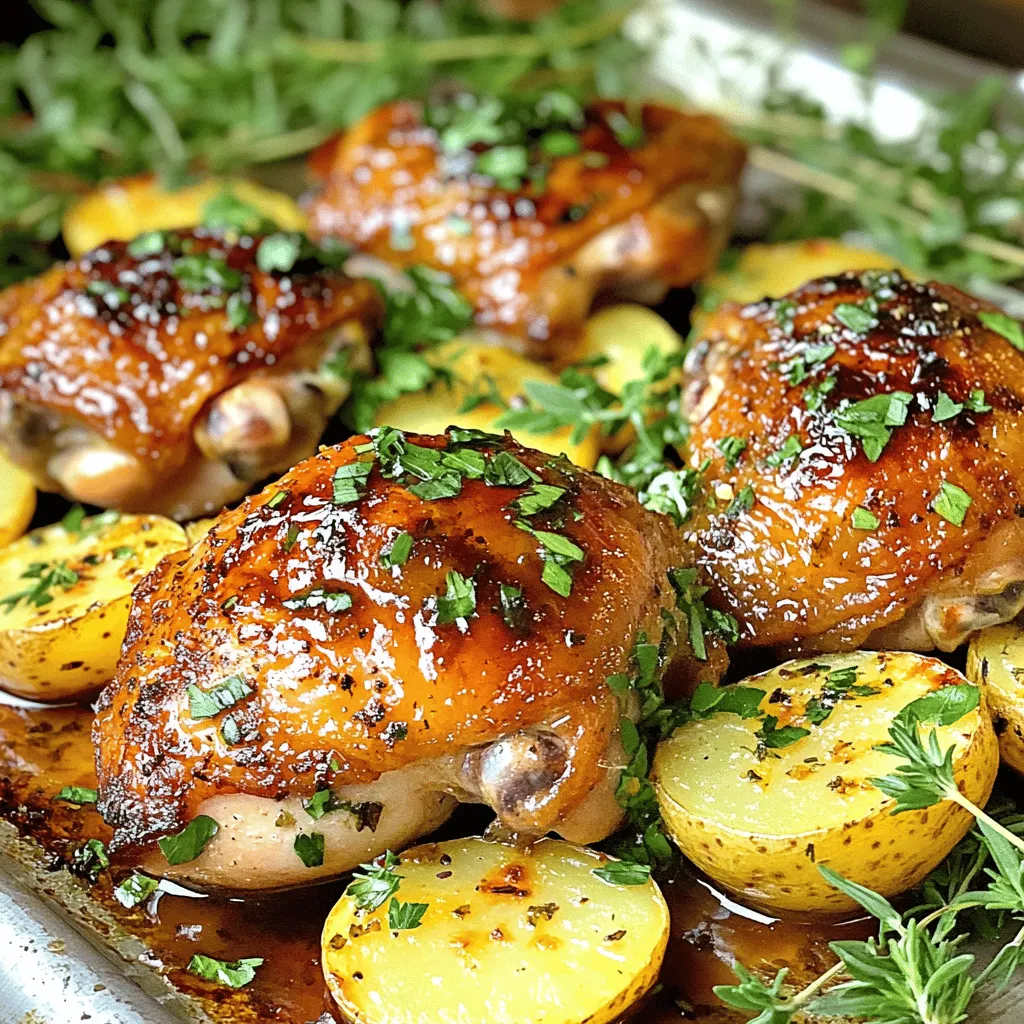
Serving Suggestions
For a rustic touch, serve everything right from the sheet pan. It looks warm and inviting. You can also plate each dish separately. Pair with steamed green beans for color and freshness. Drizzle some garlic butter over the meal before serving for extra flavor.

Variations
Ingredient Substitutions
You can switch up the chicken type in this recipe. Chicken breasts or drumsticks will work well. Each will give a different taste and texture. You can also add seasonal veggies to the pan. Carrots, bell peppers, or zucchini can add color and flavor. Just chop them up and toss them with the potatoes.
Flavor Variations
Do you want to change the taste? Use different herbs! Basil or oregano can give a fresh twist. If you like heat, add some red pepper flakes. Adjusting spice levels can make this dish fit your taste buds.
Cooking Method Alternatives
Want to try a new cooking method? You can air fry this meal. It will cut down cooking time and add crispiness. Just follow the same steps but adjust the time. Alternatively, you can slow cook it for a tender result. Place everything in a slow cooker and let it do its magic for several hours.
Storage Info
Leftovers
To keep your leftovers fresh, store them in an airtight container. Make sure to let the dish cool to room temperature before sealing. If you do this, your meal stays tasty and safe. You can keep the leftovers in the fridge for up to three days.
Reheating Suggestions
The best way to reheat the chicken and potatoes is in the oven. Preheat your oven to 350°F (175°C). Place the chicken and potatoes on a baking sheet. Heat for about 15 to 20 minutes, or until warmed through. This method helps keep the chicken juicy and the potatoes crispy. You can also use a microwave, but be careful. Microwaving can make the chicken rubbery. If you choose this option, cover it with a damp paper towel to help maintain moisture.
Freezing
If you want to save some for later, you can freeze the dish. First, let it cool completely. Then, place the chicken and potatoes in a freezer-safe container. For best results, use it within three months. To thaw, move it to the fridge for a few hours or overnight. Reheat in the oven or microwave as mentioned above. This way, you can enjoy a quick meal without losing flavor.
FAQs
Can I use frozen chicken for this recipe?
Yes, you can use frozen chicken. However, you must thaw it first. Thaw it in the fridge overnight. If you’re in a hurry, use the microwave. Just ensure it’s fully thawed before cooking. This helps the chicken cook evenly and absorb the flavors.
How do I ensure the chicken is cooked through?
To check if the chicken is done, use a meat thermometer. The internal temperature should reach 165°F (74°C). Insert it in the thickest part of the thigh. If you don’t have a thermometer, cut into the chicken. The juices should run clear, and the meat should be white, not pink.
What can I serve with garlic butter chicken and potatoes?
You can serve many sides with this dish. Here are some great options:
– Steamed green beans
– Roasted carrots
– A fresh garden salad
– Garlic bread
These sides balance the meal and add more flavor.
Can I make a vegetarian version of this dish?
Yes! To make it vegetarian, swap chicken for hearty vegetables. Use:
– Cauliflower
– Zucchini
– Bell peppers
– Chickpeas
Toss these in garlic butter and roast them like the chicken. This gives you a tasty and satisfying meal.
How do you prevent the potatoes from burning?
To prevent burning, cut the potatoes into even sizes. This helps them cook evenly. Also, toss them well in olive oil and seasonings. Make sure they are spread out on the pan. Stir them halfway through cooking. This ensures they brown nicely without burning.
This article covered a simple yet tasty garlic butter chicken and potatoes recipe. We explored the main ingredients like chicken thighs, baby potatoes, and fresh herbs. I shared step-by-step instructions, tips for perfect results, and variations for personal taste. With leftovers storage advice and answers to common questions, you now have all you need for a great meal. Enjoy experimenting with this dish, and make it your own with different flavors or cooking methods. Happy cooking!


![For this recipe, you will need: - 2 cups zucchini, sliced into rounds - 2 cups mixed bell peppers (red, yellow, and orange), chopped into bite-sized pieces - 1 cup cherry tomatoes, halved - 1 cup red onion, thinly sliced - 3 cloves garlic, minced These fresh vegetables shine when roasted. They bring color and taste to your dish. You can mix any summer vegetables you love. Try eggplant or asparagus for variety. To enhance the taste, gather: - 1 teaspoon dried oregano - 1 teaspoon dried thyme - 1/2 teaspoon smoked paprika - Salt and freshly cracked pepper to taste - Fresh basil leaves for garnish These herbs add depth and aroma. Oregano and thyme pair well with the sweetness of the veggies. Smoked paprika adds a lovely warmth and a hint of smokiness. Fresh basil leaves at the end brighten the dish. For roasting, you want to use the right oil. - 1/4 cup extra-virgin olive oil is my go-to choice. This oil adds richness and helps the veggies crisp up. You can also use avocado oil for a neutral taste. Avoid oils with low smoke points. Besides the herbs mentioned, consider: - A squeeze of fresh lemon juice for brightness - A sprinkle of chili flakes if you like heat These seasonings can lift the dish and make it even more exciting. A little acidity from lemon balances the flavors nicely. Start by washing all your vegetables well. This step removes dirt and pesticides. Next, chop the zucchini into rounds, bell peppers into bite-sized pieces, and halve the cherry tomatoes. Slice the red onion thinly. Then, mince the garlic. In a large bowl, combine all the chopped vegetables. Drizzle the olive oil evenly over the mix. Sprinkle in the dried oregano, dried thyme, smoked paprika, salt, and pepper. Use a large spoon to toss everything together. Make sure each piece gets coated with oil and seasoning. This ensures maximum flavor in every bite. Preheat your oven to 425°F (220°C). This temperature helps the vegetables roast perfectly. Spread your seasoned vegetables in a single layer on a large, rimmed baking sheet. This way, they roast evenly. Place the baking sheet in the oven. Roast the vegetables for about 25-30 minutes. Halfway through, stir the vegetables. This step is key for even cooking. You want them tender and slightly caramelized. Once your vegetables are done, remove them from the oven. Let them cool for a few minutes to enhance the flavors. For a fresh touch, garnish with basil leaves. Serve the roasted vegetables warm. You can place them over a bed of quinoa or alongside grilled chicken. Drizzle with more olive oil, and add extra herbs for a beautiful look. This dish is not only tasty but also healthy and colorful! To pick ripe summer vegetables, look for bright colors and firm textures. Zucchini should feel solid, while bell peppers should have smooth skin. When choosing cherry tomatoes, opt for those that are deep red and plump. For organic versus conventionally grown produce, organic options often have fewer pesticides. They can be a bit pricier but are great if you want to avoid chemicals. If you buy conventionally grown, wash them well to remove any residues. Set your oven to 425°F (220°C). This high heat helps the veggies caramelize. Spread them in a single layer on the baking sheet. Crowding them can make them steam instead of roast. Look for a golden brown color on the edges. This shows they are done. The veggies should be tender when pierced with a fork. Stir halfway through cooking to ensure even roasting, so all sides get that nice flavor. For the full recipe, check out the complete guide on making these vibrant roasted summer vegetables. {{image_4}} You can easily change the vegetables in this recipe. If you have other veggies, use them! Here are some ideas: - Swap zucchini for yellow squash. - Replace bell peppers with carrots or eggplant. - Use broccoli or cauliflower for a crunchy twist. - Try asparagus or green beans for a fresh bite. If you follow a special diet, you can make changes too. For a vegan option, this recipe is already perfect. If you need gluten-free, all ingredients work well. To switch up the flavor, try different spices. Here are some great ideas: - Add cumin for a warm, earthy taste. - Use curry powder for an exotic twist. - Sprinkle chili powder for a bit of heat. - For sweetness, mix in honey or maple syrup. These spices can change the whole meal. You can make it fit any cuisine you love. Enjoy exploring these flavors in your cooking! After you enjoy your roasted summer vegetables, let them cool first. This step helps keep them fresh. Store leftovers in an airtight container. This keeps moisture in and flavors safe. Roasted vegetables can last in the fridge for about 3 to 5 days. Always check for any signs of spoilage before eating. To reheat, use your oven or a skillet. Preheat your oven to 350°F (175°C). Spread the vegetables on a baking sheet and heat for about 10 minutes. This method keeps them crispy. In a skillet, add a splash of oil and heat over medium heat. Stir them gently until they warm up. You can also use leftover roasted vegetables creatively. Toss them in salads for a warm touch. Add them to pasta or grain bowls for more flavor. Mix them into omelets for a delicious breakfast. The options are endless! For the full recipe, check out [Full Recipe]. What are the best vegetables for roasting? The best vegetables for roasting are those that hold their shape and flavor. I love using: - Zucchini - Bell peppers - Cherry tomatoes - Red onion These veggies caramelize well and taste sweet when roasted. Feel free to mix in others like carrots or eggplant for variety. Can roasted vegetables be made ahead of time? Yes, you can make roasted vegetables ahead of time. Just roast them, let them cool, and store them in the fridge. They stay fresh for up to three days. When you’re ready to enjoy them, reheat in the oven for the best taste. How do I make roasted vegetables crispy? To make roasted vegetables crispy, follow these tips: - Spread them out on the baking sheet without crowding. - Use enough olive oil to coat each piece. - Stir halfway through cooking. These steps help achieve that crispy, golden finish. For the full recipe, check out the vibrant roasted summer vegetables recipe. Roasting summer vegetables is simple and rewarding. We learned how to choose fresh produce and seasonings. The blog covered easy step-by-step instructions for prepping and cooking. I shared tips for perfect roasting and ways to store and reheat leftovers. Incorporate these methods to enjoy tasty vegetables all season. Experiment with flavors and have fun. Your meals will shine with roasted veggies!](https://joymealplan.com/wp-content/uploads/2025/07/5b4132f7-a86e-4702-8661-8c8da9db132d-768x768.webp)
![To make Easy Chicken Tikka Masala, gather these key ingredients: - 500g boneless chicken thighs, cut into bite-sized pieces - 1 cup plain yogurt - 2 tablespoons garam masala - 1 tablespoon ground cumin - 1 teaspoon ground coriander - 1 teaspoon paprika - 1 teaspoon turmeric - 1 tablespoon ginger, minced - 3 cloves garlic, minced - 1 onion, finely chopped - 1 can (400g) crushed tomatoes - 1 cup coconut milk - 2 tablespoons vegetable oil - Salt to taste - Fresh cilantro for garnish These ingredients create a rich, creamy sauce that brings the dish to life. The yogurt is key for tender chicken. The spices add depth and warmth, making every bite flavorful. You can customize your Chicken Tikka Masala with these optional ingredients: - Lemon juice for brightness - Green chili for heat - Bell peppers for crunch - Peas for color Adding these extras can change the flavor profile and make it your own. Feel free to mix and match based on your taste. If you have allergies, there are simple swaps you can use: - Use almond or soy yogurt instead of dairy yogurt. - Swap coconut milk for almond milk for a nut-free option. - Replace chicken with tofu or chickpeas for a vegan dish. These substitutions keep the dish delicious while catering to your dietary needs. Enjoy your cooking adventure! For the complete recipe, check out the Full Recipe link. First, grab a large bowl. Mix 1 cup of plain yogurt, 2 tablespoons of garam masala, 1 tablespoon of ground cumin, 1 teaspoon of ground coriander, 1 teaspoon of paprika, 1 teaspoon of turmeric, 1 tablespoon of minced ginger, 3 cloves of minced garlic, and a pinch of salt. Stir well until it’s smooth. Now, add 500g of bite-sized chicken thighs. Make sure each piece is coated well with the marinade. Cover the bowl with plastic wrap. Pop it in the fridge for at least 30 minutes. For the best taste, let it sit overnight. Next, heat 2 tablespoons of vegetable oil in a large skillet over medium-high heat. Once hot, add 1 finely chopped onion. Cook the onion for 5-7 minutes. You want it to turn golden brown and soft. This step adds a sweet flavor. After the onion is ready, add the marinated chicken. Cook it for about 8-10 minutes. Stir it occasionally to brown all sides evenly. Once the chicken is browned, it’s time to add more flavor. Pour in 1 can of crushed tomatoes. Stir gently to mix everything. Bring the mixture to a gentle simmer. Let it simmer for about 10 minutes. Stir it now and then to stop it from sticking. After that, slowly pour in 1 cup of coconut milk. Stir again to combine. Simmer for another 10 minutes. This makes the sauce thick and creamy. Taste and add more salt if needed. Finish by garnishing with fresh cilantro for a pop of color and taste. To get the best flavor in your Chicken Tikka Masala, start with fresh spices. Fresh spices give a robust taste that dried spices lack. Use whole spices when possible, and grind them yourself. This step unleashes their natural oils and aromas. Another key is the yogurt marinade. It adds tenderness and tang. Marinate your chicken for at least 30 minutes, but overnight is best. This waiting time allows the spices to soak in fully. For perfect chicken, cook it in batches. Overcrowding the pan steams the meat instead of browning it. Use medium-high heat to get a nice sear on the chicken. This creates a deep flavor that you want. Once you add the crushed tomatoes and coconut milk, let it simmer gently. This step helps the flavors meld together beautifully. You can make Chicken Tikka Masala ahead of time. Cook it fully, then let it cool. Store it in an airtight container in the fridge for up to three days. Reheat it on low heat, adding a splash of water if needed. This dish also freezes well. Portion it out and freeze it for up to three months. When you're ready, thaw it overnight in the fridge and reheat. For more details, check the Full Recipe. {{image_4}} You can easily make a vegetarian version of Chicken Tikka Masala. Replace the chicken with firm tofu or vegetables like bell peppers and zucchini. Tofu soaks up flavors well. Marinate it the same way as chicken. Cook it in the same sauce for that rich taste. This way, you keep the essence of the dish while making it meat-free. If you enjoy spicy food, add some heat to your Chicken Tikka Masala. You can include chopped green chilies or a pinch of cayenne pepper in the marinade. Adjust the spice level to your liking. Just remember, a little heat goes a long way! You can also serve it with a side of spicy chutney for an extra kick. You can swap chicken for other proteins too. Paneer, a fresh cheese, works great in this dish. Cut the paneer into cubes and marinate it just like the chicken. Cook it in the same way for a rich and creamy meal. Tofu and paneer both add their own unique texture and flavor to the dish. This makes it more exciting and diverse for your taste buds. For the complete recipe, check out the [Full Recipe]. To keep your Chicken Tikka Masala fresh, let it cool down first. Use an airtight container for storage. Place it in the fridge. It will stay good for about three to four days. For best results, store it without the rice or naan. To enjoy your Chicken Tikka Masala again, use the stove or microwave. If using the stove, heat it over low heat. Stir often to prevent sticking. If using the microwave, cover the dish and heat in short bursts. This way, it warms evenly. Always check the temperature to ensure it is hot throughout. You can freeze Chicken Tikka Masala if you want to save some for later. Place it in a freezer-safe container or bag. Make sure to leave some space for expansion. It can stay good for up to three months. When you’re ready to eat, thaw it in the fridge overnight. Reheat it on the stove or microwave, and enjoy this rich flavor again! For the full recipe, check the section above. You should marinate chicken for at least 30 minutes. For the best taste, let it sit overnight. This allows the spices to soak in deeply. The yogurt keeps the chicken tender while adding flavor. Yes, you can use bone-in chicken. It will add more flavor to your dish. Just be aware that it may take longer to cook. Adjust your cooking time to ensure the chicken is fully cooked. Serve Chicken Tikka Masala with fluffy basmati rice or warm naan. Both options soak up the rich sauce well. You can also add a side of cucumber salad for a fresh crunch. For the complete recipe, check out the Full Recipe section. You’ll find all the steps to make this rich, flavorful dish in no time! In this post, we covered the key ingredients for easy Chicken Tikka Masala, from marinade to sauce. I shared tips for perfect flavor and cooking techniques. You can even explore vegetarian options or different proteins like tofu. Storing leftovers properly ensures you enjoy this dish later. Remember, marinating the chicken is key, and you can customize it to your taste. With these steps, you’ll cook a delicious meal that’s sure to impress!](https://joymealplan.com/wp-content/uploads/2025/07/18c11e8b-b17f-4eb1-983f-851954d1111b-768x768.webp)


