Garlic Butter Scampi Linguine Flavorful and Easy Meal

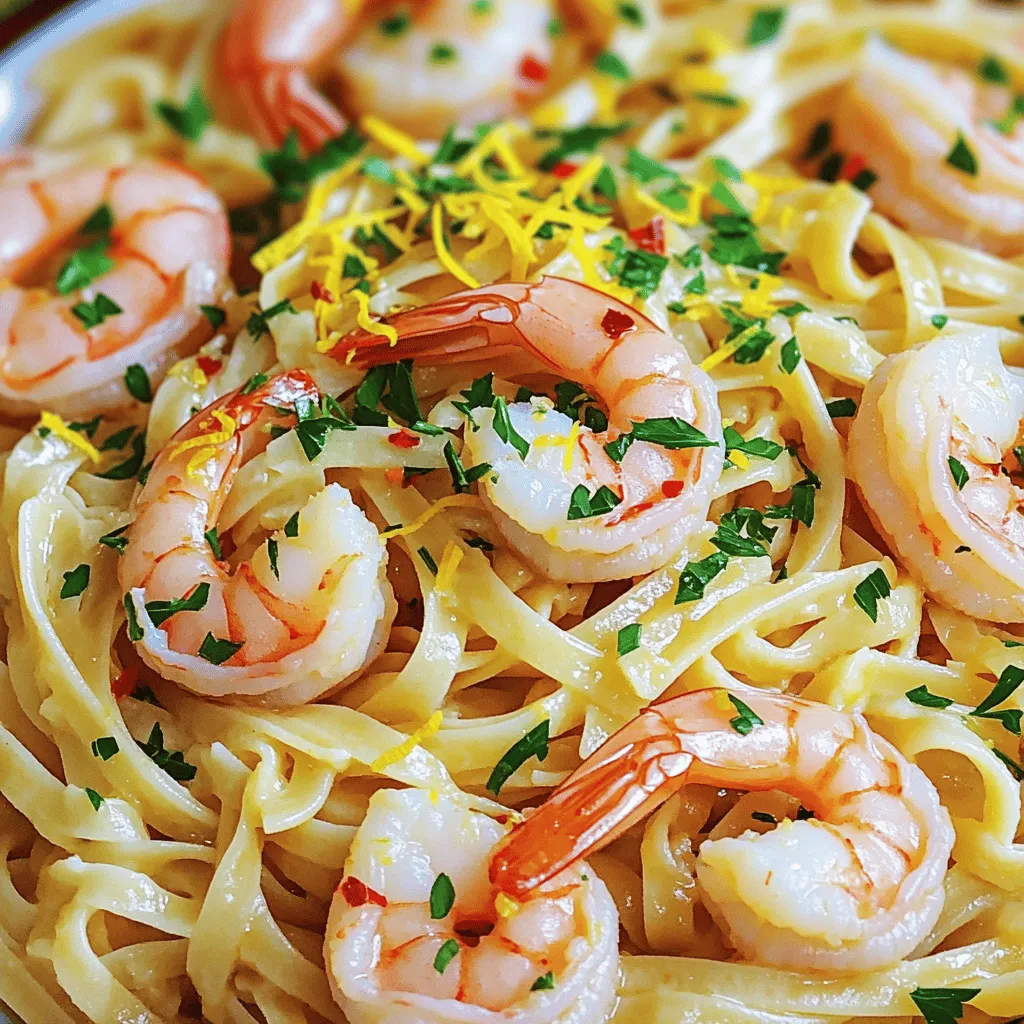
Looking for a quick and tasty dinner? Garlic Butter Scampi Linguine is your answer! In just a few steps, you can whip up a meal that’s not only simple but bursting with flavor. With shrimp, garlic, and butter, this dish will impress your family or friends. Let’s dive into the easy ingredients and steps to create a dish that everyone will love. Get ready to savor every bite!
Ingredients
List of Ingredients
– 8 ounces linguine pasta
– 6 tablespoons unsalted butter
– 4 cloves garlic, finely minced
– 1 pound large shrimp, peeled and deveined
– 1 teaspoon red pepper flakes
– 1 cup chicken broth
– 2 tablespoons fresh lemon juice
– Zest of 1 lemon
– Fresh parsley, finely chopped
– Salt and black pepper to taste
To make Garlic Butter Scampi Linguine, you need simple ingredients that pack a punch. The linguine pasta serves as a great base. Use large shrimp for a nice bite. The unsalted butter is key for rich flavor. Garlic adds aroma and taste. The red pepper flakes give it a little kick. Chicken broth brings depth to the sauce. Fresh lemon juice and zest brighten the dish. Finally, parsley adds color and freshness.
Equipment Needed
– Large pot
– Skillet
– Colander
– Measuring cups and spoons
– Knife and cutting board
Having the right tools makes cooking easier. A large pot helps boil the pasta evenly. A skillet is essential for sautéing garlic and shrimp. A colander drains the pasta quickly. Measuring cups and spoons ensure accurate amounts. A knife and cutting board help with chopping garlic and parsley. With these items, you are set to create a tasty meal.
Step-by-Step Instructions
Cooking the Linguine
To start, boil a large pot of salted water. Add the linguine and cook as the package says, usually for 8-10 minutes. You want the pasta to be al dente. Once cooked, drain it but save about 1 cup of the pasta water. Set the linguine aside for later.
Sautéing the Garlic
In a large skillet, melt 4 tablespoons of unsalted butter over medium heat. Once it’s completely melted, add 4 cloves of finely minced garlic. Sauté the garlic for about 1 minute. Stir often until you smell that great garlic aroma. Be careful not to let it brown.
Cooking the Shrimp
Now, add 1 pound of peeled and deveined shrimp to the skillet. Season them with red pepper flakes, salt, and black pepper. Cook the shrimp for 2-3 minutes, stirring occasionally. They should turn pink and opaque. Once done, take the shrimp out and set them aside.
Making the Sauce
In the same skillet, pour in 1 cup of chicken broth. Bring it to a gentle simmer. Add 2 tablespoons of fresh lemon juice and the zest of 1 lemon. Stir everything well. Let the sauce reduce for about 3-4 minutes. This helps blend all the delicious flavors.
Combining Ingredients
Return the cooked linguine and shrimp to the skillet. Toss everything together gently. You can add the reserved pasta water a little at a time, until the sauce is just how you like it. Stir in the remaining 2 tablespoons of butter until it melts and blends in.
Final Seasoning and Serving
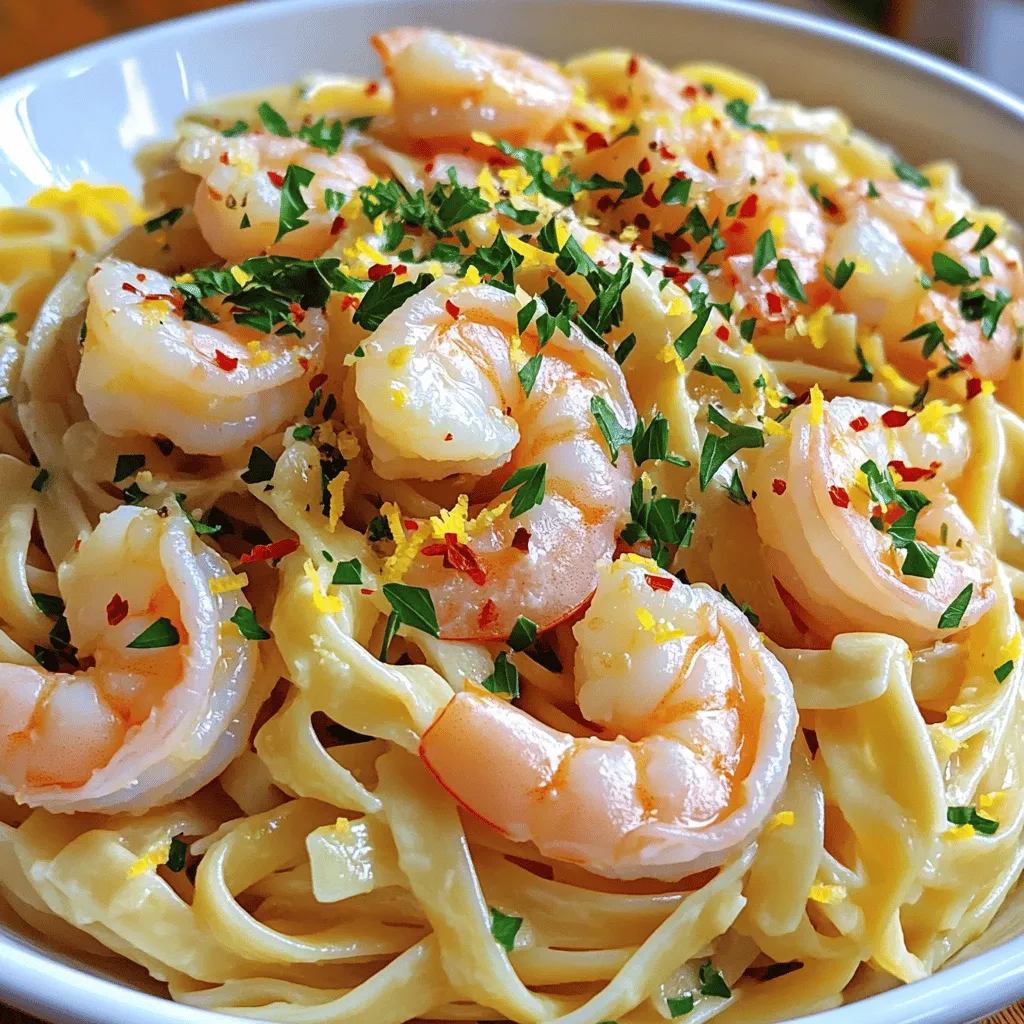
Taste your dish and add more salt and pepper if needed. When you’re happy with the flavor, take it off the heat. Garnish with chopped parsley before serving. This adds color and freshness to your meal. Serve it hot for the best taste!
Tips & Tricks
Perfecting the Sauce
To make the sauce just right, use pasta water. After cooking the linguine, save a cup of that starchy water. If your sauce is too thick, add a bit of this water. It helps the sauce cling to the pasta better. Remember, the salt from the pasta water adds flavor too.
For seasoning, taste as you go. Start with salt and pepper. Add red pepper flakes for a kick. Adjust these to match your taste. A pinch more lemon juice can brighten the dish. Always aim for a balance of flavors.
Cooking the Shrimp
How do you know when shrimp are done? Look for a pink color. They should be opaque and firm. If they curl tightly, they are likely overcooked. It only takes 2-3 minutes to cook shrimp. Watch them closely to keep them tender and juicy.
Avoid overcooking by removing the shrimp from heat early. They continue to cook from residual heat when off the stove. It’s better to undercook slightly than to overdo it.
Presentation Tips
To make your dish look great, serve the linguine in shallow bowls. This lets the shrimp sit nicely on top. It also makes it easy to see the sauce and garnish. Sprinkle fresh parsley on top for a pop of color.
For extra flair, add a lemon wedge on the side. This not only looks nice but also gives a fresh flavor boost. You can also drizzle a bit of olive oil over the top for a shiny finish.

Variations
Adding Vegetables
You can easily boost the nutrition of your Garlic Butter Scampi Linguine by adding some vegetables. Here are a few tasty options:
– Spinach: Toss in fresh spinach during the last minute of cooking.
– Cherry Tomatoes: Halve them and add them to the skillet with shrimp.
– Zucchini: Spiralize or slice zucchini and sauté it until tender.
For cooking these vegetables, simply sauté them in the butter before adding garlic. This will help them absorb the garlic flavor. Make sure to adjust cooking times so they stay crisp and fresh.
Protein Alternatives
If you want to switch up the protein, here are some great choices:
– Chicken: Use diced chicken breast instead of shrimp. Cook until golden brown and fully cooked.
– Scallops: These cook quickly. Sauté them for about 2-3 minutes on each side.
– Tofu: For a vegetarian option, use firm tofu. Sauté until golden and crispy.
Adjust the cooking time based on the protein you choose. Make sure to season well for the best flavor.
Sauce Enhancements
The garlic butter sauce is the star, but you can get creative! Here are some ideas:
– White Wine: Add a splash of white wine while simmering the sauce.
– Cream: Stir in a bit of heavy cream for a rich, creamy sauce.
– Herbs: Fresh basil or dill can add a nice twist. Sprinkle in some chopped herbs just before serving.
Feel free to experiment with spices too! A pinch of smoked paprika or lemon zest can take your dish to the next level.
Storage Info
Storing Leftovers
To store leftovers, let the dish cool down first. Place the linguine and shrimp in an airtight container. Make sure to seal it well. You can keep it in the fridge for up to three days. If you want to keep it longer, consider freezing it.
Reheating Instructions
When reheating, the best method is to use the stove. Place the leftovers in a skillet over medium heat. Add a splash of chicken broth or water to keep it moist. Stir gently until heated through. You can also microwave it in short bursts, stirring in between. Just be careful not to overcook the shrimp.
Freezing Options
To freeze Garlic Butter Scampi Linguine, use a freezer-safe container. Make sure it’s completely cool before sealing. You can freeze it for up to three months. When you’re ready to eat, thaw it overnight in the fridge. Reheat it gently as mentioned above for the best taste.
FAQs
What is the best pasta to use for scampi?
The best pasta for scampi is linguine. It pairs well with the sauce. You can also use fettuccine or spaghetti if you prefer. Both options hold the sauce nicely.
Can I make Garlic Butter Scampi Linguine ahead of time?
Yes, you can make Garlic Butter Scampi Linguine ahead of time. Cook the pasta and shrimp separately. Store them in the fridge. When ready to eat, warm them up together with the sauce.
How can I make this dish spicier or milder?
To make it spicier, add more red pepper flakes. Adjust to your taste. For a milder dish, reduce the red pepper flakes. You can also skip them entirely if you want no spice.
What can I serve with Garlic Butter Scampi Linguine?
This dish pairs well with a fresh salad. A crusty bread also complements it nicely. You can serve it with white wine for a perfect finish.
Is this recipe suitable for meal prep?
Yes, this recipe is great for meal prep. Store it in airtight containers. It keeps well in the fridge for up to three days. Reheat it gently to enjoy later.
This blog post covered a simple and tasty Garlic Butter Scampi Linguine recipe. We explored key ingredients, tools needed, and step-by-step instructions. I shared tips to perfect the dish, along with variations to suit your taste. Remember, cooking shrimp to a perfect pink and storing leftovers is essential. This dish is easy to make and great for any meal. Enjoy creating your own delicious version!


 for all the details! {{image_4}} You can switch up the protein in Chicken Alfredo Stuffed Shells easily. Ground turkey or beef works well. Both give a rich taste and fit well in the shells. If you want a lighter option, ground chicken is great too. For vegetarian options, you can use mushrooms or spinach. They add flavor and nutrients without meat. Tofu is also a good choice. It soaks up the sauce nicely and adds protein. You can play with the sauce to create different flavors. Try adding garlic or herbs to the Alfredo sauce. This gives it a fresh taste. You might also enjoy a white wine cream sauce for a twist. Adding roasted vegetables to the sauce works wonders too. Think peppers, zucchini, or even spinach. This makes the dish colorful and healthy. Cheese can change the whole vibe of your dish. You can mix in different cheeses like fontina or gouda. These cheeses melt beautifully and add a new flavor. If you want a lighter option, try part-skim mozzarella. For those who avoid dairy, vegan cheese is a great alternative. Look for brands made from nuts or soy. They can also melt well and taste great. To store Chicken Alfredo stuffed shells in the fridge, let them cool first. Place them in an airtight container. Keep them in the fridge for up to three days. For best freshness, cover the top with a bit of extra Alfredo sauce. This keeps the shells moist and tasty. To freeze stuffed shells, first let them cool completely. Then, place them in a single layer on a baking sheet. Freeze until solid, about two hours. After that, pack them in a freezer-safe container or bag. They can last for up to three months in the freezer. When you’re ready to eat, thaw them in the fridge overnight. Reheat in the oven at 350°F (175°C) for about 25 minutes. Cover with foil to avoid drying out. Enjoy your delicious meal again! Can I use non-dairy substitutes? Yes, you can! Use non-dairy cheese and a plant-based Alfredo sauce. This keeps the dish creamy without dairy. How long does it take to cook from frozen? If you cook from frozen, add about 15 to 20 minutes to the baking time. This ensures everything heats through well. What can I serve with Chicken Alfredo Stuffed Shells? These shells pair great with a fresh green salad or warm garlic bread. Both options add balance to your meal. Why are my shells falling apart? Overcooking the pasta shells can cause this. Make sure to cook them just until al dente. How can I prevent the filling from spilling out? Don’t overfill the shells. Fill them just enough, but leave some space at the top. This helps keep the filling secure. What's the best way to know when it's fully cooked? Check if the cheese on top is bubbly and golden brown. You can also insert a knife to see if it’s hot inside. Can I make this dish ahead of time? Absolutely! You can prepare the shells and store them in the fridge. Just bake them when you're ready to eat. For details, check the Full Recipe. In this article, we explored how to make Chicken Alfredo Stuffed Shells. We covered the key ingredients, including pasta shells, chicken, and cheeses. I shared clear steps for preparation, filling, and baking. We also discussed tips for perfecting your dish and variations to suit your taste. Remember, cooking is fun and can be creative. Don't hesitate to try new flavors or ingredients. Enjoy your delicious stuffed shells and share them with friends and family!](https://joymealplan.com/wp-content/uploads/2025/07/ca290995-1373-40bc-abd5-a22e15d03aa0-768x768.webp)


![To make a hearty Sweet Potato Black Bean Chili, you will need: - 2 medium sweet potatoes, peeled and cut into ½-inch cubes - 1 can (15 oz) black beans, thoroughly drained and rinsed - 1 large onion, finely diced - 2 cloves garlic, finely minced - 1 red bell pepper, chopped into small pieces - 1 can (14.5 oz) diced tomatoes with their juices - 2 cups vegetable broth (preferably low-sodium) - 1 tablespoon chili powder - 1 teaspoon ground cumin - 1 teaspoon smoked paprika - ½ teaspoon cayenne pepper (adjust according to your spice preference) - Sea salt and freshly cracked black pepper, to taste - 2 tablespoons olive oil Adding toppings can enhance the chili's flavor and look. Here are some tasty options: - Diced avocado for creaminess - Fresh cilantro leaves for a pop of color - Lime wedges for a zesty touch Each ingredient brings unique health benefits: - Sweet potatoes are rich in vitamins A and C. They provide fiber and antioxidants. - Black beans are a great source of protein and fiber. They help keep you full longer. - Onions contain antioxidants and may help reduce inflammation. - Garlic has immune-boosting properties and adds flavor. - Bell peppers are high in vitamin C and help with skin health. This chili is not just filling; it also packs a nutritious punch, making it a well-rounded meal for any day. For the full recipe, check out the recipe section above. Start with a large pot. Heat 2 tablespoons of olive oil over medium heat. Wait until the oil shimmers. Add 1 finely diced onion and 1 chopped red bell pepper. Sauté for about 5 minutes. Stir often until the onion is soft and clear. Next, add 2 minced garlic cloves. Sauté for 1 more minute, just enough to let the garlic smell good. Now, it’s time for the sweet potatoes. Add 2 medium sweet potatoes, cut into ½-inch cubes. Sprinkle in 1 tablespoon chili powder, 1 teaspoon ground cumin, 1 teaspoon smoked paprika, and ½ teaspoon cayenne pepper. Don’t forget salt and pepper to taste! Stir well to coat the sweet potatoes in the spices. Pour in 1 can of diced tomatoes with juices and 2 cups of vegetable broth. Mix everything together and bring it to a boil. Once boiling, lower the heat. Cover the pot and let the chili simmer for 25 to 30 minutes. The sweet potatoes should be soft but not mushy when you poke them with a fork. After the sweet potatoes cook, stir in 1 can of black beans, drained and rinsed. Heat through for another 5 minutes. This gives the beans time to warm up. Taste the chili and add more salt or pepper if you want. - Sauté onion and bell pepper: 5 minutes - Sauté garlic: 1 minute - Simmer chili: 25 to 30 minutes - Heat black beans: 5 minutes - Cut sweet potatoes into even pieces for uniform cooking. - Stir the chili occasionally to prevent sticking. - Adjust the spice levels based on your taste. - Let the chili sit for a few minutes before serving; this helps the flavors blend. For the full recipe, check out [Full Recipe]. Enjoy creating this hearty dish! Many people rush the cooking. Take your time to sauté the onion and pepper. This step builds flavor. If you skip it, your chili may taste flat. Another mistake is adding too much spice at once. Start small, then adjust to your taste. Remember to drain the black beans well. This avoids a watery chili. Use fresh herbs like cilantro or parsley for a burst of freshness. A squeeze of lime juice adds brightness. You can also try adding a splash of soy sauce for depth. If you want more heat, add diced jalapeños or a dash of hot sauce. Lastly, consider a drizzle of olive oil before serving. This adds richness and a nice finish. For this chili, you need a sturdy large pot. A good pot helps with even cooking. A sharp knife and cutting board make prep easy. You also need measuring spoons for spices and a can opener for the beans and tomatoes. A wooden spoon works best for stirring. Having these tools ready will make your cooking smooth and fun. For the full recipe, refer back to the main article. {{image_4}} You can switch up beans in this chili. Try using kidney beans or pinto beans. Both add a different flavor and texture. If you want a creamier chili, use cannellini beans. Mixing beans can make your dish more fun and unique. Feel free to add more veggies. Corn adds sweetness and crunch. Zucchini or carrots can boost nutrition and color. For a protein boost, add cooked quinoa or lentils. You can even throw in some chopped kale or spinach for added greens. These additions can change your chili into a new dish each time. Want more heat? Add extra cayenne pepper or diced jalapeños. For a milder taste, reduce the cayenne or skip it altogether. You can also add a dash of hot sauce when serving for those who like it spicy. If you love smoky flavors, try adding chipotle peppers in adobo sauce. Adjust the spices to fit your taste and make it your own. For the full recipe, check out the Sweet Potato Black Bean Chili section above. To keep your Sweet Potato Black Bean Chili fresh, let it cool first. Once cool, transfer it to an airtight container. It’s best to refrigerate the chili within two hours of cooking. When stored correctly, it lasts in the fridge for about 4 to 5 days. Be sure to label the container with the date. This helps you track how long it has been stored. If you want to keep your chili for a longer time, consider freezing it. First, let the chili cool completely. Then, pour it into freezer-safe bags or containers. Make sure to leave some space for expansion. Seal them tightly to prevent freezer burn. You can freeze the chili for up to 3 months. When you’re ready to enjoy it, just thaw it overnight in the fridge. To reheat your chili, you have a few options. The microwave is quick, but it can heat unevenly. Stir the chili halfway through heating. For the stove, pour the chili into a pot and heat it over medium heat. Stir often until it’s hot. This method helps maintain flavor and texture. If it seems thick, add a splash of vegetable broth or water. Enjoy your chili just like the first time you made it! For the full recipe, check out the details above. You can use pinto beans or kidney beans instead of black beans. They have a similar texture and flavor. If you want a different taste, try chickpeas. They add a nutty flavor and work well in this chili. Just make sure to drain and rinse them, just like you do with black beans. Yes, you can make this chili in a slow cooker! Start by sautéing the onion, garlic, and bell pepper on the stove. Then, add all ingredients to the slow cooker. Cook on low for 6 to 8 hours or on high for 3 to 4 hours. This method lets the flavors blend over time. Leftovers can stay fresh in the fridge for about 4 to 5 days. Make sure to store the chili in an airtight container. This helps keep it flavorful and safe to eat. If you want to keep it longer, you can freeze it! Yes, this chili is perfect for vegans! All ingredients are plant-based and wholesome. You can enjoy it without any worries. It’s full of flavor and nutrients, making it a great choice for everyone. You can find the full recipe [here](#). In this blog post, we explored how to make Sweet Potato Black Bean Chili. We covered the full list of ingredients, cooking steps, and essential tips to avoid common mistakes. Remember to experiment with toppings and variations to make it your own. Proper storage ensures your leftovers stay tasty. This chili is not only delicious but also packed with nutrients. Enjoy this easy recipe that fits many diets, including vegan. Cooking it can be fun and rewarding. Try it out, and discover your new favorite dish!](https://joymealplan.com/wp-content/uploads/2025/07/8ade8b74-c48b-4df7-852e-5be035604d83-768x768.webp)
