Looking for a quick, delicious meal that impresses? Garlic Butter Steak Bites are your answer! This easy recipe packs bold flavors and melts in your mouth. With just a few simple ingredients like sirloin steak, butter, and garlic, you’ll savor every bite. Ready to elevate your weeknight dinner? Let’s dive into this simple, flavorful dish that will delight your taste buds and leave your guests craving more!
Ingredients
Main Ingredients for Garlic Butter Steak Bites
To make garlic butter steak bites, you need a few key ingredients:
– 1 pound sirloin steak, cut into bite-sized pieces
– 4 tablespoons unsalted butter, divided
– 4 cloves garlic, minced
– 1 teaspoon smoked paprika
– 1 teaspoon salt
– 1/2 teaspoon black pepper
– 1 tablespoon fresh parsley, finely chopped (for garnish)
– Lemon wedges, for serving
The sirloin steak is tender and has great flavor. Cut it into small pieces to cook quickly. The unsalted butter adds richness, while garlic gives a wonderful aroma. Smoked paprika adds a nice touch of warmth. Salt and pepper enhance the taste. Fresh parsley brightens the dish, and lemon wedges give a zesty kick.
Optional Garnishes and Accompaniments
You can add a few optional items to elevate your meal:
– Fresh parsley
– Lemon wedges
– Side dish suggestions
Fresh parsley not only looks nice but also adds a fresh taste. Lemon wedges balance the richness of the steak. For sides, consider serving with a salad, rice, or roasted veggies. These add texture and flavor to your plate.
Step-by-Step Instructions
Preparing the Steak
First, pat the steak pieces dry with a paper towel. This step helps the steak sear well, giving it a nice crust. Next, cut the steak into bite-sized pieces. Aim for uniform chunks, so they cook evenly. This makes each bite tender and flavorful.
Cooking Process
Now, let’s melt the butter. In a large skillet, heat 2 tablespoons of unsalted butter over medium-high heat. Wait until it starts to sizzle. This means it’s hot enough. Once ready, add the steak bites to the skillet. Spread them in a single layer. Avoid overcrowding; this helps them sear nicely.
Next, sprinkle smoked paprika, salt, and black pepper over the steak. These spices add great flavor. Cook the steak bites for about 2-3 minutes on each side. Adjust the time based on how you like your steak. Remove them when they reach your desired doneness.
In the same skillet, lower the heat to medium. Add the remaining butter and minced garlic. Sauté for about 30 seconds. Keep stirring until the garlic smells good but doesn’t brown. This step creates a rich garlic butter sauce.
Final Touches
It’s time to combine the steak and sauce. Return the cooked steak bites to the skillet. Toss them in the garlic butter sauce, coating each piece well. The sauce adds moisture and flavor.
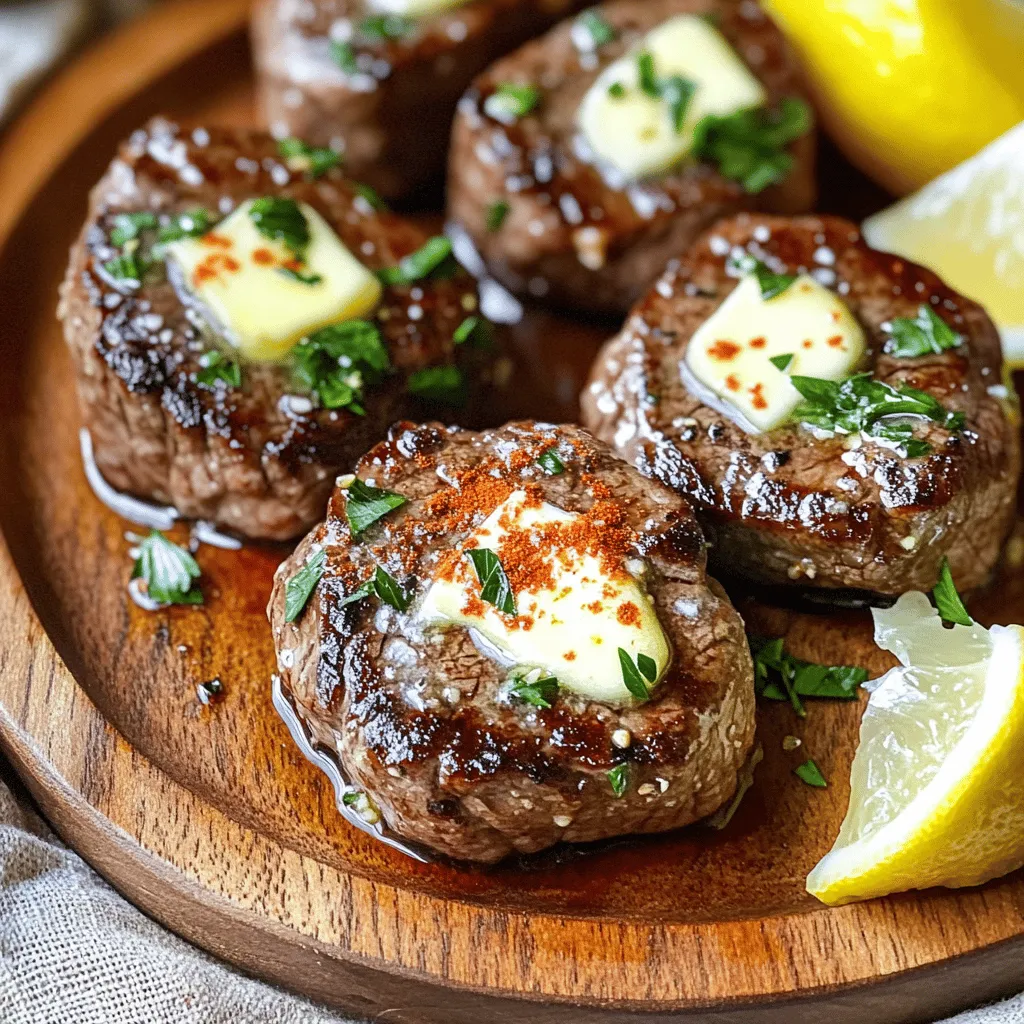
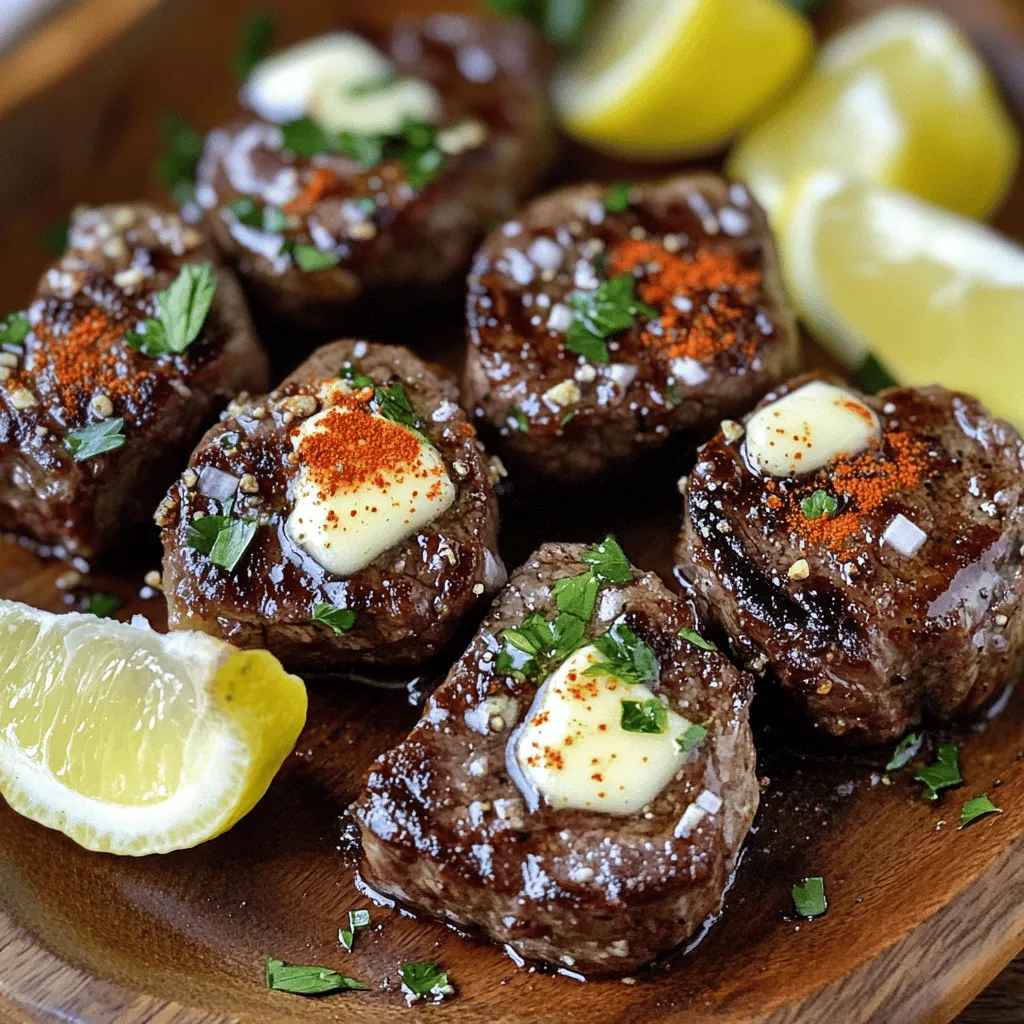
To finish, remove the skillet from heat. Garnish the steak bites with finely chopped parsley. This adds color and freshness. Serve them with lemon wedges. The juice from the lemon adds a zesty touch that brightens the dish. Enjoy your delicious garlic butter steak bites!
Tips & Tricks
How to Achieve the Perfect Sear
To get a great sear on your steak bites, space is key. Do not overcrowd the pan. When the pieces are too close, they steam instead of sear. This step makes a big difference in taste. Aim for a single layer in your skillet. For doneness, cook about 2-3 minutes per side for medium-rare. Adjust the time if you like it more or less done. Use a meat thermometer for best results. A medium steak should reach 145°F.
Ingredient Substitutions
If you want to switch things up, try different cuts of steak. Ribeye or tenderloin works well too. Both offer a nice fat content for flavor. You can also use dairy-free butter if you need it. Look for plant-based options that melt well. They give you that creamy taste without dairy.
Enhancing Flavor and Presentation
Want to add more flavor? Consider adding a pinch of cayenne pepper or fresh thyme. Both enhance the taste and give an extra kick. For a pretty plate, stack the steak bites neatly. Drizzle some garlic butter sauce over them. Then, add fresh parsley on top. Serve with lemon wedges on the side. The citrus adds a bright burst that pairs nicely with the richness of the steak. This makes your dish both tasty and beautiful.
Variations
Different Cooking Methods
You can cook garlic butter steak bites in different ways.
Grilling steak bites: Grilling adds a nice smoky flavor. Preheat your grill to medium-high. Thread the steak pieces onto skewers for easy handling. Grill them for about 2-3 minutes on each side. Always check for your desired doneness. The grill marks will make them look great!
Air frying steak bites: The air fryer is a quick option. Set it to 400°F. Toss the steak pieces with garlic butter and spices. Place them in the air fryer basket in a single layer. Cook for about 8-10 minutes, shaking halfway. You’ll achieve a crispy outside and tender inside.
Flavor Additions
You can make garlic butter steak bites even better with some fun flavors.
Adding herbs and spices: Fresh herbs like thyme or rosemary can bring depth. Add them to the garlic butter while it cooks. A sprinkle of red pepper flakes can add heat if you like spice.
Incorporating vegetables: You can add veggies for color and nutrition. Bell peppers or mushrooms work well. Just toss them in the skillet with the steak bites. They soak up that rich garlic butter flavor too.
Serving Variations
Serving your steak bites can be both fun and creative.
Pairing with different sauces: Experiment with sauces like chimichurri or barbecue. A rich steak sauce also complements the bites well. Drizzle the sauce on top or serve it on the side for dipping.
Creative side dishes: Think about sides that balance the rich flavor. A fresh salad or roasted veggies can work nicely. For something heartier, serve with mashed potatoes or rice. These will soak up the leftover garlic butter sauce too!
Storage Info
Refrigeration Guidelines
After you make garlic butter steak bites, let them cool to room temperature. Store the leftovers in an airtight container. This helps keep the flavor fresh. You can store them in the fridge for up to three days. To reheat, use a skillet over medium heat. Add a little butter to the pan. This will help bring back the juicy flavor. Heat for about 5 minutes, turning the steak bites occasionally.
Freezing Instructions
For meal prep, you can freeze steak bites. First, let them cool completely. Place them in a freezer-safe bag or container. Remove as much air as possible to prevent freezer burn. They can stay fresh in the freezer for about three months. To thaw, move them to the fridge the night before you want to eat them. This keeps them safe and tasty. You can also thaw them in the microwave if you’re in a hurry.
Shelf Life
Garlic butter steak bites last about three days in the fridge. If you freeze them, they last for about three months. Always check for any off smells or changes in color before eating. This will help ensure you enjoy every bite safely.
FAQs
What’s the best steak to use for steak bites?
The best steak for steak bites is sirloin. It has great flavor and is tender. Other good choices include ribeye and tenderloin. Both cuts provide a rich taste. They also remain juicy when cooked. If you can, choose grass-fed steak for better flavor and health.
Can I make garlic butter steak bites without garlic?
Yes, you can make steak bites without garlic. Try using shallots for a mild onion flavor. You can also use herbs like rosemary or thyme for taste. They add fresh notes to the dish. Consider using lemon zest for brightness in the sauce too.
How can I make this a low-carb dish?
To make garlic butter steak bites low-carb, skip the butter and use olive oil. Focus on fresh herbs and spices for flavor. Serve with low-carb veggies like zucchini or bell peppers. You can also pair it with a salad for a balanced meal. Enjoying this dish without bread or rice keeps it low in carbs.
Garlic butter steak bites are simple and delicious. You learned about the best ingredients. I shared tips for cooking and storing them. You can customize with different flavors and sides.
These bites shine as a hearty meal or snack. Try various cooking methods to find your favorite. Enjoy making this dish your own!


