Garlic Butter Steak Bites Savory and Simple Delight
. In this blog post, we explored how to make delicious garlic butter steak bites. We discussed the key ingredients, from sirloin steak to fresh herbs. You learned step-by-step cooking tips for perfect doneness. We also covered variations, presentation ideas, and storage methods for leftovers. By following these tips, you can create a tasty dish your friends and family will love. With a little practice, you can master this recipe and impress everyone at your next meal.](https://joymealplan.com/wp-content/uploads/2025/06/dbdd8f16-fd7f-4bf6-8b38-aa3e7b5cdfe5.webp)
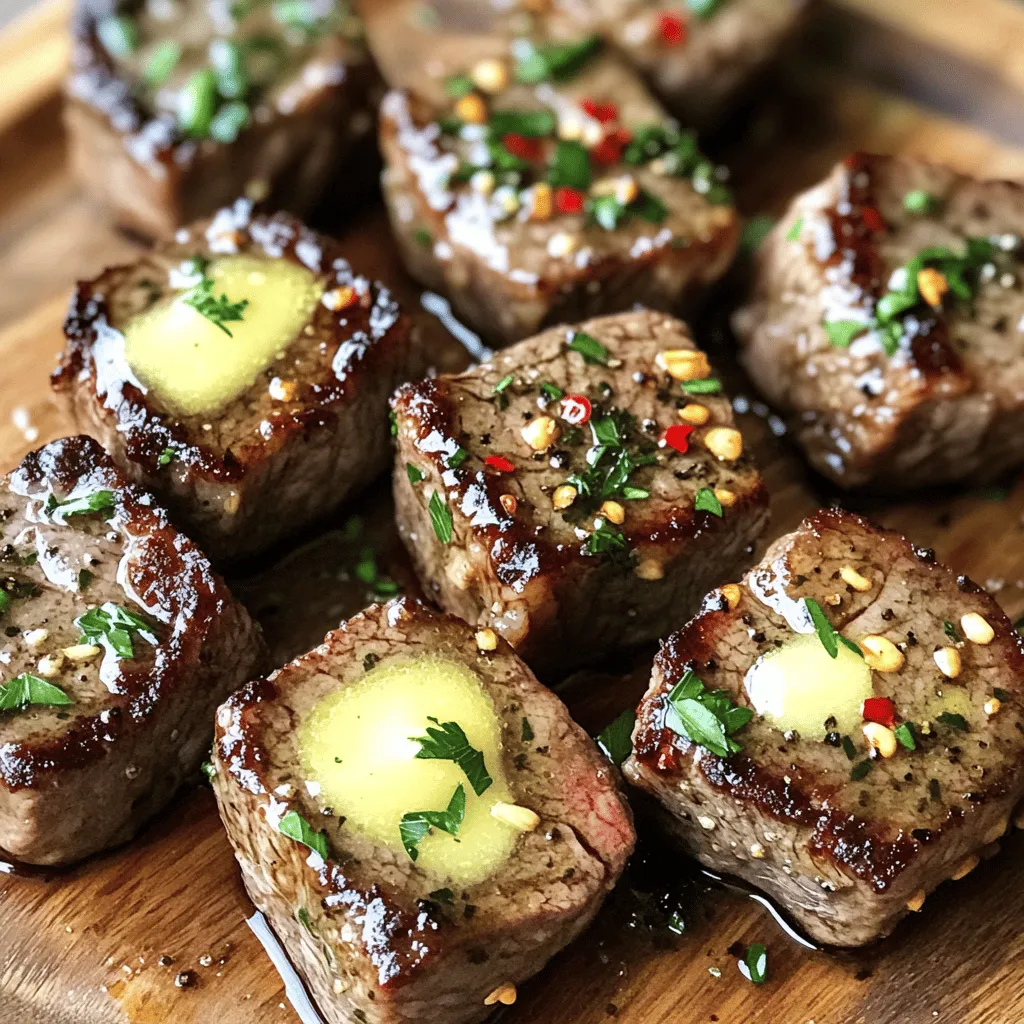
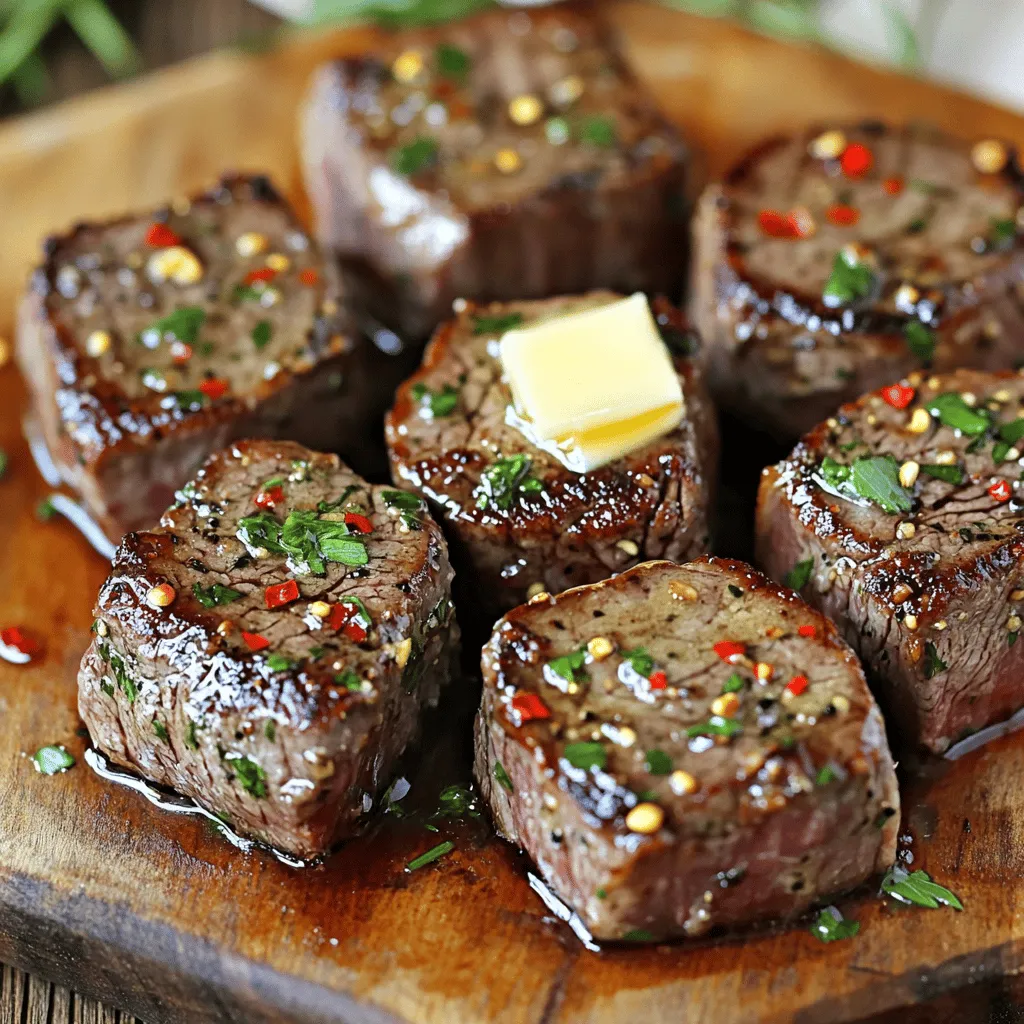
Get ready to savor a simple delight with my Garlic Butter Steak Bites. This dish is rich in flavor and easy to make. In just a few steps, you’ll transform tender sirloin steak into mouthwatering bites infused with garlic and herbs. Perfect for busy weeknights or a tasty appetizer, these steak bites will impress everyone at your table. Let’s dive into this juicy recipe that will have you cooking like a pro!
Ingredients
Main Ingredients
– 1 lb sirloin steak, cut into bite-sized cubes
– 4 tablespoons unsalted butter
– 4 cloves of garlic, minced
– 1 tablespoon fresh rosemary, finely chopped
– 1 tablespoon fresh parsley, chopped
Seasoning and Additional Ingredients
– Salt and pepper to taste
– 1 tablespoon olive oil
– Optional: 1 teaspoon red pepper flakes for an extra kick
For this dish, I love using sirloin steak. It is tender and flavorful, perfect for bites. The unsalted butter adds richness, while garlic gives that amazing aroma. Fresh rosemary and parsley brighten the dish with their herbs’ natural flavors.
I recommend seasoning your steak well. Salt and pepper will enhance the taste. If you like a bit of heat, add red pepper flakes. They give a nice kick without overpowering the dish.
Gather these ingredients before you start cooking. It makes the process smooth and fun.
Step-by-Step Instructions
Preparing the Steak
Start by patting the steak cubes dry with paper towels. This step is key. It helps the steak sear nicely. Next, season the cubes with salt and pepper. Make sure every side gets a good coating. This simple step adds a lot of flavor.
Cooking the Steak Bites
Heat olive oil in a skillet over medium-high heat. You want the oil to shimmer. This means it’s hot enough. Carefully add the seasoned steak cubes to the skillet. Don’t overcrowd the pan. Let them sear for about 2-3 minutes. This creates a tasty crust. After that, flip the steak bites. Cook for another 2-3 minutes. Check for your desired doneness. For medium-rare, aim for about 130°F.
Adding the Garlic Butter & Finishing Touches
Once the steak reaches your liking, reduce the heat to medium. Add butter, minced garlic, and rosemary to the skillet. As the butter melts, use a spoon to baste the steak bites. This helps infuse the flavors. Cook for one more minute. After that, remove the skillet from the heat. Sprinkle with fresh parsley and optional red pepper flakes. Let the steak bites rest for a few minutes. Resting helps the juices stay in the meat.
Tips & Tricks
Achieving Perfect Doneness
To get the best steak bites, aim for the right internal temperature. Here are the target temperatures for different doneness levels:
– Rare: 120°F
– Medium-rare: 130°F
– Medium: 140°F
– Medium-well: 150°F
– Well-done: 160°F
Use a meat thermometer for accuracy. This tool helps you avoid overcooking. Always let the steak rest for a few minutes after cooking. This helps keep it juicy.
Basting Techniques
Basting is key to flavor. When you melt butter, garlic, and herbs, use a spoon. Carefully scoop the mixture and pour it over the steak bites. Do this often for even flavor. It adds a nice touch to each bite.
Make sure to keep the heat at medium. This prevents burning while allowing the flavors to blend.
Presentation Tips
Garnish makes a dish shine. Serve your garlic butter steak bites on a large platter. Add fresh parsley and rosemary for color. They look great and add flavor.
Using toothpicks can make serving easier. This is perfect for parties or casual dinners. For extra style, consider a drizzle of balsamic glaze on the plate. It adds a beautiful, tangy contrast.

Variations
Flavor Additions
You can change the taste of garlic butter steak bites easily. Here are a few ideas:
– Smoked Paprika: Adds a nice depth.
– Dried Oregano: Gives a warm, earthy flavor.
– Thyme: Fresh or dried, it pairs well with steak.
– Lemon Zest: Brightens the dish with a citrus kick.
– Soy Sauce: Adds a savory umami taste.
Feel free to mix and match these to find your favorite blend.
Serving Suggestions
You can serve these steak bites in many tasty ways. Try pairing them with:
– Roasted Vegetables: Carrots, broccoli, or Brussels sprouts work well.
– Garlic Mashed Potatoes: Creamy and comforting.
– Steamed Rice or Quinoa: Perfect for soaking up the garlic butter.
– Fresh Salad: Greens with a light vinaigrette can balance the richness.
– Dipping Sauces: A tangy BBQ or zesty chimichurri adds extra flavor.
These pairings make the dish even more delightful.
Dietary Alternatives
You can easily adapt the recipe for different diets. Here are some options:
– Low-Carb: Skip the potatoes and serve with veggies.
– Gluten-Free: Ensure any sauces are certified gluten-free.
– Dairy-Free: Swap butter for olive oil or a dairy-free spread.
These changes help everyone enjoy this dish without worry.
Storage Info
Refrigerating Leftovers
After your meal, let the steak bites cool. Place them in an airtight container. They will stay fresh in the fridge for up to three days. It’s best to store them without the sauce to avoid sogginess. You can add the garlic butter back when you reheat them.
Freezing Instructions
To keep garlic butter steak bites longer, freezing is a great option. Pack them in a freezer-safe bag or container. Remove as much air as possible. They can be frozen for up to three months. Thaw them in the fridge overnight before reheating. This keeps the beef juicy and tender.
Reheating Tips
Reheat the steak bites gently to maintain their flavor. You can use a skillet over low heat. Add a bit of olive oil or butter to keep them moist. Alternatively, use the microwave for quick reheating. Just be careful not to overcook them. This will help you enjoy the same great taste as when they were fresh.
FAQs
How long do you cook steak bites?
You can cook steak bites quickly. For medium-rare, cook for 4-6 minutes total. Start with 2-3 minutes on one side, then flip. For medium, aim for 6-8 minutes. Always check the internal temp. It should be about 130°F for medium-rare and 140°F for medium.
Can I use other cuts of steak?
Yes, you can use other cuts. Ribeye and tenderloin work well too. They have good flavor and tenderness. Just remember, thinner cuts cook faster. Adjust your cooking time based on the cut you choose.
What sides pair well with garlic butter steak bites?
Many sides go great with steak bites. Here are some popular choices:
– Garlic mashed potatoes
– Roasted vegetables
– Creamy coleslaw
– Fresh garden salad
– Grilled asparagus
These sides balance the rich flavors of the steak. They add freshness and crunch.
In this blog post, we explored how to make delicious garlic butter steak bites. We discussed the key ingredients, from sirloin steak to fresh herbs. You learned step-by-step cooking tips for perfect doneness. We also covered variations, presentation ideas, and storage methods for leftovers.
By following these tips, you can create a tasty dish your friends and family will love. With a little practice, you can master this recipe and impress everyone at your next meal.
. In this blog post, we explored how to make delicious garlic butter steak bites. We discussed the key ingredients, from sirloin steak to fresh herbs. You learned step-by-step cooking tips for perfect doneness. We also covered variations, presentation ideas, and storage methods for leftovers. By following these tips, you can create a tasty dish your friends and family will love. With a little practice, you can master this recipe and impress everyone at your next meal.](https://joymealplan.com/wp-content/uploads/2025/06/dbdd8f16-fd7f-4bf6-8b38-aa3e7b5cdfe5-300x300.webp)

. When making chutney, you may face some common issues. One frequent mistake is using unripe peaches. Unripe peaches lack flavor and sweetness. Always pick ripe, fragrant peaches for the best taste. Another error is not allowing the mixture to rest. Resting lets the peaches release juices, creating a rich base. If you skip this step, your chutney may end up dry. Sometimes, people add too much salt. Remember, you can always add more later. Start with a small pinch and taste before adding more. Also, avoid boiling the chutney on high heat. This can burn the sugar and ruin the flavor. Always cook on medium heat for better results. To make your chutney even more delicious, consider adding spices. A pinch of cardamom or nutmeg can boost flavor. Cinnamon and cloves are great, but try mixing in some allspice for a warm twist. If you want to adjust sweetness, add more brown sugar or honey. For a tangy kick, add extra apple cider vinegar. If you like heat, increase the red pepper flakes. Start with a little and taste as you go. You control the flavor! {{image_4}} You can switch out peaches for other fruits. Apples, mangoes, or plums work great. Each fruit brings its own taste and texture. Use ripe, juicy fruits for the best flavor. Fresh seasonal fruit always wins. For example, use apples in the fall and mangoes in summer. This keeps your chutney fresh and exciting. You can change the heat and sweetness easily. For more spice, add extra red pepper flakes. If you like it sweet, add more brown sugar or honey. Try adding spices like cumin or coriander for a unique twist. You can also mix in herbs like cilantro for freshness. These small changes can craft a new flavor profile. For more ideas, check the Full Recipe for suggestions on different flavor combinations. To keep your Quick Peach Chutney fresh, follow these steps: - Use a clean glass jar with a tight lid. - Make sure the chutney cools to room temperature before sealing. - Store it in the fridge. This helps lock in the flavors. Glass jars are great because they do not absorb odors. You can also use airtight plastic containers if you prefer. Just make sure they are food-safe. Quick Peach Chutney lasts about one week in the fridge. After that, the flavors may fade. Always check for any signs of spoilage, like off smells or mold. You can freeze the chutney if you want to keep it longer. Pour it into freezer-safe containers, leaving some space for expansion. It can last up to three months in the freezer. When you want to use it, simply thaw it in the fridge overnight. This way, you can enjoy your chutney whenever you like! Yes, you can make this chutney ahead of time. In fact, it tastes better after sitting for a day or two. The flavors mix and deepen, making the chutney even more delicious. You can store it in the fridge for up to two weeks. Just keep it in an airtight container to prevent it from drying out. Peach chutney is safe for canning if you follow proper methods. You should use a water bath canner for safe preservation. Always make sure to process jars for at least 10 minutes to ensure safety. Check seals before storing them in a cool, dark place. This way, you can enjoy your chutney long after peach season has ended. Peach chutney pairs well with many dishes. You can serve it with grilled chicken or pork for a burst of flavor. It also complements cheese boards, especially with creamy cheeses. Try it on sandwiches or burgers for a sweet and tangy kick. For a simple snack, enjoy it with crackers. The options are endless! Quick Peach Chutney is simple and fun to make. We explored the main ingredients, focusing on ripe peaches and how their quality matters. I shared tips on preparation, cooking steps, and even storage options to keep your chutney fresh. We talked about common mistakes and how to adjust flavors. You can use other fruits or tweak spice levels for personal taste. Remember, chutney makes a great addition to meals and snacks. Enjoy making this easy recipe, and feel free to share your creations!](https://joymealplan.com/wp-content/uploads/2025/07/68e09f5d-054f-4bea-af91-fb6a51bc34a0-768x768.webp)


![- 2 large cucumbers, diced into bite-sized cubes - 3 medium tomatoes, diced into equal-sized pieces - 1 red bell pepper, diced Fresh vegetables are the heart of a Greek salad. Cucumbers add crunch and hydration. Tomatoes provide sweetness and color. Red bell peppers add a nice crunch and a touch of sweetness. Together, they make a refreshing mix. - 1 cup Kalamata olives, pitted and halved - 1 red onion, thinly sliced into rings - 1/3 cup feta cheese, crumbled (omit for a vegan version) Next, we have Kalamata olives. They bring a salty, rich flavor to the salad. Red onion adds a sharp bite that balances the sweetness of the other veggies. Feta cheese adds creaminess and a tangy taste. If you prefer a vegan salad, simply leave out the feta. - 1/4 cup extra virgin olive oil - 2 tablespoons red wine vinegar (use apple cider vinegar for a unique flavor twist) - 1 teaspoon dried oregano, preferably Mediterranean The dressing ties everything together. Extra virgin olive oil makes it rich and smooth. Red wine vinegar adds a nice tang. Dried oregano brings a hint of earthiness. This simple dressing enhances the fresh flavors without overpowering them. You can find the full recipe online for detailed steps. Start by washing all your fresh vegetables. Clean them well to remove any dirt. Next, dice the cucumbers and tomatoes into small, even pieces. This helps make each bite enjoyable. Add these diced vegetables to a large mixing bowl. Then, chop the red bell pepper and halve the Kalamata olives. Thinly slice the red onion into rings. Mix all these vibrant ingredients together in the bowl. This colorful blend makes your salad look great! In a small bowl, mix the extra virgin olive oil and red wine vinegar. Whisk them together until they blend well. Add in the dried oregano for that nice Mediterranean flavor. Season your dressing with salt and freshly ground black pepper. This adds taste and balance to the salad. Taste your dressing and adjust the salt if needed. Now, pour the prepared dressing over the bowl of vegetables. Gently toss everything together with a large spoon or salad tongs. Make sure all the vegetables are covered in the dressing. If you want feta cheese, sprinkle the crumbled cheese on top. Toss it lightly again to mix the feta in with the salad. Finally, garnish with chopped fresh parsley for a pop of color. Enjoy your healthy Greek salad! For the complete recipe, see [Full Recipe]. To make your Greek salad shine, start with high-quality olive oil. This oil adds rich taste and depth. Look for extra virgin, as it has the best flavor. A simple drizzle makes a big difference. Next, add a squeeze of fresh lemon juice. This brightens the salad and adds zing. The citrus lifts the flavors and makes each bite refreshing. Use it right before serving for the best taste. When it comes to serving, think about your style. You can serve in a large bowl for a family meal. This lets everyone help themselves. Or, you can serve in individual bowls for a fancy touch. This makes each portion feel special. Garnishes also help with presentation. Fresh herbs like parsley add color. A slice of lemon on the side gives a nice look. These small touches make your salad more inviting. Want to boost the health factor? Add more vegetables. You can include radishes, carrots, or even spinach. Each veggie adds unique nutrients and flavors. More colors mean more vitamins! If you're watching your fat intake, think about cheese options. Use low-fat feta or skip the cheese entirely for a vegan choice. You still get a tasty salad without the extra calories. This way, you can enjoy a healthy Greek salad without worry. For the full recipe, check out the Mediterranean Bliss Greek Salad. {{image_4}} You can easily change the Greek salad to fit your diet. For a vegan version, swap feta cheese with tofu or avocado. Tofu adds protein and a nice texture. Avocado gives a creamy flavor without dairy. Both are great choices. This salad is also gluten-free. All the ingredients are naturally gluten-free. You can enjoy it without worry if you have gluten sensitivities. To add more flavor, think about adding protein. Chickpeas are a great option. They are filling and nutritious. Grilled chicken is another tasty choice if you prefer meat. It adds a smoky taste that pairs well with the salad. You can also introduce different herbs and spices. Fresh dill or mint can brighten the dish. A pinch of red pepper flakes can add a nice kick. Each tweak gives the salad a unique twist. Feel free to switch up the vegetables too. Grape tomatoes are sweeter and add a pop of color. You can also try different colored bell peppers for a vibrant look. Another fun swap is with olives. While Kalamata olives are classic, green olives can give a tangy taste. Each type of olive brings its own flavor, making your salad exciting. For the full recipe, check out the Mediterranean Bliss Greek Salad. To keep your Healthy Greek Salad fresh in the fridge, follow these tips: - Use an airtight container to seal in moisture and flavors. - Place a paper towel inside the container to absorb extra moisture. - Store the salad in the fridge for up to three days. For long-term storage, keep the salad ingredients separate. Here’s how: - Store the vegetables in their own container. This keeps them crisp. - Keep dressing in a small jar or bottle. You can freeze extra dressing for later use. To tell if your salad is no longer fresh, watch for these signs: - Look for wilted greens or soggy vegetables. - Check for an off smell or sour taste. - Discard any ingredients showing mold or discoloration. Proper disposal methods include throwing spoiled food in the trash or composting if safe. Enjoy the Healthy Greek Salad fresh, and savor every bite! For the full recipe, check out the Mediterranean Bliss Greek Salad. Greek salad is full of fresh veggies. These ingredients give many health benefits. Cucumbers keep you hydrated with their high water content. Tomatoes are rich in vitamins A and C, which are good for your skin. Red bell peppers provide antioxidants that help fight disease. Kalamata olives offer healthy fats, which are good for your heart. Feta cheese adds calcium for strong bones, but you can skip it if you prefer vegan options. The dressing made with olive oil is also good for heart health. Eating this salad can help you feel full and satisfied without many calories. Yes, you can prep your Greek salad ahead of time. To keep it fresh, chop the veggies but store them separately from the dressing. This way, they stay crisp and colorful. You can mix the dressing in another bowl. When you are ready to eat, combine everything. This keeps the salad tasting fresh and not soggy. If you want to add feta, do this right before serving, so it stays creamy. Absolutely! This salad is perfect for meal prep. You can easily make a big batch and store it in your fridge. Use airtight containers to keep it fresh. The veggies will stay good for about three days. If you want to eat it later, avoid adding the dressing until just before serving. This keeps the flavors bright and the textures right. Greek salad pairs well with many dishes. You can serve it with grilled chicken for added protein. It also goes great with pita bread or hummus for a light meal. If you are looking for a heartier option, try it with grilled fish. Adding some quinoa or brown rice on the side is also a nice touch. This makes for a balanced meal that is both tasty and healthy. You can find the Full Recipe for a Mediterranean Bliss Greek Salad to try today! In this article, we explored how to make a fresh and healthy Greek salad. I covered the ingredients and steps, plus tips for flavor and presentation. You learned about variations and storage to keep your salad fresh. Remember, this dish is not just tasty but also packed with nutrients. Whether you enjoy it as a side or main dish, its flavors and colors will impress everyone. By adding your twist, you can make it your own. Happy salad making!](https://joymealplan.com/wp-content/uploads/2025/06/c94f07f9-b700-4cfc-a1be-56f301f39c39-768x768.webp)
![To make this tasty roasted red pepper hummus, you need a few key items. Here’s what you’ll need: - 1 can (15 oz) chickpeas, thoroughly rinsed and well-drained - 2 large roasted red peppers, peeled and coarsely chopped - 3 tablespoons creamy tahini - 2 tablespoons extra virgin olive oil, plus more for drizzling - 2 cloves of garlic, finely minced - 1 tablespoon freshly squeezed lemon juice - 1 teaspoon ground cumin for warmth - Salt and freshly cracked black pepper, to taste - Cold water, as required for desired creaminess - Smoked paprika and freshly chopped parsley for an elegant finish Want to kick your hummus up a notch? Consider these fun add-ins: - A pinch of cayenne pepper for heat - Roasted garlic for a sweeter taste - A tablespoon of fresh herbs like basil or cilantro - A splash of balsamic vinegar for tanginess - A bit of feta cheese for creaminess Feel free to mix and match these options. Each one can add a unique twist to your hummus. The ingredients in this hummus are not just tasty; they pack a nutritious punch: - Chickpeas: High in protein and fiber, they help keep you full. - Tahini: Made from sesame seeds, it adds healthy fats and calcium. - Olive Oil: Rich in monounsaturated fats, it supports heart health. - Garlic: Offers immune-boosting properties and can help lower blood pressure. - Red Peppers: Full of vitamins A and C, they promote healthy skin and eyes. Each ingredient works together to create a dish that's not only delicious but also good for you. For the full recipe, check out the detailed cooking guide. Making roasted red pepper hummus is easy and quick. You need a food processor. Gather all your ingredients first. This helps keep things organized. Start by blending everything together until smooth. You can add water for creaminess. 1. Place the rinsed chickpeas, chopped roasted red peppers, tahini, olive oil, minced garlic, lemon juice, and ground cumin into your food processor. 2. Secure the lid tightly. Blend the mix on high speed. Stop to scrape the bowl down. This ensures everything mixes well. 3. If the hummus is too thick, add cold water. Do this one tablespoon at a time. Blend after each addition until you reach the right creaminess. 4. Taste your hummus. Add salt and freshly cracked black pepper to make it better. 5. Transfer the smooth hummus to a serving bowl. Drizzle olive oil on top for extra flavor. 6. Sprinkle smoked paprika and chopped parsley on top for color and flair. To get your hummus just right, focus on the blending time. Blend longer for a smoother texture. If it’s still thick, keep adding cold water slowly. Make sure to taste as you go. Adjust the seasoning to your liking. A little tweak can make a big difference. One big mistake is using dry chickpeas. Always use canned chickpeas for smoothness. Another pitfall is not rinsing the chickpeas. Rinsing helps reduce the canned taste. Avoid over-blending; you want a creamy texture, not a soup. Lastly, be careful with salt. Start with a little and taste as you go. To boost flavor, try adding lemon zest. It adds brightness and fresh taste. You can also mix in roasted garlic for a sweet, rich flavor. For extra heat, toss in a pinch of cayenne pepper. Experiment with herbs like cilantro or basil for unique twists. Each of these can make your hummus stand out. Presentation matters! Serve the hummus in a colorful bowl to catch the eye. Drizzle olive oil on top for a glossy finish. Sprinkle smoked paprika or fresh herbs for color. Pair it with warm pita bread and crunchy veggies. Arrange these on a large platter for a beautiful spread. Explore the [Full Recipe] for more ideas on serving this dish. {{image_4}} Want some heat? Add a kick to your hummus! Use sliced jalapeños or red pepper flakes. Blend them in with your other ingredients for a spicy twist. This adds depth and flavor. You can also drizzle with hot sauce before serving. It’s a perfect match for those who love bold flavors. Herbs can give your hummus a fresh taste. Try adding fresh basil, cilantro, or parsley. You can also mix in other roasted veggies. Think zucchini or eggplant for extra flavor. These additions make your hummus unique and vibrant. They bring in new textures and tastes, making it fun to try different combinations. This hummus is already vegan and gluten-free! You can enjoy it with confidence. It uses chickpeas, tahini, and olive oil, which fit both diets perfectly. If you want to make it even more exciting, serve it with gluten-free crackers or veggie sticks. This way, everyone can enjoy it at any gathering. For the full recipe, check the details mentioned earlier. To keep your hummus fresh, place it in an airtight container. This helps prevent air from drying it out. Make sure to seal the lid tightly. You can also drizzle a thin layer of olive oil on top. This adds flavor and keeps it moist. Store the container in the fridge. It will stay good for about 4 to 5 days. If you want to save hummus for later, freezing is a great option. Start by placing the hummus in a freezer-safe container. Leave some space at the top, as it may expand when frozen. You can also use ice cube trays for small portions. Once frozen, transfer the cubes to a zip-top bag. This method makes it easy to thaw just what you need. Homemade hummus can last up to 3 months in the freezer. Choose containers made of glass or BPA-free plastic. Glass containers are great for keeping flavors intact. They are also easy to clean. If you use plastic, make sure it is strong and safe for freezing. Avoid containers that are too large for small amounts. This helps keep your hummus fresh. For extra care, label your containers with the date. This way, you’ll know when to use them. For the full recipe, check out the Roasted Red Pepper Hummus Delight. Homemade roasted red pepper hummus can last about 5 to 7 days in the fridge. Make sure to store it in an airtight container. This keeps it fresh and tasty. If you notice any changes in smell or color, it's best to toss it out. Yes, you can use jarred roasted red peppers. They save time and add great flavor. Just drain them well before adding to your hummus. This helps keep the hummus from getting too watery. Roasted red pepper hummus pairs well with many foods. Here are some ideas: - Warm pita bread - Fresh vegetable sticks like carrots, cucumbers, and bell peppers - Crackers or tortilla chips - A colorful mezze platter with olives and herbs You can find the full recipe above. Enjoy your tasty hummus! In this post, we explored the key ingredients and step-by-step instructions for roasted red pepper hummus. We covered tips for flavor, common mistakes, and variations. You learned how to store hummus properly and answered your main questions. Remember, this dish is simple yet versatile. Enjoy making your own hummus using fresh ingredients. Try different flavors to find your favorite mix. Happy cooking!](https://joymealplan.com/wp-content/uploads/2025/06/a7fe634f-a62f-44e2-9912-8eb9edd9a507-768x768.webp)
