Garlic Parmesan Chicken Minis Simple and Tasty Dish

Looking for a simple and tasty dish that’ll impress your family or friends? Garlic Parmesan Chicken Minis are the perfect solution! With crispy breading and rich flavors, they’re easy to make and customize. In this post, I’ll guide you through the ingredients, cooking methods, and tips to ensure your minis turn out perfectly every time. Let’s get started on this mouthwatering dish that you’ll want to make again and again!
Why I Love This Recipe
- Quick and Easy: This recipe is a breeze to prepare, taking just 15 minutes of prep time, making it perfect for busy weeknights.
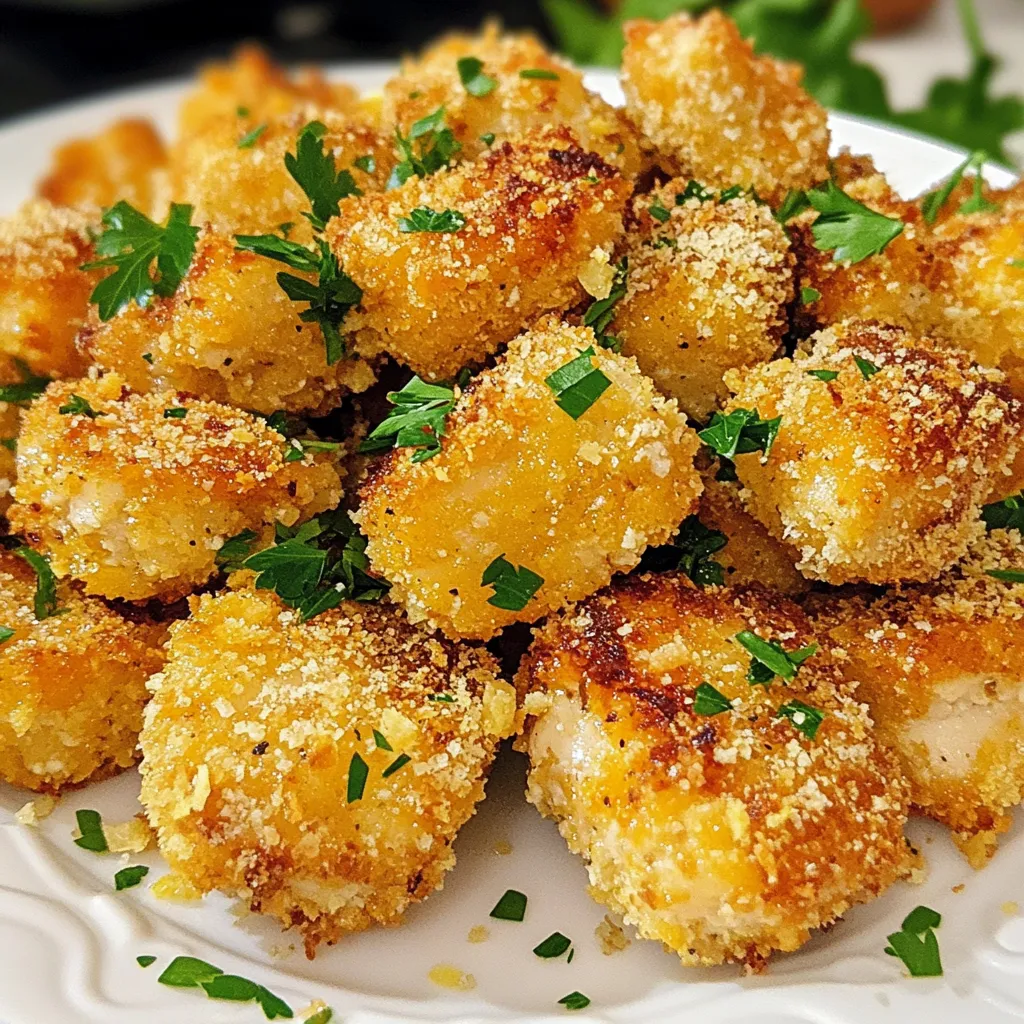
- Crispy and Delicious: The combination of panko breadcrumbs and Parmesan cheese gives these chicken minis a satisfying crunch that everyone loves.
- Versatile Serving Options: These chicken bites can be served as a main dish or as an appetizer, and they pair wonderfully with various dipping sauces.
- Flavor Packed: The garlic and Parmesan flavors shine through, making each bite a delicious explosion of taste that keeps you coming back for more.
Ingredients
List of Required Ingredients
To make Garlic Parmesan Chicken Minis, gather these key items:
– 2 boneless, skinless chicken breasts, cut into bite-sized pieces
– 1 cup all-purpose flour
– 1 teaspoon garlic powder
– 1 teaspoon onion powder
– ½ teaspoon paprika
– Salt and black pepper, to taste
– 1 large egg, lightly beaten
– 1 cup panko bread crumbs
– ½ cup freshly grated Parmesan cheese
– 2 cloves garlic, finely minced
– 2 tablespoons fresh parsley, finely chopped
– Olive oil, for frying
Optional Ingredients for Customization
You can add fun twists to your chicken minis. Here are some ideas:
– Spicy seasoning, like cayenne pepper, for a kick
– Different types of cheese, like cheddar or Italian blend
– Fresh herbs, like basil or oregano, for extra flavor
– Lemon zest, for a bright, fresh taste
Recommended Tools and Equipment
Having the right tools makes cooking easier. For this dish, you will need:
– Three mixing bowls for coating
– A whisk for combining dry ingredients
– A frying pan or skillet for cooking
– A meat thermometer to check chicken doneness
– A paper towel-lined plate to drain excess oil
These ingredients and tools will help you create tasty Garlic Parmesan Chicken Minis with ease!

Step-by-Step Instructions
Preparation Steps
– Dredging the Chicken
Start by cutting the chicken breasts into small pieces. This makes them easy to eat. In a bowl, mix flour, garlic powder, onion powder, paprika, salt, and pepper. Whisk it well. Take each chicken piece and coat it in the flour mixture. Shake off any extra flour. This step helps the egg stick later.
– Egg Coating Process
In a separate bowl, beat the egg with a fork until it’s smooth. After dredging in flour, dip each piece of chicken into the egg. Make sure every side gets coated. This step adds moisture and helps the breadcrumbs stick better.
– Coating with Breadcrumb Mixture
In another bowl, combine panko breadcrumbs, grated Parmesan, minced garlic, and chopped parsley. Mix well so the ingredients are evenly spread. Roll each egg-coated chicken piece in this breadcrumb mix. Press gently to help the crumbs stick. This gives the chicken a nice, crunchy texture.
Cooking Method
– Frying Tips for Crispiness
Heat olive oil in a large skillet over medium heat. Add just enough oil to coat the bottom. When the oil shimmers, it’s time to fry. Place the chicken pieces in batches. Don’t overcrowd the pan. This helps them cook evenly and get crispy.
– Achieving Perfect Golden Color
Fry the chicken for about 4-5 minutes on each side. You want a nice golden-brown color. Check that the internal temperature reaches 165°F (75°C) for safety. Once cooked, place the chicken on a paper towel-lined plate. This drains off any extra oil and keeps them crispy.
Tips & Tricks
Best Practices for Cooking Chicken
When cooking chicken, always start with fresh meat. Fresh chicken has better flavor and texture. Cut the chicken into even pieces. This helps them cook at the same rate. Use a meat thermometer to check doneness. Chicken is safe to eat at 165°F (75°C).
Ensuring Maximum Flavor
To boost flavor, season chicken well before breading. Use salt and pepper generously. The garlic powder and onion powder in the flour mix add depth. For more flavor, let the chicken sit in the seasoning for a few minutes. Fresh herbs like parsley enhance taste and make the dish pop.
Serving Suggestions
Serve Garlic Parmesan Chicken Minis hot for the best experience. Pair them with marinara sauce for dipping. You can also add a side salad or veggies for a complete meal. For a fun touch, use toothpicks for easy serving at parties. These chicken minis are great for gatherings or a cozy dinner.
Pro Tips
- Use Fresh Ingredients: Fresh garlic and parsley will enhance the flavor of your chicken minis, making them more aromatic and delicious.
- Adjust the Spice Level: Feel free to add a pinch of cayenne pepper or red pepper flakes to the flour mixture for a spicy kick that complements the garlic.
- Let the Chicken Rest: After frying, allow the chicken minis to rest for a couple of minutes before serving. This helps the juices redistribute, keeping them moist.
- Experiment with Dipping Sauces: While marinara sauce is classic, try serving with garlic aioli or ranch dressing for a fun twist!

Variations
Alternate Breading Options
You can switch the breading to add more flavor. Try using crushed cornflakes or crushed tortilla chips. They give a nice crunch and a different taste. For a gluten-free option, use almond flour or gluten-free breadcrumbs. These swaps keep the dish exciting and let you explore new textures.
Flavor Add-ons and Spice Adjustments
To boost the taste, add spices to the flour mix. Adding cayenne pepper gives a nice kick. You can also try Italian seasoning or dried oregano for a herbaceous touch. For a cheesy twist, mix more Parmesan into the breadcrumb mix. These little changes can make a big difference in flavor.
Healthier Cooking Methods
Frying can be tasty, but you can also bake these chicken minis. Preheat your oven to 400°F (200°C). Place the coated chicken on a baking sheet. Spray or brush them with olive oil for a crisp finish. Bake for about 20 minutes until golden brown. This way, you cut down on oil while keeping the crunch.
Storage Info
Refrigeration Guidelines
After enjoying your garlic Parmesan chicken minis, store any leftovers in an airtight container. They will keep well in the fridge for up to three days. Make sure they cool down before sealing. This helps prevent sogginess. If you want to keep them longer, consider freezing them instead.
Reheating Tips for Leftovers
When you’re ready to enjoy leftovers, the best way is to reheat them in an oven. Preheat your oven to 375°F (190°C). Place the chicken minis on a baking sheet. Heat for about 10-15 minutes until they are warm and crispy again. You can also use an air fryer for a quicker option. Just set it to 350°F (175°C) and cook for about 5-7 minutes. This keeps your chicken tasty and crunchy.
Freezing Instructions and Best Practices
To freeze garlic Parmesan chicken minis, let them cool completely first. Arrange them in a single layer on a baking sheet. Freeze them for about an hour until firm. Then, transfer them to a freezer bag, removing as much air as possible. Label the bag with the date. They will last up to three months in the freezer. When ready to enjoy, thaw them in the fridge overnight before reheating. This method helps maintain their great taste and texture.
FAQs
How to make Garlic Parmesan Chicken Minis vegan-friendly?
To make Garlic Parmesan Chicken Minis vegan, use plant-based chicken. You can find many brands that mimic real chicken. Replace the egg with a mixture of plant milk and a tablespoon of flour. Use vegan Parmesan cheese for the cheesy flavor. The rest of the recipe stays the same, and you’ll still enjoy those crunchy bites!
Can I bake instead of fry the chicken?
Yes, you can bake the chicken minis instead of frying them. Preheat your oven to 400°F (200°C). Arrange the coated chicken pieces on a baking sheet lined with parchment paper. Spray a light coat of olive oil on top for crispiness. Bake for about 20-25 minutes, flipping halfway. Check for a golden color and a safe internal temperature of 165°F (75°C).
What dipping sauces pair well with this dish?
Several sauces go well with Garlic Parmesan Chicken Minis. Marinara sauce is a classic choice, offering a nice contrast. Ranch dressing brings creaminess and flavor. Buffalo sauce adds heat for spice lovers. You can also try garlic aioli for that extra garlic kick!
How do I know when the chicken is fully cooked?
To check if the chicken is fully cooked, use a meat thermometer. Insert it into the thickest part of the chicken. It should read 165°F (75°C). The chicken should also have a nice golden-brown color. If you cut into it, the juices should run clear, not pink.
You learned about the key ingredients and tools for making chicken. We went through easy steps to create crispy, tasty chicken. I shared tips to enhance flavor and serve it well. You also discovered variations and how to store leftovers safely.
In closing, cooking chicken can be simple and fun. With practice, you can impress everyone at your table. Enjoy experimenting and share your best chicken recipe

Garlic Parmesan Chicken Minis
Ingredients
- 2 pieces boneless, skinless chicken breasts, cut into bite-sized pieces
- 1 cup all-purpose flour
- 1 teaspoon garlic powder
- 1 teaspoon onion powder
- 0.5 teaspoon paprika
- to taste salt and black pepper
- 1 large egg, lightly beaten
- 1 cup panko bread crumbs
- 0.5 cup freshly grated Parmesan cheese
- 2 cloves garlic, finely minced
- 2 tablespoons fresh parsley, finely chopped
- as needed olive oil, for frying
Instructions
- In a medium-sized mixing bowl, combine the flour, garlic powder, onion powder, paprika, and a generous pinch of salt and pepper. Whisk together until evenly combined, then set aside.
- In a separate bowl, lightly beat the egg with a fork until homogenous.
- In a third bowl, combine the panko bread crumbs, grated Parmesan cheese, minced garlic, and chopped parsley. Mix thoroughly to ensure even distribution of the ingredients.
- Take each chicken piece and first dredge it in the flour mixture, shaking off any excess flour.
- Next, dip the floured chicken into the beaten egg, making sure it is fully coated on all sides.
- Roll the egg-coated chicken pieces in the breadcrumb mixture, pressing gently to ensure the crumbs adhere well for a crisp coating.
- In a large skillet, heat enough olive oil over medium heat to coat the bottom. Once the oil is shimmering, carefully add the chicken pieces in batches, ensuring not to overcrowd the skillet for even cooking.
- Fry the chicken mini pieces for approximately 4-5 minutes on each side, or until they develop a beautiful golden-brown color and reach an internal temperature of 165°F (75°C).
- Once cooked, transfer the chicken minis to a paper towel-lined plate to drain any excess oil.
- Serve the hot garlic Parmesan chicken minis immediately, accompanied by a side of marinara sauce or your preferred dipping sauce.


![To make Garlic Parmesan Roasted Asparagus, gather these fresh items: - 1 bunch of fresh asparagus, trimmed - 3 tablespoons extra virgin olive oil - 4 cloves of garlic, finely minced - 1/2 cup freshly grated Parmesan cheese - 1 teaspoon freshly grated lemon zest - 1/2 teaspoon red pepper flakes (optional for a spicy kick) - Sea salt and freshly cracked black pepper to taste - Fresh parsley, chopped (for garnish) Using fresh ingredients makes a big difference. Fresh asparagus has a nice crunch and bright flavor. If you can't find fresh asparagus, you can use frozen, but the texture will change. Extra virgin olive oil adds a rich taste. You can swap it with avocado oil if desired. Minced garlic is key for flavor. If you want milder garlic, use garlic powder instead. Parmesan cheese brings a salty, nutty flavor. For a dairy-free option, try nutritional yeast for a cheesy taste. Lemon zest wakes up the dish. If you don’t have lemon, use lime zest for a different twist. Fresh ingredients are essential for great taste. They add vibrant flavors and textures that dried or stale items can’t match. The freshness of the asparagus shines through when roasted. It becomes tender and slightly crispy, perfect with garlic and cheese. Using fresh garlic enhances the aroma and flavor of the dish. Plus, fresh parsley adds a pop of color and freshness when you garnish the asparagus. Always choose fresh when you can. It makes a simple dish like Garlic Parmesan Roasted Asparagus truly stand out. For the full recipe, check out the details above! Start by trimming the asparagus. Hold a spear in your hand and bend it gently. The asparagus will snap at the right point. This is where the tough part ends. I usually take about an inch off. Rinse the asparagus under cold water to remove any dirt. Pat them dry with a clean towel. This step is key to getting a nice roast. In a large bowl, add the trimmed asparagus. Pour in the extra virgin olive oil. Use your hands to toss the asparagus, ensuring they are well-coated. Next, add the minced garlic, grated Parmesan cheese, and lemon zest. If you like spice, sprinkle in red pepper flakes. Season with sea salt and freshly cracked black pepper. Toss everything again until the asparagus is fully coated in the tasty mix. Now, arrange the asparagus on a lined baking sheet. Make sure they are in a single layer. This helps them cook evenly. Place the baking sheet in the oven set to 425°F (220°C). Roast for about 15 to 20 minutes. Check on them halfway through. You want them tender with crispy edges. When done, take them out and let them cool for a few minutes. Garnish with chopped parsley for a fresh look. For the full recipe, check the details above. To get that perfect crispiness, start with fresh asparagus. The thinner the spears, the better they crisp up. Make sure to coat them evenly with olive oil. This helps them roast nicely. Lay the asparagus in a single layer on the baking sheet. If they overlap, they can steam instead of roast. Keep an eye on them while they cook. You want them tender with slightly crispy edges. You can adjust the flavors to fit your taste. If you love garlic, add more minced cloves. For a kick, sprinkle in more red pepper flakes. If you prefer a milder taste, reduce the garlic or skip the flakes. Add a squeeze of lemon juice after roasting for extra brightness. Experiment until you find your perfect mix. Serve your Garlic Parmesan Roasted Asparagus warm. It pairs well with grilled meats or fish. You can also serve it alongside pasta dishes. For a fun twist, add it to salads or grain bowls. Garnish with fresh parsley for a pop of color. For more flavor, drizzle balsamic reduction over the top. This adds a sweet balance to the savory notes. Check out the Full Recipe for more ideas! {{image_4}} You can make Garlic Parmesan Roasted Asparagus more exciting. Try adding lemon juice for zest. A squeeze of fresh lime also brightens the dish. For a smoky flavor, add smoked paprika. You can also mix in nuts, like almonds or pine nuts, for added crunch. If you want a cheesy twist, use feta or goat cheese instead. The options are endless, and each adds a new layer of taste. If you prefer a vegan option, swap the Parmesan cheese for a plant-based cheese. Nutritional yeast is a great choice too. It gives a cheesy flavor without dairy. You can also use a mix of sunflower seeds and garlic powder to mimic the cheese flavor. This way, you still enjoy the savory goodness without any animal products. You can cook asparagus in many ways. Grilling gives it a nice smoky taste. To grill, toss the asparagus in oil and seasonings, then place it on the grill for about 5-7 minutes. Air frying is also a great method. It cooks the asparagus quickly while keeping it crisp. Just set your air fryer to 400°F (200°C) and cook for 8-10 minutes. Each method offers a unique flavor and texture, so feel free to experiment. For full details on the recipe, check the Full Recipe section! To store Garlic Parmesan Roasted Asparagus, first let it cool down. Place it in an airtight container. Make sure to keep it in the fridge. This keeps it fresh and tasty for later. You can also use a resealable plastic bag if you prefer. Just squeeze out the air before sealing. When you are ready to enjoy the leftovers, preheat your oven to 350°F (175°C). Spread the asparagus on a baking sheet. Heat for about 10 minutes. This will help restore its crispiness. If you want a quicker method, use the microwave. Heat it for 30 seconds at a time until warm. You can store Garlic Parmesan Roasted Asparagus in the fridge for up to 3 days. After that, it may lose its flavor and texture. If you want to keep it longer, consider freezing it. Wrap it well and store it in the freezer for up to 2 months. Just remember, the texture may change after freezing. For the best taste, enjoy it fresh or within a few days. For the full recipe, check out the earlier sections. Yes, you can use frozen asparagus. However, fresh asparagus tastes better. Frozen asparagus may have more water, which can affect the final texture. If you use frozen ones, reduce the roasting time. Cook them until they are tender but still hold their shape. Asparagus is perfectly roasted when it is bright green and tender. The tips should be slightly crispy. You can test doneness by piercing a spear with a fork. If it goes through easily, it is ready. Keep an eye on the time. Roasting takes about 15-20 minutes at 425°F. Yes, you can make this recipe in advance. Roast the asparagus, then cool it down. Store it in the fridge for up to 3 days. When ready to serve, reheat it in the oven for a few minutes. This keeps the flavors fresh and the texture nice. For the full recipe, check [Full Recipe]. This blog post covered how to make garlic parmesan roasted asparagus. You learned about key ingredients and how fresh ones make a big difference. I shared easy steps to prepare, mix, and roast the asparagus to perfection. You also found tips for crispiness, flavor, and serving ideas. Plus, variations let you explore new tastes, and I provided advice on storing leftovers. Use this guide to make a delicious dish. Enjoy your cooking and make your meals healthier and tastier!](https://joymealplan.com/wp-content/uploads/2025/06/31f02132-0972-47ce-ba26-05432beb78d0-768x768.webp)


![- 1 block (14 oz) firm tofu, pressed and drained - 1/2 cup cornstarch - 3 tablespoons vegetable oil - 1/4 cup honey - 2 tablespoons soy sauce - 4 cloves garlic, minced - 1 teaspoon fresh ginger, grated - 1 tablespoon sesame seeds, toasted - 2 green onions, sliced - Salt and pepper to taste To make crispy honey garlic tofu, you need simple ingredients that pack big flavor. Start with firm tofu. It holds its shape well and crisps up nicely. Press and drain it to get rid of excess water. This step is key for crispy tofu. Next, grab some cornstarch. It’s your secret weapon for that crunchy coating. It sticks to the tofu and gets crispy in the hot oil. Vegetable oil helps fry the tofu evenly. Use a good amount, but don’t drown the tofu. For the sauce, honey adds sweetness. Soy sauce brings saltiness, and garlic and ginger give it a warm kick. These flavors blend perfectly. You can adjust the honey and soy sauce to fit your taste. Finally, sesame seeds and sliced green onions are for garnishing. They add a nice crunch and color to your dish. This crispy honey garlic tofu is not just tasty; it's visually appealing too. For the full recipe, check out the detailed steps. - Cut the tofu into 1-inch cubes. - Toss tofu cubes in cornstarch with salt and pepper. Start by cutting your block of firm tofu into 1-inch cubes. Make sure the pieces are even for cooking. Next, take a shallow dish and add cornstarch. Sprinkle in some salt and pepper. Toss those tofu cubes in the cornstarch mixture, coating each piece well. Shake off any extra cornstarch to keep them light and crispy. - Heat vegetable oil in a skillet over medium-high. - Sauté tofu until golden brown and crispy. Now, heat 3 tablespoons of vegetable oil in a skillet over medium-high heat. Wait until the oil is hot. Carefully place the tofu cubes in the skillet in a single layer. Sauté them for about 5 to 7 minutes. Turn the pieces so they cook evenly. You want them to turn golden brown and get nice and crispy. Once done, transfer the tofu to a paper towel-lined plate to absorb excess oil. - Sauté garlic and ginger in the skillet. - Combine honey and soy sauce, allowing to thicken. In the same skillet, lower the heat to medium. Add 4 minced garlic cloves and 1 teaspoon of grated ginger. Sauté these for about 1 minute. You'll know they're ready when they smell great and turn golden. Now, pour in 1/4 cup of honey and 2 tablespoons of soy sauce. Stir well and let it cook for 2 to 3 minutes until it thickens a bit. - Coat crispy tofu in the honey garlic sauce. - Serve with garnishes. Gently place the crispy tofu back into the skillet. Toss it in the honey garlic sauce until every piece is coated. Remove from heat and sprinkle 1 tablespoon of toasted sesame seeds and 2 sliced green onions over the dish. This adds flavor and makes it look nice. For the full recipe, check the details above! - Use firm tofu for best results: Firm tofu holds its shape and crisps up nicely. - Ensure the tofu is properly pressed and drained: Pressing removes excess water. This helps the tofu absorb flavors and get crispy. - Adjust honey and soy sauce ratios to taste: You can make it sweeter or saltier by changing these amounts. - Experiment with adding red pepper flakes for heat: A little spice can really elevate the dish. Add to your liking. - Consider using an air fryer for an even crispier finish: Air frying gives a great crunch without extra oil. - Double-fry method for ultimate crunch: Fry the tofu once, let it rest, and fry again. This makes it super crispy. For more details, check the Full Recipe. {{image_4}} You can switch tofu for other proteins. Tempeh is a great choice. It has a nutty flavor and a firmer texture. Just cut it into cubes like tofu. Cook it the same way for a tasty dish. Seitan is another option. It mimics meat well and offers a chewy texture. It absorbs flavors easily. Use seitan if you're looking for a heartier bite. Want a kick? Add sriracha to the sauce. This gives a spicy twist to the sweet honey. You can also try orange juice or maple syrup. These swaps change the flavor profile. Orange adds a fresh zest, while maple syrup gives a rich taste. Both can make your dish stand out. Crispy honey garlic tofu shines when paired with sides. Steamed vegetables bring color and nutrition. A fresh salad can add crunch. You can also use this tofu in wraps or tacos. Just fill them with your favorite veggies and tofu. It makes for a fun and easy meal. For the full recipe, follow the steps and enjoy your cooking journey! You can keep crispy honey garlic tofu in the fridge. Place it in an airtight container. It will stay fresh for up to 3 days. This way, you can enjoy it later without losing flavor. To reheat your tofu, use the oven or a skillet. This keeps it crispy and tasty. Avoid using the microwave. It makes the tofu soggy, which we want to prevent. You can also freeze cooked tofu. It will last for up to 2 months in the freezer. When you want to eat it, simply thaw it out. After thawing, re-crisp it in a skillet or oven before serving. This method helps regain its crunchy texture. Typically, crispy honey garlic tofu lasts up to 3 days when stored properly. To keep it fresh, place it in an airtight container. Ensure the tofu is cool before sealing. This helps maintain its flavor and texture. Yes, you can make this recipe vegan. Simply replace honey with agave or maple syrup. Both options add sweetness without using animal products. This change keeps the dish plant-based and equally delicious! Crispy honey garlic tofu pairs well with rice, noodles, or a fresh vegetable stir-fry. You can serve it over steamed jasmine rice for a classic combo. Noodles coated in a light sauce also work great. Adding a side of colorful stir-fried veggies brings extra nutrition and flavor. Firm or extra-firm tofu works best for a crispy texture. These types hold their shape and don’t crumble. For the best results, make sure you press and drain the tofu well before cooking. This removes excess moisture, allowing for a delightful crunch. For the full recipe, check out the [Full Recipe]. In this post, we covered how to make crispy honey garlic tofu. You learned about the key ingredients, from firm tofu to the sweet and savory sauce. I shared step-by-step cooking tips and tricks for the perfect texture and flavor. Remember, you can customize the recipe with different proteins or sauces. Store leftovers correctly to enjoy this dish later. Overall, this recipe is fun, flexible, and delicious. Give it a try, and you’ll impress your friends or family!](https://joymealplan.com/wp-content/uploads/2025/07/a62a8118-0118-41a9-8dcd-10793e5e2e73-768x768.webp)
