Are you ready for a flavor explosion? Garlic Parmesan Roasted Cauliflower is more than just a side dish. It’s a delicious way to enjoy veggies! In this guide, I’ll walk you through simple steps, tips, and variations for this tasty treat. You’ll impress your family and friends with bold flavors and crispy textures. Let’s dive in and get cooking!
Ingredients
List of Ingredients
– 1 large head of cauliflower, cut into bite-sized florets
– 3 tablespoons extra virgin olive oil
– 4 cloves of garlic, finely minced
– 1/2 cup freshly grated Parmesan cheese
– 1 teaspoon onion powder
– 1/2 teaspoon dried thyme
– 1/2 teaspoon smoked paprika
– Sea salt and freshly cracked black pepper to taste
– Fresh parsley, finely chopped (for garnish)
When I crave a flavor explosion, I turn to Garlic Parmesan Roasted Cauliflower. This dish uses simple ingredients but packs a punch. The cauliflower shines with the garlic, which brings warmth. The Parmesan adds a savory depth that makes it hard to stop eating.
Nutritional Information
– Calories and Macronutrients: One serving has about 150 calories. It offers carbs, protein, and healthy fats.
– Vitamins and Minerals: This dish is rich in vitamin C and K. It also provides calcium from the cheese.
– Serving Size Details: The recipe serves four. You can easily adjust it for more guests.
This Garlic Parmesan Roasted Cauliflower is not just tasty; it’s also good for you.
Step-by-Step Instructions
Preparation Steps
First, preheat your oven to 425°F (220°C). This high heat helps the cauliflower get crispy. While the oven heats, grab a rimmed baking sheet and line it with parchment paper. This keeps the cauliflower from sticking and makes clean-up easy.
Next, prepare the garlic marinade. In a large bowl, pour in 3 tablespoons of extra virgin olive oil. Add 4 cloves of finely minced garlic, 1 teaspoon of onion powder, 1/2 teaspoon of dried thyme, and 1/2 teaspoon of smoked paprika. Season with sea salt and freshly cracked black pepper to taste. Whisk it all together until you have a smooth mixture.
Roasting Process
Now, it’s time to toss the cauliflower. Add 1 large head of cauliflower, cut into bite-sized florets, to the bowl. Use your hands or a spatula to coat each floret well with the marinade. Make sure every piece gets that tasty flavor!
Spread the coated cauliflower evenly on the prepared baking sheet. Keep them in a single layer for the best roasting. Place the baking sheet in the oven and roast for 25-30 minutes. Stir the cauliflower halfway through. This helps it brown evenly and stay tender. Look for a nice golden brown color to know it’s done.
Finishing Touches
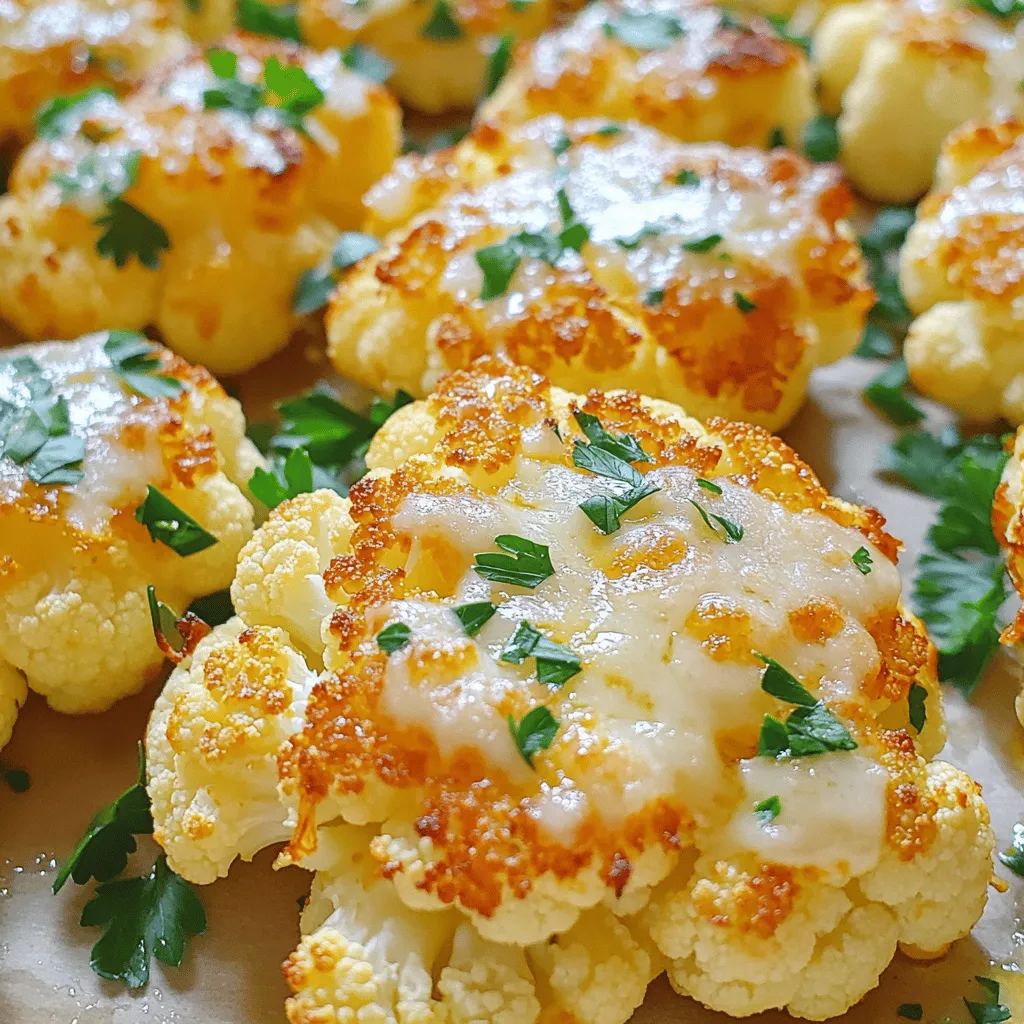
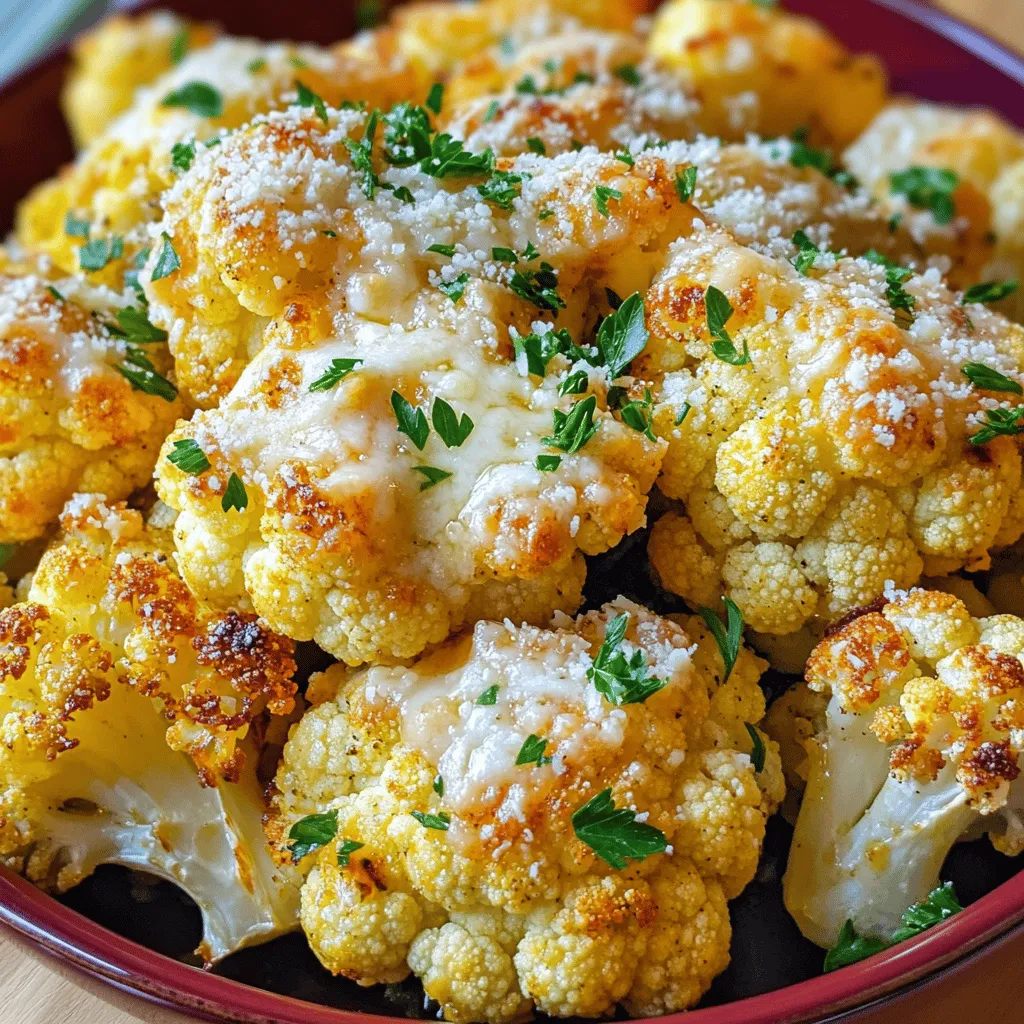
After roasting, carefully remove the baking sheet from the oven. Immediately sprinkle 1/2 cup of freshly grated Parmesan cheese over the hot cauliflower. Make sure the cheese covers all the pieces. Return the baking sheet to the oven for an extra 5 minutes. This melts the cheese and adds a bubbly, golden touch.
Once the cheese is melted, take the cauliflower out of the oven. For a beautiful finish, sprinkle finely chopped fresh parsley on top. This adds color and freshness to your dish.
For presentation, serve the roasted cauliflower on a bright platter, garnished with parsley. A lemon wedge on the side offers a nice touch. Squeeze it over the cauliflower for extra zest!
Tips & Tricks
Cooking Tips
To ensure even roasting, cut the cauliflower into similar-sized florets. Aim for bite-sized pieces. This helps them cook at the same rate. Spread the florets out on the baking sheet. Do not overcrowd them. Each piece needs space to roast well. Stir halfway through cooking for even browning.
For optimal flavor with seasoning, mix the marinade well. Combine olive oil, garlic, and spices in a bowl. Toss the cauliflower in the marinade until each piece is coated. Let it sit for a few minutes to absorb the flavors. This step boosts the taste of your roasted cauliflower.
Serving Suggestions
Pair Garlic Parmesan Roasted Cauliflower with main dishes like grilled chicken or fish. It also complements pasta nicely. The rich flavors balance the meal. For garnishing ideas, sprinkle more parsley on top. You can also add lemon zest for a fresh touch. A squeeze of lemon juice enhances the dish’s flavor too.
Making Ahead
Prepping ingredients in advance makes cooking easier. You can chop the cauliflower and make the marinade a day before. Keep them in the fridge until you’re ready to roast. This saves time and keeps the flavors fresh.
For reheating, place leftovers on a baking sheet. Heat them in a 350°F oven for about 10-15 minutes. This helps retain the crispy texture. You can also microwave them, but they may become soft. Enjoy your Garlic Parmesan Roasted Cauliflower as part of your meal or as a tasty snack!
Variations
Flavor Enhancements
Adding spices or herbs can take Garlic Parmesan Roasted Cauliflower to new levels. Try adding a pinch of red pepper flakes for heat. A sprinkle of Italian seasoning can bring a fresh twist. You can also experiment with fresh herbs like rosemary or basil to elevate the dish.
Using different cheese options gives you more room to play. If you want a dairy-free option, try nutritional yeast for a cheesy flavor. For a richer taste, you can use aged cheddar or even feta cheese. Each cheese brings a unique profile to the dish.
Dietary Modifications
Vegan adaptations are easy to make. Replace Parmesan cheese with nutritional yeast or a vegan cheese. Use olive oil to sauté garlic and skip any dairy. This makes a delicious side dish that fits a vegan diet.
For gluten-free considerations, this recipe is already gluten-free. Just ensure your cheese and any seasoning blends are also gluten-free. This way, anyone can enjoy this tasty dish without worry.
Serving Style Variations
Transforming Garlic Parmesan Roasted Cauliflower into a salad is simple. Toss it with fresh greens, cherry tomatoes, and a light vinaigrette. This adds crunch and freshness to your meal.
Using the roasted cauliflower in grain bowls or wraps is another great idea. Combine it with quinoa, brown rice, or farro for a hearty bowl. Wrap it in a tortilla with hummus and fresh veggies for a quick lunch.Enjoy the many ways to make this dish your own!
Storage Info
Storing Leftovers
To keep your garlic parmesan roasted cauliflower fresh, store it right. Use an airtight container. Place it in the fridge within two hours after cooking. This helps prevent bacteria growth. You can enjoy leftovers for up to three days. Keep it in the main part of the fridge, not the door.
Freezing Instructions
Want to save some for later? Freezing works well for roasted cauliflower. First, let it cool completely. Then, spread it on a baking sheet and freeze for an hour. This prevents clumping. Next, transfer the cauliflower to a freezer-safe bag. Remove as much air as possible. You can freeze it for up to three months.
To enjoy it later, thaw in the fridge overnight. Reheat in the oven at 350°F (175°C) for about 15 minutes. This brings back the crispy texture.
Shelf Life
For the best taste, eat your garlic parmesan roasted cauliflower within three days. If it looks mushy or smells off, it’s time to toss it. Always trust your senses. If unsure, better to be safe.
FAQs
Common Questions
How do I make Garlic Parmesan Roasted Cauliflower vegan?
You can swap the Parmesan cheese for nutritional yeast or a vegan cheese. This keeps the flavor strong while making the dish plant-based. You still get that rich taste without dairy!
Can I use frozen cauliflower for this recipe?
Yes, you can use frozen cauliflower. Just thaw it first and pat it dry. This helps avoid excess moisture, ensuring a crispy finish in the oven.
What can I serve with Garlic Parmesan Roasted Cauliflower?
This dish pairs well with grilled chicken, fish, or a hearty pasta. You can also serve it as a side with a fresh salad or grain bowl for a complete meal.
Recipe Clarifications
Can I adjust the seasoning for different tastes?
Absolutely! Feel free to add more garlic or herbs to suit your taste. Adjusting the seasoning makes the dish personal and fun to enjoy.
What oven temperature is best for roasting vegetables?
I recommend roasting vegetables at 425°F (220°C). This high temperature caramelizes the veggies while keeping them tender and flavorful.
Cooking Techniques
What’s the best way to cut cauliflower for roasting?
Cut the cauliflower into bite-sized florets. This size helps them cook evenly and get that perfect roast. Aim for uniform pieces to ensure they roast at the same rate.
How do I know when the cauliflower is fully roasted?
Look for a golden brown color and fork-tender texture. These signs show that the cauliflower has roasted perfectly. You can also taste a piece to check for flavor and tenderness.
In this post, we explored a tasty recipe for Garlic Parmesan Roasted Cauliflower. We covered the ingredients, nutritional facts, and easy steps for preparation and roasting. I shared cooking tips to improve your dish and ideas for variations and serving styles. If you follow these steps, you’ll create a delicious side that impresses everyone. Enjoy experimenting with flavors and serving options. You can make this dish to suit your taste, whether you prefer vegan or gluten-free versions. Happy cooking!


