Garlic Parmesan Zucchini Chips Crispy and Savory Snack

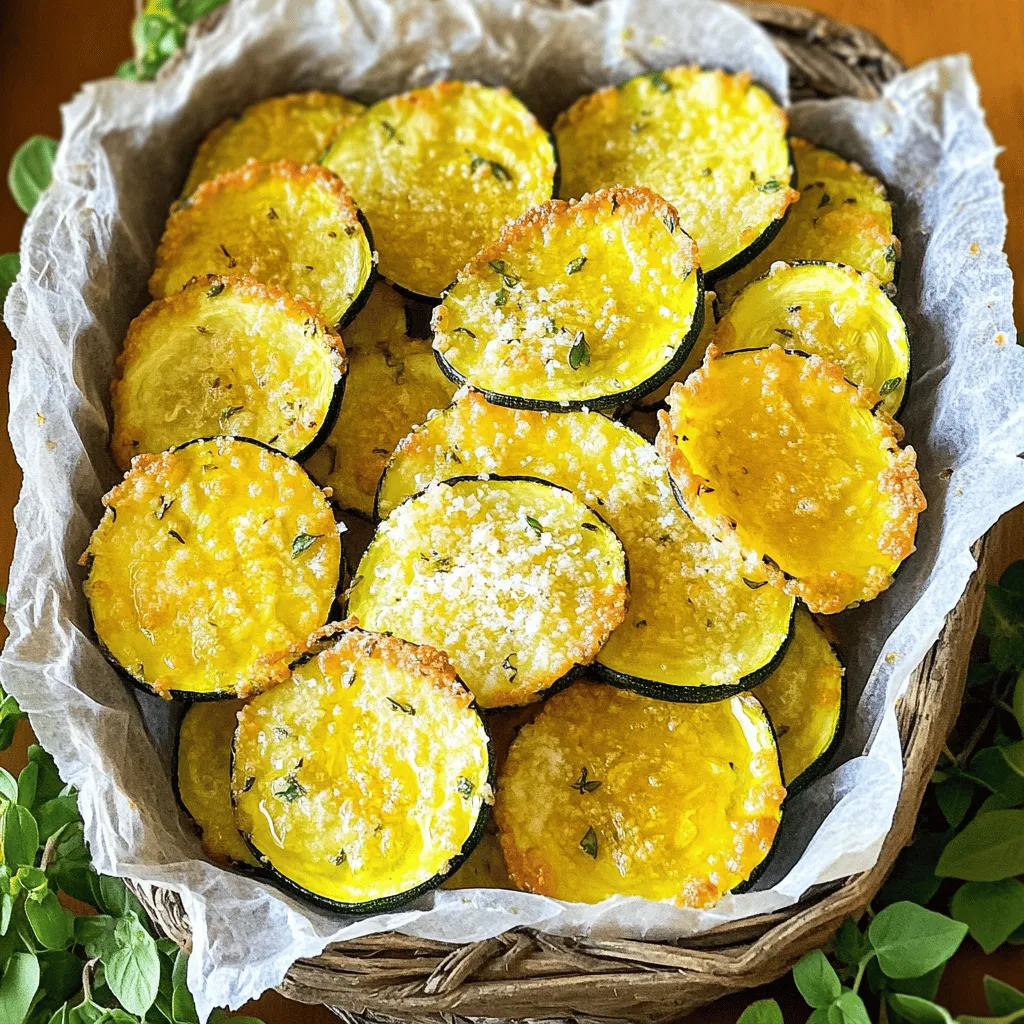
Are you ready to transform your snacking game? These Garlic Parmesan Zucchini Chips are a crispy, savory delight that’s super easy to make! With just a handful of ingredients, you can whip up a delicious snack that packs a flavor punch. Whether you’re craving something light or want to impress guests, this recipe will hit the spot. Let’s dive into the world of crunchy goodness together!
Ingredients
List of Ingredients
– 2 medium zucchinis
– 1 cup grated Parmesan cheese
– 2 tablespoons extra virgin olive oil
– 1 teaspoon garlic powder
– 1 teaspoon onion powder
– ½ teaspoon sea salt
– ¼ teaspoon freshly ground black pepper
– ½ teaspoon dried oregano
– Cooking spray
Notes on Ingredient Quality
Fresh zucchinis make a big difference in taste. Look for firm, bright green zucchinis. They should feel heavy for their size. Avoid any that are soft or have blemishes.
Choosing the right Parmesan cheese is also key. Grated cheese gives a nice melt and flavor. I recommend using real Parmesan, not the cheap stuff. Freshly grated cheese adds a richer taste and better texture. If you can, get it from the deli or a specialty store.
Step-by-Step Instructions
Preheating and Preparing
Start by setting your oven temperature to 225°F (110°C). This low heat helps the chips become crispy. Next, line your baking sheet with parchment paper. This step makes for easy cleanup and prevents sticking.
Preparing the Zucchini
Rinse the zucchinis under cool water. This removes dirt and ensures freshness. Slice the zucchinis into thin rounds, about 1/8 inch thick. Keep the slices even; this helps them cook uniformly and get crispy.
Mixing the Coating
In a large mixing bowl, pour in 2 tablespoons of extra virgin olive oil. Add 1 teaspoon of garlic powder, 1 teaspoon of onion powder, ½ teaspoon of sea salt, ¼ teaspoon of black pepper, and ½ teaspoon of dried oregano. Stir well until the spices mix fully with the oil, creating a fragrant blend.
Baking the Chips
Carefully place the zucchini slices into the bowl with the oil and spices. Toss them gently until each slice is well-coated. Arrange the seasoned zucchini slices flat on the baking sheet. They should be in a single layer with no overlapping. This ensures they become perfectly crispy.
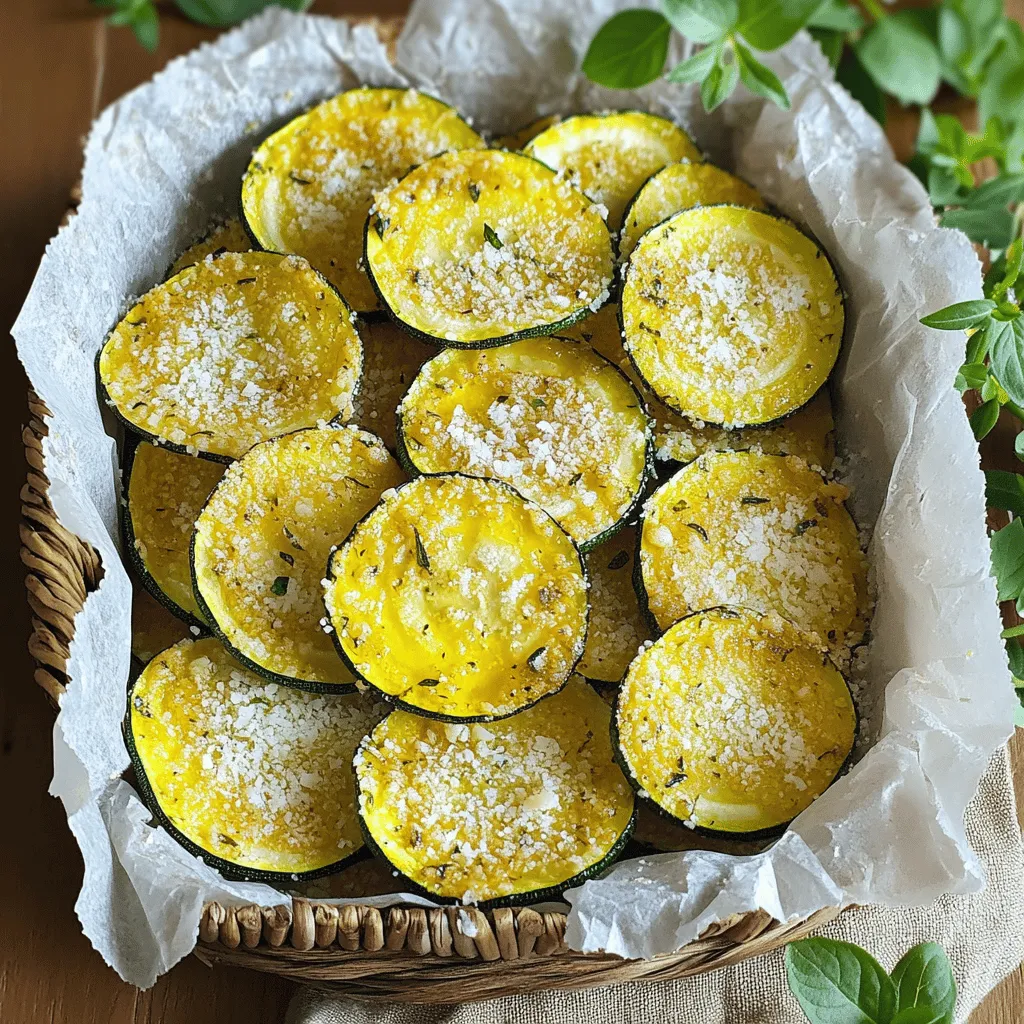
Next, generously sprinkle 1 cup of grated Parmesan cheese over the zucchini slices. Make sure each piece gets some cheese for maximum flavor. Lightly mist the tops of the zucchini chips with cooking spray. This helps them brown and become crisp during baking.
Now, place the baking sheet in the oven. Bake for 2 to 2.5 hours or until the chips turn golden brown and crispy. Check them halfway through. Rotate your baking sheet to ensure even cooking.
Once your chips are crispy, take the baking sheet from the oven. Let the zucchini chips cool for about 5 minutes. Cooling them increases their crunchiness. Enjoy your tasty snack!
Tips & Tricks
Ensuring Crispiness
To get your zucchini chips crispy, arrange the slices in a single layer. This step is key. Overlapping slices trap moisture and create sogginess. Keep them flat and evenly spread on the baking sheet.
Using cooking spray also helps. A light mist on top of the chips promotes browning. It allows the cheese to crisp up nicely. Don’t skip this step if you want that perfect crunch.
Flavor Enhancements
To add a kick, try adding chili flakes. They give your chips a nice heat without overpowering the garlic and cheese. Adjust the amount to match your taste.
You can also experiment with other herbs. Basil or thyme can add a fresh twist. Feel free to play around and find your favorite mix of flavors.
Serving Suggestions
For a fun presentation, serve your chips in a rustic basket. Line it with parchment paper to catch crumbs. Add a sprig of fresh oregano on top. This not only looks good but also adds a nice aroma.
Pair your garlic Parmesan zucchini chips with dips. A tangy yogurt dip or a zesty salsa works great. They complement the savory nature of the chips perfectly. Enjoy your tasty creation!

Variations
Alternative Seasonings
You can change the flavor of your chips by using different cheeses. Cheddar adds a sharp taste. Gouda gives a rich, smoky flavor. You can also try spice blends. Italian seasoning adds herbs and depth. Cajun spices bring heat and zest. Mix and match to find your favorite.
Vegetable Substitutions
If you want to switch up the vegetables, try sweet potatoes or carrots. Both add natural sweetness and color. Slice them thin, just like zucchini. Adjust the cooking time based on the vegetable. Sweet potatoes may take a little longer to crisp. Keep an eye on them while baking.
Dietary Modifications
To make these chips gluten-free, ensure your spices are certified gluten-free. This snack can be vegan, too. Use nutritional yeast instead of Parmesan. It gives a cheesy flavor without dairy. You can also find vegan cheese options that melt well. Enjoy delicious snacks that fit your diet!
Storage Info
Storing Leftovers
To keep your zucchini chips fresh, store them in a cool place. Use an airtight container. This will help keep them crispy. You can layer the chips with paper towels to absorb moisture. Avoid stacking too many chips on top of each other. If you have a lot of chips, consider using multiple containers. This prevents them from getting soggy.
Reheating Tips
To enjoy your zucchini chips again, reheating is key. Use an oven or an air fryer for the best results. Set the oven to 350°F (175°C). Place the chips on a baking sheet. Heat them for about 5-10 minutes. This will help bring back their crunch. If using an air fryer, cook them at 350°F for about 3-5 minutes. Avoid using the microwave, as it can make them soft. Enjoy your crispy snacks as if they were just made!
FAQs
How do I make sure my zucchini chips turn out crispy?
To get crispy zucchini chips, focus on slice thickness and oil amount. Cut the zucchini into even slices, about 1/8 inch thick. This helps them cook evenly. If slices are too thick, they may not crisp up. Use just enough olive oil to coat all the pieces without drowning them. If you see pools of oil, your chips will be soggy.
Can I use other types of cheese besides Parmesan?
Yes, you can use other cheeses. Cheddar adds a nice sharpness. Gouda brings a smoky flavor. You can also try nutritional yeast for a dairy-free option. Each cheese offers unique tastes, so feel free to get creative. Just remember to adjust the amount based on how strong the flavor is.
How do you prevent zucchini chips from becoming soggy?
Soggy chips often come from moisture. Start with fresh zucchinis, as old ones can have extra water. Slice them evenly to help them dry out. Make sure to arrange them in a single layer when baking. If they overlap, they will steam instead of crisping. Using cooking spray lightly can also help them crisp up.
What are some dipping sauces for garlic Parmesan zucchini chips?
You can pair these chips with many dips. Try a creamy ranch or a tangy yogurt dip. For something spicy, go for sriracha or a spicy mayo. Hummus also works well for a healthy option. These dips will add more flavor and make your chips even more enjoyable.
You now know how to make tasty garlic Parmesan zucchini chips. We covered the best ingredients, like fresh zucchini and quality cheese. You learned the steps to prepare, bake, and serve these snacks. Remember, using the right techniques ensures crispiness. Feel free to mix things up with different veggies or flavors. Follow these tips to impress family or friends. Enjoy your homemade snacks, and don’t forget to share and try new ideas!


![To make tasty honey garlic meatballs, you need: - 1 pound ground beef (or a blend of beef and pork for extra flavor) - 1/2 cup fresh breadcrumbs (homemade or store-bought) - 1/4 cup grated Parmesan cheese (for richness) - 1 large egg (to bind the mixture) - 2 cloves garlic, finely minced (for depth) - 1 tablespoon fresh ginger, finely minced (adds warmth) - 1/4 cup chopped green onions (for freshness) - Salt and black pepper to taste These main ingredients create a rich and flavorful base for the meatballs. The garlic and ginger add a nice zing, while the egg helps hold everything together. The honey garlic sauce is where the magic happens. You’ll need: - 1/2 cup honey (natural sweetness) - 1/4 cup soy sauce (for savory flavor) - 1 tablespoon rice vinegar (adds tang) - 1 teaspoon sesame oil (for nuttiness) - 1 teaspoon cornstarch mixed with 1 tablespoon water (to thicken the sauce) This sauce blends sweet and savory flavors. The honey pairs well with soy sauce, creating a perfect glaze for the meatballs. Feel free to customize your meatballs! Here are some ideas: - Use ground turkey instead of beef for a lighter option. - Add chopped herbs like parsley or cilantro for extra freshness. - Swap in breadcrumbs for crushed crackers if you want a different texture. - For a spicy kick, mix in some red pepper flakes. These tweaks can help you make the recipe your own. Enjoy experimenting with flavors! For the complete recipe, check out the Full Recipe link. To make tasty meatballs, start by gathering your ingredients. In a big bowl, combine: - 1 pound ground beef (or beef and pork mix) - 1/2 cup fresh breadcrumbs - 1/4 cup grated Parmesan cheese - 1 large egg - 2 cloves garlic, finely minced - 1 tablespoon fresh ginger, finely minced - 1/4 cup chopped green onions - Salt and black pepper to taste Use your hands or a spatula to mix these well. Be gentle! Overmixing will make the meatballs tough. You want them soft and tender. Now, it’s time to bake. Preheat your oven to 400°F (200°C). This step helps the meatballs cook evenly. Line a baking sheet with parchment paper. This keeps them from sticking and makes cleaning easy. Next, use clean hands to scoop out the meat mixture. Roll it into small balls, about 1 inch wide. Place them on the baking sheet, leaving space between each one. Bake for 15 to 20 minutes. You’ll know they’re done when they turn golden brown and reach an internal temperature of 165°F. While the meatballs bake, prepare the delicious sauce. In a small saucepan, mix: - 1/2 cup honey - 1/4 cup soy sauce - 1 tablespoon rice vinegar - 1 teaspoon sesame oil Heat this mix over medium heat. Stir it gently until it simmers. In a small bowl, mix 1 teaspoon cornstarch with 1 tablespoon water. Stir this into the sauce to thicken it. Cook for 2-3 more minutes until the sauce is shiny and thick. Once the meatballs are ready, take them out of the oven. Place them in a serving dish. Drizzle the warm honey garlic sauce over them. Garnish with extra chopped green onions for a fresh look. Enjoy every bite! For the full recipe, check out the details above. To make tender meatballs, start by mixing the meat gently. Overmixing makes them tough. Add breadcrumbs and egg for moisture. Let the mixture rest for a few minutes before shaping. This helps flavors blend well. Use clean hands to form the meatballs. Aim for about one inch in size for even cooking. For a rich honey garlic sauce, combine honey and soy sauce in a small pan. Heat it slowly to keep the honey from burning. Adding rice vinegar brings a nice tang. Finally, mix cornstarch with a bit of water to thicken it. Stir this mixture into the sauce until it coats the back of a spoon. This step is key for a glossy finish. These honey garlic meatballs shine on their own. Serve them on a platter with toothpicks. Pair them with rice or noodles for a full meal. Fresh veggies, like steamed broccoli or a crisp salad, add color and crunch. For added flair, drizzle extra sauce over the meatballs and sprinkle sesame seeds. This makes for a lovely presentation. Check the [Full Recipe] for more details! {{image_4}} You can use many meats for honey garlic meatballs. Ground beef is classic, but ground pork adds great flavor. You can even mix beef and pork for a tasty twist. Ground turkey is a leaner choice. It still pairs well with honey garlic sauce. Chicken also works great if you prefer a lighter meat. The key is to choose a meat you love. If you want a meat-free option, try using plant-based ground meat. There are many brands available today. You can also make meatballs with lentils or chickpeas. Just mash them up and mix in the same ingredients. For a fun twist, use quinoa or rice as a base. They both add texture and make the dish hearty. You can add fun flavors to your meatballs. Try mixing in some grated carrots or chopped bell peppers for a veggie boost. Fresh herbs, like cilantro or basil, can give a fresh kick. If you like heat, add red pepper flakes or sriracha to the mix. For an Asian twist, toss in some chopped water chestnuts or sesame seeds. These add crunch and make your meatballs stand out. You can find the full recipe to try these variations. After enjoying your honey garlic meatballs, let them cool down. Place them in an airtight container. They will stay fresh in the fridge for about 3 to 4 days. Make sure to separate layers with parchment paper to avoid sticking. To reheat, use the oven for best results. Preheat it to 350°F (175°C). Place the meatballs on a baking sheet. Heat them for about 10 to 15 minutes. This keeps them juicy and warm. You can also use the microwave, but they might get soggy. If you do use the microwave, cover them with a damp paper towel to keep moisture in. For long-term storage, you can freeze the meatballs. First, let them cool completely. Then, place them on a baking sheet in a single layer. Freeze them for a couple of hours until firm. Once frozen, transfer them to a freezer bag. They can last up to 3 months. When ready to eat, thaw them in the fridge overnight before reheating. These steps will help you enjoy your honey garlic meatballs anytime! Check out the Full Recipe for more cooking tips. Yes, you can use ground turkey instead of beef. Ground turkey makes a lighter meatball. It has less fat, so you may want to add a bit more cheese or breadcrumbs. This keeps the meatballs moist and tasty. The flavor will change slightly, but they will still taste great. To check if your meatballs are done, use a meat thermometer. They need to reach 165°F inside. You can also cut one in half. The inside should be no longer pink. Look for a nice golden brown color on the outside. These signs show that your meatballs are safe to eat. Honey garlic meatballs pair well with many sides. Here are some ideas: - Steamed rice - Roasted vegetables - Noodles - Salad - Mashed potatoes These sides balance the sweet and savory flavors. You can mix and match for a fun meal. For more ideas, check out the Full Recipe for serving suggestions. Honey garlic meatballs are simple and tasty. We covered the main ingredients and how to mix them. You learned step-by-step instructions for baking and making the sauce. I shared tips for tender meatballs and perfect sauce. You can also explore meat options and vegetarian choices. Don’t forget about storing leftovers and reheating them. Try the variations for a new twist. Enjoy cooking, and have fun sharing these delightful bites with friends and family!](https://joymealplan.com/wp-content/uploads/2025/05/91b0df71-a0c5-411f-83a7-9789c0a24c3c-768x768.webp)


![To make Garlic Parmesan Roasted Asparagus, gather these fresh items: - 1 bunch of fresh asparagus, trimmed - 3 tablespoons extra virgin olive oil - 4 cloves of garlic, finely minced - 1/2 cup freshly grated Parmesan cheese - 1 teaspoon freshly grated lemon zest - 1/2 teaspoon red pepper flakes (optional for a spicy kick) - Sea salt and freshly cracked black pepper to taste - Fresh parsley, chopped (for garnish) Using fresh ingredients makes a big difference. Fresh asparagus has a nice crunch and bright flavor. If you can't find fresh asparagus, you can use frozen, but the texture will change. Extra virgin olive oil adds a rich taste. You can swap it with avocado oil if desired. Minced garlic is key for flavor. If you want milder garlic, use garlic powder instead. Parmesan cheese brings a salty, nutty flavor. For a dairy-free option, try nutritional yeast for a cheesy taste. Lemon zest wakes up the dish. If you don’t have lemon, use lime zest for a different twist. Fresh ingredients are essential for great taste. They add vibrant flavors and textures that dried or stale items can’t match. The freshness of the asparagus shines through when roasted. It becomes tender and slightly crispy, perfect with garlic and cheese. Using fresh garlic enhances the aroma and flavor of the dish. Plus, fresh parsley adds a pop of color and freshness when you garnish the asparagus. Always choose fresh when you can. It makes a simple dish like Garlic Parmesan Roasted Asparagus truly stand out. For the full recipe, check out the details above! Start by trimming the asparagus. Hold a spear in your hand and bend it gently. The asparagus will snap at the right point. This is where the tough part ends. I usually take about an inch off. Rinse the asparagus under cold water to remove any dirt. Pat them dry with a clean towel. This step is key to getting a nice roast. In a large bowl, add the trimmed asparagus. Pour in the extra virgin olive oil. Use your hands to toss the asparagus, ensuring they are well-coated. Next, add the minced garlic, grated Parmesan cheese, and lemon zest. If you like spice, sprinkle in red pepper flakes. Season with sea salt and freshly cracked black pepper. Toss everything again until the asparagus is fully coated in the tasty mix. Now, arrange the asparagus on a lined baking sheet. Make sure they are in a single layer. This helps them cook evenly. Place the baking sheet in the oven set to 425°F (220°C). Roast for about 15 to 20 minutes. Check on them halfway through. You want them tender with crispy edges. When done, take them out and let them cool for a few minutes. Garnish with chopped parsley for a fresh look. For the full recipe, check the details above. To get that perfect crispiness, start with fresh asparagus. The thinner the spears, the better they crisp up. Make sure to coat them evenly with olive oil. This helps them roast nicely. Lay the asparagus in a single layer on the baking sheet. If they overlap, they can steam instead of roast. Keep an eye on them while they cook. You want them tender with slightly crispy edges. You can adjust the flavors to fit your taste. If you love garlic, add more minced cloves. For a kick, sprinkle in more red pepper flakes. If you prefer a milder taste, reduce the garlic or skip the flakes. Add a squeeze of lemon juice after roasting for extra brightness. Experiment until you find your perfect mix. Serve your Garlic Parmesan Roasted Asparagus warm. It pairs well with grilled meats or fish. You can also serve it alongside pasta dishes. For a fun twist, add it to salads or grain bowls. Garnish with fresh parsley for a pop of color. For more flavor, drizzle balsamic reduction over the top. This adds a sweet balance to the savory notes. Check out the Full Recipe for more ideas! {{image_4}} You can make Garlic Parmesan Roasted Asparagus more exciting. Try adding lemon juice for zest. A squeeze of fresh lime also brightens the dish. For a smoky flavor, add smoked paprika. You can also mix in nuts, like almonds or pine nuts, for added crunch. If you want a cheesy twist, use feta or goat cheese instead. The options are endless, and each adds a new layer of taste. If you prefer a vegan option, swap the Parmesan cheese for a plant-based cheese. Nutritional yeast is a great choice too. It gives a cheesy flavor without dairy. You can also use a mix of sunflower seeds and garlic powder to mimic the cheese flavor. This way, you still enjoy the savory goodness without any animal products. You can cook asparagus in many ways. Grilling gives it a nice smoky taste. To grill, toss the asparagus in oil and seasonings, then place it on the grill for about 5-7 minutes. Air frying is also a great method. It cooks the asparagus quickly while keeping it crisp. Just set your air fryer to 400°F (200°C) and cook for 8-10 minutes. Each method offers a unique flavor and texture, so feel free to experiment. For full details on the recipe, check the Full Recipe section! To store Garlic Parmesan Roasted Asparagus, first let it cool down. Place it in an airtight container. Make sure to keep it in the fridge. This keeps it fresh and tasty for later. You can also use a resealable plastic bag if you prefer. Just squeeze out the air before sealing. When you are ready to enjoy the leftovers, preheat your oven to 350°F (175°C). Spread the asparagus on a baking sheet. Heat for about 10 minutes. This will help restore its crispiness. If you want a quicker method, use the microwave. Heat it for 30 seconds at a time until warm. You can store Garlic Parmesan Roasted Asparagus in the fridge for up to 3 days. After that, it may lose its flavor and texture. If you want to keep it longer, consider freezing it. Wrap it well and store it in the freezer for up to 2 months. Just remember, the texture may change after freezing. For the best taste, enjoy it fresh or within a few days. For the full recipe, check out the earlier sections. Yes, you can use frozen asparagus. However, fresh asparagus tastes better. Frozen asparagus may have more water, which can affect the final texture. If you use frozen ones, reduce the roasting time. Cook them until they are tender but still hold their shape. Asparagus is perfectly roasted when it is bright green and tender. The tips should be slightly crispy. You can test doneness by piercing a spear with a fork. If it goes through easily, it is ready. Keep an eye on the time. Roasting takes about 15-20 minutes at 425°F. Yes, you can make this recipe in advance. Roast the asparagus, then cool it down. Store it in the fridge for up to 3 days. When ready to serve, reheat it in the oven for a few minutes. This keeps the flavors fresh and the texture nice. For the full recipe, check [Full Recipe]. This blog post covered how to make garlic parmesan roasted asparagus. You learned about key ingredients and how fresh ones make a big difference. I shared easy steps to prepare, mix, and roast the asparagus to perfection. You also found tips for crispiness, flavor, and serving ideas. Plus, variations let you explore new tastes, and I provided advice on storing leftovers. Use this guide to make a delicious dish. Enjoy your cooking and make your meals healthier and tastier!](https://joymealplan.com/wp-content/uploads/2025/06/31f02132-0972-47ce-ba26-05432beb78d0-768x768.webp)