Greek Yogurt Ranch Dip Healthy and Flavorful Recipe

Are you ready to elevate your snack game? This Greek Yogurt Ranch Dip is not just healthy but also bursting with flavor. Made with simple ingredients, this dip adds a creamy twist to your veggies and chips. It’s low in calories and high in protein, making it a perfect guilt-free option. Join me as we whip up this delightful dip that’s sure to impress! Let’s dive into the recipe and enjoy!
Ingredients
Main Ingredients for Greek Yogurt Ranch Dip
– 1 cup plain Greek yogurt
– 1 tablespoon buttermilk or milk
– 1 teaspoon dried dill
– 1 teaspoon garlic powder
– 1 teaspoon onion powder
– 1 teaspoon dried parsley
– 1/2 teaspoon salt
– 1/4 teaspoon black pepper
– 1/4 teaspoon smoked paprika
– 1 tablespoon fresh lemon juice
– Fresh vegetables for dipping
Optional Add-ins
– Hot sauce for extra spice
– Chopped fresh herbs like cilantro or chives
– Additional spices like cayenne pepper or Italian seasoning
Health Benefits of Greek Yogurt
Greek yogurt ranch dip is not just tasty; it is also good for you. Greek yogurt has more protein than sour cream. This protein helps build muscles and keeps you full. It has fewer calories and less fat too. You can enjoy the rich flavor without the guilt. Greek yogurt also has probiotics. These are good bacteria that help your gut stay healthy.
So, when you enjoy this dip, you get great taste and health benefits. You can dip crunchy carrots, celery, or bell peppers.
Step-by-Step Instructions
Preparation Steps
– Step 1: Combine Greek yogurt and buttermilk in a bowl. Use a whisk to mix well.
– Step 2: Add dried dill, garlic powder, onion powder, dried parsley, salt, black pepper, and smoked paprika. Stir until fully blended.
– Step 3: Incorporate fresh lemon juice. Mix everything until smooth and creamy.
Mixing Tips
To get the perfect texture, make sure you blend thoroughly. Use a spatula to scrape the sides of the bowl. This helps mix in any clumps. Stir gently but firmly. This way, the flavors mix evenly.
Chilling and Serving
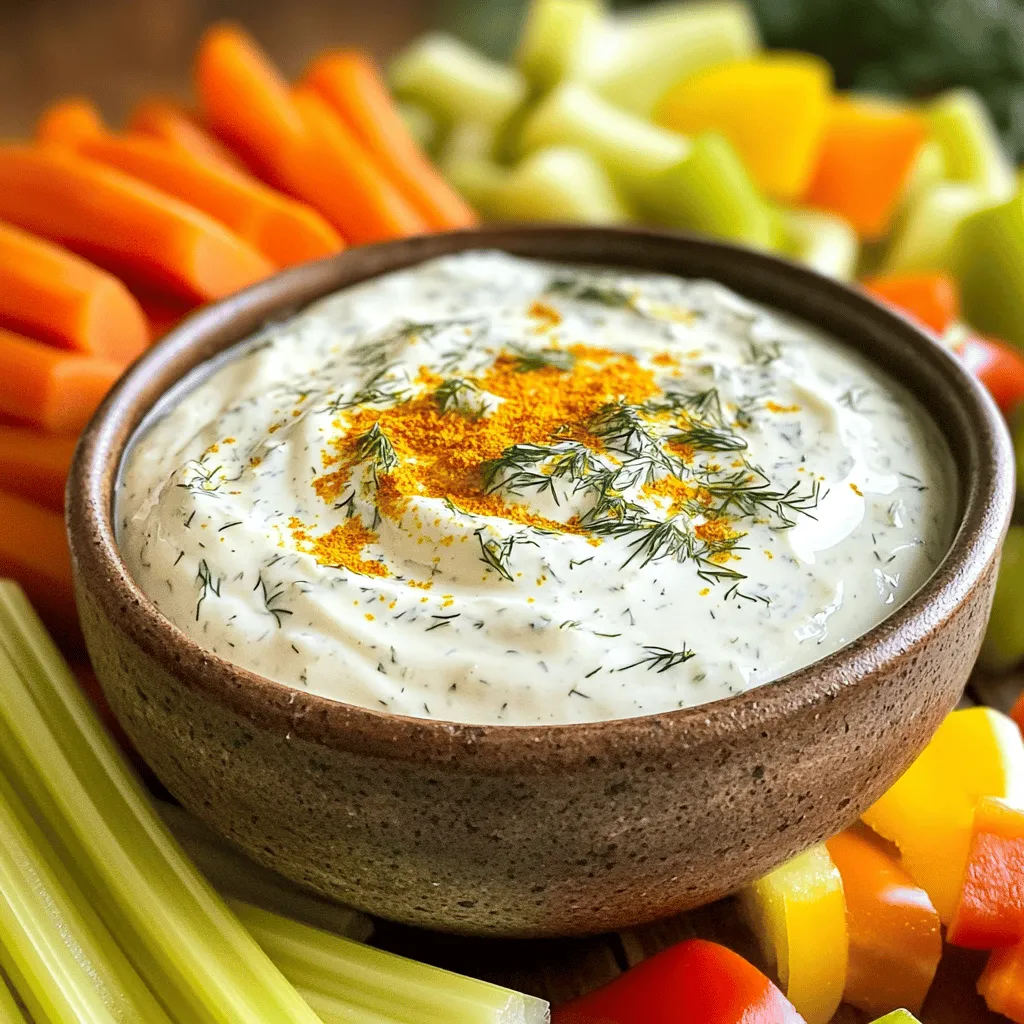
Chilling your dip is crucial. Let it rest in the fridge for at least 30 minutes. This allows the flavors to blend and deepen. For serving, arrange fresh vegetables like carrots, celery, and bell peppers on a platter. You can also use small bowls for individual servings. Add a sprig of dill on each bowl for a lovely touch.
Tips & Tricks
Flavor Enhancements
To make your Greek yogurt ranch dip even better, consider adjusting the spices. Start with the listed amounts for a balanced flavor. After mixing, taste your dip. If you want it spicier, add more black pepper or smoked paprika. You can also brighten the flavor by adding extra lemon juice. The best time to tweak the flavor is right after mixing. Take small bites and adjust until it feels just right.
Storage Tips
Storing leftovers properly keeps your dip fresh. Use an airtight container for the best results. Glass or plastic containers work well. Make sure to seal it tightly to avoid any air. This keeps the flavors strong and prevents spoilage. Your dip will last up to three days in the fridge.
Making Ahead
If you plan a party, making this dip ahead is smart. You can prepare it a day in advance. Just mix it up and store it in the fridge. The longer it sits, the better the flavors blend. Take it out about 30 minutes before serving. This allows it to warm slightly, enhancing the taste. You want everyone to enjoy the full flavor when it’s time to dig in.

Variations
Flavor Variations
You can spice up your ranch dip in fun ways. Add hot sauce for heat. Mix in fresh jalapeños for a kick. You can also try different herbs. Use fresh basil instead of dill for a twist. Or, add oregano for an Italian flair.
Dietary Adaptations
If you prefer a vegan version, use coconut yogurt. You can also swap buttermilk with almond milk. For gluten-free options, check your spices. Most are safe, but always read labels. This way, everyone can enjoy the dip.
Alternative Serving Ideas
This dip pairs well with many dishes. Serve it with chips for a snack. You can also spread it on sandwiches for extra flavor. Try drizzling it over salads for a creamy touch. Use it as a topping for baked potatoes too. The options are endless!
Storage Info
Refrigeration Guidelines
To keep your Greek yogurt ranch dip fresh, store it in an airtight container. This will help prevent it from absorbing other smells in your fridge. Properly stored, the dip lasts for about 5 to 7 days. This allows you to enjoy it during the week without worry.
Freezing Tips
Yes, you can freeze this dip, but it may lose some texture. For best results, pour the dip into a freezer-safe container. Leave some space at the top for expansion. When you’re ready to enjoy it, thaw the dip in the fridge overnight. Stir well before serving to restore some of its creamy goodness.
Usage for Leftovers
Got leftover dip? Use it as a salad dressing or spread. You can add it to wraps or sandwiches for extra flavor. Mixing it with pasta can also create a tasty creamy sauce. The dip adds a nice kick to any meal, so get creative!
FAQs
Is Greek yogurt ranch dip healthier than traditional ranch dip?
Yes, Greek yogurt ranch dip is healthier than the traditional version. It has less fat and fewer calories. Greek yogurt packs a protein punch, making it filling and nutritious. A typical ranch dip uses sour cream and mayo, which are higher in fat. Greek yogurt provides creaminess without the extra calories. You get all the flavor without the guilt.
Can I make this dip ahead of time?
Yes, you can make this dip ahead of time. In fact, it tastes better after chilling. You can prepare it a day earlier and store it in the fridge. Just cover it tightly to keep it fresh. When you’re ready to serve, give it a quick stir. This helps the flavors blend even more.
What can I serve with Greek yogurt ranch dip?
You can serve this dip with various dippers. Fresh veggies like carrots, celery, and bell peppers are perfect. You can also use crackers or pita chips. For a twist, try serving it with tortilla chips. The options are endless! You can even spread it on sandwiches or wraps.
How long does Greek yogurt ranch dip last in the fridge?
Greek yogurt ranch dip lasts about 5 to 7 days in the fridge. Make sure to store it in an airtight container. If you notice any changes in color or smell, it’s best to toss it. Always check before you enjoy your delicious dip again.
Greek yogurt ranch dip is easy to make and adapt. We learned about its tasty ingredients, health benefits, and fun variations. Include fresh herbs or try a spicy flavor. Make it ahead for gatherings to save time. Proper storage keeps it fresh for future snacks. Enjoy experimenting with different pairings and recipes. This dip fits well into meals and snacks alike. Once you try it, I bet you’ll want to make it often!


![- 1 ripe mango, diced - 2 ripe avocados, diced - 1 small red onion, finely chopped - 1 sweet red bell pepper, diced - 1 jalapeño, minced - 1/4 cup fresh cilantro, chopped - Juice of 2 limes - 1 tablespoon extra virgin olive oil - Salt and black pepper to taste How to choose the perfect mango Look for a mango that feels slightly soft when you press it. The skin should have a nice golden hue. A ripe mango smells sweet at the stem end. Choosing the best avocados Pick avocados that yield to gentle pressure. The skin should be dark green or black, depending on the variety. Avoid hard or overly mushy avocados. Signs of a fresh jalapeño A fresh jalapeño should be firm and glossy. Look for bright green skin without wrinkles. A fresh pepper has a crisp feel and a spicy aroma. These tips will help you find the best ingredients for your salsa. Fresh produce makes your dish more vibrant and tasty. For the full recipe, check the details above. - Start by washing all your fresh produce. - Dice the ripe mango into small cubes. - Carefully cut the avocados into bite-sized pieces. - Finely chop the red onion for sharp flavor. - Dice the red bell pepper for sweetness. - Mince the jalapeño, adjusting to your heat preference. Next, in a large mixing bowl, combine the diced mango, avocado, chopped onion, red bell pepper, and minced jalapeño. Gently fold in the chopped cilantro, spreading the fresh herb throughout. Squeeze the juice of two fresh limes over the mix, along with a tablespoon of olive oil. This adds richness. Use a spatula to carefully toss the ingredients. Keep the avocado pieces intact to maintain texture. Season the salsa with salt and freshly cracked black pepper, mixing lightly to combine. Resting time is key for great flavor. Let the salsa sit for about 10 minutes at room temperature. This duration allows the ingredients to blend and the flavors to develop. When you let the salsa rest, the lime juice and olive oil soak in. This process enhances the taste and makes every bite burst with flavor. Enjoy this fresh, vibrant dish as a wonderful side or topping. For the full recipe, check out the details above. - How to keep avocados from browning: To stop avocados from turning brown, use lime juice. The acid in lime juice slows oxidation. Squeeze fresh lime juice right after cutting the avocado. Mix it in well to cover all the flesh. You can also store the salsa in an airtight container to keep it fresh longer. - Using lime juice effectively: Lime juice brightens the flavors in your salsa. Use freshly squeezed lime juice rather than bottled juice. It tastes better and adds a nice zing. Aim for about two limes for this recipe. Adjust based on your taste! - Importance of ingredient proportions: Balance is key to great salsa. Use equal parts of mango and avocado for a good mix. Too much onion can overpower the other flavors. Keep the jalapeño mild if you prefer less heat. Taste as you go, and adjust the ingredients to suit your own palate. - Pairing with tortilla chips: Serve your mango avocado salsa with crispy tortilla chips. The crunch of the chips pairs well with the smoothness of the salsa. It makes for a perfect snack or appetizer at parties. - Using as a topping for grilled meats: This salsa works great as a topping for grilled chicken or fish. The sweet and spicy flavors complement the meat beautifully. Just spoon it on right before serving for the best taste. - Incorporating into tacos or burritos: Use this salsa to add freshness to tacos or burritos. It enhances your meal with vibrant flavors. Just add a scoop in your taco or wrap it up in a burrito, and enjoy! For the full recipe, check out the complete method to create this delicious dish. {{image_4}} You can make mango avocado salsa even better with new flavors. Try adding tropical fruits like pineapple or papaya. These fruits bring a sweet twist and a fun texture. You can also mix in fresh herbs like mint or basil. These herbs give a fresh taste that brightens the salsa. Want more heat? You can swap out the jalapeño for a serrano or habanero pepper. These peppers can make your salsa spicy and exciting. Just remember to taste as you go! Making mango avocado salsa fit your diet is easy. If you're vegan, this recipe is already perfect. It has no animal products and is full of healthy fats. If you need a low-sodium option, skip the added salt. The fresh lime juice and other ingredients give plenty of flavor. For those with allergies, check each ingredient. You can always swap out foods that cause issues for you. This salsa is a versatile dish that everyone can enjoy. Try these ideas to make it your own! For the full recipe, check out the [Full Recipe]. To keep your mango avocado salsa fresh, put it in the fridge. Use an airtight container. This helps prevent the salsa from browning. The salsa stays good for about 2 to 3 days in the fridge. If you see browning, it’s best to toss it. Yes, you can freeze mango avocado salsa! However, know that the texture might change. For best results, freeze it without the avocado. This keeps the salsa tasting fresh. When you're ready to use it, transfer it to the fridge for a slow thaw. To freeze, use a freezer-safe container. Leave some space at the top for expansion. You can also use freezer bags. Squeeze out the air before sealing. When thawing, avoid using a microwave. This can make the salsa mushy. Instead, let it sit in the fridge overnight. Once thawed, mix it well before serving. If it seems dry, add a splash of lime juice for extra flavor. Enjoy your mango avocado salsa fresh and flavorful! How long does mango avocado salsa last? Mango avocado salsa lasts about 2 to 3 days in the fridge. To keep it fresh, store it in an airtight container. The avocado may brown, but it will still taste good. Can I make salsa ahead of time? You can make salsa ahead of time. Just prepare it a few hours before serving. This allows the flavors to mix well. If you make it too early, the avocado may brown. What can I substitute for cilantro? If you dislike cilantro, you can use parsley instead. Parsley adds a fresh taste without the strong flavor of cilantro. Green onions or basil are also good options. What are the health benefits of mangoes and avocados? Mangoes are high in vitamins A and C. They support your immune system and promote healthy skin. Avocados contain healthy fats and fiber. They help with digestion and heart health. Is mango avocado salsa good for meal prep? Yes, mango avocado salsa is great for meal prep. It adds flavor to many meals. Use it on tacos, salads, or grilled meats for a fresh twist. Can I use canned ingredients instead of fresh? You can use canned ingredients, but fresh tastes better. Canned mango or avocado may change the texture. If you must use canned, pick options with no added sugar or salt. Mango avocado salsa is fresh, tasty, and easy to make. We covered how to choose ripe ingredients, prepare them, and enhance flavors. Remember to rest your salsa for the best taste. You can adjust it to fit your diet or add new ingredients. Store leftovers properly to enjoy later. This salsa pairs well with many dishes and adds great flavor. Enjoy your cooking and try new flavor combinations!](https://joymealplan.com/wp-content/uploads/2025/07/4f0b2596-afb2-4ef7-a95d-26c50b7bed60-768x768.webp)

![To make spicy sautéed okra, gather these fresh and flavorful ingredients: - 1 pound fresh okra, trimmed and sliced into 1/2 inch rounds - 1 red bell pepper, diced - 1 green bell pepper, diced - 1 medium onion, thinly sliced - 3 cloves garlic, minced - 1 teaspoon ground cumin - 1 teaspoon smoked paprika - 1/2 teaspoon cayenne pepper (adjust according to heat preference) - 3 tablespoons olive oil - Salt and freshly cracked black pepper to taste - Fresh cilantro, coarsely chopped (for garnish) This handy recipe combines simple steps for a delicious side dish. The tools you need are: - Large skillet - Cutting board - Chef's knife - Wooden spoon or spatula Now that you have your ingredients and tools ready, let's get cooking! 1. Heat the Oil Start by pouring 3 tablespoons of olive oil into a large skillet. Turn the heat to medium-high. Wait until the oil shimmers. This helps to get the okra nice and crispy. 2. Sauté the Okra Add 1 pound of sliced okra to the hot skillet. Sauté it for about 5 to 7 minutes. Keep stirring occasionally. You want the okra to brown slightly. This step is key to reducing its sliminess. 3. Add the Peppers and Onions When the okra turns light golden, push it to one side of the skillet. On the other side, add 1 sliced onion, 1 diced red bell pepper, and 1 diced green bell pepper. Cook these for about 4 to 5 minutes. You want the onions to become soft and clear. 4. Mix in Garlic Now, stir in 3 cloves of minced garlic. Cook for just 1 minute. It should smell really good, and the garlic will soften quickly. 5. Add Spices Sprinkle 1 teaspoon of ground cumin, 1 teaspoon of smoked paprika, and 1/2 teaspoon of cayenne pepper over the veggies. Add salt and black pepper to taste. Toss everything together. Let it cook for another 2 to 3 minutes. This helps the spices blend well and boosts the flavor. 6. Garnish and Serve Take the skillet off the heat. Add a handful of chopped cilantro on top. This adds a fresh touch. - Heating oil: 1-2 minutes - Sautéing okra: 5-7 minutes - Cooking veggies: 4-5 minutes - Cooking garlic: 1 minute - Mixing in spices: 2-3 minutes - Total: About 20 minutes from start to finish. - Freshness Matters: Use fresh okra for the best texture. - High Heat: Sauté on medium-high heat. This helps to reduce moisture. - Browning: Make sure the okra browns slightly. This change in color cuts down on sliminess. - Less Water: Do not wash the okra right before cooking. The moisture can make it slimy. You can find the full recipe for this dish above. Enjoy your cooking! - Best Heat Settings: Use medium-high heat. This helps the okra cook fast while getting nice and brown. Too low, and it may become slimy. Too high, and it might burn. - Stirring and Timing Recommendations: Stir the okra every couple of minutes. This helps it cook evenly. After adding the other veggies, let them sit for a minute before stirring. This gives them time to soften. - How to Increase or Decrease Heat: To add more spice, increase the cayenne pepper. A little can go a long way! If you want less heat, start with just a pinch. You can always add more later. - Alternative Spices to Use: If you want to change the flavor, try using chili powder or even curry powder. Both add a nice kick and different taste. Use what you love! Check the full recipe for more ideas. {{image_4}} Alternative Vegetables to Add You can mix in other veggies for more flavor. Try adding sliced zucchini or diced tomatoes. These veggies pair well with okra. You can also use corn for a sweet crunch. Spinach adds a nice green touch and cooks quickly. Vegan and Vegetarian Options This dish is vegan-friendly already. If you want a heartier meal, add chickpeas or black beans. These options increase protein and make your dish more filling. You can also serve it over quinoa or brown rice for extra fiber. Adding Proteins To make this dish more filling, add cooked shrimp or chicken. They cook fast and blend well with the spices. For a vegetarian option, try adding tofu. Make sure to press and cube it first. This keeps the tofu firm and tasty. Different Spice Blends Feel free to get creative with your spices. Instead of cumin, try curry powder for a different kick. Or, add smoked chili powder for a deeper flavor. Adjust the cayenne pepper to match your spice level. You can always start small and add more later. For the full recipe, check out the [Full Recipe]. After making spicy sautéed okra, store leftovers in an airtight container. This keeps the dish fresh. Place the container in the fridge. Leftovers stay good for about three to four days. To freeze, let the okra cool first. Then, transfer it to a freezer-safe bag. Remove as much air as you can from the bag. Label it with the date. Frozen okra lasts up to three months. When you're ready to eat, thaw the okra in the fridge overnight. You can also use the microwave for quicker thawing. Once thawed, reheat in a skillet on medium heat. Stir well to warm it up evenly. This way, you can enjoy the spicy sautéed okra again! You can serve spicy sautéed okra with many dishes. It pairs well with rice, especially fluffy jasmine rice. You can also enjoy it with quinoa for a healthy twist. This dish adds color and taste to any meal. Try it with grilled chicken or fish for a complete plate. The flavors blend nicely and make a great combo. Yes, you can use frozen okra. Just remember to thaw it first. Frozen okra can be softer than fresh but still works well in this dish. Drain excess water to avoid extra sliminess. Sauté it in a hot pan to keep it crispy. The taste will be good, and it saves time. Spicy sautéed okra is very healthy. It is low in calories and high in fiber. Okra is full of vitamins like A and C. Using olive oil adds healthy fats. The spices can boost metabolism too. This dish is a great way to enjoy vegetables and keep meals nutritious. You can find the full recipe for this tasty side dish in the earlier sections. This blog post covered everything you need to make spicy sautéed okra. You learned about the ingredients, preparation steps, and useful cooking tips. I also shared variations to suit your taste and storage info for leftovers. Cooking can be easy and fun when you know the basics. Don’t hesitate to experiment with flavors. With this guide, you can cook a fantastic dish every time. Enjoy your cooking journey!](https://joymealplan.com/wp-content/uploads/2025/07/3f11e5a2-627f-4419-8fdc-b0710d28cd51-768x768.webp)