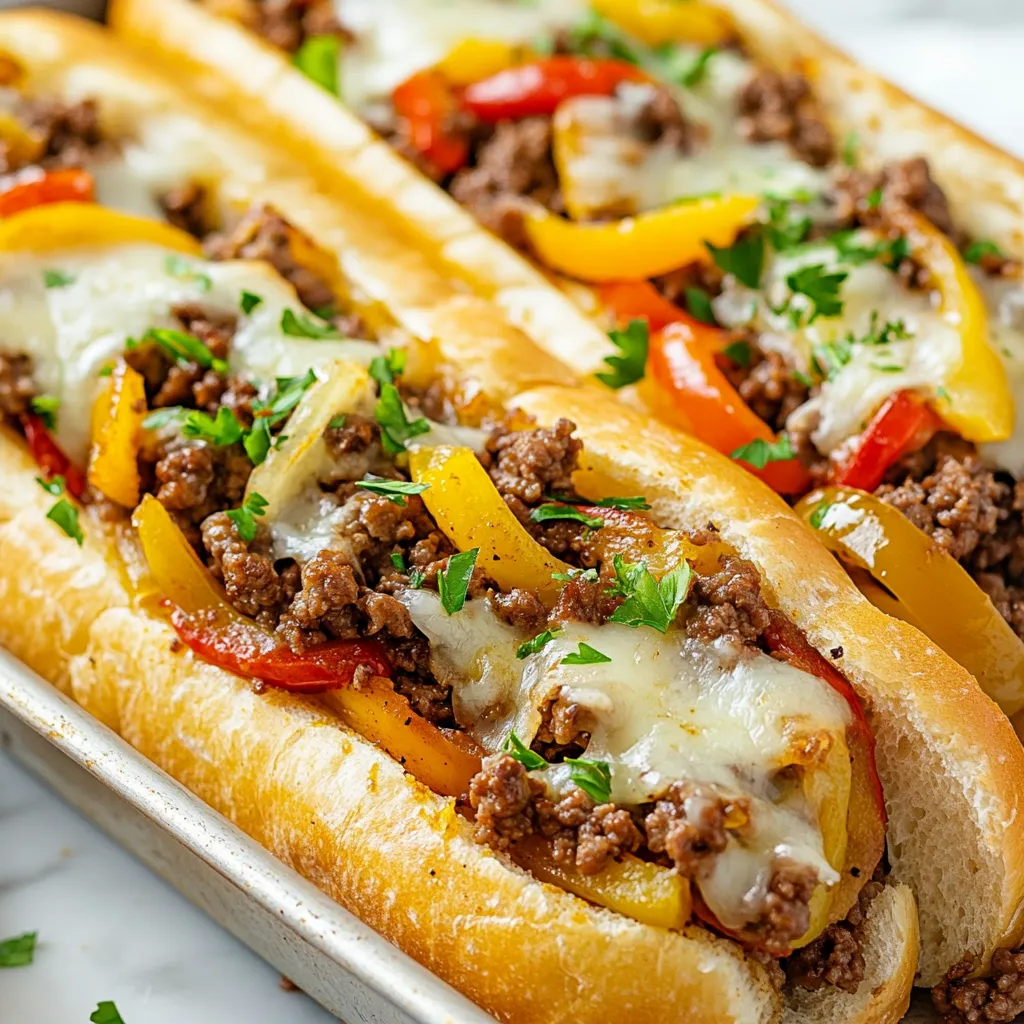
Are you ready to bring the classic taste of Philly cheesesteaks right into your kitchen? In this easy and tasty recipe, I’ll show you how to make mouthwatering Ground Beef Philly Cheesesteaks that are packed with flavor and perfect for any meal. With simple ingredients and step-by-step instructions, you’ll impress family and friends in no time. Let’s dive in and create a dish that warms the heart and satisfies your cravings!
Why I Love This Recipe
- Quick and Easy: This recipe takes just 30 minutes from start to finish, making it perfect for a busy weeknight dinner.
- Flavor Packed: The combination of sautéed vegetables and seasoned ground beef creates a deliciously rich filling that is hard to resist.
- Cheesy Goodness: With two slices of provolone melting on top, each bite is a delightful gooey experience that cheesesteak lovers will adore.
- Customizable: Feel free to add your favorite toppings or swap out the vegetables for a personalized touch that suits your taste.
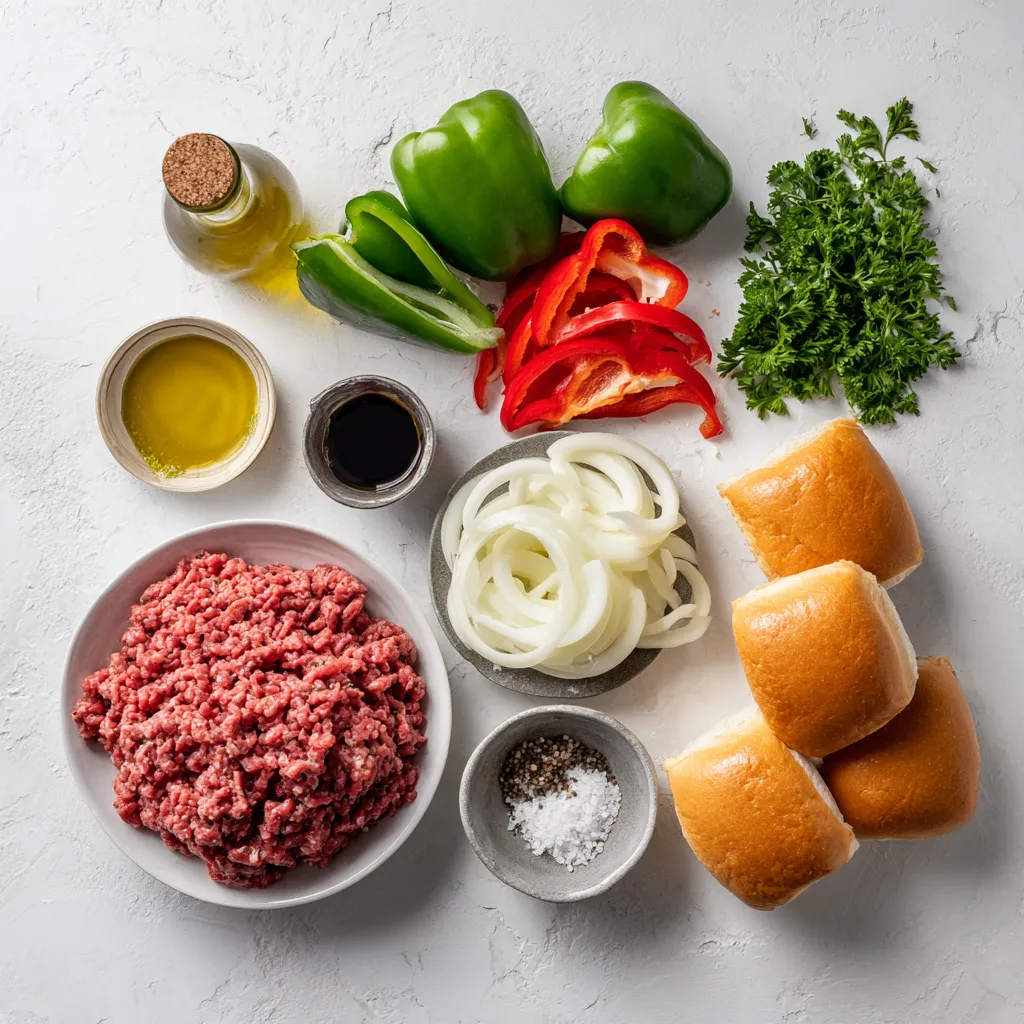
Ingredients
List of Ingredients
– Ground Beef and Cheese
– 1 pound ground beef
– 8 slices provolone cheese
– Vegetables and Seasonings
– 2 tablespoons olive oil
– 1 large onion, thinly sliced
– 1 medium green bell pepper, thinly sliced
– 1 medium red bell pepper, thinly sliced
– 3 cloves garlic, minced
– 1 teaspoon Worcestershire sauce
– Salt and freshly ground black pepper, to taste
– Hoagie Rolls and Optional Garnishes
– 4 hoagie rolls
– Fresh parsley, finely chopped (for garnish)
The ingredients come together to create a tasty and hearty meal. Ground beef gives it a rich flavor. Provolone cheese adds creaminess that melts beautifully. The mix of bell peppers and onion adds sweetness. Garlic boosts the flavor, while Worcestershire sauce ties it all together.
Using fresh parsley as a garnish not only looks nice, but it also adds a fresh touch. The hoagie rolls hold all this deliciousness well. Each bite is a blend of textures and flavors that make this dish a favorite.
Step-by-Step Instructions
Preparing the Vegetables
Heating the Olive Oil
Begin by pouring 2 tablespoons of olive oil into a large skillet. Set the heat to medium. Let the oil warm up for about a minute. You want it hot but not smoking.
Sautéing Onions and Peppers
Next, add 1 large sliced onion, 1 medium green bell pepper, and 1 medium red bell pepper to the skillet. Stir the mixture often for about 5 to 7 minutes. Cook until the veggies soften and start to brown.
Adding Garlic for Flavor
Now, toss in 3 minced garlic cloves. Stir for another minute until it smells amazing. Garlic adds a lot of flavor to our dish.
Cooking the Ground Beef
Cooking and Browning the Beef
Push the veggies to the sides of the skillet. Create a space in the center and add 1 pound of ground beef. Use a spatula to break it apart. Cook for 5 to 7 minutes. Stir it occasionally until the beef is browned and no longer pink.
Combining with Vegetables
Once the beef is cooked, mix it with the sautéed veggies. This step is crucial for getting all those great flavors together.
Seasoning for Taste
Stir in 1 teaspoon of Worcestershire sauce. Season with salt and freshly ground black pepper to taste. Cook for another 2 to 3 minutes. This lets the spices meld together.
Final Assembly
Preparing Hoagie Rolls for Broiling
Preheat your oven’s broiler on high. Carefully split 4 hoagie rolls open. Arrange them cut-side up on a baking sheet. They need to be ready for the filling.
Filling the Rolls
Evenly distribute the beef and vegetable mixture into each hoagie roll. Make sure each one is generously filled. This is where the magic happens!
Broiling with Cheese
Place 2 slices of provolone cheese on top of each filled hoagie. Slide the baking sheet under the broiler for 2 to 3 minutes. Keep an eye on them until the cheese melts and turns bubbly.
Tips & Tricks
Achieving Authentic Flavor
Selecting the Right Beef
You want ground beef that has some fat. I recommend 80/20 ground beef. The fat adds flavor and keeps your cheesesteaks juicy. Look for fresh beef, ideally from a local butcher.
Tips for Cooking Vegetables Perfectly
Slice your onions and peppers thin. This helps them cook fast and blend well with the beef. Start by cooking the onions first. They need a bit longer to caramelize. Add the peppers next. They should be soft but still vibrant in color.
Best Cheese Options for Philly Cheesesteaks
Provolone cheese is classic for cheesesteaks. It melts well and has a nice flavor. You can also use Cheez Whiz for a creamy touch. If you like a stronger taste, try sharp cheddar. Each cheese gives a unique twist to your dish.
Presentation Tips
Serving Suggestions for Cheesesteaks
Serve your cheesesteaks on a wooden platter. It adds a rustic feel. Pair them with crispy potato fries or a fresh salad. This makes the meal complete and satisfying.
Garnishing with Fresh Ingredients
Top each cheesesteak with fresh parsley. It adds a pop of color and freshness. You can also add sliced jalapeños for some heat. These little touches make your plates look and taste amazing.
Pro Tips
- Use Fresh Ingredients: Fresh vegetables and high-quality ground beef will enhance the flavor and texture of your cheesesteak.
- Don’t Overcrowd the Skillet: Sauté the vegetables in batches if needed to ensure they caramelize evenly and develop a rich flavor.
- Experiment with Cheeses: While provolone is classic, try using Cheez Whiz or American cheese for a different twist on the traditional cheesesteak.
- Serve Immediately: These cheesesteaks are best enjoyed hot and fresh, so serve them right after broiling to maintain the gooey cheese texture.
Variations
Alternative Ingredients
Different Types of Cheese
While provolone cheese is classic, you can try other types. Cheddar adds sharpness. Swiss gives a nutty flavor. For something rich, use gouda. Mixing cheeses can create fun tastes, too.
Adding Extra Veggies or Spices
Feel free to boost your cheesesteak with more veggies. Mushrooms add earthiness, while jalapeños give heat. Spinach or kale can sneak in some greens. Try different spices like paprika or cayenne for extra zing.
Using Ground Turkey or Chicken
If you want a leaner option, ground turkey or chicken works well. These meats absorb flavors nicely. They make a lighter sandwich but still deliver taste. Just adjust the cooking time since they may cook faster.
Cooking Methods
Slow Cooker Version
For an easy meal, use a slow cooker. Brown the meat first, then add veggies and sauce. Cook on low for about 6 hours. This method yields tender meat and deep flavors. Perfect for busy days!
Grilled Cheese Variation
Want to change it up? Make a grilled cheese version! Use bread slices instead of hoagie rolls. Fill with the beef mix and cheese, then grill. This gives you a crunchy, melty delight!
Vegan or Vegetarian Alternatives
To make a plant-based cheesesteak, replace ground beef with mushrooms or lentils. Use vegan cheese to keep it dairy-free. This option is tasty and still filling. You can enjoy the flavors without meat!
Storage Info
How to Store Leftovers
To keep your Philly cheesesteaks fresh, use these tips:
– Storing in the Refrigerator: Place leftovers in an airtight container. Store it in the fridge for up to three days. Make sure it cools down before sealing it. This helps keep moisture in and prevents sogginess.
– Freezing for Future Meals: For longer storage, wrap each cheesesteak tightly in plastic wrap. Then place them in a freezer bag. Label the bag with a date. These can last up to three months in the freezer. When ready to eat, thaw them in the fridge overnight.
Reheating Tips
When you want to enjoy your leftovers, here are the best ways to reheat them:
– Microwave vs. Oven Reheating: The microwave is quick but can make the bread soggy. Use it if you are in a hurry. Heat for 1-2 minutes on medium power. The oven is better for taste and texture. Preheat to 350°F (175°C) and heat for 10-15 minutes until warm.
– Best Practices for Maintaining Flavor and Texture: If using the oven, cover the cheesesteaks with foil. This keeps them moist. For the microwave, place a damp paper towel over the sandwich. This helps keep the bread soft and tasty.
FAQs
What is the Origin of Philly Cheesesteaks?
Philly cheesesteaks come from Philadelphia. The first one made a big splash in the 1930s. A hot dog vendor, Pat Olivieri, created it by grilling beef on a hot plate. People loved it and asked for one. Soon, it became a local favorite. Now, you can find cheesesteaks all over the U.S. They are a proud part of Philly’s food scene.
Can I Use Lean Ground Beef?
Yes, you can use lean ground beef. It is a great option for those watching their fat intake. Lean beef has less grease, which can make the dish lighter. However, be careful not to dry it out. Cook it well, but don’t overdo it. Add a bit more oil if needed to keep it juicy.
What Sides Pair Well with Ground Beef Philly Cheesesteaks?
Many sides go well with Philly cheesesteaks. Here are some tasty options to consider:
– Crispy potato fries
– Onion rings
– Coleslaw
– Side salad with light dressing
– Pickles for a crunch
For drinks, try a cold soda or iced tea. These sides and drinks will make your meal even better!
In this blog post, we explored how to make delicious Philly cheesesteaks. We covered essential ingredients like beef, vegetables, and cheese. You learned step-by-step cooking instructions, tips for authentic flavor, and easy storage methods.
These sandwiches are fun to make and easy to customize. Whether you like extra veggies or a slow cooker version, you can adjust the recipe to suit your taste. Enjoy your cooking adventure and share your tasty cheesesteaks with friend


