Homemade Rainbow Sherbet Refreshing Summer Treat

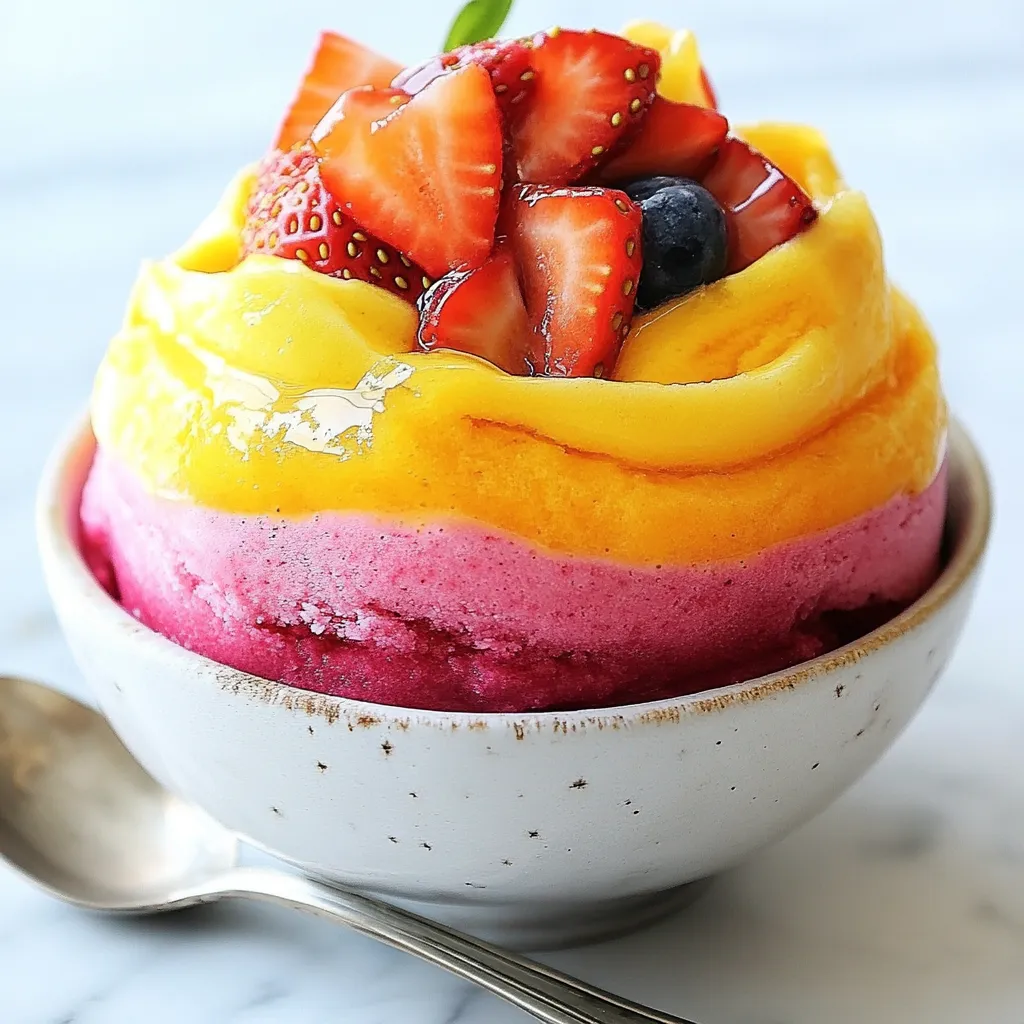
Looking for a cool treat this summer? You can make delicious Homemade Rainbow Sherbet right in your kitchen! With vibrant layers of orange, strawberry, and blueberry, this dessert is a feast for the eyes and the taste buds. I’ll guide you through simple steps to create your own refreshing treat using fresh fruits and coconut milk. Get ready to impress your friends and family with this colorful delight! Let’s dive in!
Why I Love This Recipe
- Refreshing and Fruity: This sherbet is a delightful mix of fresh fruits, making it the perfect refreshing treat on a hot day.
- Vibrant Visuals: The layers of orange, strawberry, and blueberry create a stunning rainbow effect that is sure to impress your guests.
- Easy to Make: With simple ingredients and straightforward steps, this recipe is accessible for anyone looking to create a homemade dessert.
- Healthier Option: Using fresh fruit and coconut milk, this sherbet offers a lighter and healthier alternative to traditional ice cream.
Ingredients
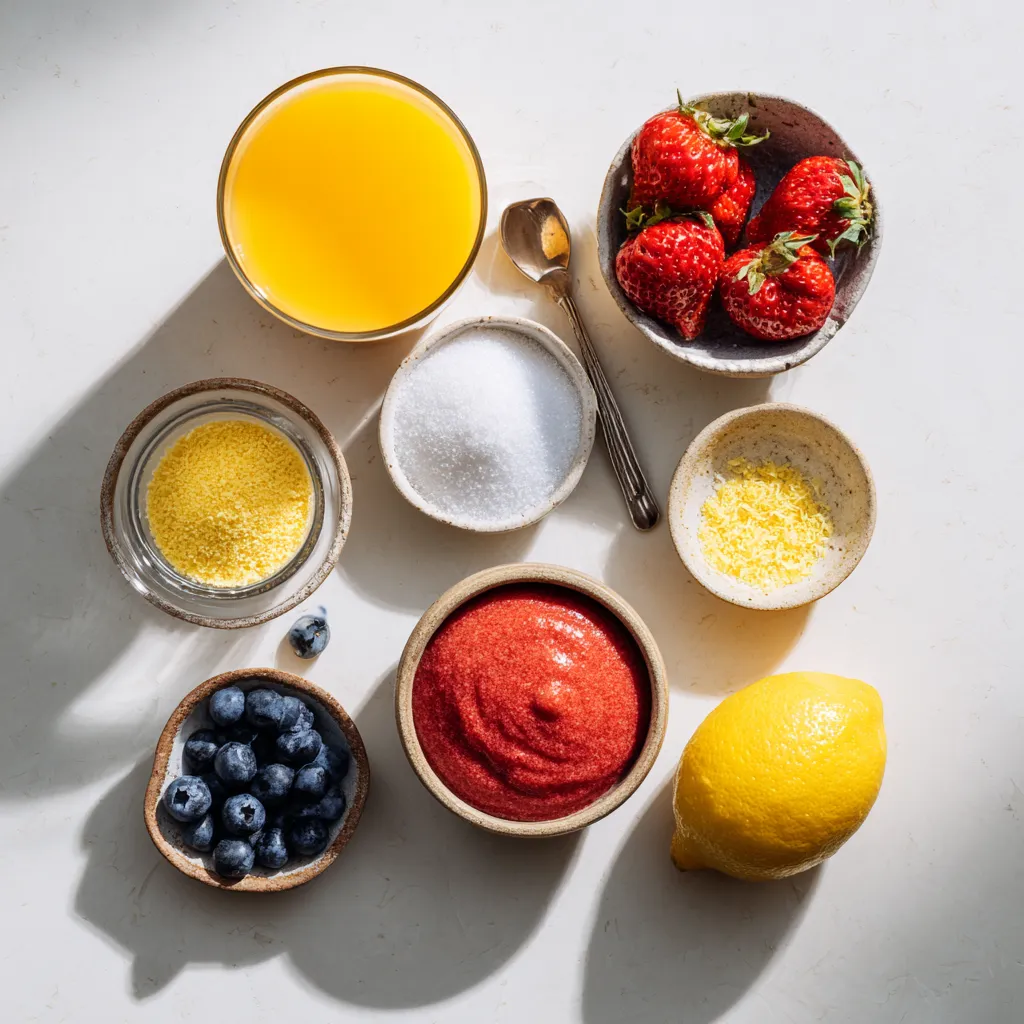
To make homemade rainbow sherbet, gather these fresh and tasty ingredients:
– 2 cups of freshly squeezed orange juice
– 1 cup of fresh strawberries, pureed
– 1 cup of fresh blueberries, pureed
– 1 cup of creamy coconut milk
– 1 cup of granulated sugar (divided into 3 equal parts)
– 2 tablespoons of zesty lemon juice
– 1 teaspoon of pure vanilla extract
– A pinch of salt
Each ingredient plays a key role. The orange juice gives a bright and tangy flavor. The pureed strawberries and blueberries add sweetness and color. Coconut milk makes it creamy, while lemon juice adds a nice zing. The sugar balances the flavors, ensuring a sweet treat. Vanilla extract enhances the taste, and a pinch of salt brings everything together.
Using fresh fruit is important for the best taste. You can squeeze your own orange juice for a fresher flavor. Blending the fruit into a puree ensures a smooth texture. This combination makes a sherbet that is not just pretty but also delicious. Enjoy the joy of making this refreshing summer treat!

Step-by-Step Instructions
Prepare the Orange Layer
Start with the orange layer. Grab your high-speed blender. Blend 2 cups of freshly squeezed orange juice, 1/3 cup of granulated sugar, 1 cup of creamy coconut milk, and 2 tablespoons of zesty lemon juice. Blend until smooth. Transfer this bright mixture into a shallow dish. Spread it out evenly. Place the dish in the freezer for about 1 hour. This helps it soften slightly.
Create the Strawberry Layer
While the orange layer firms up, it’s time for the strawberry layer. Clean your blender. Add 1 cup of pureed strawberries with 1/3 cup of sugar. Blend until you get a velvety mix. Then, add the remaining coconut milk and 1 teaspoon of pure vanilla extract. Mix well. Once the orange layer has set, carefully pour this strawberry mix over it. Make sure to cover it completely. Return the dish to the freezer for another hour.
Craft the Blueberry Layer
Next, we’ll make the blueberry layer. In your blender, combine 1 cup of pureed blueberries with the last 1/3 cup of sugar and a pinch of salt. Blend until smooth. Stir in the remaining coconut milk until it’s fully mixed. After the strawberry layer has frozen for an hour, pour the blueberry mixture on top. Spread it evenly over the strawberry layer.
Final Freeze
Cover the dish tightly with plastic wrap or a lid. Freeze the whole sherbet for at least 4 hours. This will ensure it’s fully firm and ready to scoop.
Serve the Sherbet
Before serving, let the sherbet sit at room temperature for a few minutes. This makes it easier to scoop. Use an ice cream scoop to serve the colorful sherbet into bowls or cones. Enjoy your refreshing creation!
Tips & Tricks
Achieving the Perfect Texture
To get the best texture for your homemade rainbow sherbet, follow these tips. First, blend each layer until it is very smooth. This helps avoid ice crystals. When freezing, let each layer soften before adding the next. This keeps the layers from mixing too much. After the final freeze, let the sherbet sit out for a few minutes. This makes it easier to scoop.
Substitutions for Ingredients
If you want to change things up, you can substitute some ingredients. Instead of coconut milk, use almond milk for a lighter taste. You can also mix in other fruits. Try raspberries or mango for a fun twist. If you want it sweeter, use honey or maple syrup instead of sugar. Just remember to adjust the amounts based on your taste.
Best Practices for Blending
When blending, use a high-speed blender for the best results. This helps to create a creamy texture. Start with the liquids first, then add the fruits and sugar. Blend in short bursts to avoid overheating the mixture. If your blender struggles, add a splash of liquid to help it. Always taste your mixture before freezing. This way, you can adjust flavors to suit your palate.
Pro Tips
- Layering is Key: Allow each layer to freeze slightly before adding the next to create distinct layers and a beautiful rainbow effect.
- Sweetness Adjustment: Taste each fruit puree before adding sugar; adjust the sweetness according to your preference and the natural sweetness of the fruit.
- Presentation Matters: Serve in colorful bowls or waffle cones, and add fresh fruit or mint leaves on top for a stunning presentation.
- Storage Tips: Wrap the dish tightly with plastic wrap to prevent ice crystals from forming and keep your sherbet fresh for longer.

Variations
Alternative Fruit Combinations
You can mix and match fruits for your sherbet. Try using mangoes, peaches, or raspberries. Each fruit adds its own unique flavor. For example, a mango layer gives a tropical twist. You can also use mixed berries for a berry blast. Simply puree your chosen fruit and follow the same steps as with strawberries and blueberries. The sky’s the limit!
Dairy-Free Options
If you want a dairy-free treat, coconut milk works great. It’s creamy and rich, adding a nice texture. You can also try almond milk or cashew milk. Just make sure to pick unsweetened options to control the sugar. This keeps your sherbet refreshing and light. If you want a nut-free option, stick with coconut milk. It’s a fantastic choice for dairy-free sherbet.
Adding Unique Flavors
To make your sherbet stand out, add unique flavors. A splash of mint extract gives a fresh taste. You can also try a bit of almond extract for a nutty flavor. For a zesty kick, add lime juice instead of lemon juice. Each small change can create a brand-new dessert. Experiment with these flavors and find your favorite combinations!
Storage Info
Best Way to Store Rainbow Sherbet
To keep your rainbow sherbet fresh, use an airtight container. This will prevent ice crystals from forming. Make sure to press plastic wrap against the sherbet before sealing. This extra layer helps keep the flavor strong. Store the container in your freezer. It will stay good for about two weeks.
Freezing Tips for Long-Term Storage
If you want to keep sherbet longer, freeze it in smaller portions. Use muffin tins or ice cube trays for easy serving sizes. Once frozen, transfer the portions into a freezer bag. Remove as much air as possible from the bag. This helps prevent freezer burn and keeps the sherbet tasty.
How to Revive Frozen Sherbet
When you take your sherbet out of the freezer, it may be hard. Let it sit at room temperature for about five minutes. This will soften it just enough to scoop. If it’s still too hard, use a warm scoop. Run the scoop under warm water for a few seconds. This makes it easier to serve your colorful treat!
FAQs
Can I use frozen fruit?
Yes, you can use frozen fruit. Frozen fruit works well in recipes like this. It saves time and is easy to blend. Just make sure to let the fruit thaw slightly before blending. This helps create a smooth texture.
How long can homemade sherbet last in the freezer?
Homemade sherbet can last up to two weeks in the freezer. To keep it fresh, store it in an airtight container. This prevents ice crystals from forming. For best taste, enjoy it within the first week.
Is it possible to make sherbet without sugar?
Yes, you can make sherbet without sugar. You can use natural sweeteners like honey or agave syrup. Keep in mind that sugar helps with the texture. The sherbet may be firmer without it.
What’s the difference between sherbet and sorbet?
Sherbet and sorbet are both frozen desserts but differ in ingredients. Sherbet contains dairy, making it creamier. Sorbet is dairy-free and only uses fruit and sugar. This gives sorbet a lighter texture and taste.
In this post, we explored making delicious rainbow sherbet. We listed the key ingredients and shared step-by-step methods for each layer. I also provided tips for the perfect texture and fun variations to try. Storing your sherbet correctly keeps it fresh longer. Remember, you can customize flavors and use different fruits. Make this tasty treat your own, and enjoy refreshing bites all summer long. Happy sherbet makin

Sunshine Rainbow Sherbet
Ingredients
- 2 cups freshly squeezed orange juice
- 1 cup fresh strawberries, pureed
- 1 cup fresh blueberries, pureed
- 1 cup creamy coconut milk
- 1/3 cup granulated sugar
- 2 tablespoons zesty lemon juice
- 1 teaspoon pure vanilla extract
- 1 pinch salt
Instructions
- Prepare the Orange Layer: In a high-speed blender, blend together the freshly squeezed orange juice, 1/3 cup of granulated sugar, creamy coconut milk, and zesty lemon juice until the mixture is completely smooth. Transfer this vibrant mixture into a shallow dish, spreading it evenly. Place the dish in the freezer for about 1 hour, allowing it to soften slightly without completely freezing.
- Create the Strawberry Layer: While the orange layer is firming, prepare the strawberry layer. In a clean blender, combine the pureed strawberries with 1/3 cup of sugar, blending until velvety smooth. To this, add the remaining coconut milk and pure vanilla extract, mixing until well combined. Once the orange layer has set to a soft consistency, carefully pour the strawberry mixture over the top, spreading it gently to cover completely. Return the dish to the freezer for an additional hour.
- Craft the Blueberry Layer: As the strawberry layer freezes, it's time to create the blueberry layer. Blend the pureed blueberries with the last 1/3 cup of sugar and a pinch of salt until smooth. Stir in the remaining coconut milk until fully integrated. After the strawberry layer has frozen for an hour, pour the blueberry mixture over the strawberry layer, ensuring it’s evenly spread.
- Final Freeze: Cover the dish tightly with plastic wrap or a lid, then freeze the entire sherbet for at least 4 hours, or until it’s completely firm and ready to scoop.
- Serve the Sherbet: Before serving, let the sherbet sit at room temperature for a few minutes to soften slightly—this will make it easier to scoop. Use an ice cream scoop to serve the bright and vibrant sherbet into bowls or onto cones, and indulge in your colorful, refreshing creation!


![- Ripe avocados: Choose avocados that feel soft but not mushy. Ripe avocados add creaminess. They bring healthy fats and nutrients to the mousse. When selecting avocados, look for dark green skin. A little give when pressed is a good sign. Avoid avocados with large dark spots or cracks. - Cocoa powder: The type of cocoa powder you use matters. Choose high-quality, unsweetened cocoa for the best flavor. Dutch-processed cocoa has a smooth taste. Regular cocoa has a rich chocolate flavor. Both are great choices. - Sweeteners: Maple syrup and agave syrup are both tasty options. Maple syrup gives a unique flavor. It adds a slight caramel note. Agave syrup is milder and sweeter. It blends well without changing the taste much. You can adjust the sweetness based on your preference. - Non-dairy milk options: You can use almond, coconut, or oat milk. Almond milk is light and nutty. Coconut milk adds creaminess and a hint of tropical flavor. Oat milk is thick and wholesome. Any of these choices work well to create a smooth texture. - Flavor enhancers: Vanilla extract adds warmth and depth. A little cinnamon gives an extra layer of flavor. Both options are simple and enhance the chocolate taste. You can try adding a pinch to see what you like best. - Garnish suggestions: Dark chocolate shavings are a rich topping. They add elegance and extra chocolate flavor. Fresh berries like raspberries or strawberries bring brightness. Their color and tartness balance the rich mousse perfectly. These garnishes make the dish even more appealing. You can find the full recipe at the beginning of this article. First, you need to prepare your avocados. To peel and pit them easily, slice the avocado in half. Twist the halves apart. Use a spoon to scoop out the pit. Then, scoop the green flesh into a bowl. Next, measure your ingredients. For this mousse, you will need: - 2 ripe avocados, peeled and pitted - 1/2 cup unsweetened cocoa powder - 1/3 cup maple syrup (or agave syrup) - 1/4 cup almond milk (or any non-dairy milk of your choice) - 1 teaspoon vanilla extract - 1/4 teaspoon sea salt - A pinch of cinnamon (optional) Combine all these ingredients in a food processor. Now, let’s blend for that creamy texture. Start blending on high speed. Stop occasionally to scrape down the sides. This ensures everything mixes well. Blend until it’s smooth. Taste your mousse after blending. If you desire more sweetness, add extra maple syrup. Blend again to mix in the syrup. Adjust to your liking for the best flavor. Chilling the mousse is very important. It allows the flavors to develop and the mousse to thicken. Cover the individual dishes with plastic wrap. Chill them in the fridge for at least 30 minutes. For serving, get creative! Garnish your mousse with dark chocolate shavings or fresh berries. This adds a pop of color and texture. You can serve it in small bowls or glasses for a fun touch. Enjoy your rich and creamy vegan chocolate avocado mousse! - Over-blending the mousse: Blending too long makes it thin. Blend just until smooth. You want a creamy texture, not soup. - Using unripe avocados: Unripe avocados are hard and bitter. Always pick ripe ones. They should feel slightly soft. - Balancing sweetness: Taste your mousse before serving. If it's too bitter, add more maple syrup. Start with a little more. Keep tasting until it’s just right. - Experimenting with additional flavorings: You can try adding a pinch of espresso or a drop of peppermint extract. These flavors can make the mousse even more exciting. - Best food processors for smooth blending: Look for a powerful food processor. A 600-watt model works well. It blends the ingredients evenly and quickly. - Storage containers for chilling the mousse: Use small bowls with lids. This keeps the mousse fresh. Glass containers are a great choice. They help keep the mousse cool and tasty. For the full recipe, check out the [Full Recipe]. {{image_4}} You can make your Vegan Chocolate Avocado Mousse even more fun by adding nut butters. Try almond or peanut butter for a rich and creamy taste. These nut butters enhance the texture and add healthy fats. You can also infuse flavors like coffee or mint. A splash of coffee brings a deep, bold taste. Mint adds a refreshing twist that brightens up the dessert. Both options create a unique mousse that surprises and delights. For those with dietary needs, gluten-free variations are easy to make. All the ingredients in this mousse are naturally gluten-free. This makes it a great choice for anyone avoiding gluten. You can also opt for sugar-free alternatives. Using stevia or monk fruit keeps the mousse sweet without added sugar. These substitutes do not change the creamy texture. You can enjoy a guilt-free treat that still tastes amazing. Transform your mousse into parfaits for a stunning dessert. Layer the mousse with fresh fruits or granola in clear cups. This adds color and texture, making your dessert look beautiful. You can use the mousse as a filling for cakes or other desserts. It works well between layers of cake or as a filling for tart shells. This gives you a chance to be creative with your presentation. For the complete recipe, check out the Full Recipe section. To keep your Vegan Chocolate Avocado Mousse fresh, follow these steps: - Chill the mousse: After making it, cover your mousse with plastic wrap or a lid. This helps prevent air from getting in. - Use airtight containers: Store the mousse in airtight containers. This keeps it from absorbing other flavors in the fridge. - Refrigerate promptly: Place it in the fridge as soon as it's ready. This helps maintain its creamy texture. The mousse stays fresh for about 3 to 5 days in the fridge. Always check for any changes in smell or texture before serving. Can you freeze Vegan Chocolate Avocado Mousse? Yes, you can! Freezing is a great option if you want to store it longer. - Portion it out: Divide the mousse into small portions before freezing. This makes it easy to thaw only what you need. - Use freezer-safe containers: Make sure to use containers that are safe for freezing. This prevents freezer burn. When you're ready to enjoy it again, follow these steps to thaw: - Thaw in the fridge: Place the frozen mousse in the fridge overnight. This keeps it at a safe temperature while it thaws. - Stir before serving: After thawing, give the mousse a quick stir. This helps regain its smooth texture. By following these storage and freezing tips, you can enjoy your Vegan Chocolate Avocado Mousse at its best. For the complete recipe, check out the Full Recipe section. Yes, you can use different sweeteners. Honey or agave syrup works well too. Each sweetener changes the taste slightly. Honey adds a floral note, while agave is milder. You can experiment to find your favorite. Just keep the amount similar to maple syrup for the best results. This mousse stays fresh for about three days in the fridge. Store it in an airtight container to keep it from drying out. The mousse may thicken as it sits, so stirring it gently can help restore its creamy texture. Enjoy it within this timeframe for the best flavor and quality. Yes, this dessert is quite healthy! Avocados are full of good fats and nutrients. They can boost heart health and provide fiber. Cocoa powder is also rich in antioxidants, adding to the health benefits. This mousse is a guilt-free treat that satisfies your sweet tooth while nourishing your body. Absolutely! To make it nut-free, choose oat milk or soy milk instead of almond milk. Both options work well and keep the mousse creamy. Ensure your cocoa powder is also nut-free. With these swaps, you can enjoy this tasty dessert without any nut allergy concerns. Vegan Chocolate Avocado Mousse is simple and fun to make. You learned about key ingredients like ripe avocados, cocoa powder, and sweeteners. I shared tips on preparation, blending, and storing your mousse. Mixing in flavors or making parfaits adds creativity. Remember, use ripe avocados for the best taste. This mousse is healthy and easily customizable for different diets. Enjoy your tasty treat, and don't hesitate to share your own variations!](https://joymealplan.com/wp-content/uploads/2025/06/f08f53b2-ba89-49fb-bc73-48bd2b3a08b2-768x768.webp)


