Honey Garlic Glazed Salmon Flavorful and Easy Recipe

Are you ready to elevate your dinner game with a dish that’s both quick and delicious? This Honey Garlic Glazed Salmon recipe packs a flavorful punch, perfect for busy weeknights or special occasions. With simple ingredients like honey, soy sauce, and garlic, you can create a meal that’s not only easy to make but also bursting with taste. Let’s dive into making this mouthwatering dish that will impress your family and friends!
Ingredients
Creating honey garlic glazed salmon is simple and fun. Here’s what you need:
– 4 salmon fillets (approximately 6 oz each)
– 1/4 cup honey
– 3 tablespoons low sodium soy sauce
– 4 cloves garlic, finely minced
– 1 tablespoon fresh ginger, finely grated
– 1 tablespoon rice vinegar
– 1 tablespoon sesame oil
– 2 green onions, thinly sliced (for garnish)
– Sesame seeds (for garnish)
– Salt and pepper to taste
These ingredients work together to create a sweet and savory glaze. The honey adds a rich sweetness, while the soy sauce gives depth. Garlic and ginger bring warmth and flavor. This blend makes the salmon shine.
Step-by-Step Instructions
Preparing the Marinade
To make the marinade, start by mixing honey, low sodium soy sauce, finely minced garlic, grated ginger, rice vinegar, and sesame oil. Take a small mixing bowl and add all these ingredients. Use a whisk to blend them together until smooth. This step brings out the sweet and savory flavors that make this dish shine.
Marinating the Salmon
Next, place your salmon fillets in a shallow dish. Pour the honey garlic marinade over the salmon, making sure each piece is well-coated. Cover the dish and refrigerate for at least 15 to 30 minutes. This allows the salmon to soak up all the flavors. If you can, turn the fillets halfway through for even marinating.
Cooking the Salmon
While the salmon is marinating, preheat your oven to 375°F (190°C). Prepare a baking sheet by lining it with parchment paper. Carefully arrange the marinated salmon fillets on the sheet, skin-side down. Lightly sprinkle salt and pepper on top to add extra flavor.
Bake the salmon for 15 to 20 minutes. It’s done when it turns opaque and flakes easily with a fork. Halfway through baking, baste the salmon with the reserved marinade. This adds more flavor and gives it a shiny finish.
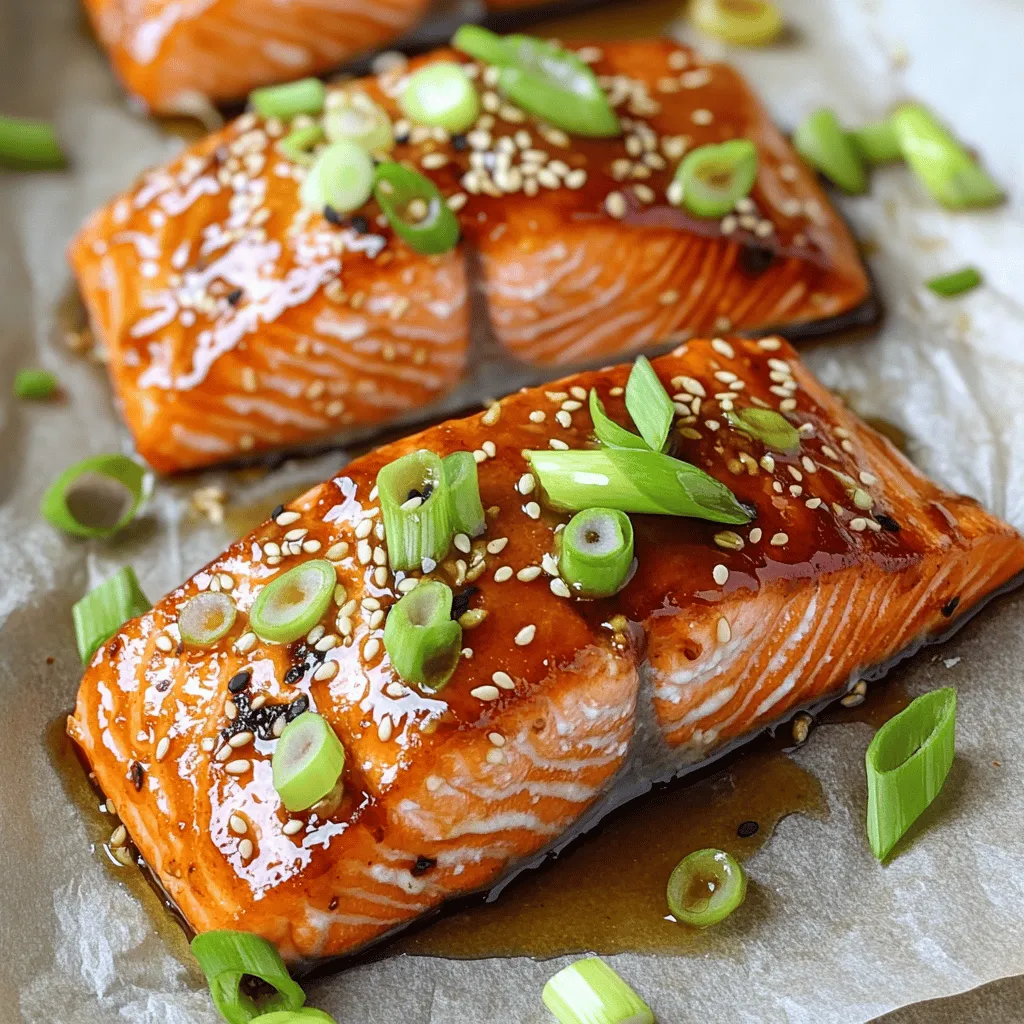
Once the salmon is fully cooked, take it out of the oven. You can serve it right away, garnished with sliced green onions and sesame seeds for a nice touch.
Tips & Tricks
Perfecting Your Honey Garlic Glazed Salmon
To make the best honey garlic glazed salmon, focus on key cooking temperatures. Preheat your oven to 375°F (190°C). This heat helps the salmon cook evenly without drying out. Bake the salmon for 15 to 20 minutes. It’s ready when it turns opaque and flakes easily. Use a fork to check for doneness.
Flavor enhancing techniques can elevate your dish. Consider basting the salmon midway through cooking. This adds moisture and extra flavor from the marinade. Also, let the salmon marinate for at least 15 to 30 minutes. This step allows the flavors to soak in deeply.
Serving Suggestions
For sides, serve the salmon with steamed broccoli or fluffy rice. Both pair well with the sweet and savory glaze. You can also add a fresh salad with citrus dressing. This contrast brightens the meal.
Presentation matters, too. Arrange the salmon on a platter. Garnish with green onions and sesame seeds for color and crunch. This makes the dish inviting for special occasions.
Essential Cooking Equipment
You need a few tools for this recipe. A mixing bowl for the marinade is essential. A whisk helps blend the ingredients well. Use a shallow dish for marinating the salmon. A baking sheet lined with parchment paper simplifies cleanup.
Quality ingredients matter for flavor. Choose fresh salmon fillets for the best taste. Look for good quality honey and soy sauce. These choices enhance the dish and make it truly memorable.

Variations
Altering the Flavor Profile
You can change the taste of honey garlic glazed salmon easily. Want a kick? Add chili flakes or fresh herbs like parsley or cilantro. They add bright and fresh flavors. For a different twist, use maple syrup instead of honey. You can also try coconut aminos in place of soy sauce for a sweeter taste. These changes can make the dish unique and fun.
Cooking Methods
You can cook your salmon in many ways. Grilling gives a nice smoky flavor. It also adds pretty grill marks. Baking is simple and easy, and it keeps the salmon moist. Pan-searing is another great method. It gives a crispy edge and a nice golden color. Each method brings its own charm to the dish.
Dietary Adjustments
If you need gluten-free options, swap the soy sauce for tamari. It tastes great and works well in the recipe. For those on low-carb or keto diets, use a sugar-free honey alternative. This keeps the flavor while fitting your diet. These swaps let everyone enjoy this tasty dish.
Storage Info
Storing Leftovers
After enjoying your honey garlic glazed salmon, store it properly to keep it fresh. Place any leftover salmon in an airtight container. This helps to keep the salmon moist. If you have a vacuum sealer, use that for even better results. Store the container in the fridge. Enjoy the salmon within three days for the best taste.
Reheating Tips
To reheat the salmon without drying it out, use the oven. Preheat to 275°F (135°C). Place the salmon on a baking sheet, cover it with aluminum foil, and heat for about 15 minutes. This method keeps the salmon juicy. You can also use the microwave. Heat it in short bursts of 30 seconds at medium power. Check it often to avoid overcooking.
Freezing Instructions
If you want to freeze marinated salmon, wrap each fillet in plastic wrap. Then, place them in a freezer bag. Remove as much air as possible to prevent freezer burn. For best results, use the salmon within three months. When you’re ready to cook, thaw it in the fridge overnight. This gives you the best texture and flavor for your honey garlic glazed salmon.
FAQs
How do I prevent the salmon from drying out?
To keep your salmon juicy, watch the cooking time closely. Bake it for 15 to 20 minutes. The fish should turn opaque and flake easily with a fork. Use the marinade to baste the salmon halfway through cooking. This adds moisture and flavor. Marinading the salmon for at least 30 minutes in the honey garlic mix helps, too.
Can I use frozen salmon for this recipe?
Yes, you can use frozen salmon. First, thaw it in the fridge overnight. If you’re short on time, place it in a sealed bag and submerge in cold water for about an hour. Once thawed, pat it dry and marinate as usual. This helps the flavors soak in.
What can I substitute for honey?
If you need a honey swap, try maple syrup or agave nectar. Both add sweetness but provide different tastes. You can also use brown sugar mixed with water for a similar effect. Adjust the amount based on your taste preference. This way, you can enjoy the dish with your favorite flavors.
This blog post covered everything you need for delicious honey garlic glazed salmon. We explored the ingredients, simple steps to cook, and storage tips. Remember, the key to moist salmon is proper marination and cooking times. With these techniques, you can enjoy this tasty dish with various sides or cooking methods. Don’t forget to experiment with flavors and dietary needs to make it your own. Enjoy making and sharing this delightful meal!


![To make sticky orange chicken, you'll need a few simple yet flavorful items. Here is a complete list of ingredients you'll need for this recipe: - 1.5 lbs boneless, skinless chicken thighs - 1/2 cup cornstarch - 2 tablespoons vegetable oil - 3 cloves garlic, finely minced - 1-inch piece of fresh ginger, grated - 1/4 cup low sodium soy sauce - 1/2 cup freshly squeezed orange juice - Zest of 1 medium orange - 1/4 cup honey - 2 tablespoons rice vinegar - 1/2 teaspoon red pepper flakes (optional) - 2 green onions, finely chopped, for garnish - Sesame seeds, for garnish Using high-quality chicken is key for this dish. Chicken thighs stay juicy and tender. Cornstarch is essential for a crispy texture. Vegetable oil helps with frying and flavor. Fresh garlic and ginger bring bold taste to the sauce. Orange juice and zest create a bright, zesty flavor. Honey adds sweetness that balances the dish. Rice vinegar gives a touch of tang. If you like spice, add red pepper flakes for heat. Don’t forget the green onions and sesame seeds for garnish. They add color and crunch. This recipe is simple yet packed with flavor. You can find the full recipe in earlier sections. Coating with Cornstarch Start by placing the chicken pieces in a big bowl. Pour in the cornstarch. Mix it well with your hands or a spoon. Make sure all chicken pieces are covered. This step is key for a crispy finish. Sautéing the Chicken Pieces Next, heat the vegetable oil in a large skillet or wok on medium-high heat. Once hot, add the chicken in batches. Avoid crowding the pan. Cook for about 5-7 minutes. Stir it often until the chicken turns golden brown. Check that each piece reaches 165°F inside. Remove the chicken and place it on a plate with paper towels to soak up extra oil. Sautéing Garlic and Ginger Lower the heat to medium. In the same skillet, add the minced garlic and grated ginger. Sauté for about 30 seconds. You want to smell the rich aroma of garlic and ginger. This signals it’s time to mix the sauce. Mixing the Sauce Ingredients Pour in the soy sauce, orange juice, orange zest, honey, and rice vinegar. If you like some heat, add the red pepper flakes. Stir it all together. Increase the heat slightly and let it bubble. Allow the sauce to simmer for 3-5 minutes. You want it to thicken and develop a rich flavor. Glazing the Chicken Now, return the cooked chicken to the skillet. Use a spatula to toss the chicken in the sauce. Ensure every piece gets coated. Let it cook for another 2-3 minutes. This will heat the chicken through and make it sticky and flavorful. Garnishing for Serving Take the skillet off the heat. Sprinkle the chopped green onions and sesame seeds over the chicken. These add color and crunch. Serve this dish hot and enjoy the zesty flavors of your sticky orange chicken. Check the Full Recipe for more details! Importance of Cornstarch Coating Coating the chicken in cornstarch is key for a crispy bite. It helps create a crunchy layer when you fry it. The cornstarch seals in moisture, keeping the chicken juicy. You want to ensure every piece is coated well. This simple step makes a big difference in texture and taste. Avoiding Overcrowding the Pan Do not overcrowd the pan when cooking the chicken. If you add too much at once, the chicken will steam instead of fry. This means less crispiness. Cook in batches and give each piece space. This way, you get that golden-brown color you want. Using Fresh Ingredients Using fresh ingredients makes your dish taste better. Fresh garlic and ginger give a bright flavor. Squeeze your own orange juice for the best taste. Fresh zest adds a lovely aroma. These small details make your sticky orange chicken shine. Adjusting Spice Levels If you like heat, add red pepper flakes. Start with a small amount and taste as you go. You can always add more if you want a kick. If you prefer a milder dish, skip the spice. Tailor the recipe to your taste buds. Pairing with Sides This sticky orange chicken goes well with many sides. Serve it over fluffy jasmine rice for a complete meal. Steamed broccoli or green beans also work nicely. These sides balance the sweetness of the chicken. Presentation Ideas Make your dish look as good as it tastes. Use a white plate to make the orange color pop. Drizzle some extra sauce on top. Sprinkle sesame seeds and green onions for a final touch. A pretty plate makes every meal special. For the full recipe, check out the Sticky Orange Chicken Delight. {{image_4}} You can easily switch up the protein in this dish. - Using Chicken Breasts: You can replace chicken thighs with chicken breasts. They are leaner and will still taste great. Just be sure to cook them until they are juicy. - Substituting with Tofu or Tempeh: For a plant-based option, try tofu or tempeh. Cut them into bite-sized pieces and follow the same steps as the chicken. They soak up the sauce well and give a nice texture. Feel free to play with flavors to make this dish your own. - Adding More Citrus: Want more zing? Add lime or lemon juice. A splash at the end brightens the dish and gives it a fresh twist. - Experimenting with Herbs and Spices: You can also try adding fresh herbs like cilantro or basil. A sprinkle of these can add depth and freshness. This recipe can fit many dietary needs. - Gluten-Free Modifications: If you're gluten-free, use tamari instead of soy sauce. This keeps the flavor while making it safe for your diet. - Low-Sugar Alternatives: For a low-sugar version, substitute honey with a sugar-free sweetener. This still gives sweetness without the extra calories. These variations help you enjoy Sticky Orange Chicken in your own way. Check the Full Recipe for more details! After you enjoy your sticky orange chicken, you may have some leftovers. To keep them fresh, store the chicken in an airtight container. Place it in the fridge. It will last for about 3 to 4 days. When reheating, use the microwave or a skillet. Heat it gently to avoid drying it out. A splash of water can help keep it moist. If you want to keep your sticky orange chicken longer, consider freezing it. Allow the chicken to cool completely before freezing. Place it in a freezer-safe bag or container. Remove as much air as possible to prevent freezer burn. It can stay in the freezer for up to 3 months. When you're ready to use it, thaw the chicken overnight in the fridge. For a quicker method, you can use the defrost setting on your microwave. Just be careful not to start cooking it. To maintain the best flavor, always serve your sticky orange chicken fresh. If you prepare it ahead of time, store the sauce separately. This will help keep the chicken crispy. When you are ready to serve, reheat both the chicken and sauce. Toss them together just before serving for that sticky goodness. For more details on how to make this dish, check out the Full Recipe. You can enjoy Sticky Orange Chicken with a few tasty sides. Here are some great options: - Fluffy jasmine rice - Steamed broccoli - Fried rice - Sautéed snap peas - Crisp green salad For drinks, pair it with: - Iced tea - Sparkling water with lemon - A light white wine These sides and drinks will balance the sweet and sticky flavors of the chicken. To kick up the heat in your Sticky Orange Chicken, try these tips: - Adding Heat with Pepper Flakes: Sprinkle red pepper flakes into the sauce. Start with a little and add more if needed. This gives a nice kick without overpowering the dish. - Experimenting with Hot Sauces: Mix in your favorite hot sauce. A few drops can add flavor and heat. Choose a sauce that complements the orange taste. You can adjust the heat to match your taste! Yes, you can prep Sticky Orange Chicken in advance. Here’s how: - Prep Tips for Making in Advance: Marinate the chicken in the sauce for a few hours or overnight. This adds great flavor. You can also chop the garlic and ginger ahead of time. - Adjusting Cooking Times: When cooking, make sure the chicken is heated through. If you make it ahead, just warm it on low heat in the skillet. This keeps it from drying out. These tips help you enjoy a delicious meal even on busy days. For the full recipe, check out the [Full Recipe]. This blog post guided you through making Sticky Orange Chicken, from ingredients to storage tips. Remember to coat the chicken in cornstarch for that perfect crunch. Use fresh ingredients to enhance flavor and feel free to experiment with proteins and spices. With these straightforward steps and variations, you can enjoy a tasty meal that suits your needs. Keep these tips in mind for a delicious outcome every time. Now, it’s time to bring this vibrant dish to your table!](https://joymealplan.com/wp-content/uploads/2025/06/0fb5afb5-059d-4b64-a6dc-9cc9d9794f9b-768x768.webp)


