Looking for a quick and tasty meal? You’ve come to the right place! These Honey Mustard Chicken Skewers are simple to make and bursting with flavor. I’ll guide you step-by-step through marinating and grilling the chicken to perfection. Plus, I’ll share tips to make them even better. Whether you’re a busy parent or just someone who loves good food, this recipe is perfect for you. Let’s dive in!
Ingredients
Main Ingredients for Honey Mustard Chicken Skewers
To make honey mustard chicken skewers, you need a few key items. Here’s a list of the main ingredients:
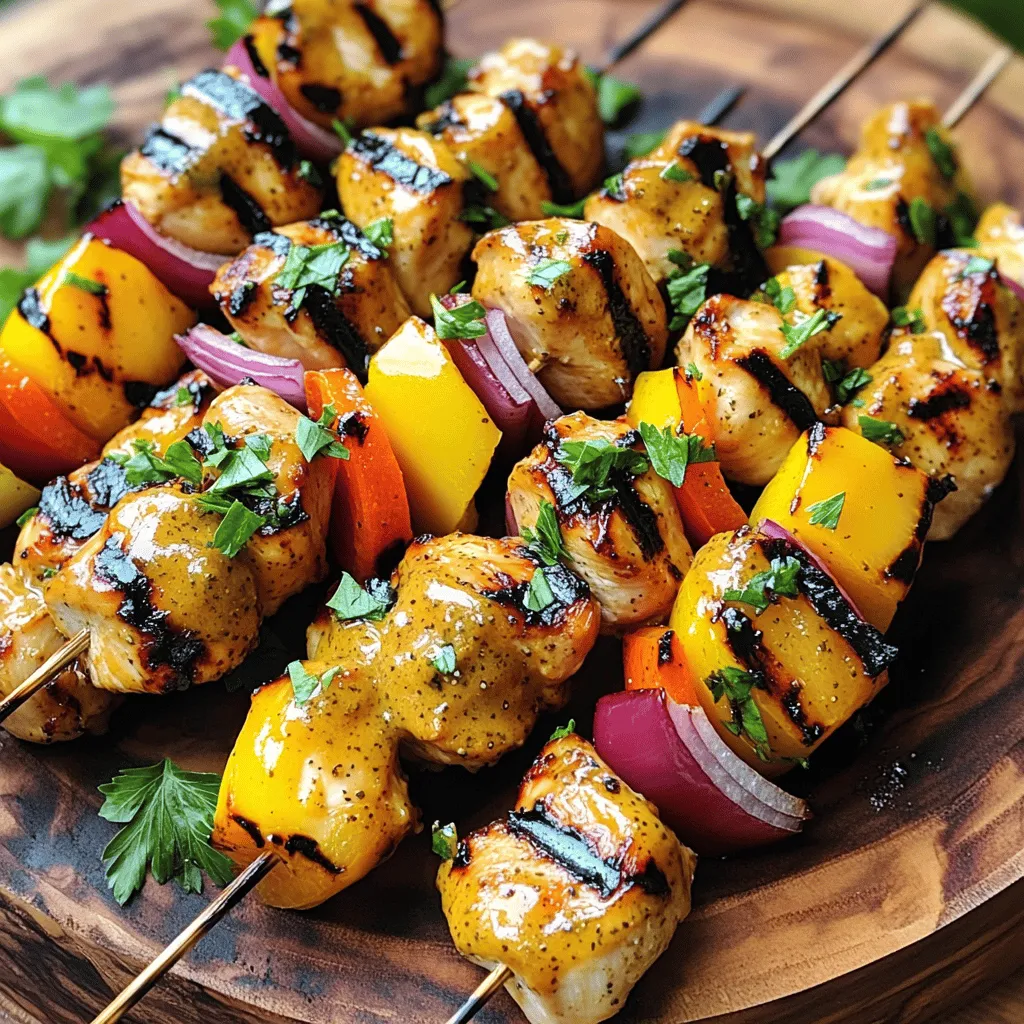
– 1 lb chicken breast, cut into 1-inch cubes
– 1 bell pepper (any color), cut into 1-inch pieces
– 1 red onion, cut into 1-inch pieces
– Wooden or metal skewers (if using wooden skewers, soak them in water for 30 minutes to prevent burning)
Marinade Components
The marinade adds flavor and tenderness to the chicken. Here are the marinade components:
– 1/4 cup honey
– 1/4 cup Dijon mustard
– 1 tablespoon olive oil
– 2 cloves garlic, minced
– 1 teaspoon smoked paprika
– Salt and freshly ground black pepper to taste
Mix these items well to create a delicious blend. The honey and mustard bring a sweet and tangy taste. The garlic and smoked paprika add depth and warmth.
Optional Garnishes
Garnishes can make your dish look even better. Here are some optional garnishes to consider:
– Fresh parsley
– Fresh cilantro
– A small bowl of warmed leftover honey mustard marinade for dipping
These simple touches can really enhance your plate. They add color and extra flavor.
Step-by-Step Instructions
Preparing the Marinade
To make the marinade, start with a large bowl. Add 1/4 cup of honey and 1/4 cup of Dijon mustard. Then, pour in 1 tablespoon of olive oil. Next, add 2 cloves of minced garlic and 1 teaspoon of smoked paprika. Finish with salt and pepper to taste. Whisk everything until it is smooth. This marinade gives the chicken a sweet and tangy flavor that makes it shine.
Marinating the Chicken
Cut 1 pound of chicken breast into 1-inch cubes. Place these cubes into the marinade. Make sure each piece is coated well. Cover the bowl with plastic wrap. Let it sit in the fridge for at least 30 minutes. If you have more time, marinate it for up to 2 hours. This step is key to infusing the chicken with flavor.
Grilling the Skewers
First, preheat your grill or grill pan to medium-high heat. While it heats, take the marinated chicken from the fridge. Start threading the chicken onto skewers. Alternate between chicken, bell pepper, and red onion pieces. This not only adds flavor but also makes the skewers look beautiful. When the grill is hot, place the skewers on it. Cook for 10-12 minutes, turning them often for even cooking. The chicken is done when it hits 165°F. Let the skewers rest for a few minutes after grilling. This step keeps the chicken juicy.
Tips & Tricks
Ensuring Perfect Grilling Temperature
Grilling at the right heat is key. Aim for medium-high heat, around 375°F to 450°F. This range helps the chicken cook evenly and develop nice grill marks. If your grill is too hot, the outside may burn before the inside cooks through. If it’s too cool, the chicken will turn dry. Use a grill thermometer to find that sweet spot.
Tips for Tender Chicken
To keep your chicken juicy, marinate it well. Use a mix of honey, Dijon mustard, and olive oil. This adds flavor and moisture. Let the chicken marinate for at least 30 minutes, but 2 hours is even better. Make sure the chicken pieces are similar in size. This helps them cook evenly and stay tender.
How to Soak Wooden Skewers
If you use wooden skewers, soak them in water for 30 minutes before grilling. This step prevents them from burning on the grill. It’s a simple trick that makes a big difference. Just fill a bowl with water and place the skewers inside. This helps them stay strong while cooking. For a fun twist, you can add herbs or spices to the soaking water for extra flavor.

Variations
Alternative Proteins
You can swap chicken for other proteins. Try shrimp, pork, or beef. Each option brings a new taste. For shrimp, use large ones. They cook fast and soak up flavors. For pork, choose tender cuts like loin. Beef works well too; just slice it thin. Adjust cooking times to ensure they are safe to eat.
Vegetarian or Vegan Adaptations
You can make this dish vegetarian or vegan too. For vegetarians, use firm tofu or tempeh. Cut them into cubes and marinate just like chicken. For vegans, use the same marinade. Pair with colorful veggies like zucchini or mushrooms. Grilling these adds great flavor. You can also try halloumi cheese for a tasty twist.
Flavor Twists: Adding Spices or Citrus
Want to change the flavor? Add spices or citrus to the marinade. Try cayenne pepper for heat. Lemon juice or zest can add brightness. You can even mix in herbs like thyme or rosemary. These simple changes can give you a whole new dish. Explore different combinations to find your favorite!
Storage Info
Storing Leftovers
After you enjoy your honey mustard chicken skewers, store any leftovers in a sealed container. They stay tasty for up to three days in the fridge. Make sure they cool down first. This way, you avoid steam and sogginess.
Reheating Tips
To reheat, place the skewers on a baking sheet. Preheat your oven to 350°F. Heat them for about 10-15 minutes, or until warm. You can also use a microwave, but the oven keeps them crispier. If you want, brush a little olive oil on them before reheating for extra flavor.
Freezing for Later
You can freeze these skewers too! Wrap them tightly in plastic wrap, then place them in a freezer bag. They can last up to three months in the freezer. When you’re ready to use them, thaw them overnight in the fridge. Then, reheat them as mentioned above.
FAQs
How long should I marinate the chicken?
You should marinate the chicken for at least 30 minutes. This allows the flavors to soak in. For even better taste, try marinating for up to 2 hours. The longer you marinate, the more flavor your chicken will have. Just be sure not to go over 2 hours, as the texture can change.
Can I use store-bought honey mustard?
Yes, you can use store-bought honey mustard. It saves time and still tastes great. Just pick a brand you like. If you want to enhance the flavor, you can mix in a bit of olive oil or garlic. This gives it a fresh twist and makes it more unique.
What can I serve with honey mustard chicken skewers?
You can serve many sides with honey mustard chicken skewers. Some great options are:
– Grilled vegetables like zucchini and corn
– Rice or quinoa for a filling side
– Fresh salad with greens and a light dressing
– A warm pita or flatbread
These sides complement the skewers and make your meal more balanced and tasty.
In this guide, we covered how to make honey mustard chicken skewers step-by-step. I shared essential ingredients, marinade tips, and grilling secrets. I also offered ideas for variations and storage tips to enjoy later. Remember, making these skewers is fun and flexible. You can adjust flavors or try different proteins. With practice, you’ll create a dish that’s sure to impress. Enjoy every bite of your tasty creation!


