Instant Pot Chicken Alfredo Rich and Creamy Delight

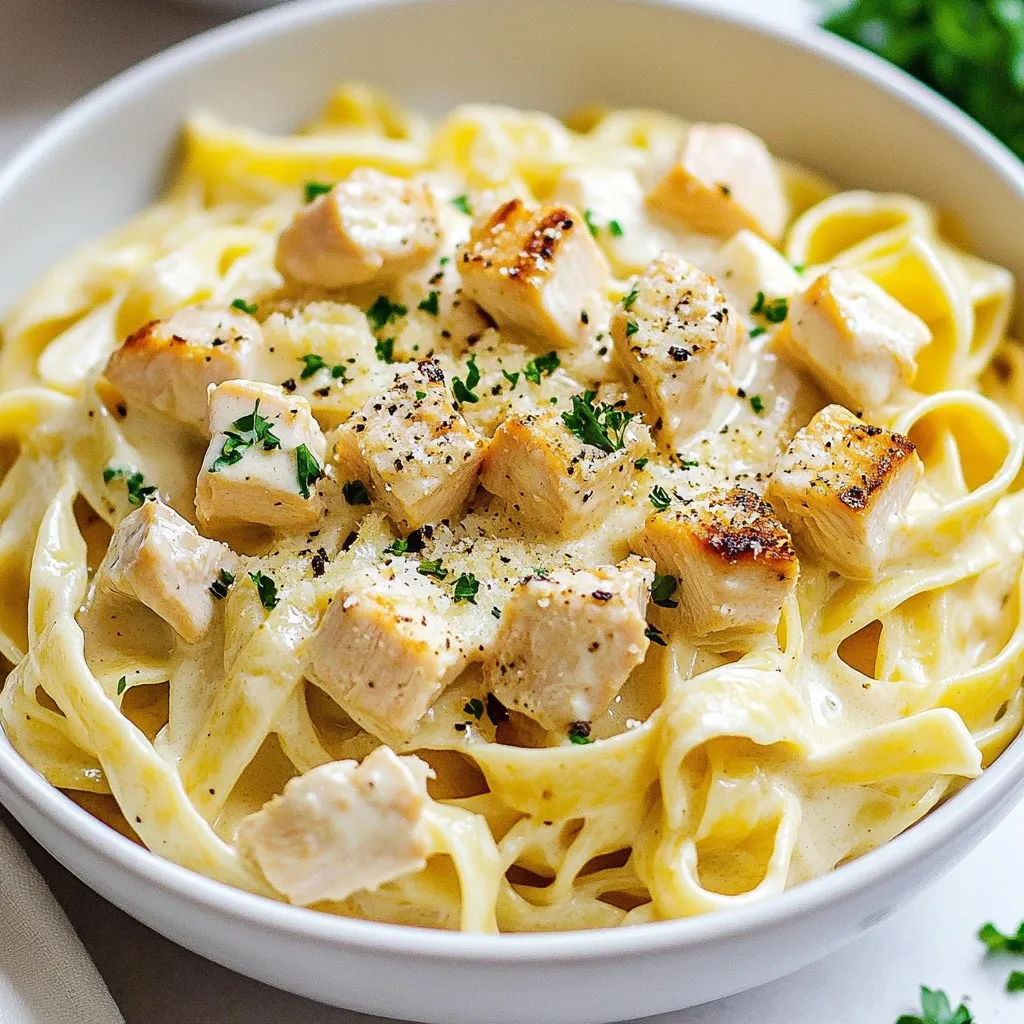
Craving a rich and creamy chicken Alfredo that cooks in minutes? Your Instant Pot can make it happen! With just a few simple ingredients and easy steps, you’ll have a delicious meal ready for any night. I’ll share not only how to prepare this dish but also tips and variations to suit your taste and needs. Dive in and discover the magic of Instant Pot Chicken Alfredo!
Why I Love This Recipe
- Quick and Easy: This recipe takes only 30 minutes from start to finish, making it perfect for busy weeknights.
- Creamy Deliciousness: The combination of heavy cream and Parmesan cheese creates a rich and creamy sauce that coats every bite of pasta.
- One-Pot Wonder: Cook everything in the Instant Pot, which means less cleanup and more time to enjoy your meal.
- Customizable: Easily add vegetables or adjust the seasoning to suit your family’s taste preferences.
Ingredients
Main Ingredients
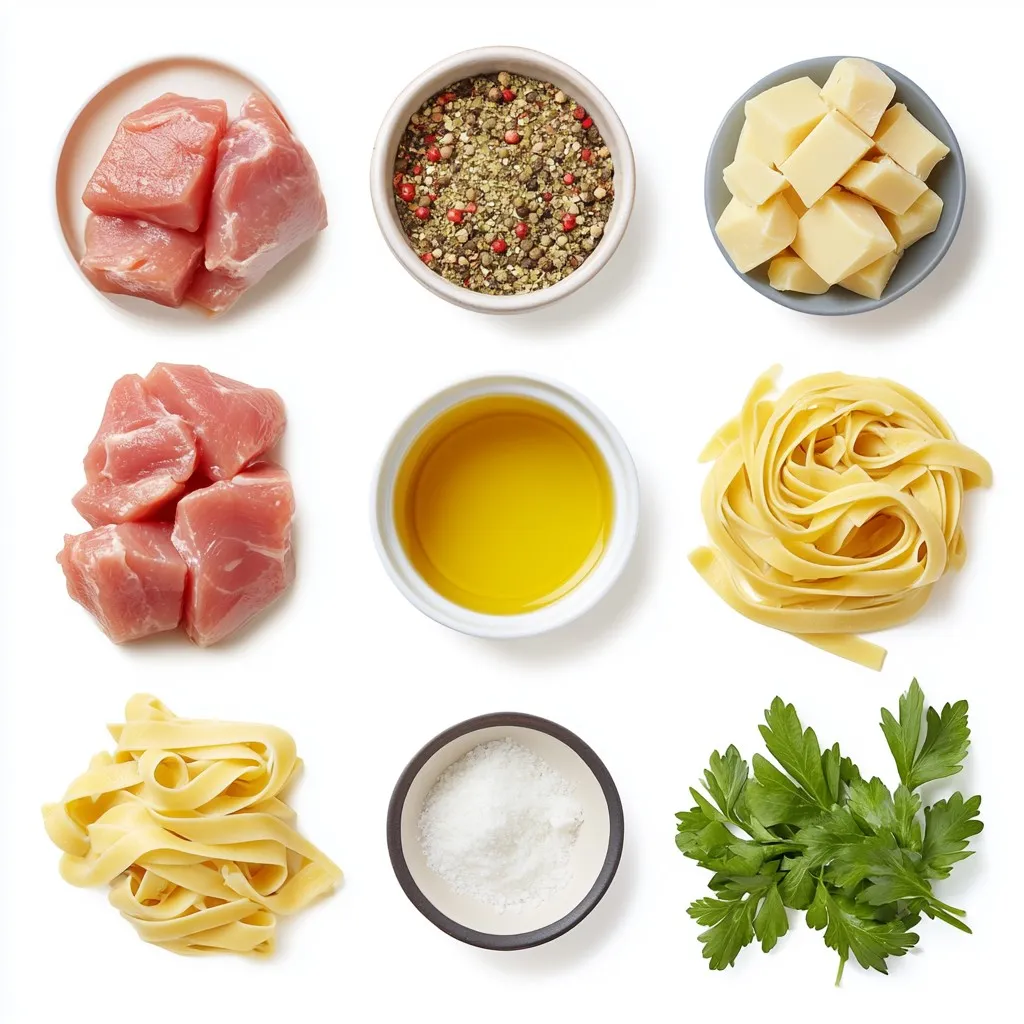
– 1 pound boneless, skinless chicken breasts, diced into bite-sized cubes
– 12 ounces fettuccine pasta
– 4 cups chicken broth (homemade or low-sodium)
– 1 cup heavy cream
– 1 cup grated Parmesan cheese (plus extra for serving)
– 3 cloves garlic, finely minced
– 1 teaspoon dried Italian seasoning
– Salt and freshly cracked black pepper, to taste
– 2 tablespoons extra virgin olive oil
The star of our dish is the chicken. It gives a nice, tender bite. Next, we have fettuccine pasta. It cooks well in the Instant Pot and holds the sauce perfectly. Chicken broth adds depth to the flavor while keeping it moist.
Heavy cream makes it rich and creamy, and Parmesan cheese adds that savory kick. Garlic and Italian seasoning infuse the dish with wonderful aromas. Salt and pepper enhance all the flavors, while olive oil helps with cooking the chicken.
Optional Garnishes
– Fresh parsley, finely chopped (for garnish)
– Additional grated Parmesan cheese
Garnishes add a fresh touch. Fresh parsley brightens the dish and adds color. Extra Parmesan gives it that cheesy finish many love. Feel free to get creative with your garnishes!

Step-by-Step Instructions
Preparing the Instant Pot
To start, I select the Sauté function on my Instant Pot. I pour in 2 tablespoons of extra virgin olive oil. After about a minute, the oil will shimmer. Now, I add 1 pound of diced chicken breasts. I make sure to season it well with salt and freshly cracked black pepper. I sauté the chicken for around 5 minutes until it turns a golden brown on all sides.
Next, I incorporate 3 cloves of finely minced garlic and 1 teaspoon of dried Italian seasoning into the pot. I sauté this mix for another 1 to 2 minutes. I keep an eye on the garlic so it doesn’t burn. Burnt garlic can ruin the dish.
Cooking the Pasta
Now comes the fun part! I carefully pour in 4 cups of chicken broth. I use a spatula to scrape any tasty bits stuck on the bottom of the pot. This process is called deglazing. It helps to boost the flavor of the dish.
Then, I add 12 ounces of fettuccine pasta. I make sure the pasta is fully submerged in the broth so it cooks evenly.
I close the lid tightly and set the Instant Pot to the Manual or Pressure Cook setting for 4 minutes.
Finishing Touches
When the cooking cycle is over, I perform a quick release of the pressure. I turn the vent to let the steam out carefully. Once the steam escapes, I open the lid with care.
I stir in 1 cup of heavy cream and 1 cup of grated Parmesan cheese. I mix it well until everything is combined. After that, I taste the dish and adjust the seasoning with more salt and pepper if needed.
I let the dish sit for about 5 minutes. This resting time helps thicken the sauce. The result is a rich and creamy delight you will love!
Tips & Tricks
Ensuring Creamy Texture
To get a rich and creamy texture, stir well after adding cream and cheese. This helps blend everything nicely. After cooking, let the dish sit for about five minutes. This resting time allows the sauce to thicken and become even creamier.
Sautéing Tips
When sautéing chicken, aim for nice browning. This adds great flavor to your dish. Be careful with garlic; sauté it just until it smells good. If garlic burns, it can make your dish taste bitter.
Instant Pot Considerations
Set the Instant Pot to high pressure. This helps cook everything evenly and quickly. To avoid pasta clumping, spread it out in the broth. Make sure all pasta is submerged for even cooking.
Pro Tips
- Use Fresh Ingredients: Fresh chicken and high-quality Parmesan cheese will elevate the flavor of your Alfredo dish significantly.
- Deglaze Properly: Make sure to scrape the bottom of the pot well while deglazing to incorporate all the delicious browned bits into the sauce.
- Don’t Overcook the Pasta: The pasta will continue to cook slightly after pressure cooking, so ensure you set the timer for exactly 4 minutes.
- Adjust Consistency: If the sauce is too thick after resting, add a splash of chicken broth or extra cream to reach your desired consistency.

Variations
Dietary Substitutions
You can change up this recipe to fit your diet. For gluten-free pasta, choose rice or quinoa pasta. These options work well and still taste great. For a dairy-free version, use coconut cream or cashew cream. They provide a rich texture without dairy.
Flavor Enhancements
Adding veggies is a smart way to boost nutrition. Consider spinach, broccoli, or peas. Just add them in with the pasta. You can also spice things up with red pepper flakes. This little kick adds fun heat and makes the dish more exciting.
Protein Alternatives
If you want a twist, swap chicken for shrimp or sausage. Shrimp cooks quickly and adds a nice flavor. For a vegetarian option, use mushrooms or a mix of your favorite veggies. They soak up the sauce well and make the dish hearty.
Storage Info
Refrigeration Instructions
To keep your Chicken Alfredo fresh, store it in the fridge. Place leftovers in an airtight container. Make sure to cool the dish to room temperature before sealing. This helps prevent bacteria growth. The Alfredo will stay good for about three to four days. Remember, the sooner you eat it, the better the taste!
Reheating Tips
When you reheat Chicken Alfredo, you want to keep it creamy. The stovetop is the best choice for this. Pour the leftovers into a pan over low heat. Stir often and add a splash of cream or broth if it seems thick. If you use the microwave, heat it in short bursts. Stir between each burst to help it heat evenly.
Freezing Guidelines
Yes, you can freeze Chicken Alfredo! First, let it cool completely. Then, put it in a freezer-safe container. Make sure to leave some space at the top for expansion. It can freeze well for up to three months. When you’re ready to eat it, thaw it in the fridge overnight. Reheat it on the stove with a bit of cream to restore its creamy texture. Enjoy!
FAQs
How long does it take to cook Chicken Alfredo in an Instant Pot?
Cooking Chicken Alfredo in an Instant Pot takes about 30 minutes from start to finish. This includes prep time and cooking time. The actual cooking time under pressure is just 4 minutes. However, don’t forget to count the time it takes for the pot to come to pressure. This can add an extra 10 to 15 minutes. The total time may vary based on your model and the amount of ingredients.
Can I use frozen chicken for this recipe?
Yes, you can use frozen chicken for this recipe. Just remember to add a few extra minutes to the cooking time. If you use frozen chicken breasts, cook them for 6 to 8 minutes under pressure. Make sure the chicken pieces are about the same size for even cooking. Always check that the chicken is cooked through before serving.
What can I use instead of heavy cream?
If you want a lower fat option, there are several ingredients you can use instead of heavy cream. Here are some ideas:
– Half-and-half: This is a great substitute that keeps it creamy.
– Greek yogurt: This adds creaminess and protein. Mix it in after cooking.
– Coconut milk: This option gives a hint of sweetness and is dairy-free.
– Milk with a little flour: This can help thicken the sauce while keeping it light.
These alternatives can change the flavor, so choose what you like best!
This blog post covered making Chicken Alfredo in an Instant Pot. We explored the main ingredients like chicken, pasta, and broth, and optional garnishes such as fresh herbs. I shared step-by-step instructions for cooking. You learned essential tips for a creamy texture and sautéing. We also discussed tasty variations and storage tips.
In summary, this dish is quick and adaptable. Whether you prefer it classic or with twists, Chicken Alfredo is sure to please. Enjoy your cooking journe

Creamy Instant Pot Chicken Alfredo Delight
Ingredients
- 1 pound boneless, skinless chicken breasts, diced into bite-sized cubes
- 12 ounces fettuccine pasta
- 4 cups chicken broth (homemade or low-sodium)
- 1 cup heavy cream
- 1 cup grated Parmesan cheese (plus extra for serving)
- 3 cloves garlic, finely minced
- 1 teaspoon dried Italian seasoning
- to taste Salt and freshly cracked black pepper
- 2 tablespoons extra virgin olive oil
- for garnish Fresh parsley, finely chopped
Instructions
- Begin by selecting the Sauté function on your Instant Pot. Pour in the olive oil and allow it to heat up for about a minute until shimmering.
- Add the diced chicken to the pot, seasoning it generously with salt and pepper. Sauté the chicken for approximately 5 minutes, stirring occasionally, until it is nicely browned on all sides.
- Incorporate the minced garlic and Italian seasoning into the pot. Sauté for an additional 1-2 minutes, or until the garlic becomes fragrant but not browned, to avoid bitterness.
- Carefully pour in the chicken broth, using a spatula to scrape any flavorful bits stuck to the bottom of the pot (this process is called deglazing).
- Add the fettuccine pasta to the pot, ensuring that it is fully submerged in the broth for even cooking.
- Close the lid securely on the Instant Pot and set it to the Manual or Pressure Cook setting for 4 minutes.
- Once the cooking cycle is finished, perform a quick release of the pressure by carefully turning the vent to release the steam.
- When the steam has fully escaped, open the lid with caution. Stir in the heavy cream and grated Parmesan cheese, mixing thoroughly until fully incorporated. Taste and adjust the seasoning with additional salt and pepper if necessary.
- Allow the dish to sit for about 5 minutes. This will help it thicken slightly, enhancing the creamy texture.
- Serve the Chicken Alfredo hot, with a generous sprinkle of freshly chopped parsley and extra Parmesan cheese on top for added flavor and presentation.


![- 8 corn tortillas - 1 cup black beans, drained and rinsed - 1 cup corn kernels (fresh or frozen) - 1 red bell pepper, diced - 1 small zucchini, diced - 1 cup fresh spinach, chopped - 1 teaspoon ground cumin - 1 teaspoon chili powder - 1/2 teaspoon garlic powder - 1 1/2 cups enchilada sauce - 1 cup shredded cheese - 1 tablespoon olive oil - Salt and pepper to taste - Fresh cilantro for garnish You can swap black beans for pinto or kidney beans. You might also try non-dairy cheese if you want a vegan option. If you need gluten-free, use gluten-free tortillas. These swaps keep the recipe flexible and fun! Each serving has about 300 calories. You get protein from beans and fiber from veggies. Black beans boost heart health, while spinach adds iron. Corn gives you energy, making these enchiladas not just tasty but also good for you. - Preheat the oven to 375°F (190°C). - In a large skillet, heat 1 tablespoon of olive oil over medium heat. - Add 1 diced red bell pepper and 1 small diced zucchini. - Sauté for about 5 minutes until they soften. Stir often to avoid sticking. - Next, stir in 1 cup of drained black beans, 1 cup of corn, and 1 cup of chopped spinach. - Cook for 3-4 minutes until the spinach wilts. - Season the mix with 1 teaspoon of ground cumin, 1 teaspoon of chili powder, and 1/2 teaspoon of garlic powder. - Add salt and pepper to taste. Mix well and cook for another 2 minutes. - Pour 1/2 cup of enchilada sauce into a baking dish. Spread it evenly across the bottom. - Warm 8 corn tortillas in the microwave for 20 seconds, or heat them in a skillet. - Take one tortilla and spoon a portion of the filling into the center. - Sprinkle some shredded cheese on top, then roll it up tightly. Place the rolled tortilla seam-side down in the baking dish. - Repeat this for all the tortillas until the filling is used up. - Pour the remaining enchilada sauce over the assembled enchiladas. - Sprinkle the remaining shredded cheese on top of the sauce. - Place the dish in the oven and bake for 20-25 minutes. Look for melted and bubbly cheese. - Allow the enchiladas to cool for a few minutes before serving. Enjoy with fresh cilantro if you like! For the full recipe, check the details above. - Add smokiness with chipotle peppers: Chipotle peppers add a rich, smoky taste. You can use them in the filling or mix them into the sauce. Just chop a few and add them to your veggies while cooking. This will elevate the flavor profile. - Use fresh herbs for garnish: Fresh herbs brighten up your dish. I love adding cilantro or parsley on top before serving. It adds color and freshness, making the enchiladas look even more appealing. - Importance of softening tortillas: Softening the tortillas is key. If they are too hard, they will crack when you roll them. Heat them in the microwave for 20 seconds or warm them on a skillet. This makes them easy to roll and fill without breaking. - Tips for perfectly melted cheese: To get that perfect melt, use a cheese blend with good melting properties. Cheddar and Monterey Jack work great. Add a little extra cheese on top when baking for a delicious, bubbly finish. - Pair with side dishes: Serve your enchiladas with rice or beans on the side. These help balance the meal and add more protein. You can also serve them with a simple salad for extra crunch. - Ideas for toppings: Top your enchiladas with sour cream or guacamole. These creamy toppings add richness and flavor. You can also sprinkle some diced onions or jalapeños for extra spice. These tips will help you make your vegetarian enchiladas even more delicious. For the full recipe, check out the [Full Recipe]. {{image_4}} You can make your enchiladas even better by changing the filling. - Adding roasted vegetables: Roasting veggies like carrots, eggplant, or butternut squash adds depth. The sweet, caramelized flavor makes the filling more exciting. - Using different kinds of cheese: Try mixing cheeses like queso fresco or pepper jack. Each cheese brings its unique taste. This change can keep your enchiladas fresh and fun. The sauce can change the whole dish. - Homemade enchilada sauce recipe: Making your own sauce is simple and rewarding. Blend tomatoes, chili powder, and spices for a rich flavor. This way, you control the heat and taste. - Alternatives like verde sauce: If you like a fresh twist, try verde sauce made with tomatillos. It adds a nice tangy kick that contrasts well with the cheese and veggies. You can adjust the recipe to fit various diets. - Vegan version of enchiladas: Swap cheese for a nut-based cheese or leave it out. Use more beans and veggies to fill the tortillas. You still get a hearty meal without animal products. - Low-carb or keto adaptations: Use lettuce wraps instead of tortillas. This swap keeps the taste while reducing carbs. You can still enjoy the flavors of enchiladas without the extra carbs. For a complete guide on making these delicious meals, check out the Full Recipe. To store leftovers, first, let the enchiladas cool down. Place them in an airtight container. This keeps them fresh and tasty. Glass or plastic containers work well. I prefer glass for easy reheating. If you want to freeze enchiladas, wrap them tightly in plastic wrap. Then, place them in a freezer-safe bag or container. Label the bag with the date. To reheat frozen enchiladas, remove them from the freezer. Let them thaw in the fridge overnight. Bake in a preheated oven at 350°F (175°C) until hot. In the fridge, these enchiladas last about 3 to 5 days. Always check for signs of spoilage. Look for off smells, mold, or changes in color. If you see any of these, it’s best to throw them out. Enjoy your tasty vegetarian enchiladas with confidence! For the full recipe, check the earlier sections. To prevent soggy enchiladas, apply the sauce wisely. Use a thin layer on the bottom of your dish. Do not drown the rolled enchiladas in sauce. Pour the rest of the sauce on top after filling them. Bake them just right. Overcooking can cause sogginess. Bake at 375°F for 20-25 minutes. This keeps them firm and tasty. Yes, you can use flour tortillas. They are softer and easier to roll. However, corn tortillas add a nice flavor. They are also gluten-free. Flour tortillas can get too soft and break. Each type has its charm. Choose based on your taste and needs. Many sides pair well with vegetarian enchiladas. Try Mexican rice for a classic touch. Beans add protein and fiber. A fresh salad can balance the meal. Guacamole or sour cream makes a great dip. You can also serve with a refreshing drink. Consider agua fresca or a light beer. These sides enhance the flavor of your enchiladas. Enjoy exploring different pairings! This blog post covered all you need for delicious vegetarian enchiladas. We discussed key ingredients, from black beans to fresh spinach. I shared tips on prepping and cooking, plus variations for your taste. You learned how to store leftovers and reheat them. These enchiladas are tasty, healthy, and easy to make. Enjoy trying different flavors and ingredients. Whether for a quick dinner or a party, these enchiladas will impress everyone. Now, get in the kitchen and start cooking!](https://joymealplan.com/wp-content/uploads/2025/06/0bc30ee8-fb20-468c-811c-2f42a5691433-768x768.webp)


