Instant Pot Creamy Mac & Cheese Flavorful Delight

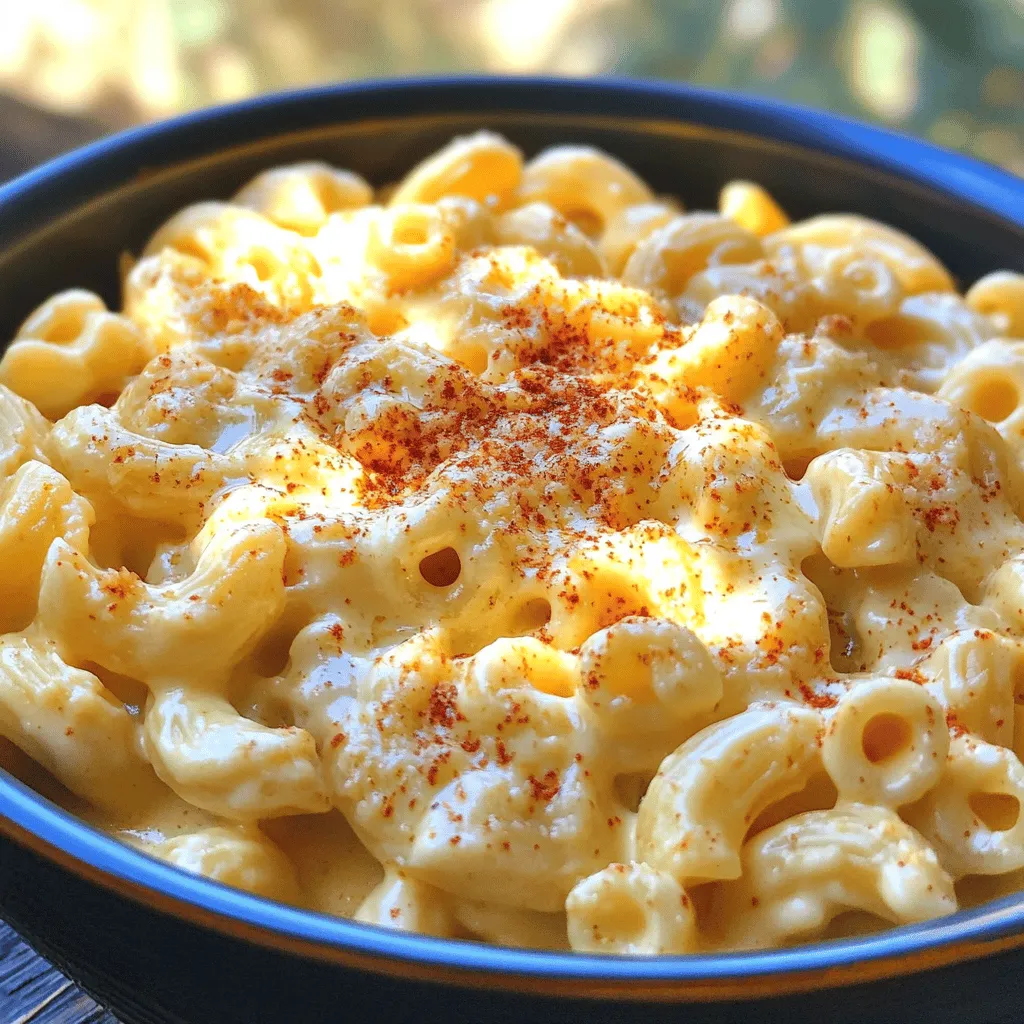
If you crave a creamy, cheesy dish that’s quick and easy, you’ve found it! My Instant Pot Creamy Mac & Cheese is a flavorful delight that packs comfort in every bite. In this post, I’ll share simple ingredients, easy steps, and tips to make the perfect mac and cheese. Ready to impress your taste buds? Let’s dive in!
Ingredients
List of Required Ingredients
To make the perfect Instant Pot creamy mac and cheese, gather these simple ingredients:
– 8 oz elbow macaroni
– 4 cups water
– 1 teaspoon salt
– 2 tablespoons unsalted butter
– 1 cup sharp cheddar cheese, shredded
– 1 cup fresh mozzarella cheese, shredded
– 1/2 cup cream cheese, softened
– 1 teaspoon garlic powder
– 1 teaspoon onion powder
– 1/2 teaspoon smoked paprika
– 1/2 teaspoon ground black pepper
– 1/4 cup grated Parmesan cheese (for topping)
Recommended Cheese Types
For a rich and creamy flavor, I recommend using:
– Sharp cheddar cheese for tanginess
– Fresh mozzarella cheese for stretchiness
– Cream cheese for smoothness
These cheeses blend well, creating a smooth and tasty sauce. You can also experiment with other varieties like gouda or fontina for unique flavors.
Tools and Equipment Needed
To make this dish, you will need:
– Instant Pot
– Measuring cups and spoons
– A mixing spoon
– Grater for the cheese
– Serving bowls
This equipment helps streamline the cooking process and ensures you achieve the best results.
Step-by-Step Instructions
Preparing the Macaroni
Start by taking 8 ounces of elbow macaroni. Pour it into your Instant Pot. Add 4 cups of water and 1 teaspoon of salt. This salt boosts the flavor. Secure the lid tightly. Make sure the pressure valve is set to sealing.
Cooking in the Instant Pot
Now, press the Manual or Pressure Cook button. Set the timer for 4 minutes on high pressure. This cooks the macaroni just right. When the timer goes off, carefully do a quick release. Turn the valve to venting to let out steam. Be careful; the steam is hot!
Once you remove the lid, stir the macaroni. This helps break up any clumps.
Creating the Creamy Cheese Sauce
Next, add 2 tablespoons of unsalted butter. Let it melt into the hot macaroni. Then, mix in 1 cup of sharp cheddar cheese and 1 cup of fresh mozzarella cheese. Add 1/2 cup of softened cream cheese for a rich taste.
Now, sprinkle in 1 teaspoon of garlic powder, 1 teaspoon of onion powder, 1/2 teaspoon of smoked paprika, and 1/2 teaspoon of ground black pepper. Stir gently until all the cheese melts. This makes your sauce creamy and smooth.
If you want it thicker, use the Sauté function. Cook for an extra 2-3 minutes while stirring.
Serve your mac and cheese hot. Top it with 1/4 cup of grated Parmesan cheese for a delicious finish. Enjoy this cheesy delight!
Tips & Tricks
Achieving the Perfect Creamy Texture
To get that smooth and creamy texture, use a mix of cheeses. I suggest sharp cheddar and fresh mozzarella. These melt well and blend nicely. Cream cheese adds richness too. Stir the mixture gently until all the cheese melts. If you want it creamier, use the Sauté function for a few minutes. This thickens the sauce perfectly.
Flavor Enhancements and Additions
Want to boost the flavor? Try adding cooked bacon or ham. They add a salty punch. You can also mix in sautéed vegetables, like spinach or mushrooms, for extra taste and nutrition. For a spicy kick, add crushed red pepper or jalapeños. A sprinkle of smoked paprika gives a nice depth to the flavor.
Troubleshooting Common Issues
If your mac and cheese turns out too thick, add a splash of milk or water. Stir gently until you get the right consistency. If it’s too thin, use the Sauté mode again to thicken it. Remember to keep stirring. If you notice clumps of cheese, this often happens from rushing. Just take your time to stir until smooth.

Variations
Adding Protein Options
Want to make your mac and cheese heartier? You can add protein for a filling meal. Cooked bacon adds a nice crunch. Chicken or turkey can also work well. For a vegetarian option, try adding cooked lentils or chickpeas. They pack protein and blend nicely with the creamy cheese.
Vegetarian and Vegan Alternatives
If you prefer a vegetarian or vegan dish, swap out the cheeses. Use vegan cheese that melts well. Nutritional yeast can give a cheesy flavor without dairy. Coconut cream can add richness. You can also add extra veggies like spinach or broccoli. These add color and nutrition to your meal.
Flavor Profiles to Experiment With
Don’t be afraid to get creative with flavors! Add spices like cayenne pepper for heat. A dash of mustard powder gives a nice tang. Try mixing in roasted garlic for a sweet, rich taste. Fresh herbs like basil or parsley can brighten up the dish. Each change will give you a new twist on this classic recipe!
Storage Info
How to Store Leftovers
After enjoying your Instant Pot creamy mac and cheese, you might have some leftovers. To store them, first let the dish cool to room temperature. Then, place it in an airtight container. Make sure to close it tightly to keep out air. Store it in the fridge for up to three days. This helps maintain its tasty flavor and creamy texture.
Reheating Methods
When you’re ready to eat the leftovers, there are a few ways to reheat them. The microwave is the quickest option. Just place the mac and cheese in a microwave-safe bowl. Heat in short bursts of about 30 seconds, stirring in between. If you want a stovetop method, add a little milk to a pan. Heat on low, stirring often, until warm. This helps bring back the creaminess.
Freezing for Future Meals
If you have more leftovers than you can eat, consider freezing them. First, let the mac and cheese cool completely. Then, scoop it into freezer-safe bags or containers. Remove as much air as possible before sealing. You can freeze it for up to three months. When you’re ready to enjoy it again, thaw it in the fridge overnight. Reheat as mentioned above for a delicious meal anytime.
FAQs
How do I prevent the macaroni from sticking?
To stop the macaroni from sticking, use enough water. I suggest using 4 cups for 8 ounces of elbow macaroni. Make sure to stir after cooking to break up clumps. If you notice sticking, add a little extra butter or cheese when mixing. This will help create a creamy sauce that binds the pasta together.
Can I make this recipe without an Instant Pot?
Yes, you can make this recipe on the stovetop. Start by boiling the macaroni in a large pot with water. Cook it according to the package directions. Once drained, mix in the butter and cheeses just like in the Instant Pot method. This gives you a creamy mac and cheese too, but it may take a bit longer.
What is the best cheese for creamy mac and cheese?
The best cheeses for creamy mac and cheese are sharp cheddar and fresh mozzarella. I love adding cream cheese to enhance the creaminess. You can mix in other cheeses, like gouda or fontina, for extra flavor. The key is to use a combination of cheeses for the best taste and texture.
This guide covered everything you need for mac and cheese. You learned about key ingredients, tools, and step-by-step cooking instructions. We also shared tips for perfect texture, added flavors, and how to handle common issues. Plus, you discovered variations for proteins and dietary needs, storage tips, and answers to FAQs.
As you dive into making mac and cheese, remember that practice makes perfect. Enjoy experimenting with flavors and techniques to make your dish truly your own. Your creamy mac and cheese adventure starts now!


![To make this savory sweet potato black bean chili, gather these main ingredients: - 2 medium sweet potatoes, peeled and cut into 1-inch cubes - 1 can (15 oz) black beans, thoroughly rinsed and drained - 1 can (14.5 oz) diced tomatoes - 1 medium onion, finely chopped - 2 cloves garlic, finely minced - 1 bell pepper, diced - 1 cup vegetable broth - 2 teaspoons ground cumin - 1 teaspoon smoked paprika - 1 teaspoon chili powder - ½ teaspoon dried oregano - Salt and freshly cracked pepper to taste - 2 tablespoons extra virgin olive oil - Fresh cilantro, chopped, for garnish - Lime wedges, for serving If you want to take your chili to the next level, you can add some optional ingredients: - 1-2 jalapeños, diced for heat - 1 cup corn, for sweetness and crunch - 1 teaspoon cayenne pepper, for extra spice - 1 tablespoon apple cider vinegar, to brighten flavors This chili is not just tasty; it’s also packed with nutrition. Here’s a quick breakdown: - Calories: About 250 per serving - Protein: 10 grams - Fat: 7 grams - Carbohydrates: 45 grams - Fiber: 12 grams - Sugars: 5 grams This dish is rich in fiber and protein, making it a filling meal. It also provides a good source of vitamins A and C from the sweet potatoes and peppers. For the full recipe, check out the provided link! Start by gathering your ingredients. You need sweet potatoes, black beans, diced tomatoes, onion, garlic, bell pepper, vegetable broth, spices, olive oil, salt, and pepper. Make sure to peel and cube the sweet potatoes into 1-inch pieces. Rinse the black beans well and drain them. Chop the onion and garlic finely. Dice the bell pepper. This will set you up for success! Heat olive oil in a large pot over medium heat. Add the chopped onion and bell pepper. Sauté them for about 5 minutes until they are soft. Then, add the minced garlic. Stir for 1 minute until you smell its great aroma. Next, add the sweet potatoes, diced tomatoes, and vegetable broth. Sprinkle in cumin, smoked paprika, chili powder, oregano, and season with salt and pepper. Mix everything together. Bring the mix to a gentle boil, then lower the heat. Cover the pot and let it simmer for 25-30 minutes. The sweet potatoes should be tender and easy to fork. Finally, fold in the black beans and let them warm for about 5 minutes. Taste it and adjust the seasoning if you want. Serve the chili hot in vibrant bowls. Top each bowl with fresh cilantro and a lime wedge. The lime adds a nice burst of flavor. For more richness, you can add a dollop of avocado or sour cream. This chili tastes great and looks beautiful on the table. For the full recipe, check out the [Full Recipe] link! To boost flavors in your sweet potato black bean chili, use a few easy tricks. Start by sautéing your onions and peppers in olive oil. This step builds a solid flavor base. Make sure they soften and release their natural sugars. Next, add garlic for aroma, stirring it briefly. This brings out the richness in your chili. Using smoked paprika adds depth. It gives a subtle, smoky taste that lifts the dish. Always taste as you go. Adjusting the seasoning lets you find the perfect balance. Many people rush when cooking chili. Give your sweet potatoes enough time to soften. If they are still hard, your chili will not taste great. Another mistake is ignoring the beans. Be sure to fold them in gently so they don’t break apart. Also, don’t skip the lime! It brightens the flavors. Lastly, avoid overcooking the chili. A gentle simmer is enough to meld the flavors without losing texture. If you like heat, there are simple ways to spice things up. Start with mild chili powder, then add cayenne or hot sauce for more warmth. You can also use diced jalapeños for a fresh kick. For less heat, choose milder peppers and skip the extra spices. Always taste before serving. This way, you can adjust the spice level to suit everyone’s palate. {{image_4}} This chili is already vegetarian and vegan. You can enhance it by adding more veggies. Try using zucchini, corn, or mushrooms. These add texture and flavor. You can also swap the vegetable broth for a homemade version. Just boil water with herbs and spices to boost taste. This chili is gluten-free as is. If you want, you can add gluten-free grains. Quinoa or brown rice make great additions. Cook them separately and mix them in before serving. This will give you a hearty meal without gluten. You can make this chili your own with fun add-ins. Try adding fresh spinach or kale for extra greens. A splash of lime juice brightens the flavors. For a smoky kick, add chipotle peppers in adobo sauce. You can also top it with avocado, cheese, or yogurt. These toppings add creaminess and contrast. Check out the Full Recipe for more ideas! To keep your sweet potato black bean chili fresh, first, let it cool down. Then, pour it into an airtight container. This helps prevent spills and keeps the flavor locked in. You can store it in the fridge for up to three days. Make sure to label the container with the date for easy tracking. If you want to save your chili for later, freezing is a great option. Use freezer-safe bags or containers. Pour the chili into the bags, leaving some space for expansion. Seal them tightly to avoid freezer burn. You can freeze your chili for up to three months. Remember to label the bags with the date so you know when to use them. When you're ready to enjoy your chili again, there are a few ways to reheat it. The best method is to use a pot on the stove. Heat it over medium-low heat, stirring often until it's hot. If you prefer the microwave, pour the chili into a microwave-safe bowl. Cover it loosely and heat for 2-3 minutes, stirring halfway through. Always check that it’s hot all the way through before serving. For added flavor, squeeze some fresh lime juice on top before you dig in! If you do not have sweet potatoes, you can use butternut squash or regular potatoes. Both options will add a nice texture and flavor to the chili. You may also try carrots for a slightly sweeter taste. Adjust the cooking time as needed, since these veggies may take different times to cook. To add heat to your chili, you can use fresh jalapeños or serrano peppers. Chop them up and add them with the onions. You can also increase the chili powder or smoked paprika. Adding a dash of hot sauce or cayenne pepper at the end can give it an extra kick too! Yes, canned black beans work great in this recipe. They save time and still taste delicious. Make sure to rinse and drain them well before adding to the chili. This helps remove excess sodium and keeps the flavor balanced. To serve more people, just double or triple the ingredients. Keep the same cooking steps, but watch the cooking time. You may need a larger pot to accommodate the extra chili. Always taste and adjust seasoning as you increase the amounts. For the full recipe, check out the earlier section. This article covered key ingredients and cooking steps for your dish. You learned about optional ingredients for added flavor and useful tips to improve taste. We explored variations, including vegetarian and gluten-free options. You also picked up on how to store leftovers and common questions. Remember, cooking is fun, and experimenting makes it even better. Enjoy your dish and feel proud of your culinary skills!](https://joymealplan.com/wp-content/uploads/2025/07/8c039768-80c3-4c1c-94c6-06aef8e7156d-768x768.webp)
![To make Easy Chicken Tikka Masala, gather these essential ingredients: - 500g chicken breast, diced into bite-sized pieces - 1 cup plain yogurt - 2 tablespoons garam masala - 1 tablespoon ground cumin - 1 tablespoon ground coriander - 1 teaspoon turmeric - 1 teaspoon chili powder (adjust for spice level) - 4 cloves of garlic, finely minced - 1 inch fresh ginger, grated - 2 tablespoons olive oil - 1 medium onion, finely chopped - 1 can (400g) diced tomatoes, with juices - 1 cup coconut milk - Salt, to taste - Fresh cilantro (coriander), chopped, for garnish To boost the taste, you can add these optional items: - 1 tablespoon lemon juice for a tangy twist - 1-2 green chili peppers, chopped, for extra heat - 1 teaspoon sugar to balance flavors - Additional spices like cinnamon or cardamom for depth You will need these items to make cooking easier: - A large mixing bowl for marinating chicken - A sharp knife and cutting board for prep - A skillet or frying pan for cooking - A spoon or spatula for stirring - Measuring spoons for accurate ingredient amounts - A serving dish for presentation Gathering these ingredients and utensils sets you up for a flavorful cooking experience. Enjoy the process of making this delightful dish! To start, take a mixing bowl. In it, add 1 cup of plain yogurt. Then, mix in 2 tablespoons of garam masala, 1 tablespoon of ground cumin, and 1 tablespoon of ground coriander. Next, add 1 teaspoon of turmeric and 1 teaspoon of chili powder. You can adjust the chili powder to suit your taste. Finally, add half of the minced garlic and the grated ginger. Stir everything together until it forms a smooth marinade. This mix is key to a flavorful dish. Now, take 500g of diced chicken breast. Add it to the marinade you just made. Make sure every piece is well-coated. This is where the magic happens! Cover the bowl with plastic wrap or a lid. Place it in the refrigerator for at least 1 hour. For the best flavor, let it sit overnight. This allows the spices to soak into the chicken. Heat 2 tablespoons of olive oil in a large skillet over medium heat. Once the oil is hot, add 1 finely chopped onion. Sauté it for about 5 minutes until it turns soft and clear. Next, add the remaining minced garlic and grated ginger. Cook for 1-2 more minutes. This step fills your kitchen with a lovely aroma. Now, add the marinated chicken to the skillet. Reserve any leftover marinade. Cook the chicken for about 7-10 minutes until it browns. Then, pour in the can of diced tomatoes with their juices and the reserved marinade. Stir everything together and bring it to a simmer. Let it cook for 10 more minutes. Lower the heat, and stir in 1 cup of coconut milk. Mix it well. Let it simmer gently for another 10 minutes. You can add water if you want a thinner sauce. Season with salt to taste. When it’s ready, turn off the heat and let it sit for a few minutes. This resting time helps the flavors blend well. For the full recipe, refer to the earlier section. To get the best flavor, marinate your chicken well. Use plain yogurt as your base. Yogurt helps to tenderize the meat and adds a tangy taste. Mix yogurt with spices like garam masala, cumin, and turmeric. This mixture will coat every piece of chicken. Make sure to let it marinate for at least one hour. For the best results, marinate overnight. This gives the spices more time to soak in. Cooking techniques matter a lot. Start by sautéing onions in olive oil. This adds sweetness and depth to your dish. After the onions are soft, add garlic and ginger for more flavor. These ingredients should cook just until fragrant. This step enhances the taste of the whole dish. When adding the marinated chicken, let it brown well. Browning adds a nice texture. Finally, add diced tomatoes and coconut milk, stirring thoroughly to combine. To make your meal complete, serve Chicken Tikka Masala with basmati rice or naan. The rice soaks up the sauce, making every bite delicious. Naan is perfect for scooping up the sauce. For a fresh touch, garnish with chopped cilantro. You can also add lime wedges for extra zing. This adds a bright flavor that balances the spices. For more fun, consider serving a side salad or yogurt raita to cool things down. {{image_4}} You can easily swap chicken for vegetables or tofu. For a vegetarian version, use firm tofu. Cut it into cubes and marinate just like the chicken. You can also use mixed vegetables like bell peppers, zucchini, and cauliflower. These options soak up the spices nicely. Cook them until they're tender. The flavors will still shine through. Not everyone enjoys the same level of heat. If you want less spice, reduce the chili powder. Start with a half teaspoon and taste as you go. For more heat, add extra chili powder or even fresh chopped chilies. Remember, you can always add more, but it’s hard to take it away. If you have dietary needs, you can make changes easily. For a dairy-free version, use almond yogurt instead of plain yogurt. If you're gluten-free, check that all spices and canned goods are gluten-free. Coconut milk is a great dairy substitute, but you can also use vegetable broth for a lighter sauce. You can find the full recipe [here]. To store leftover chicken tikka masala, let it cool down first. Then, place it in an airtight container. This helps keep it fresh. Store it in the fridge for up to four days. If you want to keep it longer, consider freezing it. When reheating chicken tikka masala, use the stove for the best taste. Place it in a pan over low heat. Stir occasionally to warm it evenly. You can add a splash of water or coconut milk if it seems too thick. You can also use a microwave, but be careful not to overheat. To freeze chicken tikka masala, ensure it is fully cooled. Place it in freezer-safe bags or containers. Remove as much air as possible to prevent freezer burn. It can last up to three months in the freezer. When ready to eat, thaw it in the fridge overnight before reheating. Yes, you can make Easy Chicken Tikka Masala ahead of time. Prepare the dish, then cool it down. Store it in a sealed container in the fridge for up to three days. When ready to eat, just reheat on the stove until hot. This helps the flavors meld even more! If you want to swap out coconut milk, try using heavy cream or Greek yogurt. These options add creaminess without losing flavor. You can also use almond milk, but it may change the taste a bit. Just remember to adjust the seasoning to keep it tasty. Easy Chicken Tikka Masala can be made spicy or mild. The chili powder is the main spice. Start with a small amount if you prefer less heat. You can always add more later, but you can’t take it out once it’s in! Adjust it to your taste for the best experience. We explored how to make easy Chicken Tikka Masala, focusing on ingredients, instructions, and tips. You learned about required and optional ingredients that elevate flavor. Understanding marinating and cooking steps ensures juicy chicken. Plus, I shared ways to adapt recipes for different diets and spice levels. In closing, enjoy your meal and feel free to experiment. Happy cooking!](https://joymealplan.com/wp-content/uploads/2025/07/7203decf-58c7-4016-ac99-38120703d330-768x768.webp)
![- 2 cups cooked chicken, shredded - 1 cup canned black beans, rinsed and drained - 1 cup fresh or frozen corn kernels The main ingredients create the heart of the chicken enchiladas. First, shredded chicken offers a tender and juicy base. I love using rotisserie chicken for ease. Black beans add protein and fiber, making the meal hearty. Corn brings sweetness and a pop of color. Each ingredient plays a role in making this dish satisfying. - 1 small red onion, finely chopped - 2 cloves garlic, minced - 1 teaspoon ground cumin - 1 teaspoon chili powder Aromatics and seasonings elevate the flavor. The red onion adds a sweet, savory taste. Garlic brings depth and aroma that fills your kitchen. Cumin provides a warm, earthy note. Chili powder adds a gentle kick. These elements create a rich base for the enchiladas. - 8 small corn tortillas - 2 cups shredded cheese (cheddar or Mexican blend) - ¼ cup fresh cilantro, chopped (for garnish) Tortillas hold everything together. I prefer corn tortillas for their authentic flavor. They warm up nicely, making them easy to roll. Cheese melts beautifully, creating a creamy topping. I recommend using a blend for extra flavor. Fresh cilantro adds brightness and a fresh touch. Together, these elements create a delightful finish to your enchiladas. For the full recipe, check out the Spicy Chicken Enchiladas. - Preheat your oven to 350°F (175°C). - Sauté red onion and garlic until fragrant. Start by heating a drizzle of oil in a large skillet over medium heat. Add the finely chopped red onion. Sauté for about 3-4 minutes until the onion turns soft and clear. Then, add the minced garlic and cook for another minute. This step makes your kitchen smell amazing and sets the stage for great flavor. - Combine chicken, black beans, corn, onion-garlic mixture, salsa, cumin, and chili powder. In a big mixing bowl, add the shredded chicken, rinsed black beans, and corn. Pour in the sautéed onion and garlic mixture, along with your choice of salsa. To spice it up, add cumin and chili powder. Mix everything well. This filling is packed with protein and flavor, making your enchiladas both tasty and hearty. - Warm tortillas and fill with chicken mixture. - Roll and arrange in baking dish. Now, warm the corn tortillas in a dry skillet or microwave. This makes them soft and easy to roll. Take about ¼ cup of the chicken mixture and place it in the center of each tortilla. Sprinkle a little cheese on top, then roll them up tightly. Place the rolled tortillas seam-side down in a greased 9x13 inch baking dish. This step is where the magic begins! - Cover with salsa and cheese, bake with foil, then uncovered. Pour any remaining salsa over the top of the enchiladas. Sprinkle the rest of the cheese evenly on top. Cover your baking dish with aluminum foil to keep the moisture in. Bake in the preheated oven for 20 minutes. After that, remove the foil and bake for another 10 minutes. You want the cheese to melt and bubble. Once done, let the enchiladas cool for a few minutes. Garnish with fresh cilantro before serving. This adds a fresh flavor and a lovely touch. Enjoy your homemade chicken enchiladas! For more detailed steps, check out the Full Recipe. - Ensure tortillas are pliable to prevent cracking. Warm them in a skillet or microwave. - Use a mix of cheeses for more flavor. Try combining cheddar and pepper jack. - Serve with sour cream and additional cilantro for extra zest. - Integrate sides like rice or refried beans to complete the meal. - Overfilling tortillas can make them hard to roll. Stick to ¼ cup of filling. - Not letting them cool before serving can lead to a messy plate. Give them a few minutes. {{image_4}} You can make your chicken enchiladas even better for you. - Swap out cheese for a low-fat version. This change cuts calories. - Use whole wheat tortillas for extra fiber. This option boosts nutrition. Want to spice things up? Add some fun flavors! - Add jalapeños for extra heat. This will make your dish lively! - Experiment with different salsas. Try mild, medium, or spicy. Each adds a unique taste. Need to adjust for dietary needs? No problem! - Make it vegetarian by using black beans only. This keeps it hearty and filling. - Use corn tortillas for gluten-free options. They work perfectly in this dish. Feel free to explore these variations and make the recipe your own! To keep your chicken enchiladas fresh, store them in an airtight container. This helps prevent moisture loss and keeps flavors intact. Place them in the fridge where they can stay good for about 3-4 days. Label the container with the date, so you remember when you made them. If you want to save some for later, freezing is a great option. Wrap each enchilada tightly in foil before placing them in a freezer bag. This protects them from freezer burn. They can last for up to 3 months in the freezer. When you're ready to eat, simply thaw them overnight in the fridge. For the best taste and texture, reheat your enchiladas in the oven. Preheat your oven to 350°F (175°C). Place the enchiladas in a baking dish, cover with foil, and heat for about 20-25 minutes. Remove the foil for the last 5 minutes to crisp up the cheese. Enjoy them warm! Chicken enchiladas last about 3-4 days when stored properly. Keep them in an airtight container to maintain freshness. Always check for any signs of spoilage before eating leftovers. Yes, you can assemble chicken enchiladas ahead of time. Just prepare them and place them in the fridge before baking. This is a great way to save time, especially on busy days. You can add many tasty toppings to your enchiladas. Some options include: - Avocado - Guacamole - Green onions - Olives Feel free to get creative with your toppings. They can add color and flavor. You can easily customize this recipe. Adjust the spices to fit your taste. Add your favorite vegetables to the filling, like bell peppers or spinach. This makes the dish more personal and fun. Yes, you can use a slow cooker for this dish. Cook the filling in the slow cooker first. Then, assemble the enchiladas and bake them as usual. This method adds rich flavors and makes cooking easier. For the full recipe, check [Full Recipe]. Chicken enchiladas are simple and fun to make. You need cooked chicken, black beans, corn, and cheese. Follow the steps to prepare, mix, and bake them to perfection. Use tips to avoid common mistakes and enjoy variations for your taste. Remember, leftovers are easy to store and reheat. You can customize this dish with your favorite toppings too. Enjoy this tasty meal with friends and family!](https://joymealplan.com/wp-content/uploads/2025/07/08f715d1-a8ab-4086-9fca-7ff252efa8d5-768x768.webp)

![When making easy chicken fajitas, you need fresh and simple ingredients to bring out the best flavors. Here’s the detailed list: - 2 boneless, skinless chicken breasts, thinly sliced into strips - 1 red bell pepper, sliced into thin strips - 1 green bell pepper, sliced into thin strips - 1 medium onion, sliced into thin rings - 3 cloves garlic, minced - 2 tablespoons olive oil - 1 teaspoon chili powder - 1 teaspoon ground cumin - 1 teaspoon smoked paprika - Salt and freshly ground black pepper, to taste - Juice of 1 fresh lime - Flour tortillas, for serving - Fresh cilantro, chopped, for garnish - Sour cream and salsa, for serving (optional) - You can swap chicken for shrimp or beef if you prefer. - Use corn tortillas if you want a gluten-free option. - Lemon juice can replace lime juice for a different zing. - Look for high-quality chili powder and smoked paprika for a rich taste. - I trust McCormick and Penzeys for spices that boost flavor. - Fresh herbs like cilantro add a nice touch, so always use fresh when possible. For more details on how to prepare your ingredients and cook this dish, check the Full Recipe. To start, prepare your chicken and veggies. Take the two boneless, skinless chicken breasts. Slice them into thin strips. Next, grab one red bell pepper, one green bell pepper, and one medium onion. Slice these into thin strips and rings, respectively. Now, let’s marinate the chicken. In a large bowl, mix the sliced chicken with minced garlic, olive oil, chili powder, cumin, smoked paprika, lime juice, salt, and pepper. Toss everything well. Make sure the chicken is coated evenly with the spices. Let the chicken marinate for at least 15 minutes. You can refrigerate it for up to 2 hours for more flavor. When you are ready to cook, heat a large skillet on medium-high heat. Add the marinated chicken to the skillet. Cook it for about 5 to 7 minutes. Stir occasionally until it reaches an internal temperature of 165°F (75°C). After the chicken is cooked, add the sliced peppers and onion to the skillet. Sauté the mixture for another 5 to 7 minutes. Cook until the veggies are tender but still crunchy. Taste and adjust the seasoning with salt and pepper if needed. Now, let's assemble the fajitas. Start with warm flour tortillas. Place a generous portion of the chicken and vegetable mix in the center of each tortilla. For a lovely presentation, serve the fajitas on a bright platter. Stack the tortillas neatly on the side. Arrange toppings like sour cream and salsa in small bowls. This makes it colorful and inviting. When serving, don’t forget the garnishes. Sprinkle freshly chopped cilantro on top. This adds a fresh touch and enhances the flavor. Enjoy your easy chicken fajitas! For the full recipe, check out [Full Recipe]. To make your chicken fajitas burst with flavor, try these cooking tips: - Use a cast-iron skillet. This tool holds heat well and gives a nice sear to the chicken. - Preheat your pan. A hot pan helps to cook the chicken fast and keeps it juicy. - Don’t overcrowd the pan. Cook in batches if needed. This helps the chicken brown instead of steam. - Add a splash of broth. If the chicken seems dry, add a little chicken broth while cooking. Pair your chicken fajitas with these tasty sides: - Mexican rice. It adds a nice, filling touch. - Refried beans. They give a creamy texture and flavor. - Guacamole. This creamy dip adds richness to the meal. For extra flavor, consider these enhancers: - Squeeze fresh lime juice. It brightens the dish and adds a zesty kick. - Top with sliced avocado. This adds creaminess and balances the spices. - Drizzle with hot sauce. It brings heat and excitement to each bite. Explore the [Full Recipe] for detailed steps on creating this quick dinner. {{image_4}} You can change up the protein in your fajitas. Try shrimp or beef for a new twist. You can even use tofu or tempeh for a plant-based option. Each protein brings a different flavor, so have fun with it. For seasoning, you can mix things up too. Use taco seasoning for a spicier kick. You might enjoy adding lime zest for a fresh taste. Try using garlic powder or onion powder for extra flavor. Each option can make your dish unique. If you want to keep it low-carb, use lettuce wraps instead of tortillas. It gives you a crunchy bite and cuts down on carbs. You can also find low-carb tortillas at the store. For gluten-free options, use corn tortillas. They taste great and work well with the filling. If you're dairy-free, skip the sour cream and use avocado instead. It adds creaminess and flavor without the dairy. To keep your chicken fajitas fresh, store them in an airtight container. Make sure to separate the chicken from the tortillas and toppings. This helps keep everything tasty. You can refrigerate them for up to three days. If you want to save them longer, freeze the chicken and veggies in a freezer-safe bag. They can last for up to three months in the freezer. When you’re ready to eat, thaw them in the fridge overnight. To reheat, use a skillet over medium heat. This method keeps the chicken juicy and the veggies crisp. You can also microwave them, but be careful not to overcook. The expected shelf life for your chicken fajitas is about three days in the fridge. In the freezer, they last about three months. Always check for signs of spoilage before eating. If you see any off smells, discoloration, or mold, it’s best to toss the leftovers. Keeping track of freshness helps you enjoy your meal safely. What is the best way to marinate chicken for fajitas? To marinate chicken for fajitas, mix olive oil, lime juice, and spices. Use chili powder, cumin, and smoked paprika for a great flavor. Combine these in a bowl, add the chicken, and coat it well. Let it marinate for at least 15 minutes. Longer marinating, up to 2 hours, gives better taste. Can I prepare chicken fajitas ahead of time? Yes, you can prepare chicken fajitas ahead of time. Marinate the chicken and store it in the fridge. You can also slice the vegetables early. Just keep them in a sealed container. When you're ready, cook everything up quickly. This makes weeknight meals super easy! What toppings are best for chicken fajitas? Great toppings for chicken fajitas include fresh cilantro, sour cream, and salsa. You can also add sliced avocado, shredded cheese, or jalapeños for extra flavor. These toppings add color and taste, making your fajitas even better. What to do if the chicken is tough or dry? If your chicken is tough or dry, try cooking it at a lower heat next time. Overcooking can dry it out. Also, make sure to marinate the chicken well. This helps keep it juicy. If it happens, serve with a sauce or salsa to add moisture. How to avoid soggy tortillas? To avoid soggy tortillas, warm them briefly in a pan. This keeps them soft but not wet. You can also heat them in the oven wrapped in foil. Serve the hot filling right away to keep your tortillas crisp. How to add more spice to the dish? To add more spice, include extra chili powder or a pinch of cayenne pepper. You can also add sliced jalapeños to the mix. If you want heat at the table, serve hot sauce on the side. Adjust spice levels to suit your taste. Chicken fajitas are a tasty and fun meal to make. You learned about the right ingredients, how to cook them, and tips for perfect fajitas. Whether you want to change the protein or try new spices, options are endless. Store leftovers well to enjoy later. Keep these tips in mind for your next cooking adventure. Enjoy your delicious fajitas with family and friends!](https://joymealplan.com/wp-content/uploads/2025/06/5a93604c-472d-424a-a3e8-bce972c2f096-768x768.webp)
