Irresistible Three Ingredient Nutella Fudge Recipe

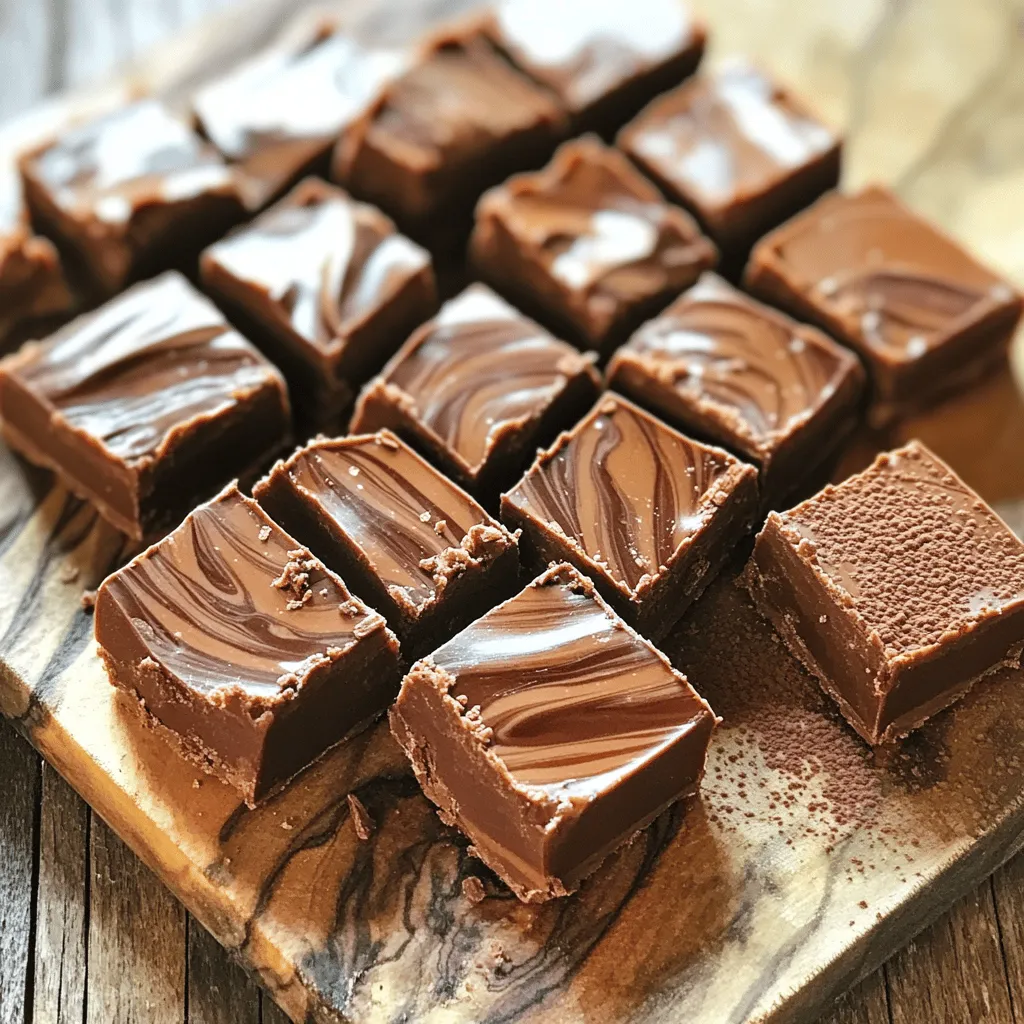
Are you ready to indulge in a sweet treat that’s easy to make? This three-ingredient Nutella fudge is pure bliss wrapped in chocolatey goodness. With just Nutella, sweetened condensed milk, and chocolate chips, you can whip up a decadent dessert in no time. Join me as I guide you through the simple steps to this irresistible fudge that will impress your family and friends. Let’s get started!
Ingredients
List of Ingredients
– 1 cup Nutella
– 1 cup sweetened condensed milk
– 2 cups semi-sweet chocolate chips
Kitchen Tools Needed
– Medium saucepan
– Spatula
– 8×8 inch baking dish
– Knife
Gathering the right ingredients is key to making this fudge. You will need just three simple items: Nutella, sweetened condensed milk, and semi-sweet chocolate chips. These ingredients blend perfectly to create a smooth and creamy fudge.
The kitchen tools are also important. You need a medium saucepan to heat and mix the fudge. A spatula helps you stir the mixture well. An 8×8 inch baking dish will hold your fudge as it cools. Finally, a knife is needed to cut the fudge into squares for serving.
With the ingredients and tools ready, you are set to create this delicious treat.
Step-by-Step Instructions
Preparing the Fudge Mixture
– Start by placing a medium saucepan over low heat.
– Add 1 cup of Nutella and 1 cup of sweetened condensed milk into the pan.
– Stir the mixture continuously with a spatula.
– Keep stirring until the mix is smooth and combined.
Incorporating Chocolate Chips
– Now, add 2 cups of semi-sweet chocolate chips to the pan.
– Continue to stir gently as the chocolate melts.
– Mix until the fudge becomes creamy and smooth without lumps.
Setting the Fudge
– Carefully pour the fudge mixture into an 8×8 inch baking dish.
– Use a spatula to spread it evenly.
– Let the dish sit at room temperature for about 1 hour to cool.
– After that, refrigerate for at least 2 hours, or until firm.
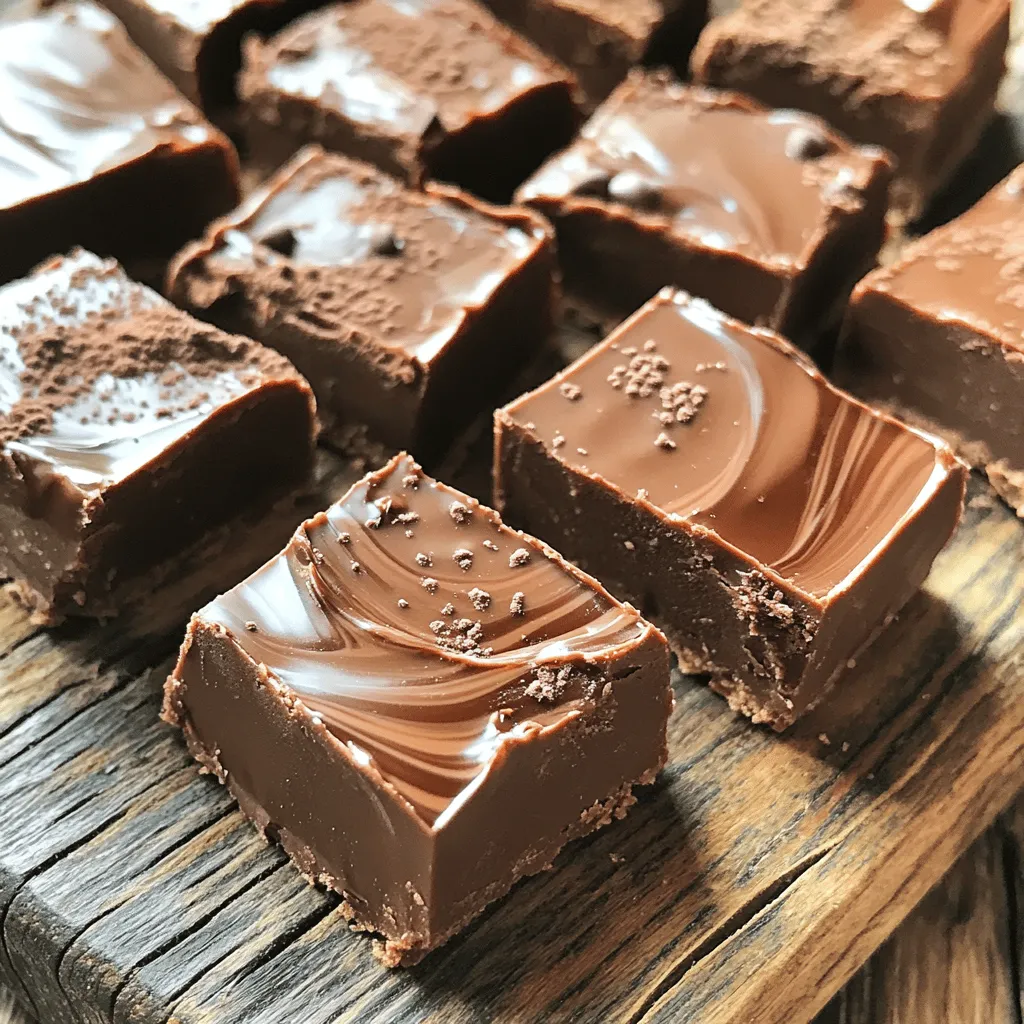
Enjoy every bite of this easy and delicious Nutella fudge!
Tips & Tricks
Achieving the Perfect Texture
To get smooth fudge, you need even heat. When you mix the Nutella and sweetened condensed milk, keep the heat low. Stir gently and often. This helps avoid lumps. If you heat it too fast, you risk burning the fudge.
Serving Suggestions
Garnish your fudge for an extra touch. Drizzle melted chocolate on top. A sprinkle of sea salt adds a nice contrast. You can also serve it with fresh fruits. Ice cream pairs well, too. These options make the fudge even tastier.
Common Mistakes to Avoid
Accuracy is key. Make sure to measure your ingredients. If you skip this, your fudge may not set right. Also, don’t forget to refrigerate the fudge. This step is important for it to become firm. Without it, your fudge will be too soft to enjoy.

Variations
Flavor Additions
You can make your Nutella fudge even better. Consider adding a splash of vanilla extract. This will give your fudge a warm and sweet note. You can also mix in nuts or dried fruits. Chopped walnuts or almonds add crunch. Dried cranberries or cherries bring a fruity twist.
Dietary Substitutes
If you want a vegan option, use dairy-free chocolate. It works well with Nutella and keeps the fudge rich. For a sugar-free treat, substitute regular Nutella with a sugar-free version. Both options keep the taste great while meeting your dietary needs.
Different Shapes and Sizes
You can change the thickness of your fudge too. Use different baking dish sizes to get thicker or thinner fudge. Want to try something fun? Make fudge logs or truffles instead. Just roll the fudge into balls or shape it into logs for a new look.
Storage Info
How to Store Fudge
To keep your fudge fresh, use an airtight container. This helps lock in moisture and flavor. You can store it at room temperature if you eat it within a few days. If you want it to last longer, put it in the fridge. Just be sure to allow it to cool completely before covering it.
Shelf Life
How long will the fudge last? If stored well, it can last up to two weeks at room temperature. In the fridge, it can last up to a month. Signs that the fudge has gone bad include a change in color or a strange smell. If you notice either, it’s best to throw it away.
Freezing Options
To freeze fudge, cut it into squares first. Wrap each piece in plastic wrap, then place them in a freezer bag. This helps prevent freezer burn. You can freeze it for up to three months. When you’re ready to enjoy it, take the fudge out and let it thaw in the fridge. This keeps it soft and tasty. For best results, eat it within a week after thawing.
FAQs
How do I know when the fudge is set?
To check if your fudge is set, feel its firmness. When you press it lightly, it should feel solid. The texture should be smooth, not sticky or gooey. A good test is to gently pull back the edge with your finger. If it holds its shape, it’s ready to enjoy! After you pour it into the baking dish, let it cool at room temperature for about one hour. Then, pop it in the fridge for at least two hours. This helps it firm up properly.
Can I use a different chocolate?
Yes, you can use other types of chocolate. Dark chocolate or milk chocolate can work well. Each will change the taste a bit. If you want a sweeter fudge, use milk chocolate. For a richer flavor, dark chocolate is great. You can even mix chocolates for a unique twist. Whatever chocolate you choose, make sure it melts well. This helps keep your fudge creamy and smooth.
What if my fudge is too soft?
If your fudge is too soft, don’t worry. There are easy fixes. First, put it back in the fridge for a bit longer. This may help it firm up more. If that does not work, you can reheat it gently. Mix in more chocolate chips until it thickens. Then, pour it back into the dish and chill again. This will help you get the right texture. Remember, patience is key when making fudge!
This fudge recipe is easy and fun to make. You learned the key ingredients, tools, and steps to create a sweet treat. Tips for perfect texture and common mistakes can help you succeed. Explore variations to customize your fudge for any occasion. Remember to store it properly to enjoy later. Follow these guidelines, and you’ll be a fudge-making expert in no time. Satisfy your sweet tooth with this delightful treat!


![For my Lemon Poppy Seed Zucchini Muffins, I use these ingredients: - 1 cup grated zucchini (squeeze out excess moisture) - 1 cup all-purpose flour - 1/2 cup whole wheat flour - 1/4 cup poppy seeds - 1 teaspoon baking powder - 1/2 teaspoon baking soda - 1/2 teaspoon salt - 1/2 teaspoon ground cinnamon - 1/2 cup granulated sugar - 1/4 cup brown sugar, packed - 2 large eggs - 1/2 cup vegetable oil - 1/4 cup plain Greek yogurt - Zest of 1 lemon (about 1 tablespoon) - 2 tablespoons fresh lemon juice Using fresh zucchini is key. It keeps your muffins moist. Fresh lemon juice and zest add bright flavors. These ingredients work together to create a light and fluffy treat. If you have dietary needs, you can substitute some ingredients: - For gluten-free muffins, replace all-purpose flour with a gluten-free blend. - Use almond milk or coconut milk in place of Greek yogurt for a dairy-free option. - You can swap the granulated sugar with coconut sugar for a lower glycemic option. To enhance flavor, consider adding: - 1/2 cup chopped nuts, like walnuts or pecans. - 1/2 cup chocolate chips for a sweet twist. - A pinch of nutmeg or ginger for a warm spice note. Feel free to experiment! These small changes can lead to new and exciting flavors in your muffins. For the complete recipe, check out the [Full Recipe]. 1. Preheat your oven to 350°F (175°C). This step is key for even baking. 2. Prepare a muffin tin by lining it with paper liners or lightly greasing it with cooking spray. I like to use liners for easy removal and cleanup. 3. Mix the dry ingredients in a medium bowl. Combine all-purpose flour, whole wheat flour, poppy seeds, baking powder, baking soda, salt, and ground cinnamon. Whisk until well blended. This helps mix the leavening agents evenly. 4. In a large bowl, blend the granulated sugar and brown sugar. Add the lemon zest and whisk until mixed. This adds a bright flavor to your muffins. 5. Add the eggs one at a time, whisking well after each. This helps create a smooth, fluffy batter. Then, pour in the vegetable oil, Greek yogurt, and lemon juice. Mix until smooth. 1. Carefully fold the dry ingredients into the wet mixture. Stir gently until just combined. Avoid overmixing to keep your muffins tender. 2. Fold in the grated zucchini. Make sure it is evenly distributed without overworking the batter. The zucchini adds moisture and flavor. 1. Divide the batter evenly among the muffin cups. Fill each cup about two-thirds full. This allows space for the muffins to rise. 2. Bake in the preheated oven for 18-22 minutes. Check for doneness by inserting a toothpick into the center. If it comes out clean, your muffins are ready. 3. Let the muffins cool in the tin for about 5 minutes. Then, transfer them to a wire rack to cool completely. This helps them maintain their shape and texture. For the complete recipe, check the [Full Recipe]. Enjoy the delightful taste of lemon poppy seed zucchini muffins! To make moist lemon poppy seed zucchini muffins, focus on a few key techniques: - Squeeze the Zucchini: Grate your zucchini, then squeeze out the excess moisture. This step prevents the batter from becoming too wet. - Measure Accurately: Use measuring cups for both dry and wet ingredients. This helps your muffins rise and stay light. When you measure, remember that even small variations can change the texture. Accurate measurements make a big difference in your results. Avoid these common missteps to keep your muffins light and fluffy: - Overmixing: When you combine the dry and wet ingredients, mix gently. Overmixing can lead to tough muffins. - Filling Too Full: Fill the muffin cups about two-thirds full. If you fill them too high, they might sink in the middle. By following these tips, you can make sure your lemon poppy seed zucchini muffins turn out perfectly every time. For the complete recipe, check out the [Full Recipe]. {{image_4}} You can make lemon poppy seed zucchini muffins even more exciting by adding spices. Try mixing in 1/2 teaspoon of nutmeg or 1/2 teaspoon of ginger for a warm twist. These spices add depth and enhance the citrus flavor. Fruits can also change the taste of your muffins. You might consider adding 1/2 cup of blueberries or 1/2 cup of cranberries. These fruits will bring a burst of sweetness and tartness. Just fold them into the batter gently to keep the muffins fluffy. If you want to make vegan lemon poppy seed zucchini muffins, it's easy. Substitute the eggs with 1/2 cup of unsweetened applesauce or 1/4 cup of ground flaxseed mixed with 1/2 cup of water. Both options work well for binding the ingredients. For those wanting lower sugar options, you can use 1/4 cup of honey or 1/4 cup of maple syrup instead of granulated sugar. If you need a sugar-free version, try a sugar substitute that measures like sugar. These variations help you enjoy the muffins while fitting your dietary needs. You can still delight in the great taste of lemon poppy seed zucchini muffins. For the full recipe, check out the details provided earlier. To keep your lemon poppy seed zucchini muffins fresh, store them in an airtight container at room temperature. If you add a paper towel inside, it helps absorb moisture. This method keeps the muffins soft and tasty. When stored this way, they can last for about 2 to 3 days. After that, they may start to dry out or lose their flavor. If you want to save muffins for later, freezing is a great option. Allow the muffins to cool completely, then wrap each muffin tightly in plastic wrap. Place them in a freezer-safe bag or container. They can stay fresh in the freezer for up to 3 months. When you’re ready to eat a muffin, take it out of the freezer. Let it thaw in the fridge overnight or at room temperature for a few hours. For the best taste, reheat them in the oven at 350°F for about 10 minutes. You can also use the microwave for about 20-30 seconds. This warms them up and brings back their soft texture. Enjoy your muffins just like the day you baked them! To make lemon poppy seed zucchini muffins, start by prepping your oven and muffin tin. 1. Preheat your oven to 350°F (175°C). 2. Grate 1 cup of zucchini and squeeze out extra moisture. 3. In one bowl, mix 1 cup all-purpose flour, 1/2 cup whole wheat flour, 1/4 cup poppy seeds, 1 teaspoon baking powder, 1/2 teaspoon baking soda, 1/2 teaspoon salt, and 1/2 teaspoon ground cinnamon. 4. In another bowl, combine 1/2 cup granulated sugar, 1/4 cup brown sugar, and the zest of 1 lemon. 5. Add 2 large eggs, followed by 1/2 cup vegetable oil, 1/4 cup Greek yogurt, and 2 tablespoons of lemon juice. 6. Mix until smooth. Fold in the dry ingredients, then add the zucchini. 7. Fill muffin cups two-thirds full. Bake for 18-22 minutes. This quick overview gives you all the steps needed to create delicious muffins. Check the Full Recipe for more details. Yes, you can freeze these muffins. Here’s how: - Let the muffins cool completely after baking. - Place them in an airtight container or a freezer bag. - Label the bag with the date and type of muffin. - Store in the freezer for up to 3 months. When ready to eat, thaw them in the fridge overnight or on the counter for a few hours. You can warm them in the oven for a fresh-baked taste. Dense muffins can happen for a few reasons: - Overmixing the batter can create too much gluten. - Not using enough leavening agents like baking powder or baking soda can also lead to density. - Using too much zucchini without squeezing out moisture may add extra weight. To prevent dense muffins, mix the batter gently and ensure you measure ingredients correctly. Following these tips will help you achieve light and fluffy muffins. In summary, we covered how to make Lemon Poppy Seed Zucchini Muffins. You learned about the key ingredients and possible substitutions for dietary needs. I shared step-by-step instructions, tips to perfect your muffins, and various flavor options. Remember, measuring accurately and not overmixing are key for success. These muffins can be stored well, either short-term or long-term, for your convenience. With a bit of practice, you can enjoy delicious muffins tailored to your taste preferences. Happy baking!](https://joymealplan.com/wp-content/uploads/2025/07/b4c3b954-0106-4660-8231-7250b8c7a63e-768x768.webp)


