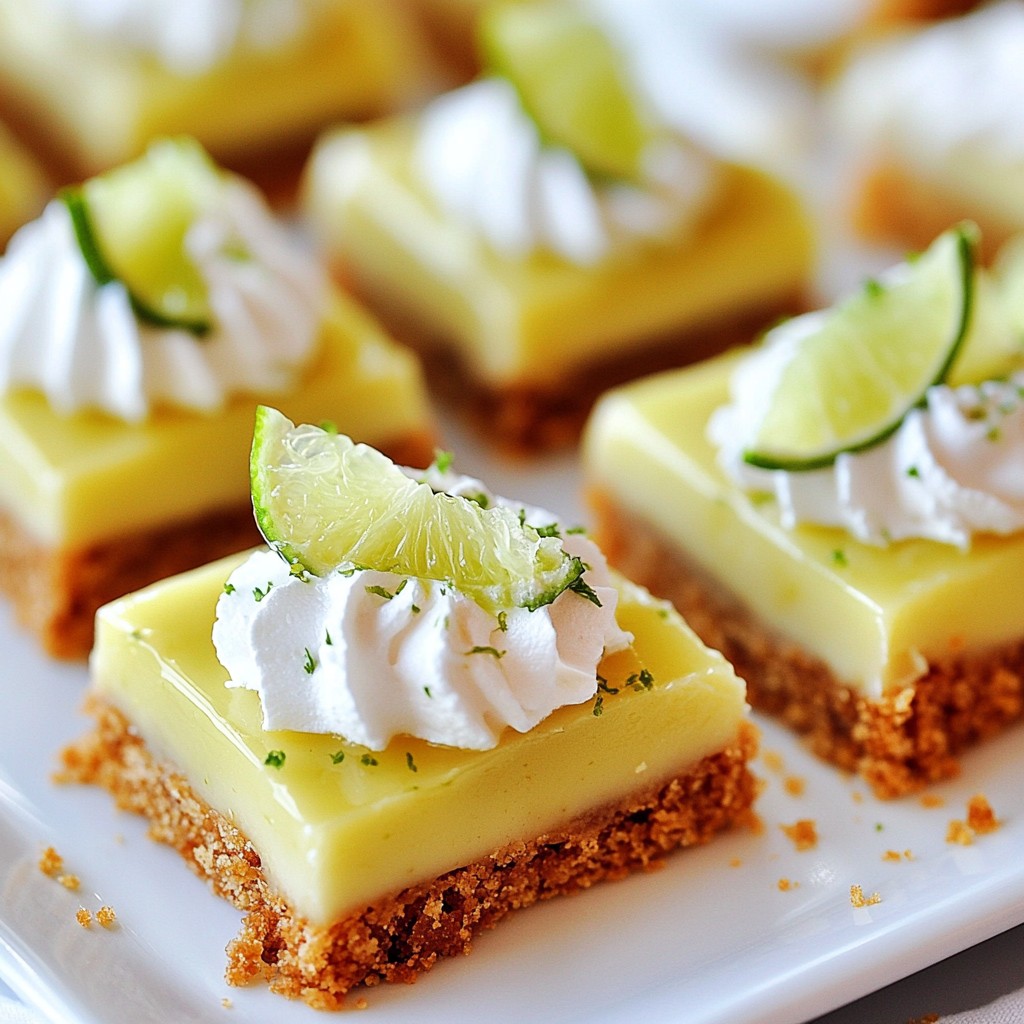
If you love tangy treats, you’re in for a delight! Key Lime Pie Bars are simple to make and pack a punch of flavor. With buttery crusts, zesty lime filling, and creamy toppings, these bars are a perfect dessert for any occasion. Follow along as I guide you step-by-step to create these tasty bites that will impress your friends and family. Get ready to bake something amazing!
Why I Love This Recipe
- Bright and Tangy Flavor: The combination of fresh key lime juice and zest delivers a vibrant, zesty flavor that’s refreshing and delightful, perfect for dessert lovers.
- Easy to Make: With simple ingredients and straightforward steps, this recipe is perfect for both novice and experienced bakers looking to impress.
- Perfect for Any Occasion: These bars are a crowd-pleaser, making them ideal for parties, picnics, or just a sweet treat at home.
- Chilled Delight: The chilled bars offer a creamy texture with a cool finish, making them a refreshing choice for hot days.
Ingredients
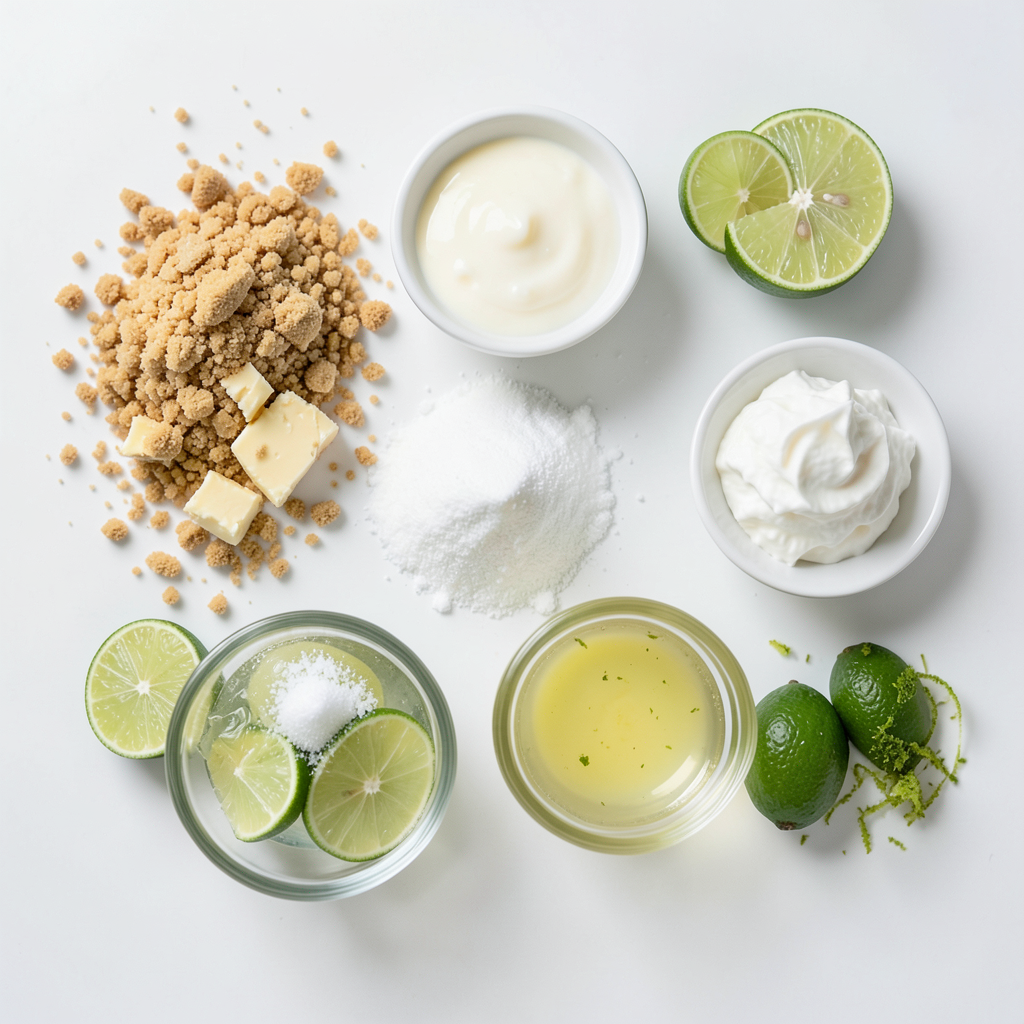
Main Ingredients
- 1 ½ cups graham cracker crumbs
- ½ cup unsalted butter, melted
- ¼ cup granulated sugar
- 1 can (14 oz) sweetened condensed milk
- ½ cup fresh key lime juice (about 4-5 key limes)
- 2 large egg yolks
- 1 teaspoon freshly grated lime zest
- Pinch of salt
The base of our key lime pie bars starts with graham cracker crumbs. They give a nice crunch and a sweet taste. Next, I use fresh key lime juice. This juice brings the tangy flavor that key lime pie is known for. Sweetened condensed milk adds creaminess and sweetness. The egg yolks help to set the filling when baked. Finally, a pinch of salt balances the flavors.
Optional Toppings
- Whipped cream
- Lime slices
You can top your bars with whipped cream for extra creaminess. Lime slices add a lovely pop of color and brightness. Both toppings make the dessert look beautiful and taste even better.
Equipment Needed
- 8x8 inch baking pan
- Mixing bowls
- Whisk and spatula
To make these bars, you will need a few tools. An 8x8 inch baking pan is perfect for making the bars. Mixing bowls are great for combining ingredients. A whisk helps mix the filling until it is smooth. A spatula is handy for spreading the filling evenly. These tools make the cooking process easier and more fun.
Step-by-Step Instructions
Preparing the Crust
- Preheat your oven to 350°F (175°C). Line an 8x8 inch baking pan with parchment paper. Leave some paper over the sides for easy lifting later.
- In a medium bowl, mix 1 ½ cups of graham cracker crumbs, ½ cup of melted unsalted butter, and ¼ cup of granulated sugar. Use a fork to combine until it looks like wet sand.
- Press this crumb mix firmly into the bottom of the pan to form a solid layer. Bake the crust for 10 minutes, until it turns lightly golden. Let it cool slightly after baking.
Making the Key Lime Filling
- In another bowl, whisk together 1 can of sweetened condensed milk and ½ cup of fresh key lime juice. Add 2 large egg yolks, 1 teaspoon of lime zest, and a pinch of salt. Keep whisking until it is smooth.
- Pour this key lime filling over the cooled crust. Use a spatula to spread it evenly from edge to edge.
Final Baking and Cooling
- Return the filled pan to the oven. Bake for an additional 15 to 20 minutes. The edges should be set, but the center can still jiggle a bit.
- After baking, cool the bars to room temperature on a wire rack. Once cooled, chill them in the refrigerator for at least 2 hours. This helps them set and enhances the flavors.
- When ready to serve, use the parchment overhang to lift the bars out of the pan. Cut them into 9 equal squares. Top each square with whipped cream and a slice of lime for a bright touch.
Tips & Tricks
Perfecting the Crust
To make the crust just right, you want to press the crumb mixture evenly. Use the bottom of a measuring cup for nice, flat edges. This helps the crust bake evenly, giving you a firm base.
Bake the crust for about 10 minutes. Look for a light golden color and a nice smell. If it’s too dark, it might taste burnt. Let it cool slightly before adding the filling.
Achieving the Ideal Filling
Getting the filling smooth is key. To avoid lumps, whisk the sweetened condensed milk and key lime juice first. Then, add the egg yolks and lime zest. Keep whisking until it’s creamy.
When zesting limes, use a microplane. It gets the zest fine without the bitter white pith. Just a teaspoon gives a lot of flavor!
Serving Suggestions
For a pretty presentation, cut the bars into equal squares. Use a sharp knife for clean edges. Top each square with whipped cream for a nice touch.
Pair these bars with fresh berries or a scoop of vanilla ice cream. The tartness of the lime goes great with sweet flavors. Enjoy!
Pro Tips
- Chill for Best Flavor: Allow the bars to chill in the refrigerator for at least 2 hours before serving. This enhances the flavors and helps the filling set perfectly.
- Fresh Key Limes: Use fresh key limes for the best flavor. If key limes are not available, Persian limes can be used as a substitute, but the taste will be slightly different.
- Perfect Crust: Ensure the graham cracker crust is pressed firmly into the pan to create a sturdy base. This prevents it from crumbling when cutting the bars.
- Lime Zest Boost: Don't skip the lime zest! It adds an extra layer of brightness and flavor to the filling, making your key lime pie bars even more delicious.
Variations
Gluten-Free Options
If you need a gluten-free treat, you can swap graham crackers. Use almond flour or gluten-free cookie crumbs. Combine these with melted butter and sugar. This mix works well for the crust. Press it into the pan just like the original recipe. Bake it the same way. You'll enjoy a tasty, gluten-free key lime pie bar!
Vegan Alternatives
For a vegan twist, replace sweetened condensed milk. Use plant-based condensed milk instead. You can easily make your own by cooking coconut milk with sugar. You also need to swap the eggs. Use flaxseed meal or apple sauce as an egg substitute. This gives your bars a creamy texture. The taste of key lime will shine through just as well.
Flavor Twists
Want to mix it up? Add different citrus flavors. Try lemon or orange juice for a twist. You can also add zest from these fruits. This gives a fun flavor boost. Top your bars with fresh fruits like berries or coconut flakes. This adds color and taste, making your dessert stand out.
Storage Info
Short-term Storage
You can store your key lime pie bars in the refrigerator. Place them in an airtight container. This keeps them fresh for up to five days. If you like, you can cover them with plastic wrap for extra protection. The bars will stay cool and tangy, just like when you first made them.
Long-term Freezing
To freeze key lime pie bars, cut them into squares first. Wrap each square in plastic wrap. Then, place them in a freezer-safe bag. This way, they won’t stick together. They can stay in the freezer for up to three months. When you're ready to enjoy them, just take out what you need.
Reheating Tips
To defrost the bars, move them from the freezer to the fridge. Let them sit there for about 6 hours or overnight. If you need to eat them sooner, you can leave them at room temperature for about 30 minutes. Serve them cold, topped with whipped cream and a lime slice for a refreshing treat!
FAQs
What can I use instead of key limes?
You can use regular limes if key limes are hard to find. Their flavor is close enough for most recipes. You can also mix lemon juice and lime juice for a tangy twist. The ratio is two parts lime to one part lemon. This keeps the bars bright and zesty.
How do I know when the bars are done baking?
Look for the edges to be set while the center has a slight jiggle. The filling should not look runny. If it is golden brown around the edges, that’s a good sign too. Take them out and let them cool at room temperature. They will set more as they cool.
Can I make these bars ahead of time?
Yes! You can make these bars a day in advance. Just chill them in the fridge after baking. They taste even better the next day. Store them in an airtight container. This keeps them fresh and ready for your event or gathering.
You now have a clear guide to making key lime pie bars. We covered the key ingredients, essential equipment, and detailed steps for preparation. Remember to tweak the recipe with your favorite toppings or variations. Storage tips ensure your dessert stays fresh, while FAQs help you troubleshoot common concerns. Enjoy making these delicious bars for yourself and your loved ones. With practice, you’ll master this tasty treat. Dive in and start baking!