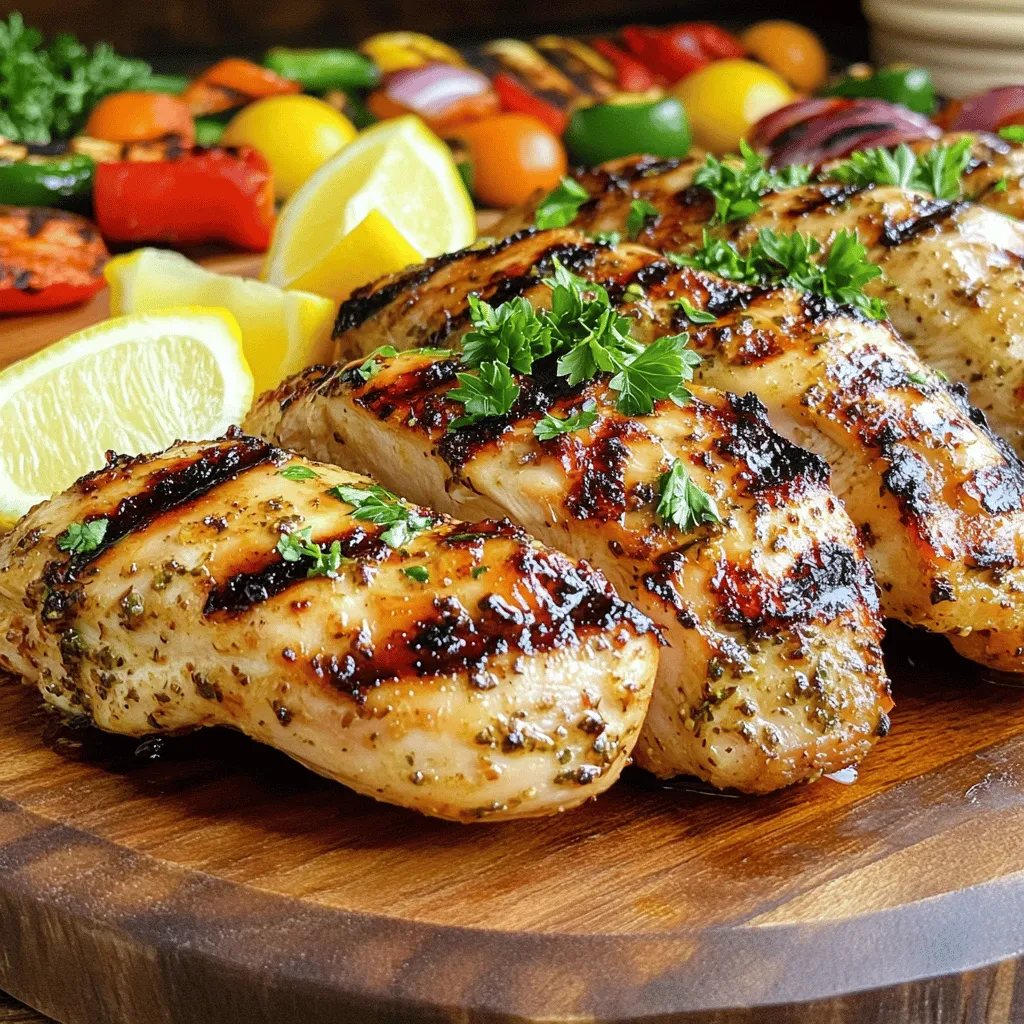
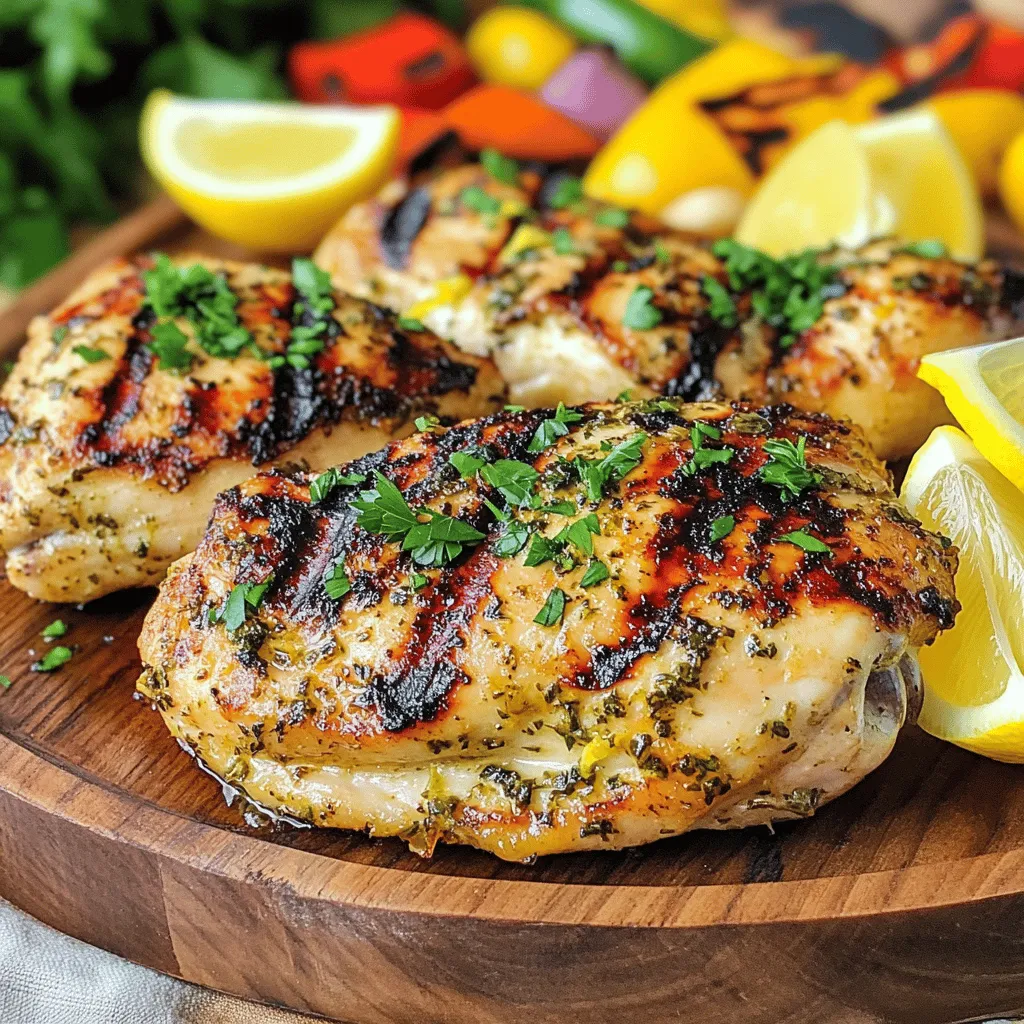
Ready to elevate your grilling game? This Lemon Herb Grilled Chicken recipe is simple, savory, and bursting with flavor! Using fresh herbs and a zesty marinade, you’ll create juicy chicken that impresses every time. Just follow my easy steps, and you’ll be grilling like a pro. Let’s dive in and get started on this delicious dish that’ll have everyone asking for seconds!
Ingredients
Complete List of Ingredients
– Chicken and Marinade
– 4 boneless, skinless chicken breasts
– 1/4 cup extra virgin olive oil
– 1 large lemon (zested and juiced)
– 3 cloves of garlic, finely minced
– 2 teaspoons dried oregano
– 2 teaspoons dried thyme
– 1 teaspoon smoked paprika
– Sea salt and freshly ground black pepper, to taste
– Fresh Herbs and Spices
– Fresh parsley, finely chopped (for garnish)
– Optional Garnishes
– Lemon wedges for serving
– Grilled vegetables or a garden salad for a colorful side
When cooking Lemon Herb Grilled Chicken, the right ingredients make all the difference. You want fresh flavors that shine. The chicken breasts should be plump and fresh. The marinade features olive oil, lemon, and garlic. These ingredients create a bright and zesty flavor.
Fresh herbs like parsley add a lovely touch at the end. Dried herbs like oregano and thyme give depth to your dish. Smoked paprika adds a subtle warmth without overpowering.
Feel free to play with optional garnishes. Lemon wedges add zest and color. Grilled veggies or a salad make great sides. They complete your meal beautifully.Now, gather your ingredients and get ready for a delicious experience!
Step-by-Step Instructions
Marinating the Chicken
Preparing the Marinade
First, gather your ingredients. In a medium bowl, mix together the olive oil, lemon juice, lemon zest, minced garlic, oregano, thyme, smoked paprika, sea salt, and black pepper. Whisk it well. This blend creates a bright marinade that adds flavor to the chicken.
Coating the Chicken
Next, take your chicken breasts and place them in a resealable plastic bag or shallow dish. Pour the marinade over the chicken, making sure every piece is well coated. Seal the bag or cover the dish. Refrigerate the chicken for at least one hour. For even more flavor, let it sit for up to four hours.
Grilling the Chicken
Preheating the Grill
As the chicken marinates, preheat your grill to medium-high heat. This step is key for a nice sear on the chicken. A hot grill helps lock in juices and gives you those beautiful grill marks.
Cooking Times and Techniques
After marinating, remove the chicken from the bag. Let any excess marinade drip off. Discard the leftover marinade to keep everything safe. Place the chicken on the hot grill. Cook for about six to seven minutes on each side. Check the chicken’s internal temperature; it should reach 165°F (75°C). The meat should no longer be pink.
Final Touches
Resting the Chicken
Once the chicken is cooked, transfer it to a serving platter. Let it rest for about five minutes. This resting period is important. It allows the juices to settle, making the chicken more tender and juicy.
Garnishing Tips
Before serving, sprinkle chopped parsley over the grilled chicken for freshness and color. You can also add lemon wedges around the platter. This adds a nice touch and gives your meal a zesty pop.
Tips & Tricks
Perfecting the Grilling Process
Optimal Grill Temperature
To get juicy chicken, preheat your grill to medium-high heat. This is about 375°F to 450°F. A hot grill gives the chicken a nice sear. This locks in the flavor and moisture. Use a grill thermometer to check the heat. If you don’t have one, hold your hand about six inches above the grill. Count to three; if it’s too hot to hold, it’s ready.
Preventing Sticking
To keep the chicken from sticking, clean the grill grates first. Use a grill brush before heating. Then, oil the grates lightly. You can use a paper towel dipped in oil. Grab it with tongs and wipe the grates. This creates a non-stick surface. It helps the chicken release easily when it’s done cooking.
Enhancing Flavor
Additional Marinade Ideas
Want to mix it up? Try adding fresh herbs like basil or cilantro to the marinade. You can also use different citrus juices, like orange or lime. For a spicy kick, add red pepper flakes or a splash of hot sauce. Each choice gives a new twist to the classic recipe.
Recommended Cooking Tools
For the best results, use a good set of tongs and a spatula. Tongs let you flip the chicken without piercing it. This keeps the juices in. A meat thermometer is also a must. It ensures your chicken reaches 165°F. This keeps it safe to eat and perfectly cooked. You might also want a grill basket for vegetables. It makes grilling easy and fun!
Variations
Flavor Combinations
Different Citrus Options
You can switch up the citrus in this recipe. Try using lime or orange juice instead of lemon. Each option gives a unique taste. Lime adds a sharp, fresh kick. Orange offers a sweeter, milder flavor. Experiment to find your favorite!
Adding Heat with Spices
If you like spice, add some heat! A pinch of cayenne pepper works well. You could also try red pepper flakes for a nice kick. Adjust the amount to match your heat level. This change can make the dish even more exciting.
Substitutions
Chicken Alternatives
This recipe is not just for chicken breasts. You can use chicken thighs for a juicier option. If you want a different protein, try turkey or even firm tofu for a vegetarian twist. Each choice brings its own flavor and texture.
Herb Variations
Feel free to swap herbs based on your taste. Fresh basil or cilantro can add a fresh twist. You can also use rosemary or dill for a unique flavor. Don’t be afraid to mix herbs to create your personal blend.
Storage Info
Storing Leftovers
Refrigeration Guidelines
After your meal, store any leftover grilled chicken in an airtight container. Make sure the chicken cools down first. Place it in the fridge within two hours. It will stay fresh for up to four days. Label the container with the date, so you know when to use it.
Freezing Instructions
If you want to save chicken for later, freezing is a great choice. Wrap each piece tightly in plastic wrap, then place it in a freezer bag. Squeeze out all the air before sealing. This helps prevent freezer burn. You can freeze the chicken for up to three months. When ready to eat, thaw it in the fridge overnight.
Reheating Tips
Best Methods for Reheating Grilled Chicken
To reheat grilled chicken, use your oven for the best taste. Preheat your oven to 350°F (175°C). Place the chicken in a baking dish and cover it with foil. Heat for about 15-20 minutes or until it reaches 165°F (75°C). This keeps the chicken moist.
Another option is using a microwave. Place the chicken on a microwave-safe plate. Cover it with a damp paper towel to keep it from drying out. Heat in short bursts of 1-2 minutes, checking often. Make sure it’s hot all the way through before serving.
FAQs
How long should I marinate the chicken?
You should marinate the chicken for at least one hour. This time allows the chicken to absorb the flavors of the marinade. For the best taste, try marinating for up to four hours. Longer marination can enhance the taste and keep the chicken juicy.
Can I use bone-in chicken for this recipe?
Yes, you can use bone-in chicken for this recipe. Bone-in chicken can add more flavor and moisture. Just remember, cooking times will change. Bone-in pieces may take a bit longer to cook through. Always check the internal temperature to ensure it reaches 165°F (75°C).
What sides pair well with Lemon Herb Grilled Chicken?
Many sides go well with Lemon Herb Grilled Chicken. Here are a few ideas:
– Grilled vegetables (like zucchini, bell peppers, and asparagus)
– A fresh garden salad with lemon vinaigrette
– Creamy mashed potatoes or roasted sweet potatoes
– Rice pilaf with herbs and lemon zest
These sides will complement the bright flavors of the chicken and create a balanced meal.
This guide covered everything you need for Lemon Herb Grilled Chicken. We discussed ingredients, marinating, grilling, and adding flavors. Remember to rest the chicken after cooking for the best taste. Keep your grill hot and check for sticking. Try different herbs and spices to make it your own. Store leftovers in the fridge or freezer for later. With these tips, you can create a tasty meal anytime. Enjoy your cooking journey and make each dish your favorite!


