
Are you ready to dive into the delicious world of Margherita pizza? This simple and classic recipe guide will help you create a perfect pie at home. With fresh ingredients and easy steps, you’ll impress your friends and family. Whether you’re new to pizza making or a seasoned chef, I’ll share tips to help you achieve the best flavor. Let’s get started on making your own Margherita pizza!
Ingredients
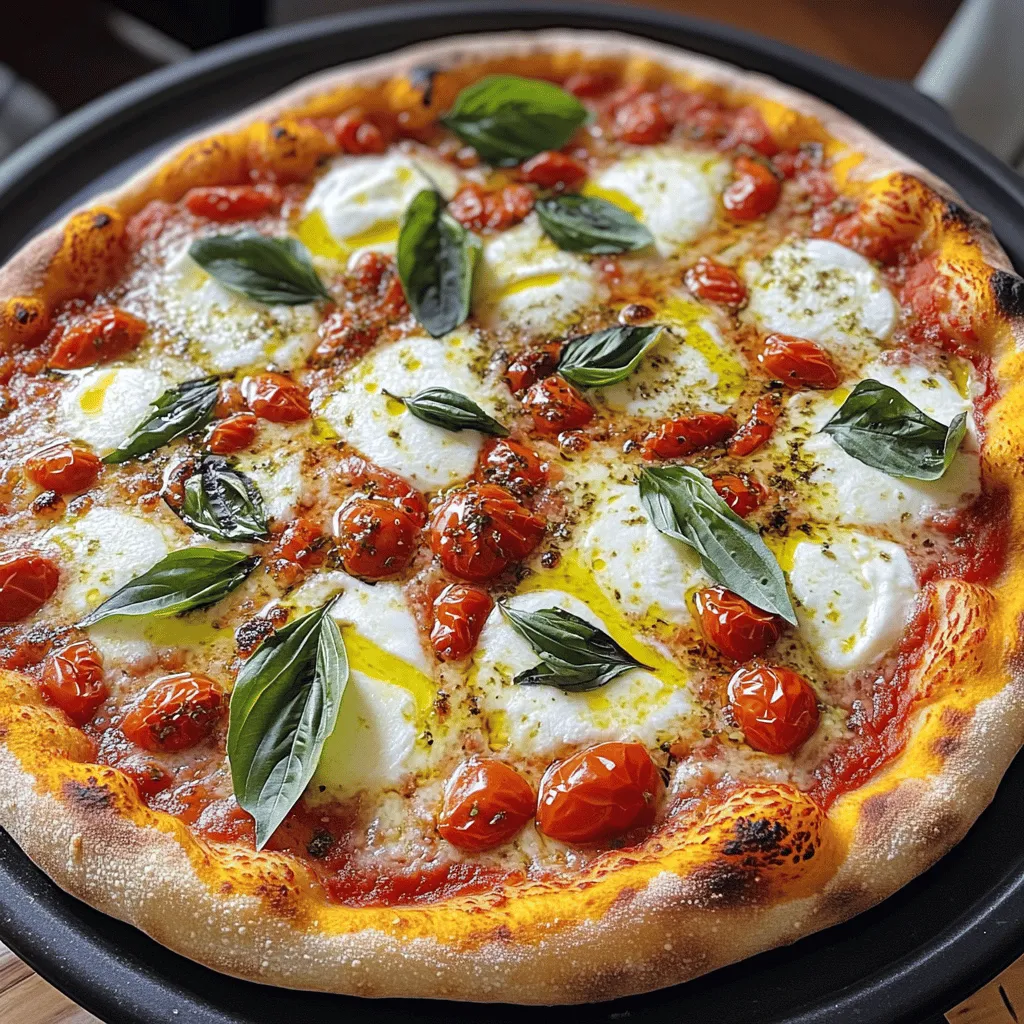
Traditional Ingredients for Margherita Pizza
To make a classic Margherita pizza, you need simple, fresh ingredients. The core ingredients are:
– 2 cups all-purpose flour
– 1 packet (2 1/4 teaspoons) instant yeast
– 1 teaspoon sugar
– 1 teaspoon salt
– 3/4 cup warm water (about 110°F)
– 1 tablespoon extra virgin olive oil
– 1 cup canned San Marzano tomatoes, crushed
– 1 1/2 cups fresh mozzarella cheese, sliced
– A handful of fresh basil leaves
– Salt and pepper to taste
– Extra virgin olive oil for drizzling
These ingredients work together to create a delicious and authentic pizza.
Recommended Quality Ingredients
Using high-quality ingredients can elevate your pizza. Here are my top picks:
– San Marzano tomatoes: These tomatoes are known for their sweet flavor and low acidity.
– Fresh mozzarella: Look for buffalo mozzarella if possible. It has a rich taste and creamy texture.
– Extra virgin olive oil: Choose a good quality oil for drizzling. It adds depth and flavor.
– Fresh basil: Look for vibrant, green basil to enhance the pizza’s aroma.
Investing in these ingredients makes a big difference in taste.
Ingredient Substitutes
If you can’t find some ingredients, don’t worry! Here are some substitutes:
– All-purpose flour: You can use bread flour for a chewier crust.
– Instant yeast: Active dry yeast works well, but you may need to let it bloom first.
– San Marzano tomatoes: Any quality canned tomatoes can work, but they should be crushed.
– Fresh mozzarella: Use shredded mozzarella if fresh is not available, though it may melt differently.
These substitutes ensure that you can still enjoy a homemade Margherita pizza, even if you lack some traditional items.
Step-by-Step Instructions
Prep and Make the Dough
To make the dough, start with a large bowl. Mix 2 cups of all-purpose flour, 2 1/4 teaspoons of instant yeast, 1 teaspoon of sugar, and 1 teaspoon of salt. Stir these dry ingredients together well. Next, pour in 3/4 cup of warm water and 1 tablespoon of extra virgin olive oil. Stir until the mixture forms a dough.
Now, place the dough onto a floured surface. Knead it for about 5 to 7 minutes. This step helps the dough become smooth and elastic. When you finish kneading, shape the dough into a ball. Put it in a lightly oiled bowl and cover it with a damp cloth. Let it rise in a warm spot for 1 hour, or until it doubles in size.
Preparing the Toppings
While the dough rises, prepare the toppings. Use 1 cup of canned San Marzano tomatoes. Crush them if they aren’t already. This tomato sauce will add rich flavor. For cheese, slice 1 1/2 cups of fresh mozzarella cheese. Slice it thick enough to melt nicely. Gather a handful of fresh basil leaves. You can also keep salt and pepper nearby for extra taste.
Baking the Pizza
Once the dough has risen, preheat your oven to 475°F (245°C). If you have a pizza stone, put it in the oven to heat up. Punch down the dough gently to release air. Roll it out on a floured surface into a 12-inch round. Make sure the edges are a bit thicker for a crust.
Now, place the rolled dough onto a parchment-lined baking sheet or a pizza peel. Spread the crushed tomatoes evenly over the dough, leaving a small edge. Sprinkle salt and pepper on top for flavor. Next, layer the sliced mozzarella evenly on the sauce.
Carefully slide the pizza into the hot oven. Bake for 12 to 15 minutes, or until the crust is golden brown and the cheese is bubbly. Once done, take out the pizza and scatter fresh basil leaves on top. Drizzle a bit more olive oil to make it shine. Let it cool for a couple of minutes, then slice and enjoy your homemade Margherita pizza!
Tips & Tricks
Achieving the Perfect Crust
To get a great crust, start with high-quality flour. I like all-purpose flour for its balance. Mix your dry ingredients well. This helps the yeast activate properly. Knead the dough until it feels smooth and elastic. This step is key for the right texture. Let the dough rise in a warm spot. A warm kitchen works well. This helps it double in size. Preheat your oven to a high temperature, around 475°F. If you use a pizza stone, let it heat up too. This gives you a crispy base.
Cheese Melting Techniques
For the best cheese melt, use fresh mozzarella. Slice it thinly and drain any excess water. This keeps your pizza from getting soggy. Spread the cheese evenly over the sauce. Make sure each piece melts nicely. Bake your pizza at high heat. This helps the cheese bubble and brown. If you want extra flavor, try mixing in some grated Parmesan cheese. This adds a lovely salty kick.
Flavor Enhancement Suggestions
To boost flavor, use quality San Marzano tomatoes. Crush them gently and season with salt and pepper. You can also add a pinch of sugar to balance acidity. Fresh basil is a must for classic taste. Scatter it on right after baking for a fresh touch. A drizzle of extra virgin olive oil adds richness. Try adding a sprinkle of chili flakes for some heat. You can also use a balsamic glaze for a sweet contrast. These small tweaks can elevate your pizza to new heights.
Variations
Margherita Pizza with a Twist
You can add fun flavors to your Margherita pizza. Try adding spicy pepperoni or sweet roasted red peppers. These toppings give a nice kick. You can also try fresh arugula after baking for a peppery touch. For a unique twist, swap mozzarella for burrata cheese. Burrata adds creaminess and richness that is just delightful.
Gluten-Free Margherita Pizza
If you need a gluten-free option, you can still enjoy Margherita pizza. Use a gluten-free pizza dough mix found in stores. Many brands offer good alternatives. Just follow the package instructions. You can achieve a crispy crust that tastes amazing. Top it just like the classic version with tomatoes, mozzarella, and basil.
Vegetarian Additions
For those who love veggies, adding fresh ingredients makes your pizza special. Try bell peppers, mushrooms, or zucchini. These add color and flavor. You can also sprinkle some olives for a briny taste. If you want more greens, fresh spinach works well too. Just remember to keep it light so the crust stays crispy.Enjoy making your Margherita pizza your own!
Storage Info
Storing Leftover Pizza
After enjoying your Margherita pizza, you might have some left. To store it, let the pizza cool first. This step helps keep the crust crisp. Place the slices in an airtight container. If you don’t have one, wrap them in plastic wrap. Keep the container or wrapped pizza in the fridge. It will last about 3 days. Remember, the sooner you eat it, the better it tastes!
Reheating Techniques
When you are ready to enjoy your leftover pizza, reheating makes a difference. The oven is best for this task. Preheat your oven to 375°F (190°C). Place the pizza slices on a baking sheet. Heat for about 10 minutes. This method keeps the crust crispy. You can also use a skillet. Heat the skillet over medium heat. Add the pizza slice and cover it with a lid. Heat for about 5-8 minutes. This keeps the cheese melty and the crust nice.
Freezing for Later Use
If you want to save your pizza for a long time, freezing is a great option. Wrap each slice tightly in plastic wrap. Then, place them in a freezer-safe bag or container. Make sure to remove as much air as possible. Label the bag with the date. Your pizza can stay in the freezer for up to 2 months. To eat later, thaw the slices in the fridge overnight. Then, reheat them in the oven or skillet, and enjoy!
FAQs
What is Margherita Pizza?
Margherita pizza is a simple, classic dish. It has a thin crust, fresh tomatoes, mozzarella cheese, and basil. This pizza honors Queen Margherita of Savoy. The colors of the toppings represent the Italian flag: red, white, and green.
How do you make the dough rise faster?
To make the dough rise faster, use warm water. Warm water should be about 110°F. Adding a bit of sugar helps too. Sugar feeds the yeast and speeds up the rise. Place the dough in a warm spot, like near a sunny window, to help it rise.
Can I use mozzarella cheese alternatives?
Yes, you can use mozzarella cheese alternatives. Some great options include burrata or vegan cheese. Just make sure the cheese melts well. You want that nice, gooey texture for your pizza.
What toppings go well with Margherita Pizza?
Margherita pizza is best with simple toppings to keep it classic. Here are some options:
– Fresh arugula
– Sliced tomatoes
– Prosciutto
– Olives
These toppings add flavor without overpowering the pizza.
How does homemade compare to restaurant Margherita Pizza?
Homemade Margherita pizza often tastes fresher. You control the ingredients and make it your way. Restaurant pizza may use special ovens for a crispier crust. Still, with practice, your homemade pizza can rival any restaurant.
Making Margherita pizza is simple yet rewarding. You learned about the right ingredients, how to prepare them, and baking techniques. We also explored tips for a great crust and creative variations, plus how to store leftovers.
Homemade pizza not only tastes better, but it also lets you make it your way. With these steps and ideas, you can impress anyone with your pizza skills. Now it’s time to roll up your sleeves and get cooking!


