Minute Buffalo Chicken Wraps Flavorful and Simple Meal

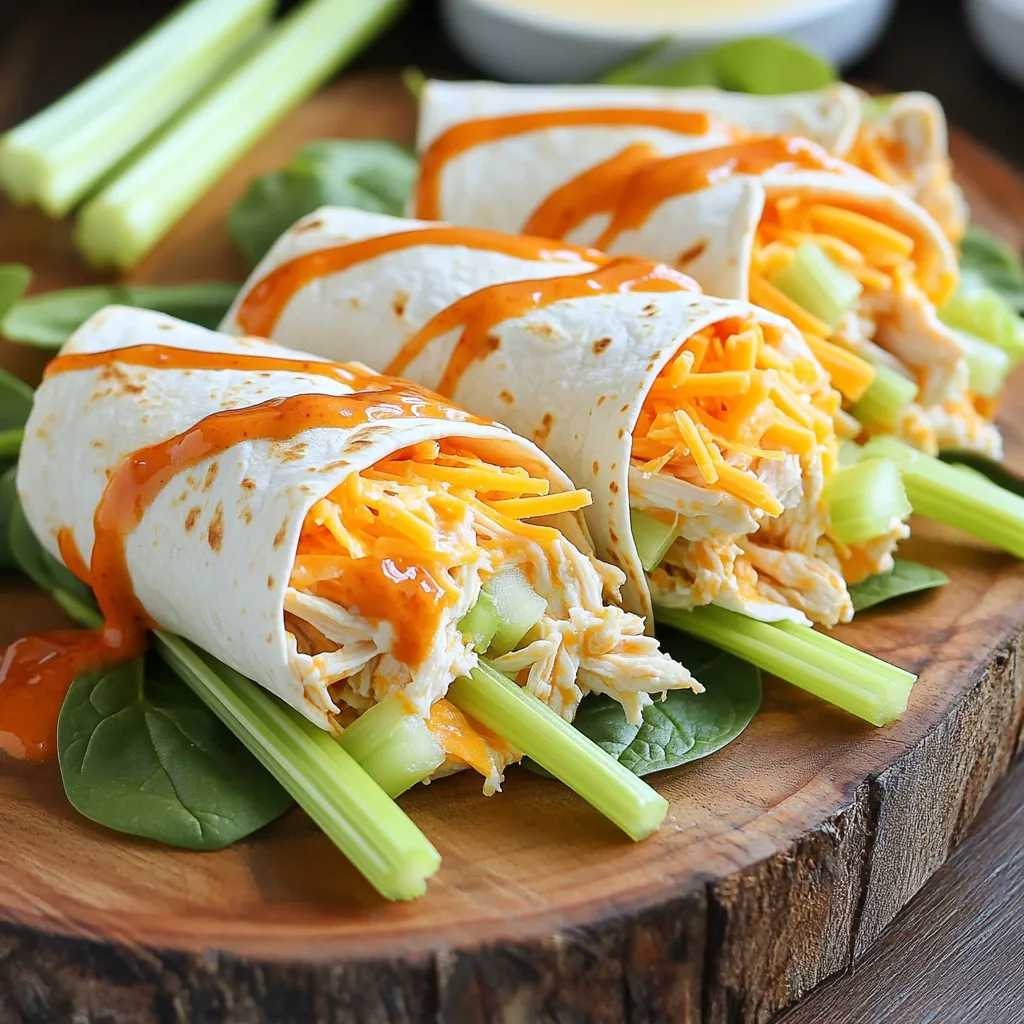
Looking for a quick and tasty meal? Minute Buffalo Chicken Wraps are your answer! This simple recipe combines tender chicken, zesty buffalo sauce, and creamy ranch, all wrapped up for a flavorful bite. Whether it’s a weeknight dinner or a fun lunch, these wraps are easy to make and customizable to fit your taste. Ready to whip up something delicious? Let’s dive into the ingredients and get started!
Ingredients
Main Ingredients
– 2 cups cooked and shredded chicken breast
– 1/2 cup buffalo sauce
– 1/4 cup cream cheese
– 1/2 cup shredded cheddar cheese
– 1/2 cup chopped celery
– 4 large flour tortillas
– 1 cup fresh baby spinach leaves
– 1/4 cup ranch dressing
– Salt and pepper
I love using shredded chicken for these wraps. It gives a great flavor and texture. The buffalo sauce adds a spicy kick, but you can adjust it to your taste. Cream cheese makes the filling creamy and rich.
Chopped celery adds a nice crunch, and shredded cheddar gives a cheesy goodness. Flour tortillas hold everything together well. Fresh spinach leaves add color and nutrients. Don’t forget the ranch dressing; it balances the heat of the buffalo sauce. A sprinkle of salt and pepper helps to enhance the flavors.
Optional Ingredients
– Additional veggies for crunch (carrots, bell peppers)
– Different types of cheese (blue cheese, pepper jack)
– Alternative wraps (whole grain, spinach)
Feel free to add more veggies if you like. Carrots and bell peppers can give extra crunch and flavor. You can try other cheeses too, like blue cheese for a bold taste. If you want a healthier wrap, choose whole grain or spinach tortillas. These options make the wraps fun and unique!
Step-by-Step Instructions
Preparation Steps
First, grab a large mixing bowl. In this bowl, combine 2 cups of cooked and shredded chicken breast with 1/2 cup of buffalo sauce. Mix well until the chicken is fully coated in the sauce.
Next, add 1/4 cup of softened cream cheese to the chicken mixture. Use a spatula to blend it in until smooth. This will give your wraps a creamy texture.
Finally, fold in 1/2 cup of shredded cheddar cheese and 1/2 cup of chopped celery for a nice crunch. Stir until everything is mixed well. Season with salt and freshly cracked pepper to taste.
Assembling the Wraps
Now, it’s time to lay out your 4 large flour tortillas on a clean surface. In the center of each tortilla, place a generous handful of 1 cup of fresh baby spinach leaves.
Next, add a hearty scoop of the buffalo chicken mixture on top of the spinach. This layer packs in the flavor. Drizzle 1/4 cup of ranch dressing over the chicken mixture. This will add extra creaminess.
To form the wraps, fold in the two sides of the tortilla first. After that, roll the tortilla tightly from the bottom up. This step keeps all your fillings snug inside.
Final Touch
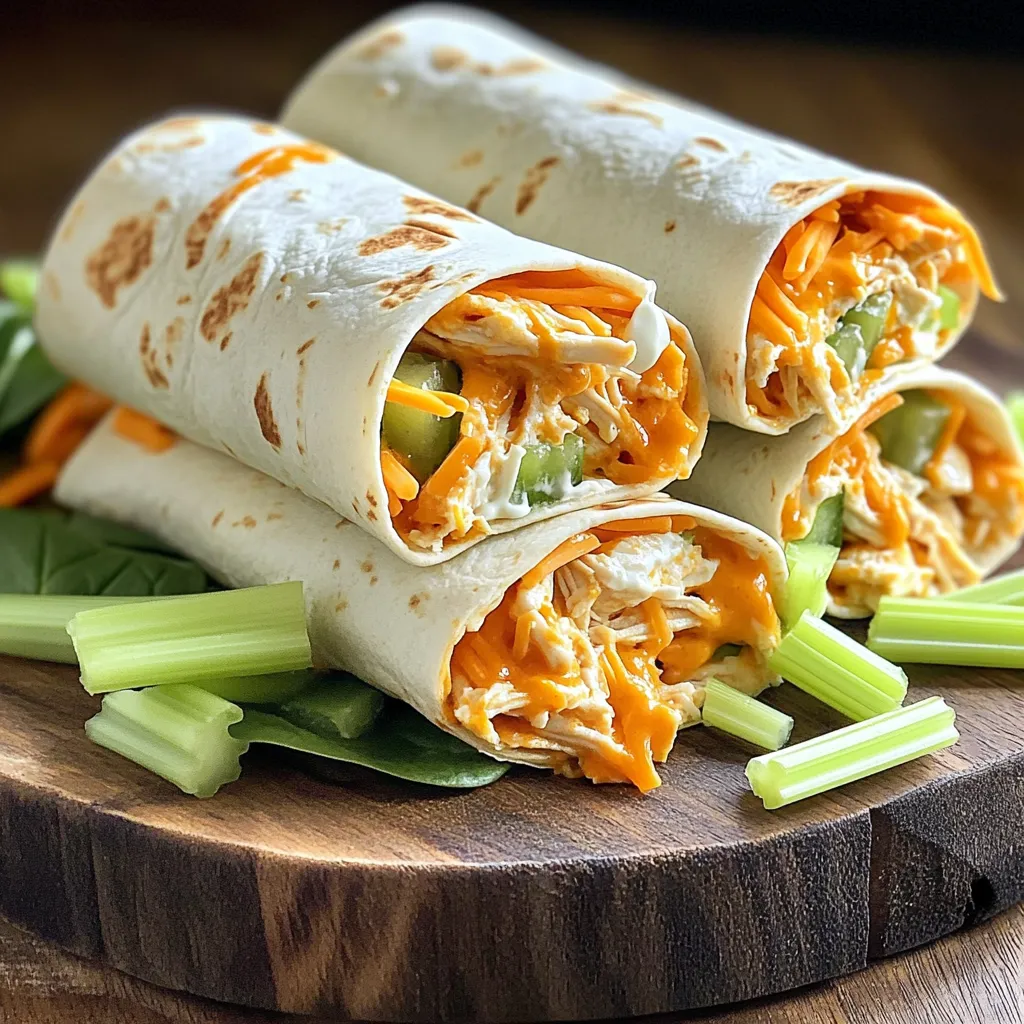
With your wraps assembled, use a serrated knife to cut each one in half diagonally. This makes them easier to handle and looks great on a plate.
For presentation, arrange the wraps neatly on a large serving platter. You can garnish with extra celery sticks. Place a small bowl of ranch dressing nearby for dipping. This adds a fun touch and invites everyone to dig in!
Tips & Tricks
Cooking Tips
To shred chicken easily, use two forks. Hold one fork steady, and pull with the other. This method works well on warm, cooked chicken. You can also use a stand mixer with a paddle attachment. Just place the chicken in the bowl, turn it on low, and watch it shred in seconds.
When it comes to buffalo sauce, I like to recommend a few brands. Frank’s RedHot is a classic choice, known for its perfect balance of heat and flavor. If you want something creamier, try Sweet Baby Ray’s Buffalo Sauce. It adds a nice twist while keeping the spicy kick.
Serving Suggestions
For drinks, pair your wraps with a light beer or a refreshing lemonade. Both options can cool down the heat. If you want sides, fresh veggies and dip work well. Carrot sticks and celery are perfect for that crunchy contrast.
Garnishing your wraps can really make them pop. You can sprinkle some extra cheddar cheese on top. Adding fresh herbs like parsley or cilantro also brightens the dish. For an extra crunch, serve with celery sticks and a small bowl of ranch dressing on the side.

Variations
Flavor Variations
You can easily switch up the taste of your Minute Buffalo Chicken Wraps. Here are a couple of fun ideas:
– For a spicy kick, add jalapeños to your chicken mix. This gives your wraps a nice heat.
– If you love creamy flavors, mix in extra ranch dressing. This makes the wraps rich and tasty.
Feel free to get creative! You can also add different veggies or cheese to change the flavor even more.
Dietary Variations
These wraps can fit many diets. Here are some great options:
– You can use lettuce wraps instead of tortillas. This makes your meal gluten-free and fresh.
– For a vegetarian version, swap chicken with plant-based chicken. This way, you can enjoy the same great taste without meat.
These variations help everyone enjoy a tasty meal. Whether you want spicy, creamy, or a diet-friendly option, these wraps can adapt to your needs.
Storage Info
Storing Leftovers
To store your buffalo chicken wraps, wrap them tightly in plastic wrap or foil. This keeps them fresh and prevents them from drying out. You can also place them in an airtight container. They stay good in the fridge for up to three days. After that, the flavors may fade, and the texture may change.
Reheating Tips
When it comes to reheating, you have two great options: the microwave or the oven. The microwave is quick but can make the wrap a bit soft. If you want a crispy texture, use the oven. Preheat it to 350°F (175°C) and place the wraps on a baking sheet. Heat for about 10 minutes, or until warm.
To keep your wraps nice, cover them with foil while reheating. This step helps them stay moist. Enjoy your tasty buffalo chicken wraps again!
FAQs
How do I make buffalo chicken wraps spicier?
To make buffalo chicken wraps spicier, add more buffalo sauce. You can also mix in some diced jalapeños or crushed red pepper flakes. Adjust the heat to your taste. This way, you can enjoy a kick in every bite!
Can I prepare the filling in advance?
Yes, you can prepare the filling ahead of time. Mix the chicken, buffalo sauce, cream cheese, and other ingredients. Store it in an airtight container in the fridge. This makes it easy to assemble your wraps when you’re ready to eat!
What can I substitute for ranch dressing?
If you want a different flavor, try blue cheese dressing. Greek yogurt is a healthy option too. You can also mix sour cream with a little lemon juice for a tangy taste. Choose what you like best!
How many servings does this recipe yield?
This recipe yields four servings. Each wrap is filling and tasty. You can easily double the recipe for more guests or leftovers!
Can I freeze buffalo chicken wraps?
Yes, you can freeze buffalo chicken wraps. Wrap them tightly in plastic wrap or foil. Store them in a freezer bag to keep them fresh. When you’re ready to eat, thaw them in the fridge and reheat before serving.
This blog post covered everything you need for tasty buffalo chicken wraps. You learned about the key ingredients, step-by-step instructions, and helpful tips. We explored variations to suit different tastes and diets. Lastly, we discussed storage and reheating methods to keep your wraps fresh.
Enjoy making these wraps for your next meal. They are easy to customize and always a hit!


![- 1 cup fresh spinach, finely chopped - 1 cup canned artichoke hearts, well-drained and chopped - 1/2 cup cream cheese, softened to room temperature - 1/2 cup sour cream - 1/2 cup mozzarella cheese, freshly shredded - 1/4 cup Parmesan cheese, finely grated - 2 cloves garlic, minced - 1 teaspoon fresh lemon juice - Salt and freshly ground black pepper to taste - 1/4 teaspoon red pepper flakes (optional) - Tortilla chips or freshly sliced baguette for serving The ingredients for creamy spinach artichoke dip come together easily. You can choose fresh or canned artichokes. I prefer fresh spinach for flavor, but both work well. Cream cheese gives the dip its base, making every bite rich and smooth. The sour cream adds tanginess. For that cheesy pull, I use mozzarella. Parmesan adds a salty bite that brightens the whole dish. I always add fresh garlic for depth. A splash of lemon juice lifts the flavors, making them pop. Salt and pepper balance the dish. If you like heat, use red pepper flakes. They add a nice kick without overwhelming the flavors. Serve with tortilla chips or a sliced baguette for dipping. Each bite of this dip is a creamy, cheesy delight. For the full recipe, check the section above. Preheating your oven to 350°F (175°C) is key for this dip. This step makes sure your dip cooks evenly. You want it to bubble and get a nice golden color. Skipping this step can lead to an uneven bake. In a large bowl, mix together the cream cheese, sour cream, mozzarella, and Parmesan. Use a spatula or a hand mixer to blend until smooth. This creates a rich and creamy base. The cream cheese must be soft for easy mixing. Make sure there are no lumps. A smooth texture makes the dip great for dipping. Next, gently fold in the chopped spinach and artichoke hearts. Add in the minced garlic, lemon juice, salt, pepper, and red pepper flakes if you like some heat. Stir carefully to mix everything well. This is where the magic happens. The flavors of spinach and artichokes blend to create a delicious combination. Now, spoon the mixture into a baking dish. Spread it evenly to create a uniform layer. Place the baking dish in the preheated oven and bake for 25 to 30 minutes. You want to see bubbling around the edges and a light golden top. This means your dip is ready. Once baked, let it cool for a few minutes before serving. This short wait allows the flavors to meld beautifully, making it taste even better. For the Full Recipe, visit the provided link. To get that smooth and creamy dip, mix your cheeses well. Start with softened cream cheese and sour cream. This helps avoid lumps. Use a spatula or hand mixer to blend everything until it's nice and smooth. When you add spinach and artichokes, fold them in gently. This keeps the dip fluffy and creamy. Want to kick up the flavor? Add more garlic! You can use three or four cloves if you love garlic. Fresh herbs like basil or parsley also boost taste. A sprinkle of cayenne pepper adds a fun kick. Experiment with Italian seasoning for a unique twist. Each addition brings new flavor layers to your dip. Serve your dip warm for the best experience. When it comes out of the oven, let it cool for a few minutes. This allows the flavors to blend well. Serve it hot with tortilla chips or sliced baguette. The warmth makes it extra inviting and tasty. For a lovely touch, sprinkle some extra Parmesan on top before serving. {{image_4}} You can make this dip lighter by swapping some ingredients. Use low-fat cream cheese and sour cream for a healthier twist. Greek yogurt is another great choice. It adds creaminess without the extra fat. You won't miss the full-fat versions. Plus, you still get that rich taste you love. Want to change up the flavor? Try adding different cheeses. Cheddar or gouda can give it a fun kick. You can also mix in spices like cumin or paprika. These simple tweaks can make your dip unique. Don’t be afraid to experiment. Each time, you can create a new favorite. For a vegan version, replace dairy products with plant-based alternatives. Use cashew cream or tofu for the cream cheese. You can also use coconut yogurt instead of sour cream. Nutritional yeast gives it a cheesy flavor. These swaps keep the dish creamy while being vegan-friendly. Enjoy delicious flavors without the dairy! For the full recipe, check out [Full Recipe]. Store leftover dip in an airtight container. This keeps the dip fresh and tasty. Place it in the fridge within two hours of serving. For longer storage, you can freeze it. Use a freezer-safe container and label it with the date. Make sure to leave some space for expansion when freezing. To reheat your dip, use an oven or a microwave. In the oven, preheat to 350°F (175°C). Place the dip in a baking dish and cover it with foil. Heat for about 15-20 minutes, or until warm. In the microwave, heat in short bursts of 30 seconds, stirring in between. This way, you keep the dip creamy and avoid a rubbery texture. The dip lasts about 3-4 days in the fridge. Make sure it is sealed well. If frozen, it can last up to 2 months. To enjoy the best flavor, eat it within this time. Always check for any off smell or change in texture before eating. Yes, you can make this dip ahead of time! Prepare the dip and store it in the fridge. Use an airtight container to keep it fresh. You can make it a day before your event. Just remember to bake it right before serving. If you want to reheat it, warm it in the oven until it's hot and bubbly. This dip pairs well with many snacks. Try serving it with: - Tortilla chips - Fresh vegetable sticks like carrots and celery - Sliced baguette - Pita chips These options add crunch and freshness. They also bring out the creamy flavor of the dip. You can bake this dip in a slow cooker! First, mix all the ingredients as usual. Then, place the mixture in the slow cooker. Cook it on low for about 2 to 3 hours. Stir it occasionally to keep it smooth. This method makes the dip perfect for parties, as it stays warm and ready to enjoy. For the full recipe, check out the complete guide above. This creamy spinach artichoke dip is easy to make and fun to share. We covered the key ingredients and detailed step-by-step instructions to guide you. Remember to adjust flavors and textures to your liking, and don’t hesitate to explore variations. Whether making it healthier or trying vegan options, there’s a version for everyone. Store any leftovers properly, and reheat to enjoy it warm again. With this recipe, you are set for tasty gatherings and comfy nights in. Enjoy your delicious creation!](https://joymealplan.com/wp-content/uploads/2025/07/4577691d-75b4-487d-8cf6-776305dcf758-768x768.webp)


![- 1 pre-made phyllo pastry sheet (about 8-10 sheets) or one ready-made pie crust - 4 medium ripe tomatoes, thinly sliced - 1 cup fresh basil leaves, roughly chopped - 1 cup ricotta cheese - 1 cup shredded mozzarella cheese - 2 tablespoons extra virgin olive oil, plus additional for brushing - 1 teaspoon garlic powder - Salt and freshly cracked black pepper to taste - Optional: Balsamic glaze for drizzling When I create this fresh tomato basil tart, I love to use simple, fresh ingredients. The star is the ripe tomatoes. They bring bright flavor and juicy texture. I choose tomatoes that are firm but not hard. Their color should be vibrant. Basil is another key player. Fresh basil adds a sweet and peppery taste. I prefer to roughly chop it to release its oils. This way, every slice of the tart bursts with flavor. For creaminess, I use ricotta cheese. It adds a rich and smooth layer. I mix it with garlic powder, salt, and pepper. This mix gives a nice seasoning base. Next, mozzarella cheese adds a lovely stretch. It melts beautifully and gives that gooey texture we crave. Together, they make the tart creamy and savory. I also use extra virgin olive oil. It not only adds flavor but helps the crust brown nicely. A drizzle before baking makes a big difference. Lastly, I sometimes add balsamic glaze. It gives a sweet and tangy touch. It’s optional, but I find it elevates the dish. Each ingredient plays a role in making this tart special. When you gather these items, you set the stage for a delightful meal. Check out the [Full Recipe] for a step-by-step guide to bring this tart to life! 1. Preheating the oven Start by preheating your oven to 375°F (190°C). This step is key to getting a nice, crispy crust. 2. Preparing the pastry If using phyllo pastry, layer 4-5 sheets in a tart pan. Brush a thin layer of olive oil between each sheet. This adds flavor and helps create a crunchy texture. If you opt for a pie crust, just place it in the tart pan and crimp the edges for a nice look. 3. Making the ricotta mixture In a mixing bowl, combine ricotta cheese, garlic powder, salt, and pepper. Use a spatula to mix until smooth. This mixture adds creaminess to the tart. 1. Layering tomatoes and cheese Spread the ricotta mixture evenly over the crust. Then, layer the sliced tomatoes on top. Overlap the slices slightly for a pretty design. After the tomatoes, sprinkle shredded mozzarella cheese over them. Finally, add the chopped basil for a fresh taste. 2. Drizzling olive oil Drizzle the remaining olive oil over the top of the tart. This helps the tart brown nicely and boosts flavor. 1. Baking duration and tips Place the tart in your preheated oven. Bake for 25-30 minutes. Look for a golden brown crust and bubbly cheese. This means it’s nearly ready! 2. Cooling period before slicing Once baked, remove the tart from the oven. Let it cool on a wire rack for a few minutes. This cooling time helps set the filling, making slicing easier. Check out the Full Recipe to get all the details you need! For the best results, set your oven to 375°F (190°C). This temperature helps the tart cook evenly and creates a nice, crisp crust. To check for doneness, look for a golden-brown crust and bubbly cheese. The cheese should be slightly browned, adding flavor and texture. If you see these signs, your tart is ready! Garnishing makes your dish pop. Slice the tart into wedges and serve on a rustic wooden board. Add fresh basil leaves on top for a vibrant touch. You can also drizzle balsamic glaze over the tart right before serving. It adds a sweet and tangy flavor that enhances the dish. One mistake is ending up with a soggy crust. To prevent this, always brush the pastry with olive oil or egg wash before adding toppings. Another common issue is uneven cheese melting. Spread the cheese evenly and avoid overloading one side. This ensures every bite is cheesy and delicious. {{image_4}} To make your Fresh Tomato Basil Tart even more exciting, try using different cheeses. Instead of ricotta, you can use goat cheese or feta. Both add a unique tang. For mozzarella, consider using provolone or a sharp cheddar. These swaps change the taste while keeping it delicious. You can also play with herbs and spices. Instead of basil, use fresh oregano or thyme for a new flavor. A pinch of red pepper flakes can add a little heat. Just remember, keep the balance so it doesn't overpower the fresh tomatoes. Seasonal vegetables can enhance your tart. In summer, add zucchini or bell peppers for a colorful twist. In fall, roasted butternut squash works well. These veggies bring new flavors and textures to your dish. Don't shy away from incorporating different flavors. For instance, a sprinkle of smoked paprika gives a lovely depth. You could even add sun-dried tomatoes for a rich, sweet touch. These tweaks keep the tart fresh and exciting all year round. If you need vegan or gluten-free options, it’s easy to adapt. For a vegan tart, swap the cheeses for cashew cream or tofu. These provide creaminess without dairy. Use gluten-free pie crust or phyllo pastry for a gluten-free option. These variations allow everyone to enjoy this dish. You can create a tart that fits any diet without losing flavor. Check out the Full Recipe for more ideas! To keep your fresh tomato basil tart tasty, store leftovers properly. First, let the tart cool completely. Wrap it in plastic wrap or place it in an airtight container. This helps keep flavors and moisture in. If you prefer, you can also use aluminum foil for wrapping. Store it in the fridge for up to three days for the best taste. When ready to enjoy your leftover tart, preheat your oven to 350°F (175°C). Place the sliced tart on a baking sheet for even heating. Bake for about 10-15 minutes until it's warm. This method keeps the crust crisp and the cheese melty. To avoid sogginess, don’t microwave it. Microwaving can make the crust soft and chewy, which isn’t ideal. Enjoy your delicious tart again! To make a tomato basil tart from scratch, you can choose between two crust options. - Homemade crust: 1. Combine flour, butter, and salt in a bowl. 2. Mix until crumbly. 3. Add cold water, one tablespoon at a time, until the dough forms. 4. Roll out the dough and fit it into your tart pan. 5. Chill the crust for about 30 minutes before filling. - Store-bought crust: Use a pre-made phyllo pastry or ready-made pie crust. This saves time and effort. Simply place it in your tart pan and crimp the edges. I often use phyllo for a crisp texture, but a pie crust works great too. Each option gives a unique taste. Yes, you can prepare the tart in advance. Here are some tips: - Make the crust: You can bake the crust a day ahead. Cool it and store it in the fridge. - Prep the filling: You can mix the ricotta with seasonings a day before. Keep it in the fridge until you're ready to assemble. - Assemble and bake: Assemble the tart a few hours before serving. Bake it fresh to enjoy the best flavors. Store leftovers in an airtight container in the fridge. They stay good for 2-3 days. This tart pairs well with various side dishes and drinks. - Complementary side dishes: - A simple green salad with vinaigrette. - Roasted vegetables for added flavor. - Garlic bread for a comforting touch. - Drinks: - A chilled white wine, like Sauvignon Blanc. - Fresh lemonade for a refreshing option. These options enhance your meal and make it even more enjoyable. Check out the Full Recipe for more details on making this dish! You can make a tasty tomato basil tart with simple steps. We covered key ingredients, like fresh tomatoes and phyllo pastry. The baking process helps bring out rich flavors, while our tips keep your crust crispy. I shared several ways to adapt the tart for diets and seasons. Lastly, proper storage keeps leftovers fresh, making them easy to enjoy later. Dive in, try this recipe, and create your own delicious variations. Enjoy the process—it’s all about making a meal you love!](https://joymealplan.com/wp-content/uploads/2025/07/c4443384-77e0-40e2-9fba-17a466e29922-768x768.webp)
