Indulge your taste buds with my Mocha Chip Ice Cream Sandwiches, a rich and tasty delight! Imagine soft chocolate cookies paired with creamy coffee ice cream, creating the perfect treat for any occasion. Whether you’re celebrating or just treating yourself, this easy recipe will have you impressing friends and family in no time. Let’s dive into this delicious journey and create a sweet masterpiece together.
Ingredients
To make these tasty mocha chip ice cream sandwiches, you will need the following ingredients:
– 1 cup all-purpose flour
– 1/2 cup unsweetened cocoa powder
– 1/2 teaspoon baking soda
– 1/4 teaspoon salt
– 1/2 cup unsalted butter, softened
– 1/2 cup packed brown sugar
– 1/4 cup granulated sugar
– 1 large egg
– 1 teaspoon pure vanilla extract
– 1 cup semi-sweet chocolate chips
– 2 cups coffee ice cream
– Optional toppings: 1/2 cup chopped nuts or chocolate sprinkles
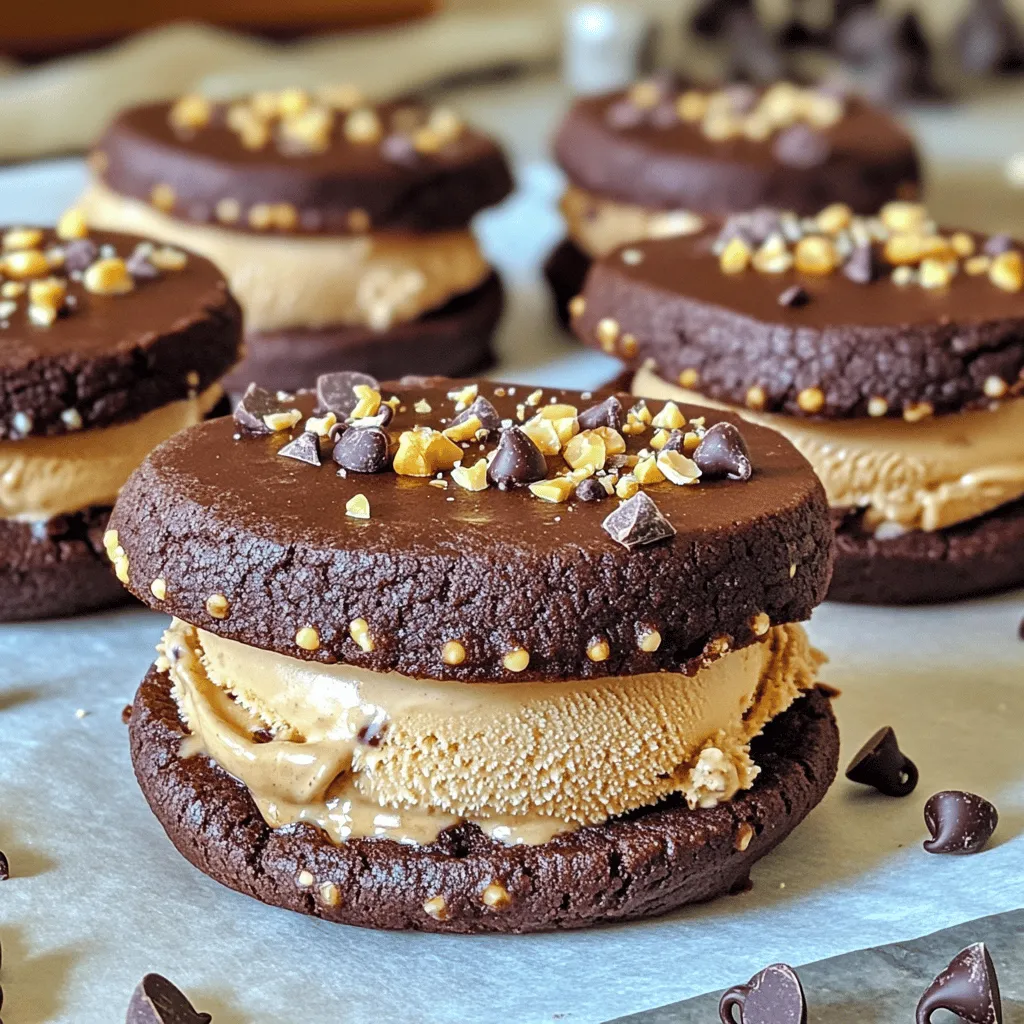
These ingredients come together to create a rich and tasty treat. The cocoa powder gives the cookies a deep chocolate flavor. The coffee ice cream adds a lovely coffee kick. You can even switch up the ice cream for fun! Try vanilla or any flavor you enjoy. Don’t forget the optional toppings for added crunch. Each bite will be a delightful mix of textures and flavors.
Step-by-Step Instructions
Preparing the Cookie Dough
1. Preheat your oven to 350°F (175°C). This step is key for the right texture.
2. Line a baking sheet with parchment paper. This helps cookies not to stick.
3. In a bowl, mix 1 cup of flour, 1/2 cup cocoa powder, 1/2 teaspoon baking soda, and 1/4 teaspoon salt. Whisk these dry ingredients well.
Mixing and Baking
4. In a larger bowl, cream together 1/2 cup softened butter, 1/2 cup brown sugar, and 1/4 cup granulated sugar for 2-3 minutes. The mix should be creamy.
5. Add in 1 large egg and 1 teaspoon vanilla extract. Mix until everything looks smooth.
6. Gradually add the dry mix to the wet mix. Stir gently until just combined.
7. Fold in 1 cup of chocolate chips for that rich flavor.
8. Scoop out tablespoon-sized dough and place them on the baking sheet. Space them 2 inches apart to allow for spreading.
9. Bake for 10-12 minutes. The edges should be crisp, while the centers stay soft.
Cooling and Assembly
10. Let the cookies rest on the baking sheet for 5 minutes. This helps them firm up.
11. Move the cookies to a wire rack to cool completely. This step is important for the perfect texture.
12. For assembly, take one cookie and add a scoop of 2 cups coffee ice cream on top. Place another cookie on top and press gently.
13. For a fun touch, roll the edges in 1/2 cup chopped nuts or chocolate sprinkles. This adds crunch and looks great.
Tips & Tricks
Perfecting the Cookies
To make the best mocha chip cookies, avoid overmixing the dough. When you mix the flour with the wet ingredients, do it gently. This keeps the cookies soft and chewy. Mix until just combined; some flour bits are okay.
For baking, keep an eye on the time. Bake the cookies for 10-12 minutes. The edges should be crisp, and the centers should stay soft. Remove them from the oven when they look slightly underbaked. They will firm up as they cool.
Customizing the Sandwich
You can have fun with flavor variations. Try using different ice cream flavors, like vanilla, chocolate, or even mint! Each choice adds a new twist to your sandwich.
For mix-ins, consider adding chopped nuts or drizzling caramel inside. You can even roll the edges in chocolate sprinkles for some crunch. Mixing these elements gives your sandwiches a personal touch that everyone will love.

Variations
Flavor Combinations
You can switch up the flavor by using different ice cream. Try vanilla for a classic touch. Chocolate ice cream adds even more richness. For a fruity twist, opt for strawberry or mint chocolate chip. Each choice brings a unique taste to your sandwich.
Also, think about the chocolate chips. You can use dark chocolate for a bolder flavor. White chocolate chips add a sweet contrast. If you’re feeling adventurous, try flavored chips like mint or peanut butter. Each combination creates a new experience with every bite.
Dietary Adjustments
If you need gluten-free options, use a gluten-free flour blend. This swap keeps the cookie texture nice and soft without gluten. You might also want to check that your chocolate chips are gluten-free. Many brands offer tasty options.
For those looking for vegan choices, replace the butter with a plant-based alternative. Use a flax egg instead of the large egg. Simply mix one tablespoon of ground flaxseed with three tablespoons of water. Let it sit for a few minutes. This mix works well in place of an egg.
You can also find dairy-free ice cream. Many brands offer delicious flavors made from coconut or almond milk. This choice keeps your mocha chip ice cream sandwiches tasty and friendly for everyone!
Storage Info
Storing Ice Cream Sandwiches
To keep your mocha chip ice cream sandwiches fresh, follow these tips:
– Refrigeration tips: Store the sandwiches in an airtight container. This keeps the cookies soft and the ice cream firm. They can stay in the fridge for up to three days.
– Freezing for longer shelf life: For longer storage, wrap each sandwich in plastic wrap and place them in a freezer-safe bag. They can last for about two months in the freezer. This method keeps the flavors intact and prevents freezer burn.
Best Practices for Serving
– How to thaw before serving: For the best taste, take the sandwiches out of the freezer about 10 minutes before serving. This allows the ice cream to soften slightly, making them easier to bite into.
– Reheating options for a fresh-tasting treat: If you prefer a warm treat, heat the cookies briefly in the microwave for 10-15 seconds. This gives the sandwich a fresh-baked taste while keeping the ice cream cool.
FAQs
How to make mocha chip ice cream sandwiches from scratch?
To make mocha chip ice cream sandwiches, first gather your ingredients. You will need flour, cocoa powder, baking soda, salt, butter, sugars, an egg, vanilla, chocolate chips, and coffee ice cream. Start by preheating your oven to 350°F. Mix the dry ingredients in one bowl. In another bowl, cream the butter and sugars together. Add the egg and vanilla, then mix well. Combine the wet and dry ingredients, then fold in the chocolate chips. Scoop the dough onto a lined baking sheet. Bake for 10-12 minutes and cool. Once cool, scoop the coffee ice cream between two cookies to assemble.
Can I use other cookies for ice cream sandwiches?
Yes, you can use other cookies for ice cream sandwiches. Chocolate chip, peanut butter, or oatmeal cookies work well. Just ensure the cookies are sturdy enough to hold the ice cream. Soft cookies may fall apart. You can also try different flavors to match your ice cream choice.
Where can I buy pre-made mocha chip ice cream sandwiches?
You can find pre-made mocha chip ice cream sandwiches at most grocery stores. Check the ice cream aisle or frozen dessert section. Some local ice cream shops may also offer them. Look for brands that focus on quality ingredients for the best taste.
How long can I store homemade ice cream sandwiches?
You can store homemade ice cream sandwiches in the freezer for up to two weeks. Wrap each sandwich in plastic wrap or foil to prevent freezer burn. For best results, place them in an airtight container. This keeps them fresh and ready for your next craving.
You now have a guide for making delicious mocha chip ice cream sandwiches. Start with simple ingredients like flour, cocoa, butter, and chocolate chips. Follow the steps for making the cookie dough, baking, and cooling your cookies.
Remember, you can customize flavors and use gluten-free or vegan options. Store your treats properly for the best taste. Enjoy sharing these fun desserts with friends and family. Get creative, and savor every bite!


