Mocha Oreo Icebox Cake Delightful No-Bake Treat

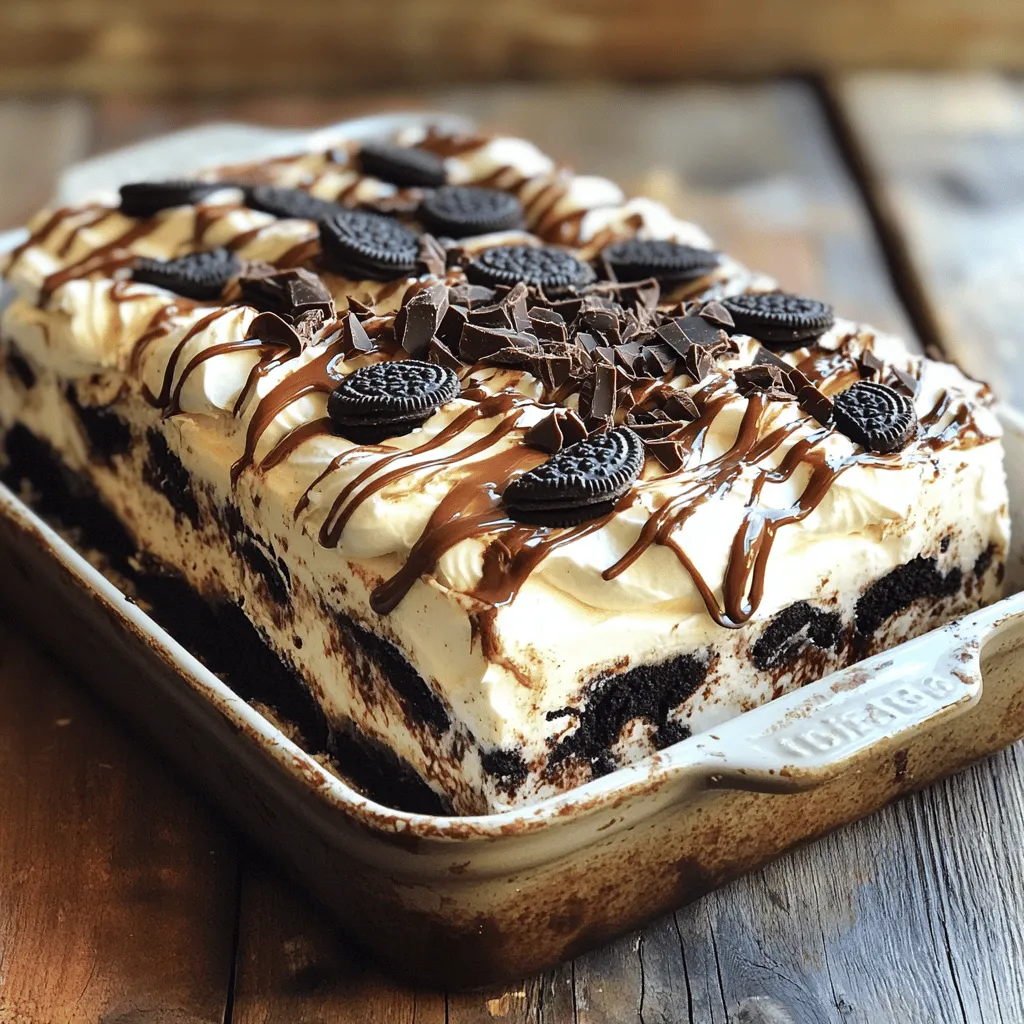
Are you ready for a sweet, no-bake treat? This Mocha Oreo Icebox Cake is a crowd-pleaser! You’ll learn how to whip up creamy layers of rich coffee and chocolate flavors without turning on your oven. Perfect for gatherings or a laid-back dessert night, this easy recipe requires just a few basic ingredients and minimal effort. Let’s dive into the fun of making this delightful cake!
Ingredients
The Mocha Oreo Icebox Cake is simple and fun to make. You only need a few key ingredients to create this delightful treat. Here’s what you will need:
– 2 cups heavy cream
– 1 cup powdered sugar
– 1 teaspoon pure vanilla extract
– 2 tablespoons instant coffee granules
– 1 cup milk
– 24 Oreo cookies
– 1/2 cup chocolate syrup
– Optional: Chocolate shavings and crushed Oreos for garnish
Each ingredient plays a vital role. The heavy cream gives the cake a light and fluffy texture. The powdered sugar adds sweetness, while the vanilla extract brings a warm flavor. Instant coffee granules add a rich mocha taste that pairs well with the chocolate.
The milk helps soften the Oreo cookies, making them easier to layer. Meanwhile, the Oreo cookies serve as the base and main flavor of the cake. The chocolate syrup adds a nice drizzle and extra chocolatey goodness. If you want, you can add chocolate shavings or crushed Oreos on top for a fun finish.
Step-by-Step Instructions
Preparation of Whipped Cream
To start, you need to whip the heavy cream. In a large bowl, use an electric mixer. Beat the cream until soft peaks form. This takes about 2 to 3 minutes. Next, add the powdered sugar, vanilla extract, and instant coffee granules. Keep whipping until you see stiff peaks. This means your cream is ready and will hold its shape.
Soaking Oreo Cookies
Now it’s time to soak the Oreo cookies. In a separate bowl, mix milk with a few crushed Oreos. This adds a nice flavor to the milk. Then, take each Oreo cookie and dip it in the milk. Hold it there for about 2 to 3 seconds. Be careful not to soak them too long. You want them to be moist but not mushy.
Assembling the Cake
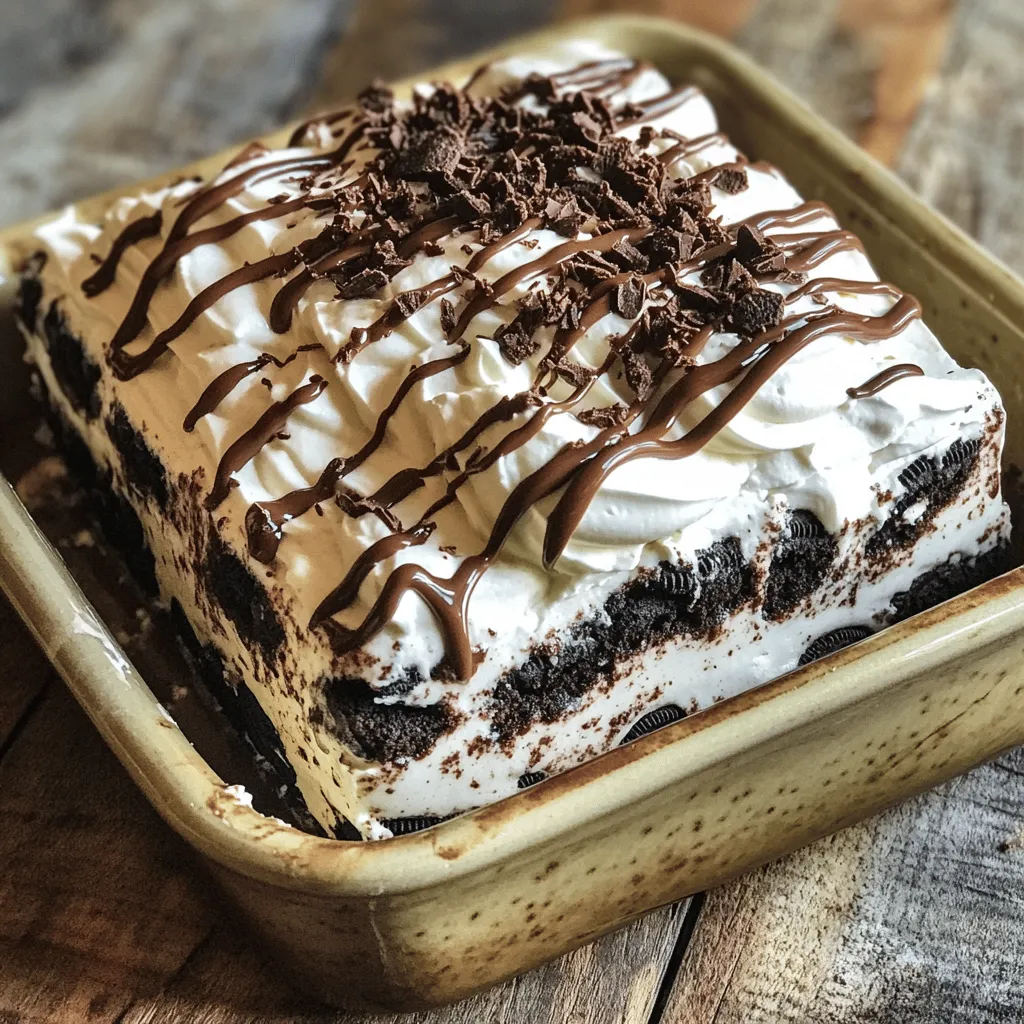
Let’s assemble your cake! Start with a 9×9-inch baking dish. Place a layer of soaked Oreos at the bottom. Make sure they are arranged neatly. Next, spread a layer of the coffee whipped cream over the Oreos. Drizzle some chocolate syrup on top of the cream. Repeat this layering process. Alternate soaked Oreos with whipped cream and chocolate syrup. Finish with a final layer of whipped cream.
Cover the dish tightly with plastic wrap. Refrigerate for at least 4 hours. For the best taste, chill it overnight. This helps the flavors mix well. Just before you serve, add some chocolate shavings and crushed Oreos on top. This makes your cake look amazing!
Tips & Tricks
Achieving the Best Flavor
Chilling time is key for a great Mocha Oreo Icebox Cake. It allows flavors to blend well. I recommend letting it chill overnight for the best taste. The balance of coffee and chocolate creates a rich flavor. Use good quality chocolate syrup and instant coffee for the best result.
Common Mistakes to Avoid
One common mistake is over-soaking the Oreos. Dip them in milk for only 2-3 seconds. If you soak too long, they become mushy instead of soft. Another mistake is not whipping the cream to the right consistency. You want stiff peaks, so the cake holds its shape.
Serving Suggestions
When serving, cut the cake into squares for easy bites. Use a sharp knife to get clean edges. For presentation, add chocolate shavings and crushed Oreos on top. This makes it look fancy and inviting. You can also serve it with a drizzle of chocolate syrup for extra flair.

Variations
Flavor Variations
You can change the flavor of your Mocha Oreo Icebox Cake. Try using other cookies instead of Oreos. Some great options include:
– Chocolate chip cookies
– Peanut butter cookies
– Vanilla wafers
These swaps can create a new taste. You can also add different flavors to the whipped cream. For instance, mix in some peppermint extract for a minty twist. Or, a bit of almond extract can add warmth.
Dietary Adaptations
Many people have special diets. You can make this cake gluten-free. Use gluten-free Oreo cookies or any gluten-free cookies you like. This way, everyone can enjoy a slice.
If you want a vegan option, substitute heavy cream with coconut cream. Use coconut milk instead of dairy milk. Make sure to choose vegan cookies too. This ensures the cake fits a vegan diet.
Seasonal Themes
You can customize the cake for different holidays. For Christmas, add crushed candy canes on top. In the summer, try adding fresh berries between the layers.
For birthdays, decorate with colorful sprinkles or edible glitter. This helps make the cake fit the occasion. You can modify the flavors and toppings to match each season.
Storage Info
How to Store Leftovers
After you enjoy this Mocha Oreo Icebox Cake, storing leftovers is easy. First, keep the cake covered with plastic wrap or aluminum foil. This helps prevent it from drying out. A tight seal keeps the flavors fresh. If you have a cake keeper, that works great too. Place the cake in the fridge for best results. Enjoy it within 3 to 5 days for the best taste.
Freezing Instructions
Yes, you can freeze Mocha Oreo Icebox Cake! To freeze, wrap it tightly in plastic wrap, then aluminum foil. This double layer keeps air out. You can freeze it for up to 2 months. When ready to eat, move the cake to the fridge. Let it thaw overnight. This way, it retains its creamy texture.
Shelf Life
In the fridge, your Mocha Oreo Icebox Cake lasts about 3 to 5 days. Check for signs it may be past its prime. Look for changes in texture or smell. If it smells off or has a watery layer, it’s best to toss it. Freshness is key for flavor! If stored well, you can still enjoy a slice for a few days.
FAQs
Can I use other cookies instead of Oreos?
Yes, you can! Some great alternatives include:
– Chocolate wafer cookies
– Graham crackers
– Vanilla sandwich cookies
These options will change the flavor a bit, but they can still be delicious. Just make sure they are sturdy enough to hold layers.
How long does the Mocha Oreo Icebox Cake need to chill?
The cake needs at least 4 hours to chill. However, for the best taste, I recommend chilling it overnight. This longer time lets the flavors mix well and makes the cake creamier.
Can I make this cake a day in advance?
Absolutely! Making the cake a day ahead helps the flavors deepen. Just cover it tightly in the fridge. It saves you time and ensures a tasty treat for your guests.
Is this recipe kid-friendly?
Yes, this recipe is very kid-friendly! It uses simple ingredients like cookies and cream. Just keep an eye on the caffeine from the instant coffee. You can reduce it or skip it if needed.
The Mocha Oreo Icebox Cake combines simple ingredients for a delightful treat. We explored how to prepare whipped cream, soak Oreos, and layer the cake correctly. I shared tips to enhance flavors and avoid common mistakes. You can even adapt the recipe for different diets or occasions.
In the end, this cake is fun to make and enjoy. Whether you share it or keep it for yourself, it’s sure to impress!


![For a delicious Strawberry Shortcake Trifle, you will need fresh and simple ingredients. Here’s what you need to gather: - 2 cups fresh strawberries, hulled and sliced - 1/4 cup granulated sugar (for macerating strawberries) - 1 cup heavy whipping cream - 1/4 cup powdered sugar (for the whipped cream) - 1 teaspoon pure vanilla extract - 1 package (10 oz) ladyfinger cookies or sponge cake, cut into bite-sized pieces - 1 cup vanilla pudding (store-bought or homemade) - Fresh mint leaves, for garnish (optional) Each ingredient plays a key role. The strawberries need sugar to bring out their flavor. The heavy cream and powdered sugar create a light, airy whipped cream. The ladyfingers or sponge cake form the base. Lastly, the vanilla pudding adds creaminess to the trifle. When you layer these ingredients, you create a beautiful and tasty dessert. For the full recipe, you can check [Full Recipe]. Enjoy making this sweet treat! To macerate the strawberries, start by slicing them. Place 2 cups of fresh strawberries in a bowl. Add 1/4 cup of granulated sugar on top. Gently stir the strawberries to coat them with sugar. Let them sit for 15 to 20 minutes. This helps draw out their sweet juices, creating a syrup. For optimal syrup extraction, keep an eye on the time. The longer you let them sit, the more syrup you will get. Just don’t let them sit too long, or they may become mushy. For the perfect whipped cream, you will need a large mixing bowl and a hand or stand mixer. Start by adding 1 cup of heavy whipping cream, 1/4 cup of powdered sugar, and 1 teaspoon of pure vanilla extract to the bowl. Whip the mixture on medium-high speed. Watch closely for soft peaks to form. Stop mixing as soon as you see those peaks. Overwhipping can turn your cream into butter, and we want it light and fluffy! Now comes the fun part: layering! In a large trifle bowl or individual glasses, start with ladyfinger pieces or sponge cake at the bottom. Use enough pieces to cover the base. Next, spoon a layer of vanilla pudding over the cake. Spread it evenly. Then, add a layer of your macerated strawberries, syrup included. Finish this layer with a dollop of whipped cream. Repeat these steps. Add another layer of ladyfingers, pudding, strawberries, and another dollop of cream. Keep going until you reach the top. The last layer should be whipped cream for a nice finish. Chill your trifle for at least 1 hour. Cover it with plastic wrap or a lid. If you have more time, chill it longer. The flavors blend better that way. Refrigerating helps the ladyfingers absorb moisture from the pudding and strawberries. This makes every bite taste amazing! Plus, it keeps your trifle fresh and cool, perfect for a warm summer day. For the full recipe, check out the complete instructions. To keep your trifle layers from turning soggy, use fresh, dry ladyfingers or sponge cake. Make sure to layer them quickly after preparation. You can also lightly toast the ladyfingers for added texture. This helps them hold their shape better. To whip cream correctly, start with cold equipment. Cold bowls and beaters help the cream whip faster. Whip the cream at medium speed until soft peaks form. Stop as soon as the cream holds its shape. Overwhipping makes the cream grainy and hard. Serve your trifle in a clear glass bowl to show off the layers. You can also use small jars for individual servings. This adds a fun touch for guests. For garnishes, fresh mint leaves or extra strawberry slices on top create a beautiful finish. You can also sprinkle some crushed cookies for crunch. One common mistake is not preparing ingredients well. Make sure your strawberries are hulled and sliced evenly. This ensures great flavor throughout. Layering inconsistently can lead to a messy trifle. Each layer should be even and flat. This keeps your trifle looking nice and appetizing. For the full recipe, check the Strawberry Shortcake Trifle Delight section. {{image_4}} You can change the fruit in your trifle to mix things up. Blueberries work great in place of strawberries. Peaches add a sweet twist, too. You can also try different pudding flavors. Chocolate pudding gives a rich taste, while banana adds a fun touch. Each swap gives your trifle a new vibe. If you need gluten-free options, use gluten-free ladyfingers or sponge cake. Many stores sell these now. For a dairy-free version, use coconut cream instead of heavy cream. Dairy-free pudding is also easy to find. These swaps keep the trifle tasty for all diets. You can make themed trifles for special times of the year. For example, add pumpkin spice for fall or berries for a Fourth of July treat. You can also create fun trifle recipes for parties. Layer with seasonal fruits and colorful toppings for a festive look. This way, your trifle is always a showstopper. For a full recipe, check the [Full Recipe]. To keep your trifle fresh, store it in the fridge. Use an airtight container to avoid unwanted smells. Cover the top with plastic wrap if you don't have a lid. This helps keep the layers intact. It's best to eat your trifle within three days. This way, you enjoy the best taste and texture. Avoid stacking heavy items on top of it, as this can cause squishing. Your stored trifle stays good in the fridge for up to three days. After this, the ingredients start to separate. If you see watery layers, it’s a sign that it’s no longer fresh. Trust your nose and eyes; if it smells off, it's time to toss it. Always check for any strange colors or textures before diving in. You can freeze the trifle, but it changes the texture. Freeze only the layers separately for best results. Make sure to wrap each layer tightly in plastic wrap. When you're ready to eat, thaw them in the fridge overnight. Avoid refreezing once it's thawed, as it affects quality. For the best flavor and texture, enjoy your trifle fresh, but freezing can work in a pinch. For the complete recipe, check the Full Recipe link. Making a strawberry shortcake trifle takes about 30 minutes of prep time. You will need an hour for chilling. This allows all the flavors to mix well and makes the trifle taste its best. Yes, you can make this trifle ahead of time! I suggest preparing it a few hours before serving. This gives the layers time to blend. Just keep it covered in the fridge until you are ready to serve. If you can't find ladyfingers or sponge cake, you can use pound cake or angel food cake. Both options work well. Cut them into smaller pieces, just like the ladyfingers. To avoid sogginess, use less liquid in your layers. You can also layer quickly and serve soon after making it. If you chill it too long, the cake may soak up too much liquid. Yes! You can use gluten-free ladyfingers or sponge cake. Make sure to check the labels on all ingredients. Also, consider using gluten-free pudding mix for a fully gluten-free dessert. You can use frozen strawberries! Just thaw them first and drain excess liquid. This keeps your trifle layers from becoming too wet. Frozen strawberries still give a sweet flavor, making them a great substitute. For the full recipe, check here. Now you know how to create a delicious strawberry shortcake trifle. We walked through each step, from fresh ingredients to layering tips. You learned how to prepare strawberries, whip cream, and avoid common mistakes. Remember to chill your trifle for maximum flavor. Feel free to try different fruits or flavors to make it your own. With careful preparation and creativity, your trifle will impress everyone. Enjoy serving this delightful dessert at your next gathering!](https://joymealplan.com/wp-content/uploads/2025/07/d4c251d2-a8a0-4e84-a7ee-6717c5d98257-768x768.webp)


