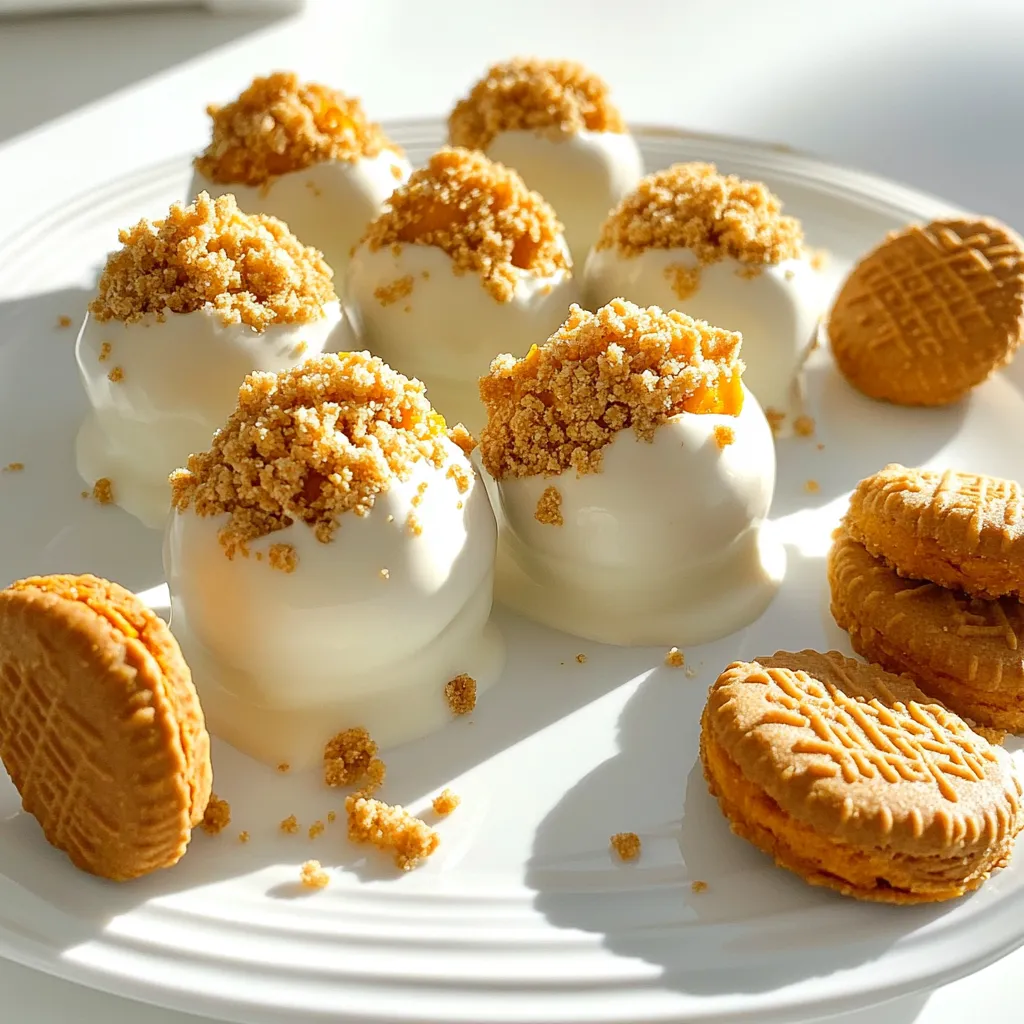
Fall is here, and it’s time for a sweet treat that captures the season! No Bake Biscoff Pumpkin Truffles are easy to make and perfect for cozy gatherings. With just a few simple ingredients like pumpkin puree, Biscoff crumbs, and cream cheese, you can whip up these delightful bites without turning on your oven. Ready to impress your friends and family? Let’s dive into this tasty recipe!
Ingredients
Gather these simple ingredients to make your No Bake Biscoff Pumpkin Truffles:
– 1 cup pumpkin puree
– 1 cup Biscoff cookie crumbs
– 1/2 cup cream cheese, softened to room temperature
– 1/4 cup powdered sugar
– 1 teaspoon pumpkin spice
– 1/4 teaspoon vanilla extract
– 1/3 cup white or dark chocolate chips (for coating)
– Extra Biscoff cookie crumbs for garnish
Using quality ingredients makes a big difference. Fresh pumpkin puree gives a nice flavor. Biscoff cookie crumbs add a sweet and spiced crunch. Cream cheese binds everything together and adds creaminess.
When measuring, use precise amounts for the best taste. Too much pumpkin or sugar can change the texture. The pumpkin spice gives that cozy fall taste. It’s perfect for this time of year.
White or dark chocolate chips are for coating. Choose what you love most! The extra cookie crumbs on top add a fun finish. Each bite will be a treat.
Now, let’s get started on making these delicious truffles!
Step-by-Step Instructions
Mixing the Ingredients
Start by grabbing a medium bowl. Add 1 cup of pumpkin puree and 1/2 cup of softened cream cheese. Use a hand mixer to blend these until smooth. This will create a creamy, rich base. Next, add 1/4 cup of powdered sugar, 1 teaspoon of pumpkin spice, and 1/4 teaspoon of vanilla extract. Mix again until everything is well combined. This mixture smells amazing and tastes even better!
Forming the Truffles
Now it’s time to add some crunch. Gradually fold in 1 cup of Biscoff cookie crumbs. Stir until the dough is thick and holds together. If it feels too crumbly, use your hands to knead it gently. Once it feels right, cover the bowl with plastic wrap. Chill it in the fridge for about 30 minutes. This step helps firm the mixture, making it easier to shape the truffles.
After the mixture is chilled, scoop about one tablespoon of the dough. Roll it into a ball using your palms. Place it on a parchment-lined baking sheet. Repeat this with the rest of the mixture until you have formed all your truffles.
Coating the Truffles
Next up, melt your chocolate. In a microwave-safe bowl, add 1/3 cup of chocolate chips. Heat them in 15-second intervals, stirring in between until the chocolate is smooth. Be careful not to overheat it!
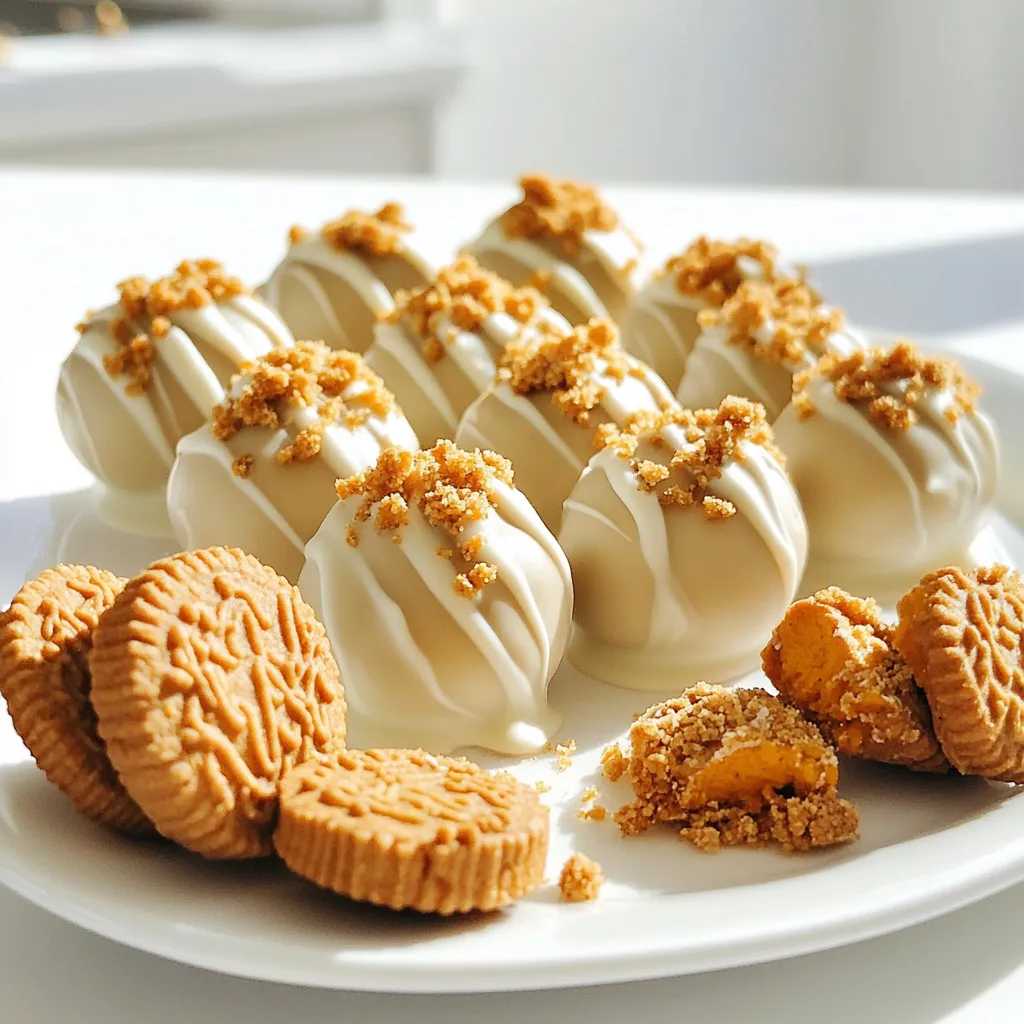
Now, dip each truffle into the melted chocolate. Make sure to coat it well, then allow any extra chocolate to drip off. Place the coated truffles back on the parchment. While the chocolate is still wet, sprinkle extra Biscoff cookie crumbs on top. This adds a nice touch and extra flavor!
Finally, return the truffles to the fridge for about 30 minutes to let the chocolate set. After that, you’ll have a delicious treat ready to enjoy!
Tips & Tricks
Best Practices for Making Truffles
To get the best texture for your truffles, use room-temperature cream cheese. This helps create a smooth mixture. Mix all the wet ingredients first, then fold in the dry ingredients. This way, you avoid lumps. If your mixture feels too loose, add more Biscoff crumbs. Letting the mixture chill for at least 30 minutes helps firm it up.
Presentation Tips
Arranging truffles on a nice plate makes them look great. Use a decorative platter for a festive touch. Drizzling some melted chocolate over the truffles adds flair. You can also place whole Biscoff cookies beside the truffles. This will make your treat even more inviting.
Troubleshooting Common Issues
If the mixture is too soft, add more Biscoff crumbs. This will help it hold shape better. If the truffles taste too sweet, you can mix in a pinch of salt. This balances the flavor nicely. Always taste your mixture before rolling it into truffles. Adjust as needed!
Variations
Flavor Variations
You can change the taste of your truffles easily. Adding spices like cinnamon or nutmeg makes them warm and cozy. If you want a twist, try mixing in a bit of cocoa powder for a chocolatey kick. You can also swap Biscoff cookies for other types. Oreos or ginger snaps work great too. These simple changes can make your truffles unique.
Dietary Variations
For a vegan option, use dairy-free cream cheese. There are many brands that taste great and work well. If you need gluten-free truffles, choose gluten-free cookie brands. This way, everyone can enjoy these tasty treats without worry. Check the labels to ensure they meet your needs.
Seasonal Variations
Fall is a great time for new flavors. You can add maple syrup or crushed pecans for a new taste. These ingredients enhance the fall vibe of your truffles. Try adding a bit of caramel for a sweet surprise. With these seasonal twists, you can keep your truffles fresh and exciting.
Storage Info
How to Store Truffles
To keep your truffles fresh, store them in the fridge. Place the truffles in an airtight container. This helps to prevent them from drying out. Make sure the container has a tight seal. If you stack the truffles, use parchment paper between layers. This keeps them from sticking together.
Freezing Truffles
You can freeze the truffles for later enjoyment. To freeze, place them in a single layer on a baking sheet. Freeze until solid, then transfer them to an airtight container. They can last up to three months in the freezer.
When you want to eat them, take them out and let them thaw in the fridge. This keeps the texture nice. Avoid thawing them at room temperature, as it can make them too soft.
FAQs
How long do No Bake Biscoff Pumpkin Truffles last?
No Bake Biscoff Pumpkin Truffles stay fresh in the fridge for about one week. To keep them safe, store them in an airtight container. If you notice any off smells, or if the truffles feel sticky or look dry, it’s time to discard them.
Can I use other types of cookies instead of Biscoff?
Yes, you can swap Biscoff for other cookies. For a similar taste, try gingersnaps or speculoos cookies. If you seek a different flavor, use Oreo cookies or vanilla wafers. Each type of cookie adds its own unique twist to the truffles.
Is it possible to make these truffles in advance?
Absolutely! You can make these truffles up to three days ahead. After shaping them, store them in the fridge in an airtight container. You can coat them in chocolate just before serving for the best taste and texture.
You can make delicious No Bake Biscoff Pumpkin Truffles with simple ingredients. Start by mixing pumpkin puree and cream cheese with spices. Shape the mixture into truffles and coat them in melted chocolate. Remember to chill your truffles for a perfect texture.
For extra fun, try different flavors or dietary options. Store them in an airtight container for freshness. You’ll wow your friends and enjoy tasty treats all season. Truffles are easy to make and full of flavor; give them a try!