No Bake Cheesecake Bites Irresistible Treat Recipe

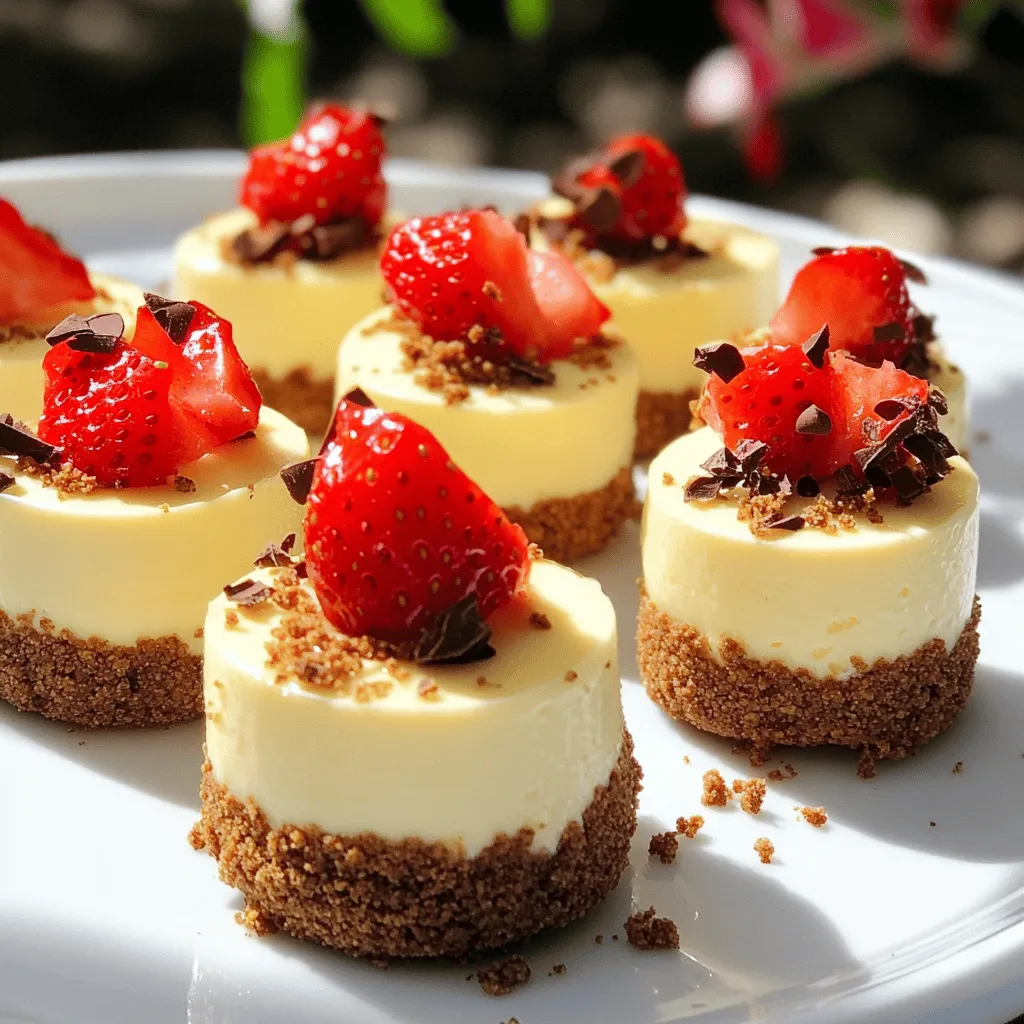
Craving a sweet treat without the hassle of baking? No Bake Cheesecake Bites are your answer! They are creamy, delicious, and super easy to make. With just a few simple ingredients, you can create these irresistible bites in no time. Whether you’re treating yourself or impressing guests, these cheesecake bites will always hit the spot. Ready to whip up a batch? Let’s dive into the delightful world of no-bake desserts!
Ingredients
Main Ingredients
To make No Bake Cheesecake Bites, you need some key items:
– 1 cup cream cheese, softened to room temperature
– 1/2 cup powdered sugar
– 1 teaspoon vanilla extract
– 1 cup whipped cream or whipped topping
Using room temperature cream cheese is vital. It blends easily and gives a smooth texture. Cold cream cheese can lead to lumps, which you want to avoid. The powdered sugar adds sweetness, while the whipped cream makes the bites light and fluffy.
Additional Ingredients
You can customize your cheesecake bites with extra ingredients. Here are some fun ideas:
– 1/2 cup graham cracker crumbs
– 1/4 cup unsweetened cocoa powder (for a chocolatey twist)
– 1/4 cup strawberries, crushed (for a fruity filling)
You can also add optional garnishes like chocolate shavings or extra fruit. These not only make the bites look pretty but also enhance the flavor. A little creativity with toppings can take your treats to the next level!
Step-by-Step Instructions
Preparation of Cheesecake Mixture
To start, grab a large mixing bowl. Use an electric mixer to beat your cream cheese until it is smooth and creamy. This step is key for the best texture in your bites. Next, add in the powdered sugar and vanilla extract. Mix these ingredients well until everything blends into a uniform mixture. This creamy base is what makes your cheesecake bites so delightful.
Forming the Cheesecake Bites
Now, take small portions of the cheesecake mixture. Roll them into balls about 1 inch in size. Be gentle but firm, so they hold their shape. After rolling, use your finger to make a small indentation in the center of each ball. This little space will hold a touch of crushed strawberries, giving a sweet surprise inside your bites.
Coating and Chilling
In a separate bowl, mix the graham cracker crumbs with cocoa powder. Now, roll each cheesecake ball in this mixture until it is fully coated. This adds a crunchy texture and rich flavor. After coating, place the bites on a baking sheet lined with parchment paper. Chill them in the fridge for at least 30 minutes. This cooling time helps the cheesecake bites firm up, ensuring the perfect texture.
Tips & Tricks
Achieving the Perfect Texture
To get that perfect cheesecake texture, mixing is key. Start by beating the cream cheese until it’s smooth. This step makes your base creamy. When you add the powdered sugar and vanilla, mix gently. You want everything blended but not overworked. Overmixing can make the cheesecake heavy.
When you fold in the whipped cream, do it carefully. Use a spatula to gently combine. This keeps your mix light and fluffy.
Chilling is just as important. Aim for at least 30 minutes in the fridge. This helps the cheesecake bites firm up nicely. If you can wait longer, that’s even better!
Serving Suggestions
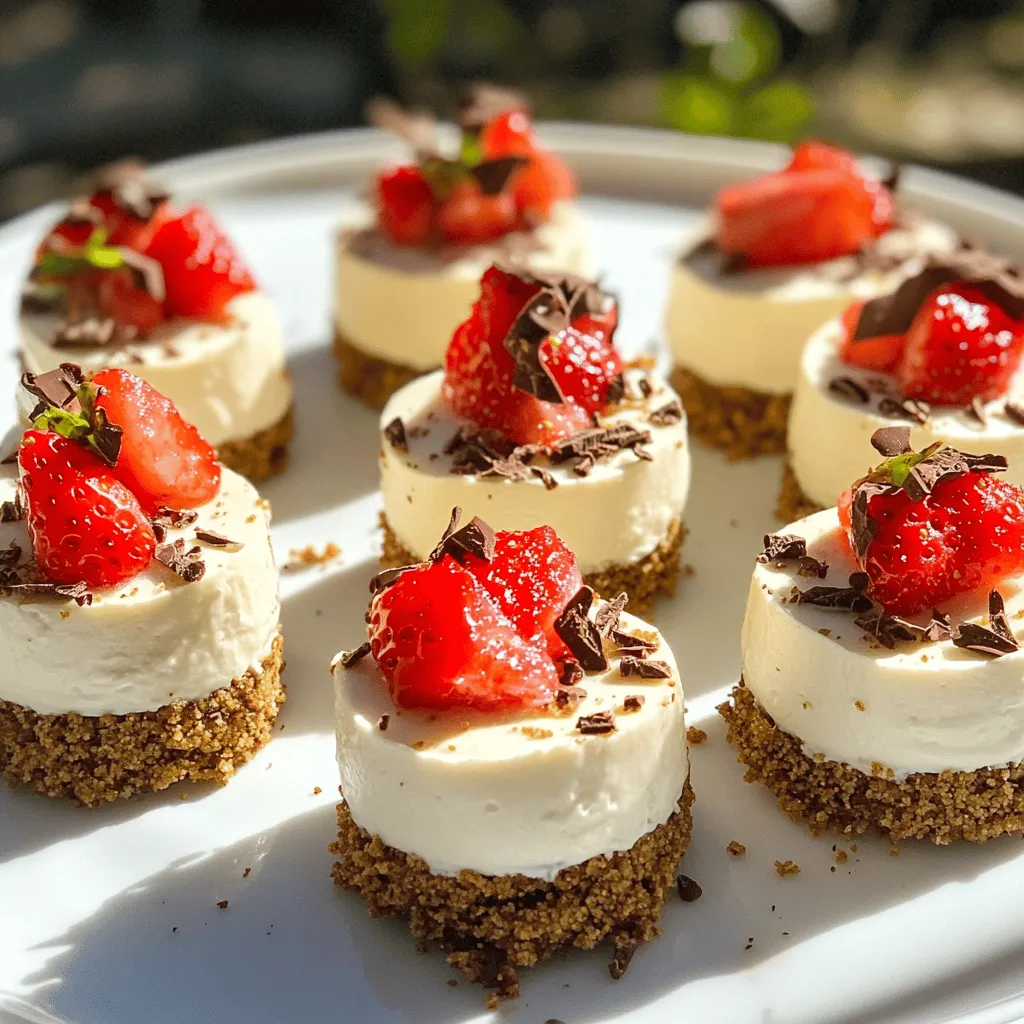
For a stunning presentation, serve the cheesecake bites on a nice plate. Add a sprinkle of extra graham cracker crumbs around them. It looks fancy and adds a nice touch.
When it comes to serving size, aim for about one bite per person. These treats are rich, so one is often enough. Pair them with fresh fruit or a sweet dessert wine. This combination makes for a delightful experience.
For an extra pop, drizzle some chocolate or fruit sauce over the bites. It adds color and flavor. You can also garnish with chocolate shavings or fresh berries. These little details will impress your guests and make your cheesecake bites unforgettable.

Variations
Flavor Variations
You can easily change the taste of your no bake cheesecake bites. Try using chocolate or caramel for a different filling. These flavors add a rich twist. For a refreshing change, consider adding lemon zest or matcha powder to the cheesecake base. Lemon brings a bright and tangy flavor, while matcha adds a unique earthy note. Both options can elevate your bites and impress your guests.
Dietary Adjustments
If you need gluten-free options, you can use gluten-free graham crackers. For a vegan twist, substitute the cream cheese with dairy-free cream cheese. You can also swap regular whipped cream for coconut whipped cream. These changes keep the taste and texture delightful while meeting dietary needs. Always check labels to ensure your ingredients fit your diet.
Storage Info
How to Store Cheesecake Bites
To keep your cheesecake bites fresh, store them in an airtight container. Place the container in your refrigerator. This helps maintain their creamy texture and flavor. They will last up to five days in the fridge. Make sure to keep them covered to avoid any drying out. If you plan to enjoy them later, proper storage is key.
Freezing Options
For long-term storage, you can freeze the cheesecake bites. First, place them on a baking sheet in a single layer. Freeze them for about one hour. Once firm, transfer the bites to a freezer-safe bag. Remove as much air as possible before sealing. They can last up to three months in the freezer.
When you’re ready to enjoy them, take them out and let them thaw in the fridge overnight. This helps the texture remain smooth and creamy. Avoid thawing at room temperature, as this can affect their consistency.
FAQs
How long do No Bake Cheesecake Bites last?
No Bake Cheesecake Bites can last up to five days when stored properly. Keep them in an airtight container in the fridge. If you want to keep them longer, you can freeze them. Just make sure they’re well wrapped to avoid freezer burn.
Can I use different crust types?
Yes, you can use many crust types. If you want a gluten-free option, try crushed almond flour or gluten-free cookies. You can also use vanilla wafers for a sweeter base. Each crust will change the flavor a bit, so choose one that you like.
What can I use instead of cream cheese?
If you want a dairy-free option, try using cashew cream or coconut cream. For a lighter version, Greek yogurt works well too. Each substitute may change the texture and flavor slightly, but they can still be delicious.
These cheesecake bites are easy to make and great for sharing. We covered key ingredients, preparation steps, and helpful tips to ensure they turn out perfectly. Remember to use room temperature ingredients for smooth mixing. You can also customize flavors or adjust for dietary needs. Store them right, and they will stay fresh. Enjoy these bites at your next gathering or special event. They are a fun and tasty treat everyone will love!


![- 1 cup glutinous (sticky) rice - 1 ½ cups coconut milk - 1 ripe mango, peeled and thinly sliced - ¼ cup granulated sugar - ¼ teaspoon salt Glutinous rice gives Mango Sticky Rice its unique texture. It sticks together and becomes chewy when cooked. The coconut milk adds a rich and creamy flavor to the dish. Using ripe mango is key; its sweetness and juiciness balance the rice. - 1 tablespoon sesame seeds (toasted, optional) - Fresh mint leaves for garnish (optional) Toasted sesame seeds provide a nice crunch. Fresh mint leaves add a pop of color and a refreshing taste. Both are great if you want to elevate your dish. - Calories per Serving: Approximately 300 calories - Key Nutrients: Carbohydrates, fats, fiber, vitamin C, and iron Mango Sticky Rice is a delightful dessert. While it is not low-calorie, it offers some nutrients. The rice provides energy, and mango adds vitamins. Enjoy it as an occasional treat! For the complete recipe, check out the Full Recipe. Rinsing and Soaking the Rice Start by rinsing the sticky rice under cold water. Keep rinsing until the water runs clear. This step removes excess starch. It's key for the right texture. After rinsing, soak the rice in water for 4 hours. If you can, soak it overnight. This helps the rice absorb water and cook better. Steaming Process After soaking, drain the rice. Place it in a steamer lined with cheesecloth or a steaming basket. Steam the rice over simmering water for 25 to 30 minutes. You want it to become translucent and tender. This process makes the rice fluffy and sticky, perfect for the dish. Combining Ingredients While the rice steams, prepare the coconut milk mixture. In a medium saucepan, mix coconut milk, sugar, and salt. Stir the mixture over low to medium heat. Keep stirring until the sugar dissolves. Be careful not to boil it; you want a smooth texture. Cooking Technique Once the sugar is dissolved, take the saucepan off the heat. This step ensures the coconut milk stays creamy. Set it aside until the rice is ready. This coconut milk will add a rich flavor to the sticky rice. Mixing Rice and Coconut Milk When the sticky rice is cooked, transfer it to a large bowl. Gradually pour in about 1 cup of the warm coconut milk mixture. Use a gentle folding motion to mix it in. Make sure every grain of rice is coated. Let it sit for 15 to 20 minutes. This allows the rice to absorb the coconut flavor. Plating Suggestions To serve, scoop a generous amount of sticky rice onto a plate. Arrange thin slices of ripe mango on top. Drizzle some extra coconut milk over it. For added crunch, sprinkle toasted sesame seeds on top. You can also garnish with fresh mint leaves for a pop of color. This makes the dish look as good as it tastes! For the complete method, check the Full Recipe. Appearance and Aroma Indicators When choosing mangoes, look for smooth skin. The color should be bright and rich. A ripe mango feels slightly soft when gently squeezed. It should also have a sweet aroma near the stem. This smell tells you it's ready to eat. Ideal Varieties for the Dish For this dessert, I recommend using the Ataulfo or Haden mango. Ataulfo mangoes have a creamy texture and sweet taste. Haden mangoes are juicy and fragrant, adding great flavor to your dish. Both work well with the sticky rice. Toasting Sticky Rice Option Toasting the sticky rice can bring out a nutty taste. Before soaking, heat it in a pan over low heat. Stir it for a few minutes until it turns golden. This step adds depth to the flavor of your dessert. Alternative Sweeteners While granulated sugar is common, you can try other sweeteners. Honey or agave syrup can add unique flavors. Coconut sugar offers a caramel-like taste. Each option can change the dish’s final taste, so feel free to experiment. Serving Style Variations For a fun twist, try serving the sticky rice in small bowls. You can layer the mango slices on top. This makes each serving look special. You can also use a ring mold to shape the rice for a more elegant look. Creative Garnishing Tips Garnishing can elevate your dessert. Sprinkle toasted sesame seeds for crunch. Add fresh mint leaves for color and flavor. You can also drizzle a bit of coconut milk on top for a beautiful finish. These small touches make your dish more appealing. For the complete recipe, check out the [Full Recipe]. {{image_4}} Mango sticky rice shines in Thai cuisine. Each region has its own twist. In northern Thailand, you might find a version with black sticky rice. This adds a nutty flavor and a stunning dark color. Southern styles often emphasize sweetness with extra coconut milk. Other cuisines influence this dish too. In Vietnam, they serve a similar treat called "xôi xoài." It features a sweeter coconut sauce and often includes mung beans. Exploring these variations lets you enjoy mango sticky rice in new ways. If you want vegan options, just use coconut milk. This recipe is already dairy-free. You can also make it gluten-free, since glutinous rice has no gluten. For low-sugar options, try using a sugar substitute. Many people enjoy using stevia or monk fruit. These keep the sweetness without the added calories. Want to make your mango sticky rice unique? You can add food coloring to the rice. This gives it a fun pop of color. Just a few drops will do! Incorporating fruits and nuts is another way to change up the flavor. Add some chopped mango or berries for extra fruitiness. You could also sprinkle in some toasted coconut or nuts for crunch. This adds texture and makes your dish even more delightful. For the full recipe, check out the Mango Paradise Sticky Rice section. When you have leftover mango sticky rice, you want to keep it fresh. Here are some tips: - Refrigeration Tips: Store the sticky rice in an airtight container. It will stay good in the fridge for about 3 to 4 days. Always let the rice cool to room temperature before sealing it to avoid condensation. - Freezing Sticky Rice: If you want to keep it longer, consider freezing. Wrap the sticky rice tightly in plastic wrap. Then place it in a freezer bag. This way, it can last up to 3 months. You can enjoy your mango sticky rice again with these methods: - Microwave vs. Stovetop: The microwave is quick and easy. Place the rice in a bowl, add a splash of water, and cover it. Heat in short bursts until warm. The stovetop can be better for texture. Add a little coconut milk to a pot, then heat the rice gently over low heat. - Maintaining Texture and Flavor: When reheating, stir the rice often. This helps it warm evenly. Adding coconut milk will also keep it creamy and flavorful. You should know how long your mango sticky rice lasts: - How Long Can You Store It? In the fridge, it lasts 3 to 4 days. In the freezer, it can be good for up to 3 months. - Signs of Spoilage: Check for off smells or a change in color. If you see mold or a strange texture, it’s best to throw it away. Always trust your senses! Mango sticky rice is a sweet dessert from Thailand. It features glutinous rice cooked in creamy coconut milk. This dish is very popular in Thai cuisine, often enjoyed as a treat during festivals or special occasions. The soft, sweet rice pairs perfectly with ripe mango slices. The dish represents a delightful mix of flavors and textures. You should not use regular rice. Regular rice will not give the same sticky texture. Glutinous rice is key to achieving that chewy bite. If you cannot find glutinous rice, look for sushi rice as an alternative. It has a similar texture but may not be as sticky. You can easily change the sweetness of your mango sticky rice. To do this, modify the amount of sugar you use. Start with less sugar and add more to taste. If you want alternatives to granulated sugar, try using honey or maple syrup. These can add unique flavors while still sweetening your dish. Mango sticky rice is a simple, yet delicious dessert. It requires just three main ingredients: sticky rice, coconut milk, and fresh mango. You can add garnishes like sesame seeds or mint for that extra touch. Follow the easy steps for preparation and assembly to create this flavorful dish. Remember to choose ripe mangoes for the best taste. With tips on storage and variations, you can enjoy this treat anytime. Experiment with flavors and enjoy the process. Your mango sticky rice will shine with every bite!](https://joymealplan.com/wp-content/uploads/2025/06/5d335504-2931-49f8-8062-6f7285d5d66d-768x768.webp)


![- 3 cups unsweetened shredded coconut - 1/2 cup sweetened condensed milk - 2 large egg whites - 1/4 teaspoon vanilla extract - 1/4 teaspoon almond extract - Pinch of salt - 1/2 cup dark chocolate chips (optional) These ingredients create the base for your coconut macaroons. The unsweetened shredded coconut gives it that chewy texture. Sweetened condensed milk adds creaminess and sweetness, making each bite delightful. The egg whites are crucial for lightness and fluffiness. The extracts bring in a lovely depth of flavor. If you want to add a twist, dark chocolate chips can add a rich touch. - Gluten-free options: This recipe is naturally gluten-free, perfect for those with gluten issues. - Nut-free alternatives: You can enjoy these macaroons without nuts, making them safe for nut allergies. - Vegan substitutions: For a vegan version, try using aquafaba instead of egg whites and a plant-based condensed milk. These options help everyone enjoy this treat. Whether you have dietary needs or just want to try something new, there’s a way for you to make these coconut macaroons. You can find the full recipe above to get started! Start by preheating your oven to 325°F (160°C). This step is key to baking your macaroons evenly. While the oven heats, line a baking sheet with parchment paper. This helps prevent sticking and makes cleaning up easier later. In a large mixing bowl, combine 3 cups of unsweetened shredded coconut and 1/2 cup of sweetened condensed milk. Add 1/4 teaspoon of vanilla extract, 1/4 teaspoon of almond extract, and a pinch of salt. Stir well until everything is mixed together nicely. Now, in a separate bowl, take 2 large egg whites and whip them until they form stiff peaks. This is an important step because it gives your macaroons a light and airy texture. Next, gently fold the whipped egg whites into the coconut mixture. Use a spatula and be careful not to stir too hard. You want to keep the air in the egg whites. Fold until the egg whites are just mixed in; some lumps are okay. Using a tablespoon or a small cookie scoop, portion out the mixture onto the prepared baking sheet. Make sure to space each mound about 2 inches apart. This allows them to spread a bit while baking. Now, place the baking sheet in your preheated oven. Bake the macaroons for about 20 to 25 minutes. You want them to turn a lovely golden brown. Once done, take the tray out and let the macaroons cool for about 5 minutes on the sheet. This helps them firm up. After that, transfer them to a wire rack to cool completely. For those who love chocolate, you can melt some dark chocolate chips and dip the bottoms of each macaroon. Let the chocolate set on the parchment paper. Enjoy these delightful treats from the full recipe! To make great coconut macaroons, focus on the egg whites. Whipping them correctly is key. Use a clean bowl and beaters. Beat until stiff peaks form. This step adds lightness to the macaroons. Avoid overmixing when you fold them into the coconut mix. Gently combine the ingredients. Some lumps are okay. A light touch keeps the texture airy and nice. You can boost the flavor of your macaroons in fun ways. Try adding a pinch of cinnamon or nutmeg for warmth. These spices bring depth and richness. Another idea is to add citrus zest. Lemon or lime zest gives a fresh twist. Just a small amount can make a big difference in taste. How you serve your macaroons can impress your guests. Place them on a decorative platter to catch the eye. You can garnish with shredded coconut or fresh fruit. This adds color and flair. Arrange them in clusters for an inviting look. These small touches make your dessert stand out and look professional. For the full recipe, check out the Tropical Coconut Macaroons section. {{image_4}} You can make your macaroons even better by adding chocolate. Start by melting dark chocolate chips. Use a microwave-safe bowl. Heat in 30-second bursts, stirring after each. This helps prevent burning. Alternatively, you can use a double boiler for even heating. Once the chocolate is melted, dip the bottom of each macaroon in it. Make sure to coat it well. Place the dipped macaroons back on the parchment paper. Let the chocolate harden before serving. This adds a rich flavor that complements the coconut. Want to add some nuts? Almonds and pecans work great. Simply chop them finely and mix them in with the coconut. This adds a nice crunch to the soft macaroons. If you have nut allergies, you can skip the nuts. The recipe still tastes great without them. You can also use seeds like sunflower or pumpkin for a similar texture. Always be cautious and adjust based on your needs. There are endless flavor combinations for your macaroons. One tasty option is coconut-lime. Just add lime zest and a bit of lime juice to the coconut mixture. This gives a fresh twist. Another option is vanilla bean macaroons. Instead of vanilla extract, use the seeds from a vanilla bean. This adds a lovely fragrance and flavor. You can also mix in spices like cinnamon for a warm touch. Each variation brings a new taste to your delightful tropical treats. For the complete recipe, refer to the [Full Recipe]. Store your coconut macaroons at room temperature for the best taste. Keep them in a cool, dry place. Use an airtight container to keep them fresh. This helps avoid moisture and keeps them soft. If you live in a warm climate, consider refrigerating them. The cold can help them last longer. However, be aware that refrigeration may change their texture slightly. To freeze macaroons, let them cool completely first. Once cooled, place them in a single layer on a baking sheet. Freeze for about one hour. This step prevents them from sticking together. After they are firm, transfer them to a freezer-safe bag or container. When you want to enjoy a macaroon, take it out of the freezer. Let it thaw in the fridge overnight. For a quick thaw, leave it at room temperature for a few hours. Coconut macaroons can last up to one week at room temperature. If stored in the fridge, they can last for about two weeks. Check for signs of spoilage before eating. Look for changes in texture, color, or a sour smell. If you see any of these, it’s best to toss them out. Yes, you can make coconut macaroons without egg whites. Instead, use ground flaxseed or chia seeds mixed with water. This mixture acts as a binder. For every egg white, mix 1 tablespoon of ground flaxseed or chia seeds with 2.5 tablespoons of water. Let it sit for about 10 minutes to thicken. This will give your macaroons a nice texture while keeping them egg-free. To keep your macaroons from falling apart, mix the ingredients gently. Overmixing can cause them to break. When you fold in the egg whites, do it slowly and carefully. This helps maintain air and keeps the macaroons light. Make sure to space them well on the baking sheet. This allows them to bake evenly. A good tip is to form them tightly with your hands. This will help them hold their shape during baking. Leftover shredded coconut can be used in many ways. You can add it to smoothies for extra texture. It works well in oatmeal or yogurt for a tropical twist. Consider making coconut pancakes or muffins. You can also toast it for a crunchy topping on salads or desserts. If you enjoy baking, use it in granola or energy balls. This way, you won't waste any coconut, and you'll enjoy its rich flavor in other dishes. You now know how to make coconut macaroons from scratch. We covered the essential ingredients, step-by-step instructions, and storage tips. You learned about variations, dietary options, and how to enhance flavors. Give these tasty treats a try! They are fun to make and share. Don’t forget to experiment with flavors or coatings. Enjoy your baking, and let your creativity shine!](https://joymealplan.com/wp-content/uploads/2025/06/e4df15b8-ca64-4a89-a5eb-245e13ac6d80-768x768.webp)