No-Bake Chocolate Coconut Pumpkin Truffles Delight

For these No-Bake Chocolate Coconut Pumpkin Truffles, you will need: - 1 cup canned pumpkin puree - 1 cup almond flour - 1/2 cup unsweetened shredded coconut, plus extra for rolling - 1/2 cup pure maple syrup - 1/4 cup unsweetened cocoa powder - 1 teaspoon pure vanilla extract - 1/2 teaspoon ground cinnamon - 1/4 teaspoon ground nutmeg - A pinch of sea salt Each truffle has about 100 calories. They have 3 grams of protein and 5 grams of fat. Carbs are around 13 grams, with about 2 grams of fiber. These truffles have no added sugars. The natural sweetness comes from maple syrup and pumpkin. These truffles offer many health benefits: - Pumpkin puree is rich in vitamins A and C. It can boost your immune system. - Coconut provides healthy fats. It can help your heart health. - Almond flour is low in carbs. It’s a good choice for gluten-free diets. - Maple syrup has antioxidants. It may help lower blood pressure. - Cinnamon can regulate blood sugar levels. It adds nice flavor too. These truffles not only taste amazing but also help keep you healthy! Start by grabbing a large mixing bowl. Add 1 cup of canned pumpkin puree. Next, pour in 1 cup of almond flour. Then add 1/2 cup of unsweetened shredded coconut. After that, mix in 1/2 cup of pure maple syrup. Now, it's time for 1/4 cup of unsweetened cocoa powder. Don’t forget 1 teaspoon of pure vanilla extract. Add 1/2 teaspoon of ground cinnamon and 1/4 teaspoon of ground nutmeg. Finally, sprinkle in a pinch of sea salt. Use a spatula or your hands to mix everything well. You want a smooth, cohesive dough. Take a moment to taste the dough. If you want it sweeter, stir in a little more maple syrup. Cover the bowl with plastic wrap. Place the bowl in the refrigerator for about 30 minutes. This step helps the mixture firm up. A firmer mixture makes it easier to shape into truffles. After 30 minutes, take the mixture out of the fridge. Use a tablespoon or cookie scoop to portion out the mixture. Aim for about 1 inch in diameter for each truffle. Roll each portion into a smooth ball. Now, roll each ball in the extra shredded coconut. This gives the truffles a nice texture. Place the coconut-coated truffles on a baking sheet lined with parchment paper. Return the tray to the refrigerator. Let the truffles set for at least one hour. To make your truffles just right, taste the mixture before rolling. If you want more sweetness, add a bit of maple syrup. This can bring out the pumpkin flavor more. Try adding a pinch of salt to balance the sweetness. A little sea salt can enhance the taste. Present your truffles in fun paper cups for a festive look. Arrange them on a pretty plate for a nice touch. For extra flair, drizzle melted dark chocolate on top. This adds a visual pop and a rich taste. You can also sprinkle extra shredded coconut over them for texture. Use a tablespoon or cookie scoop to make rolling easier. This helps ensure each truffle is the same size. Keep your hands damp while rolling to avoid sticking. A baking sheet lined with parchment paper makes clean-up a breeze. Having these tools ready can speed up your process. {{image_4}} You can easily switch up the flavor of your truffles. For a richer taste, add more cocoa powder. If you love spices, try adding ginger or cardamom. These spices give a warm kick. You might even mix in some orange zest for a bright twist. This will enhance the pumpkin flavor and add freshness. Feel free to play with the ingredients. If you don’t have almond flour, use oat flour instead. You can substitute maple syrup with honey or agave syrup. This keeps the sweetness but changes the flavor a bit. For a nut-free version, try sunflower seed flour. It works well and adds its own unique taste. These truffles can fit many diets. They are already gluten-free, which is great. To make them vegan, stick with maple syrup as your sweetener. Ensure your cocoa powder is dairy-free too. If you want to cut sugar, use a sugar substitute like stevia. Just be sure to check the conversion ratio for sweetness. This way, everyone can enjoy these tasty treats! Storing your No-Bake Chocolate Coconut Pumpkin Truffles in the fridge is easy. Place them in an airtight container. This keeps them fresh and prevents them from drying out. You can store them for up to one week. When you want a tasty treat, just grab one when you feel like it. If you want to keep your truffles longer, freezing is a great option. To do this, first let the truffles set. Then, place them in a single layer on a baking sheet. Freeze them for about two hours. Once they are hard, transfer them to a freezer-safe bag. This way, they can last for up to three months. When you want to eat one, let it thaw in the fridge overnight. These truffles stay fresh for a while, but some tips help. Always check for any signs of spoilage, like mold or an off smell. If they look good and smell fine, they should be safe to eat. Enjoying them within a week ensures you taste all the lovely flavors. Yes, you can use other nut flours. Almond flour works well, but you can try cashew or hazelnut flour too. Each type adds its own flavor. Just keep in mind that the texture may change slightly. These truffles stay fresh for up to one week in the fridge. Store them in a sealed container to keep them safe from air and moisture. If you want them to last longer, freezing is a great option. Absolutely! You can make these truffles a few days in advance. Just follow the recipe steps, then store them in the fridge. They taste even better after chilling for a while! In this post, we covered how to make delicious truffles using simple ingredients. I explained the steps for mixing, chilling, and forming the truffles. You learned tips for flavor adjustments and creative presentations. We also explored variations and storage methods to keep your truffles fresh. Try these recipes to impress friends or enjoy a sweet treat. With some fun twists, you can make them your own. Enjoy making and sharing your tasty truffles!

WANT TO SAVE THIS RECIPE?

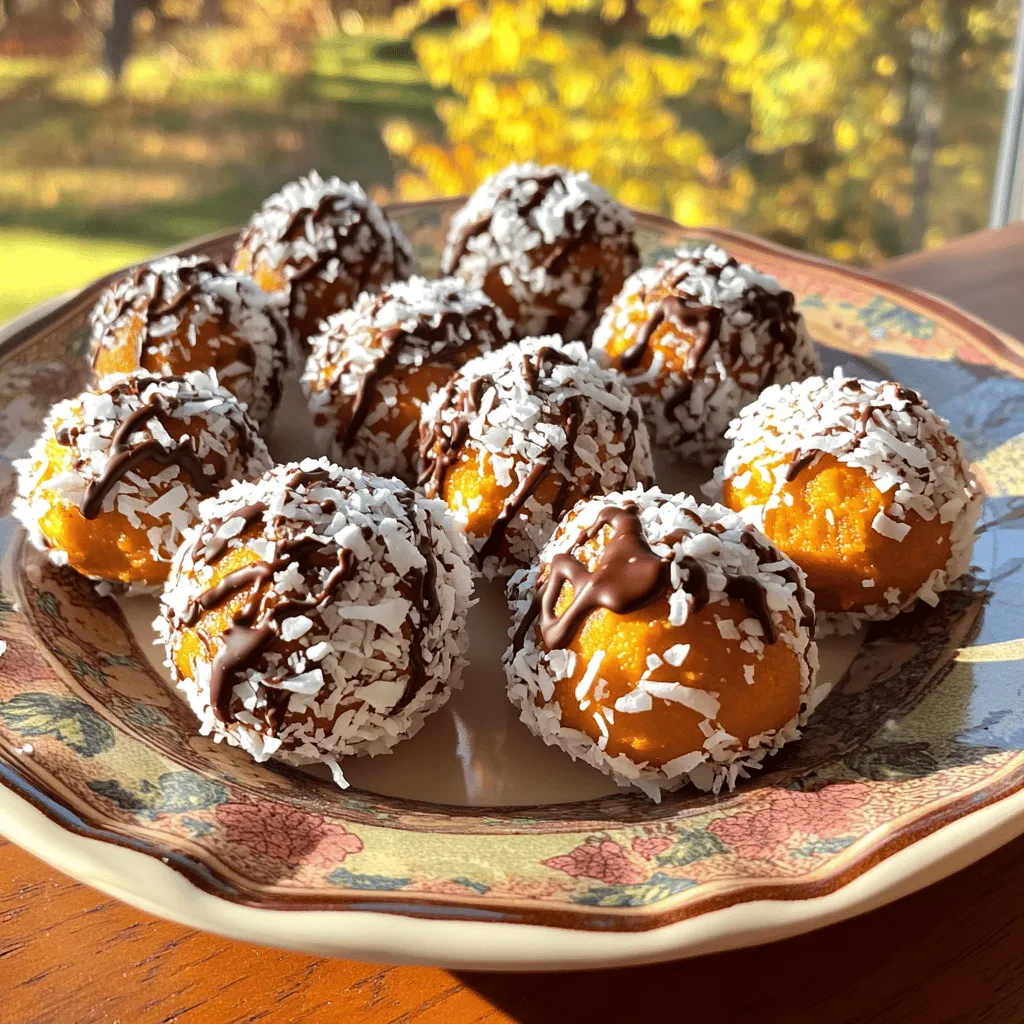
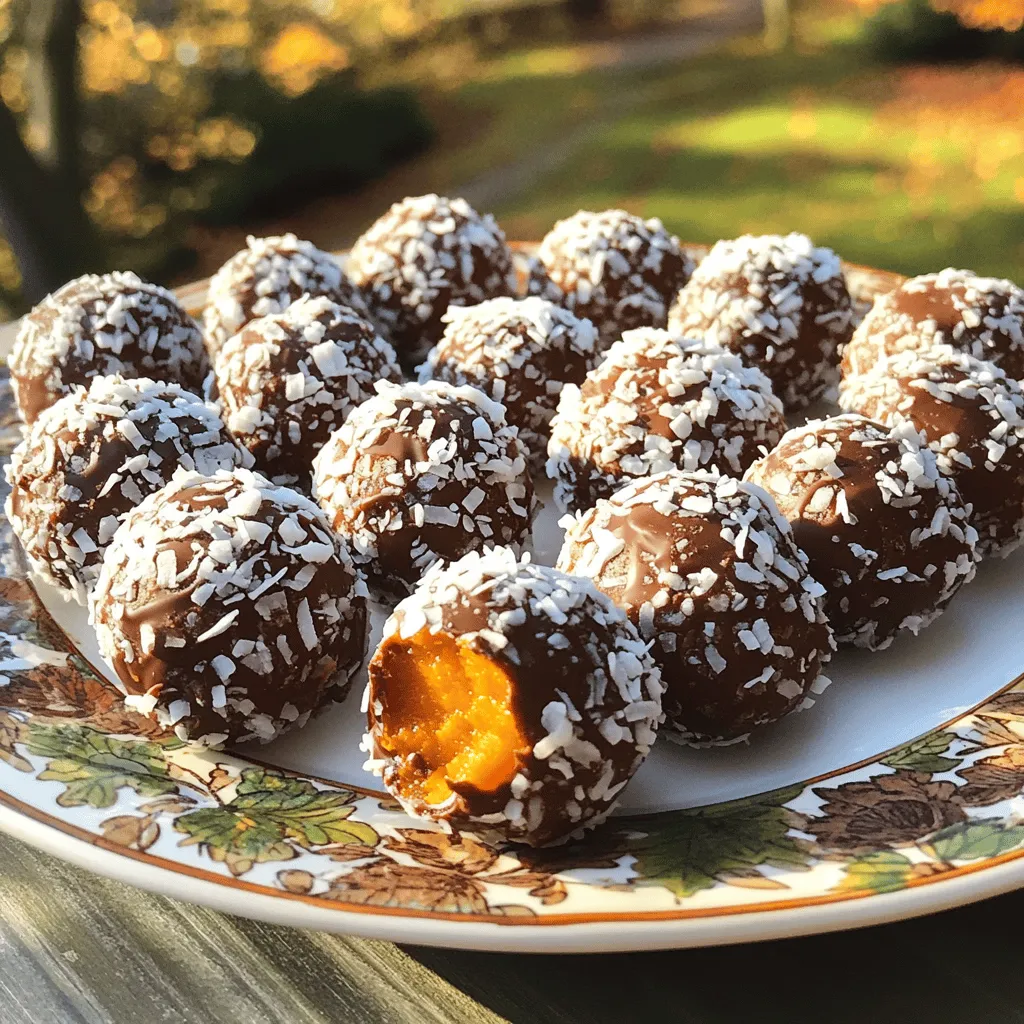
If you crave a sweet treat that’s easy to make and packed with flavor, I’ve got just the thing: No-Bake Chocolate Coconut Pumpkin Truffles! These truffles combine rich chocolate, nutty coconut, and pumpkin spice, making them a perfect fall treat. You won’t need an oven for this recipe, just a bowl and a little chill time. Let’s dive into this delightful no-bake recipe you can enjoy anytime!

Ingredients

List of Ingredients

For these No-Bake Chocolate Coconut Pumpkin Truffles, you will need:

– 1 cup canned pumpkin puree

– 1 cup almond flour

– 1/2 cup unsweetened shredded coconut, plus extra for rolling

– 1/2 cup pure maple syrup

– 1/4 cup unsweetened cocoa powder

– 1 teaspoon pure vanilla extract

– 1/2 teaspoon ground cinnamon

– 1/4 teaspoon ground nutmeg

– A pinch of sea salt

Nutritional Information

Each truffle has about 100 calories. They have 3 grams of protein and 5 grams of fat. Carbs are around 13 grams, with about 2 grams of fiber. These truffles have no added sugars. The natural sweetness comes from maple syrup and pumpkin.

Health Benefits

These truffles offer many health benefits:

Pumpkin puree is rich in vitamins A and C. It can boost your immune system.

Coconut provides healthy fats. It can help your heart health.

Almond flour is low in carbs. It’s a good choice for gluten-free diets.

Maple syrup has antioxidants. It may help lower blood pressure.

Cinnamon can regulate blood sugar levels. It adds nice flavor too.

These truffles not only taste amazing but also help keep you healthy!

Step-by-Step Instructions

Mixing the Ingredients

Start by grabbing a large mixing bowl. Add 1 cup of canned pumpkin puree. Next, pour in 1 cup of almond flour. Then add 1/2 cup of unsweetened shredded coconut. After that, mix in 1/2 cup of pure maple syrup. Now, it’s time for 1/4 cup of unsweetened cocoa powder. Don’t forget 1 teaspoon of pure vanilla extract. Add 1/2 teaspoon of ground cinnamon and 1/4 teaspoon of ground nutmeg. Finally, sprinkle in a pinch of sea salt.

Use a spatula or your hands to mix everything well. You want a smooth, cohesive dough. Take a moment to taste the dough. If you want it sweeter, stir in a little more maple syrup.

Chilling the Mixture

Cover the bowl with plastic wrap. Place the bowl in the refrigerator for about 30 minutes. This step helps the mixture firm up. A firmer mixture makes it easier to shape into truffles.

Forming the Truffles

After 30 minutes, take the mixture out of the fridge. Use a tablespoon or cookie scoop to portion out the mixture. Aim for about 1 inch in diameter for each truffle. Roll each portion into a smooth ball.

Now, roll each ball in the extra shredded coconut. This gives the truffles a nice texture. Place the coconut-coated truffles on a baking sheet lined with parchment paper. Return the tray to the refrigerator. Let the truffles set for at least one hour.

Tips & Tricks

Adjusting Flavor and Sweetness

To make your truffles just right, taste the mixture before rolling. If you want more sweetness, add a bit of maple syrup. This can bring out the pumpkin flavor more. Try adding a pinch of salt to balance the sweetness. A little sea salt can enhance the taste.

Presentation Ideas

Present your truffles in fun paper cups for a festive look. Arrange them on a pretty plate for a nice touch. For extra flair, drizzle melted dark chocolate on top. This adds a visual pop and a rich taste. You can also sprinkle extra shredded coconut over them for texture.

Tools for Easy Rolling

Use a tablespoon or cookie scoop to make rolling easier. This helps ensure each truffle is the same size. Keep your hands damp while rolling to avoid sticking. A baking sheet lined with parchment paper makes clean-up a breeze. Having these tools ready can speed up your process.

Variations

Flavor Twists

You can easily switch up the flavor of your truffles. For a richer taste, add more cocoa powder. If you love spices, try adding ginger or cardamom. These spices give a warm kick. You might even mix in some orange zest for a bright twist. This will enhance the pumpkin flavor and add freshness.

Ingredient Substitutions

Feel free to play with the ingredients. If you don’t have almond flour, use oat flour instead. You can substitute maple syrup with honey or agave syrup. This keeps the sweetness but changes the flavor a bit. For a nut-free version, try sunflower seed flour. It works well and adds its own unique taste.

Dietary Adjustments

These truffles can fit many diets. They are already gluten-free, which is great. To make them vegan, stick with maple syrup as your sweetener. Ensure your cocoa powder is dairy-free too. If you want to cut sugar, use a sugar substitute like stevia. Just be sure to check the conversion ratio for sweetness. This way, everyone can enjoy these tasty treats!

Storage Info

Best Practices for Refrigeration

Storing your No-Bake Chocolate Coconut Pumpkin Truffles in the fridge is easy. Place them in an airtight container. This keeps them fresh and prevents them from drying out. You can store them for up to one week. When you want a tasty treat, just grab one when you feel like it.

Freezing Truffles for Longer Storage

If you want to keep your truffles longer, freezing is a great option. To do this, first let the truffles set. Then, place them in a single layer on a baking sheet. Freeze them for about two hours. Once they are hard, transfer them to a freezer-safe bag. This way, they can last for up to three months. When you want to eat one, let it thaw in the fridge overnight.

Shelf Life and Freshness Tips

These truffles stay fresh for a while, but some tips help. Always check for any signs of spoilage, like mold or an off smell. If they look good and smell fine, they should be safe to eat. Enjoying them within a week ensures you taste all the lovely flavors.

FAQs

Can I use a different type of nut flour?

Yes, you can use other nut flours. Almond flour works well, but you can try cashew or hazelnut flour too. Each type adds its own flavor. Just keep in mind that the texture may change slightly.

How long do these truffles last in the fridge?

These truffles stay fresh for up to one week in the fridge. Store them in a sealed container to keep them safe from air and moisture. If you want them to last longer, freezing is a great option.

Can I make these truffles ahead of time?

Absolutely! You can make these truffles a few days in advance. Just follow the recipe steps, then store them in the fridge. They taste even better after chilling for a while!

In this post, we covered how to make delicious truffles using simple ingredients. I explained the steps for mixing, chilling, and forming the truffles. You learned tips for flavor adjustments and creative presentations. We also explored variations and storage methods to keep your truffles fresh.

Try these recipes to impress friends or enjoy a sweet treat. With some fun twists, you can make them your own. Enjoy making and sharing your tasty truffles!

For these No-Bake Chocolate Coconut Pumpkin Truffles, you will need: - 1 cup canned pumpkin puree - 1 cup almond flour - 1/2 cup unsweetened shredded coconut, plus extra for rolling - 1/2 cup pure maple syrup - 1/4 cup unsweetened cocoa powder - 1 teaspoon pure vanilla extract - 1/2 teaspoon ground cinnamon - 1/4 teaspoon ground nutmeg - A pinch of sea salt Each truffle has about 100 calories. They have 3 grams of protein and 5 grams of fat. Carbs are around 13 grams, with about 2 grams of fiber. These truffles have no added sugars. The natural sweetness comes from maple syrup and pumpkin. These truffles offer many health benefits: - Pumpkin puree is rich in vitamins A and C. It can boost your immune system. - Coconut provides healthy fats. It can help your heart health. - Almond flour is low in carbs. It’s a good choice for gluten-free diets. - Maple syrup has antioxidants. It may help lower blood pressure. - Cinnamon can regulate blood sugar levels. It adds nice flavor too. These truffles not only taste amazing but also help keep you healthy! Start by grabbing a large mixing bowl. Add 1 cup of canned pumpkin puree. Next, pour in 1 cup of almond flour. Then add 1/2 cup of unsweetened shredded coconut. After that, mix in 1/2 cup of pure maple syrup. Now, it's time for 1/4 cup of unsweetened cocoa powder. Don’t forget 1 teaspoon of pure vanilla extract. Add 1/2 teaspoon of ground cinnamon and 1/4 teaspoon of ground nutmeg. Finally, sprinkle in a pinch of sea salt. Use a spatula or your hands to mix everything well. You want a smooth, cohesive dough. Take a moment to taste the dough. If you want it sweeter, stir in a little more maple syrup. Cover the bowl with plastic wrap. Place the bowl in the refrigerator for about 30 minutes. This step helps the mixture firm up. A firmer mixture makes it easier to shape into truffles. After 30 minutes, take the mixture out of the fridge. Use a tablespoon or cookie scoop to portion out the mixture. Aim for about 1 inch in diameter for each truffle. Roll each portion into a smooth ball. Now, roll each ball in the extra shredded coconut. This gives the truffles a nice texture. Place the coconut-coated truffles on a baking sheet lined with parchment paper. Return the tray to the refrigerator. Let the truffles set for at least one hour. To make your truffles just right, taste the mixture before rolling. If you want more sweetness, add a bit of maple syrup. This can bring out the pumpkin flavor more. Try adding a pinch of salt to balance the sweetness. A little sea salt can enhance the taste. Present your truffles in fun paper cups for a festive look. Arrange them on a pretty plate for a nice touch. For extra flair, drizzle melted dark chocolate on top. This adds a visual pop and a rich taste. You can also sprinkle extra shredded coconut over them for texture. Use a tablespoon or cookie scoop to make rolling easier. This helps ensure each truffle is the same size. Keep your hands damp while rolling to avoid sticking. A baking sheet lined with parchment paper makes clean-up a breeze. Having these tools ready can speed up your process. {{image_4}} You can easily switch up the flavor of your truffles. For a richer taste, add more cocoa powder. If you love spices, try adding ginger or cardamom. These spices give a warm kick. You might even mix in some orange zest for a bright twist. This will enhance the pumpkin flavor and add freshness. Feel free to play with the ingredients. If you don’t have almond flour, use oat flour instead. You can substitute maple syrup with honey or agave syrup. This keeps the sweetness but changes the flavor a bit. For a nut-free version, try sunflower seed flour. It works well and adds its own unique taste. These truffles can fit many diets. They are already gluten-free, which is great. To make them vegan, stick with maple syrup as your sweetener. Ensure your cocoa powder is dairy-free too. If you want to cut sugar, use a sugar substitute like stevia. Just be sure to check the conversion ratio for sweetness. This way, everyone can enjoy these tasty treats! Storing your No-Bake Chocolate Coconut Pumpkin Truffles in the fridge is easy. Place them in an airtight container. This keeps them fresh and prevents them from drying out. You can store them for up to one week. When you want a tasty treat, just grab one when you feel like it. If you want to keep your truffles longer, freezing is a great option. To do this, first let the truffles set. Then, place them in a single layer on a baking sheet. Freeze them for about two hours. Once they are hard, transfer them to a freezer-safe bag. This way, they can last for up to three months. When you want to eat one, let it thaw in the fridge overnight. These truffles stay fresh for a while, but some tips help. Always check for any signs of spoilage, like mold or an off smell. If they look good and smell fine, they should be safe to eat. Enjoying them within a week ensures you taste all the lovely flavors. Yes, you can use other nut flours. Almond flour works well, but you can try cashew or hazelnut flour too. Each type adds its own flavor. Just keep in mind that the texture may change slightly. These truffles stay fresh for up to one week in the fridge. Store them in a sealed container to keep them safe from air and moisture. If you want them to last longer, freezing is a great option. Absolutely! You can make these truffles a few days in advance. Just follow the recipe steps, then store them in the fridge. They taste even better after chilling for a while! In this post, we covered how to make delicious truffles using simple ingredients. I explained the steps for mixing, chilling, and forming the truffles. You learned tips for flavor adjustments and creative presentations. We also explored variations and storage methods to keep your truffles fresh. Try these recipes to impress friends or enjoy a sweet treat. With some fun twists, you can make them your own. Enjoy making and sharing your tasty truffles!

No-Bake Chocolate Coconut Pumpkin Truffles

Indulge in these decadent no-bake chocolate coconut pumpkin truffles that are as easy to make as they are delicious! With rich pumpkin puree, creamy almond flour, and a touch of sweet maple syrup, these truffles are a perfect fall treat. Discover the step-by-step recipe and tips for creating these delightful bites at home. Click through to explore this irresistible recipe and impress your friends and family with a tasty pumpkin dessert!

Ingredients
  

1 cup canned pumpkin puree

1 cup almond flour

1/2 cup unsweetened shredded coconut, plus extra for rolling

1/2 cup pure maple syrup

1/4 cup unsweetened cocoa powder

1 teaspoon pure vanilla extract

1/2 teaspoon ground cinnamon

1/4 teaspoon ground nutmeg

A pinch of sea salt

Instructions
 

In a large mixing bowl, thoroughly combine the canned pumpkin puree, almond flour, shredded coconut, maple syrup, cocoa powder, vanilla extract, ground cinnamon, ground nutmeg, and a pinch of sea salt. Use a spatula or your hands to ensure an even mixture, forming a cohesive dough.

    After mixing, taste the dough for sweetness. If desired, adjust the flavor by stirring in a little extra maple syrup.

      Cover the bowl with plastic wrap and refrigerate the mixture for approximately 30 minutes. Chilling will help the mixture firm up, making it easier to shape into balls.

        Once chilled, remove the mixture from the refrigerator. Utilizing a tablespoon or cookie scoop, portion out the mixture and roll each portion into a smooth ball, aiming for about 1 inch in diameter.

          Roll each truffle in extra shredded coconut until fully coated, ensuring a delightful texture on the outside.

            Place the coconut-coated truffles on a baking sheet lined with parchment paper. Transfer the tray back to the refrigerator and let the truffles set for at least one hour.

              Prep Time: 10 minutes | Total Time: 1 hour 40 minutes | Servings: 12 truffles

                - Optional Presentation Tips: Present the truffles in charming paper cups on a decorative serving plate. For an added touch of elegance, drizzle some melted dark chocolate over the top before serving. Enjoy this delightful treat!

                  WANT TO SAVE THIS RECIPE?

                  Related Posts