No Bake Chocolate Lasagna Delightful and Easy Treat

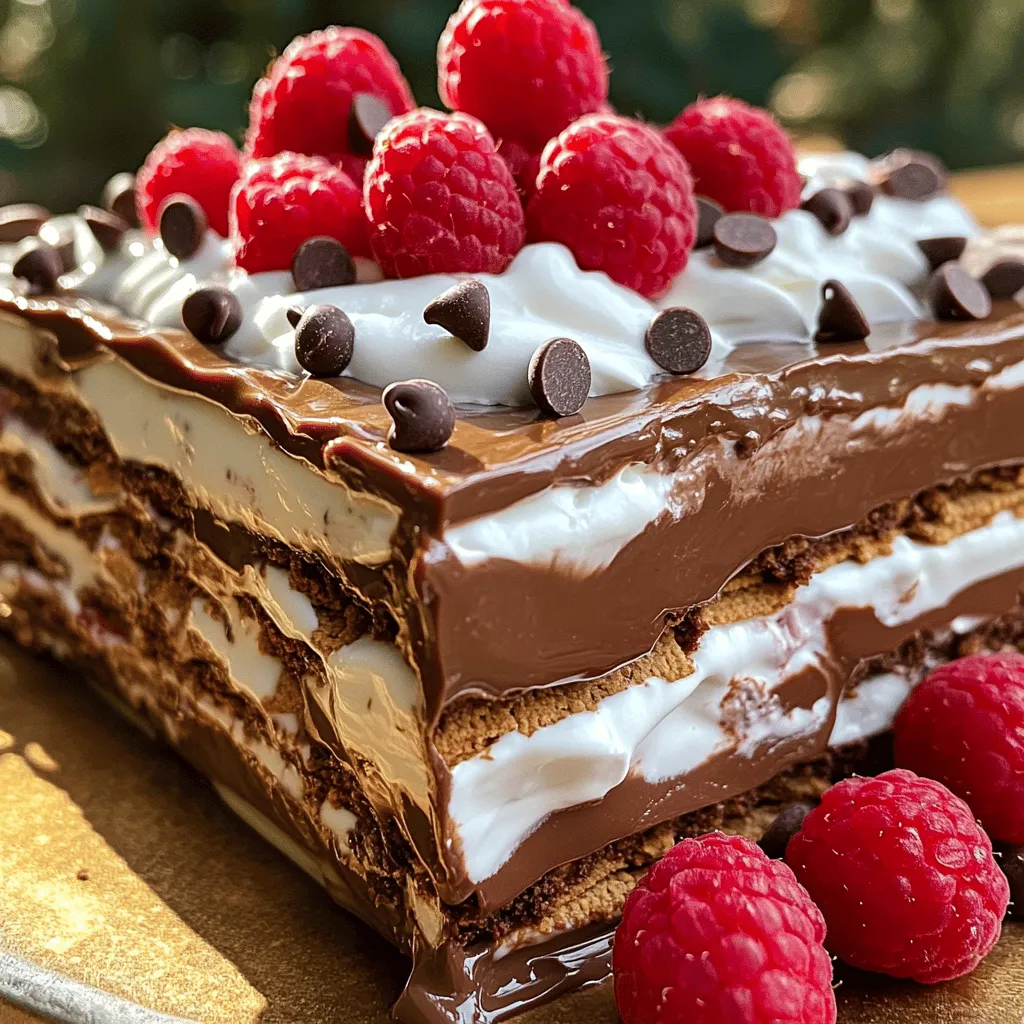
If you crave a sweet treat that’s simple to make, look no further! No Bake Chocolate Lasagna is your answer. This delightful dessert layers creamy goodness with rich chocolate, leaving everyone wanting more. You won’t need to turn on the oven, and the steps are clear and easy. Join me as I guide you through creating this indulgent treat that will impress any crowd! Let’s get started!
Ingredients
List of Essential Ingredients
For this no-bake chocolate lasagna, you need these key ingredients:
– 1 package (14.3 oz) chocolate graham crackers
– 2 cups heavy whipping cream
– 8 oz cream cheese, softened
– 1 cup powdered sugar
– 1 teaspoon vanilla extract
– 1 cup semi-sweet chocolate chips, melted
– 2 cups chocolate pudding (instant or homemade)
– 1 cup mini chocolate chips (for topping)
Optional Garnishes
To make your dessert even more special, consider these garnishes:
– Fresh raspberries
– Fresh strawberries
These add color and freshness to each slice.
Substitutions for Ingredients
If you need to swap out some items, here are some ideas:
– Instead of chocolate graham crackers, use regular graham crackers or Oreo cookies.
– For a lighter option, try whipped topping instead of heavy cream.
– You can use Greek yogurt in place of cream cheese for a tangy twist.
These substitutions keep the dessert tasty while fitting your needs. Enjoy creating your no-bake chocolate lasagna!
Step-by-Step Instructions
Preparing the Cream Layer
Start by gathering your ingredients. You will need heavy whipping cream, cream cheese, powdered sugar, and vanilla extract. In a large bowl, whip the heavy cream until it forms soft peaks. This takes about three to five minutes. In a separate bowl, beat the softened cream cheese until smooth. Then, add the powdered sugar and vanilla extract. Mix until fully combined. Gently fold the whipped cream into the cream cheese mixture with a spatula. This makes a fluffy cream layer.
Melting the Chocolate
Now, let’s melt the chocolate. Take a microwave-safe bowl and add the semi-sweet chocolate chips. Heat them in the microwave for 20 seconds at a time. Stir between each heating until the chocolate is smooth. Be careful not to overheat it. Once smooth, let the melted chocolate cool for a few minutes before using it. This will help keep the layers from getting too warm.
Assembling the Layers
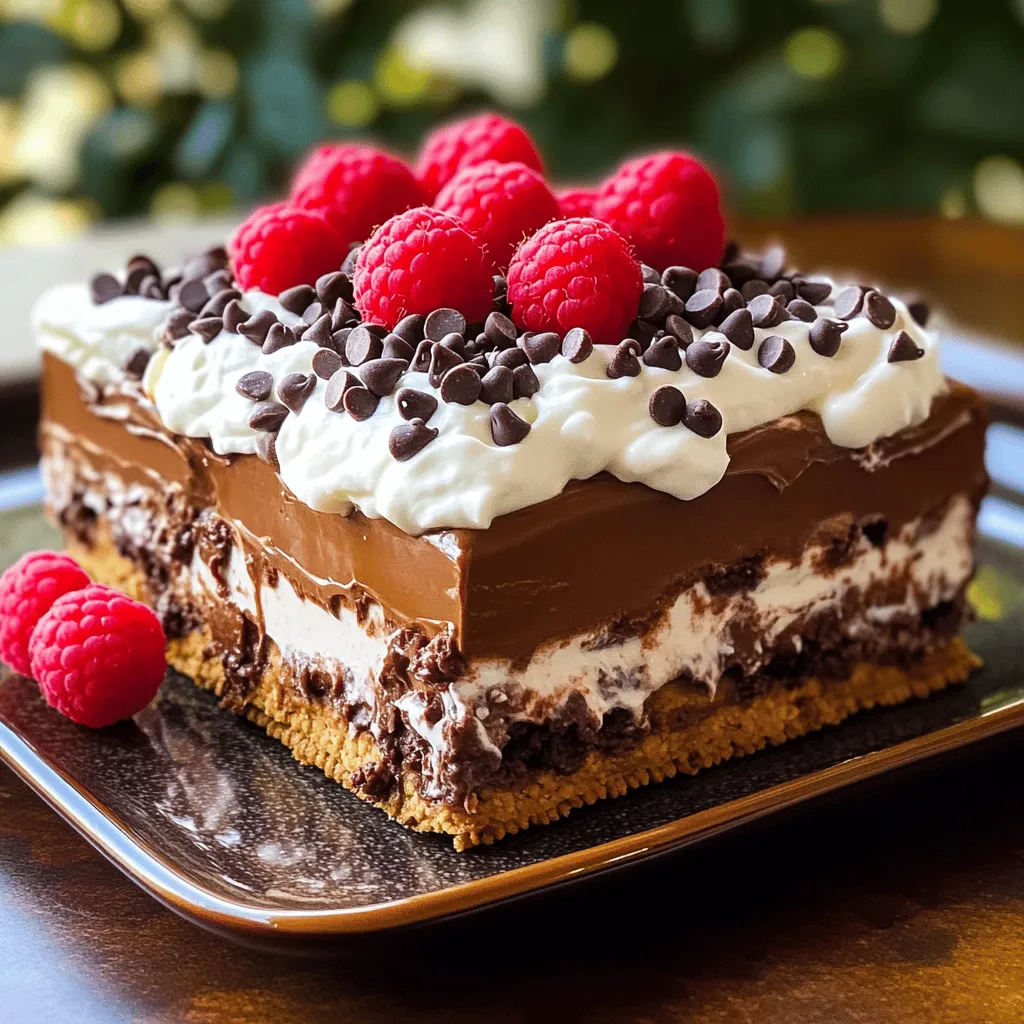
Grab a 9×13-inch baking dish to start layering. Place a single layer of chocolate graham crackers at the bottom. Make sure to cover the whole base. Pour half of the cooled melted chocolate over the graham crackers. Spread it evenly. Next, add half of the cream mixture on top. Smooth it out with a spatula. Pour half of the chocolate pudding over the cream layer. Repeat these steps for another layer. Finish by covering the dish tightly with plastic wrap. Chill it in the fridge for at least 4 hours. For best results, let it sit overnight. This allows the flavors to meld together beautifully.
Tips & Tricks
Achieving the Perfect Whipped Cream
To make great whipped cream, start with cold cream. Use a large bowl and a hand mixer. Beat the cream until soft peaks form. This means the cream holds its shape but still looks fluffy. Be careful not to overbeat it. Overbeaten cream can turn into butter, and we don’t want that. Mixing it gently with the cream cheese adds a light texture. This balance makes the layers smooth and creamy.
Best Practices for Layering
Layering is key to a great no bake chocolate lasagna. Begin with a solid base of chocolate graham crackers. This helps support all the layers above. Pour melted chocolate evenly on top, spreading it out well. When adding the cream mixture, use a spatula to smooth it down. Make sure each layer is flat before adding the next. This helps each bite taste the same. Remember, patience is important here!
Avoiding Common Mistakes
One common mistake is rushing the chilling time. Letting the dessert chill for at least four hours helps the layers set. This wait is worth it for the best flavor and texture. Another mistake is not measuring ingredients properly. Use measuring cups for accuracy. Lastly, don’t forget the toppings! Mini chocolate chips or fresh fruit add a fun finish.

Variations
Flavor Variations (Peanut Butter, Mint, etc.)
You can add fun flavors to your no bake chocolate lasagna. Try peanut butter for a nutty twist. Just mix half a cup of creamy peanut butter into the cream layer. You get a rich taste that pairs well with chocolate.
Mint is another great choice. Add a few drops of mint extract to the cream mix. This gives your dessert a refreshing zing. You can also use mint chocolate chips for extra flavor.
Want to be extra creative? Mix in some coffee or espresso powder. This adds depth to the chocolate taste. You could even layer in fruit, like bananas or cherries, for a fruity kick.
Gluten-Free Options
Making this dessert gluten-free is easy. Use gluten-free chocolate graham crackers instead of regular ones. Many brands offer tasty options that work well. Just check the label to ensure they are gluten-free.
You can also make your own graham crackers using gluten-free flour. This way, you can control the ingredients. It’s a fun project if you have some time.
Alternative Toppings
Toppings can change the whole look and taste of your dessert. While mini chocolate chips are great, you can switch things up. Try crushed nuts for a nice crunch. Walnuts or almonds add a delightful texture.
Fresh fruit is another option. Berries, like raspberries or strawberries, add color and flavor. You could also drizzle caramel or chocolate sauce on top for added sweetness.
If you want a unique touch, use whipped cream or chocolate sauce. These can make each slice look even more tempting.
Storage Info
How to Store Leftovers
Store any leftover No Bake Chocolate Lasagna in an airtight container. This will keep it fresh. You can also cover the dish tightly with plastic wrap. Make sure it seals well to keep out air.
Refrigeration Tips
Refrigerate your lasagna for up to five days. Keep it in the fridge at a temperature below 40°F (4°C). This keeps the cream and pudding layers safe to eat. Before serving, check for any changes in texture or smell.
Freezing Instructions
If you want to save some for later, you can freeze it. Cut portions into squares for easy serving. Wrap each piece tightly in plastic wrap and then foil. Store it in the freezer for up to three months. When ready to eat, let it thaw in the fridge overnight. This will help keep the layers intact and tasty. For the best flavor, enjoy it soon after thawing.
FAQs
Can I make No Bake Chocolate Lasagna ahead of time?
Yes, you can make No Bake Chocolate Lasagna ahead of time. It tastes better when it chills! I suggest making it the day before. This way, the layers set well and flavors blend perfectly. Just keep it covered in the fridge until you’re ready to serve.
What can I use instead of chocolate graham crackers?
You can use regular graham crackers if you want. If you’re looking for something different, try Oreo cookies for a rich flavor. You can also use any chocolate cookie you love. Just crush them to make a tasty base for your dessert.
How long can No Bake Chocolate Lasagna be stored?
You can store No Bake Chocolate Lasagna in the fridge for about 3 to 5 days. Just keep it tightly covered. If you want to keep it longer, you can freeze it. It will last for up to 2 months in the freezer. Just remember to thaw it in the fridge when you’re ready to enjoy it again.
This blog post covered how to make a delicious No Bake Chocolate Lasagna. You learned about the key ingredients and optional garnishes to enhance the dessert. We explored easy step-by-step instructions, tips for perfect layers, and variations to suit your taste. Remember, you can adjust ingredients and toppings to make it your own.
No Bake Chocolate Lasagna is simple to make and fun to share. Enjoy creating this treat!


![- 1 cup unsalted butter - 2 cups granulated sugar - 4 large eggs - 1 teaspoon vanilla extract To make the best fudgy brownies, you need these core ingredients. Unsalted butter gives the brownies a rich, smooth base. Granulated sugar adds sweetness and helps create that perfect crust. The eggs provide moisture, binding everything together. Lastly, vanilla extract enhances the overall flavor with its warm notes. - 1 cup all-purpose flour - 1 cup unsweetened cocoa powder - 1 teaspoon baking powder - 1/2 teaspoon salt Dry ingredients play a key role in the texture. All-purpose flour forms the structure. Cocoa powder gives that deep chocolate flavor. Baking powder helps the brownies rise a bit, creating a tender bite. Salt balances the sweetness and brings out the chocolate flavor. - 1 cup chocolate chips - 1/2 cup chopped walnuts or pecans You can take these brownies to the next level with add-ins. Chocolate chips add extra gooeyness. You can choose milk or dark chips based on your taste. Nuts, like walnuts or pecans, add crunch and flavor. However, you can skip them if you prefer a smooth brownie. For the complete recipe, check the Full Recipe section. - Preheat oven to 350°F (175°C). - Grease or line the baking pan. Start by getting your oven nice and hot. This helps the brownies bake evenly. You can use butter or parchment paper to prepare your baking pan. This makes it easy to take the brownies out later. - Melt butter and combine with sugar. - Whisk in eggs and vanilla extract. Next, melt the butter in a medium saucepan over low heat. Once it’s melted, mix in the granulated sugar really well. It should look smooth and creamy. After that, let it cool a bit. Then, whisk in the eggs one by one. Finish by adding vanilla extract for extra flavor. - Sift and mix dry ingredients. - Fold dry into wet without overmixing. In another bowl, sift together the flour, cocoa powder, baking powder, and salt. This helps break up any lumps. Now, gently fold the dry mix into the wet mixture. Be careful not to overmix it. This step is key for that fudgy texture you want. - Incorporate chocolate chips and nuts. - Pour batter into prepared pan. Now comes the fun part! Fold in the chocolate chips and nuts if you choose to add them. They create little pockets of flavor. Once everything is mixed, pour the batter into your prepared pan. Use a spatula to spread it evenly. - Bake for 25-30 minutes. - Cool before cutting. Put the pan in the oven and bake for 25 to 30 minutes. Check if they’re done by inserting a toothpick in the center. If it comes out with a few moist crumbs, they are perfect! Allow the brownies to cool in the pan for about 10 minutes. Then, move them to a wire rack to cool completely. This helps them set up nicely for cutting. For the full recipe, check out the complete guide above. To get that fudgy texture, avoid overmixing the batter. When you mix too much, air gets in. This makes brownies more cake-like. Instead, mix just until you see no dry flour. Quality cocoa powder matters too. Choose a rich, unsweetened cocoa for deep flavor. Brands like Valrhona or Ghirardelli work great. This will give you the best taste and color. How do you check for doneness? Insert a toothpick into the center. If it comes out with a few moist crumbs, they’re ready! If it’s clean, you may have overbaked them. Ovens can vary, so adjust the baking time. If your oven runs hot, start checking at 20 minutes. This way, you’ll catch them at the right time for that fudgy finish. For a show-stopping treat, serve brownies warm. Add a scoop of ice cream on top. The warm brownie and cold ice cream create a tasty contrast. Drizzle with chocolate sauce for extra indulgence. You can also sprinkle some sea salt on top. This adds a nice flavor kick. Feel free to add toppings like nuts, caramel, or fresh berries for more fun. Want to explore more ideas? Check out the Full Recipe for more serving tips! {{image_4}} You can twist the classic fudgy brownie in fun ways. Here are some ideas: - Mint chocolate brownies: Add 1 teaspoon of mint extract to the batter. This gives a fresh taste that pairs well with chocolate. - Peanut butter swirl: Create swirls by adding 1/2 cup of creamy peanut butter. Drop spoonfuls on top and use a knife to swirl it in. - Espresso-infused brownies: Mix in 1 tablespoon of instant espresso powder. This will deepen the chocolate flavor and add a rich taste. Not everyone can eat regular brownies. Here are a few options: - Gluten-free options: Replace all-purpose flour with almond flour or gluten-free flour blend. This keeps the texture fudgy and delicious. - Vegan adaptations: Substitute eggs with 1/4 cup of applesauce or flaxseed meal mixed with water. Use dairy-free butter and dark chocolate for a great result. How you serve brownies can change the whole experience. Try these ideas: - Brownie sundaes: Serve warm brownies with a scoop of vanilla ice cream. Top it with chocolate sauce and nuts for crunch. - Brownie bites for parties: Cut brownies into small squares. Arrange them on a tray for easy snacking and sharing. Explore these fun variations to enjoy your ultimate fudgy brownies even more! For the full recipe, refer to the earlier section. To keep your brownies fresh, store them in an airtight container. This helps maintain their moisture. You can also wrap them tightly in plastic wrap. This keeps them soft and fudgy. Place the container at room temperature for up to four days. If you want to keep them longer, the fridge is a good choice. Just remember, chilling can change their texture a bit. Freezing brownies is simple. First, let them cool completely. Then, cut them into squares. Wrap each square in plastic wrap. After that, place them in a freezer-safe bag. Make sure to remove all the air. Your brownies can stay in the freezer for up to three months. When you’re ready to enjoy them, take them out. Thaw them in the fridge overnight for best results. You can also warm them in the microwave for a few seconds. Brownies last about four days at room temperature. In the fridge, they can stay fresh for a week. Look for signs of spoilage. If they smell off or have a dry texture, it’s best to toss them. Fresh brownies should be soft and have a rich chocolate smell. Enjoy your Ultimate Fudgy Brownies while they’re at their best! For the complete recipe, check the [Full Recipe]. Fudgy brownies have more fat than flour. The high fat helps create a dense texture. This means using more butter and chocolate in your mix. The key is to mix gently. This keeps the brownies moist and rich. Cakey brownies use more flour and less fat. They rise more and are lighter. Yes, you can! Feel free to swap chocolate types in this recipe. You can use dark, milk, or even semi-sweet chocolate. Each type will change the taste a bit. Dark chocolate gives a rich flavor. Milk chocolate makes it sweeter. It’s all about what you like the most. Check the brownies at 25 minutes. Insert a toothpick into the center. If it comes out with a few moist crumbs, they’re ready. Don’t worry if it’s not clean. A few crumbs mean they will be fudgy. If it’s all wet, bake for a few more minutes. Absolutely! You can add nuts like walnuts or pecans for crunch. You can also add toppings like caramel or sea salt. Get creative! Just remember to mix them in gently. This keeps the fudgy texture while adding fun flavors. To reheat brownies, use your oven. Preheat to 350°F (175°C). Place the brownies on a baking sheet. Heat them for about 10 minutes. You want them warm but not dried out. You can also microwave them for 15-20 seconds. Enjoy them warm for a gooey treat! In this blog post, we covered the key ingredients and steps to make fudgy brownies. We explored essential ingredients, optional add-ins, and tips for the perfect texture. You can try fun variations such as mint or peanut butter. Remember to store your brownies well to keep them fresh. With these tips and recipes, you can bake brownies that everyone will love. Dive in and enjoy your delicious creations!](https://joymealplan.com/wp-content/uploads/2025/06/0df86677-361d-4dfc-89fb-f08daaeec0f4-768x768.webp)


![- 1 cup rolled oats - 2 ripe bananas - 1 cup almond milk - 1 teaspoon baking powder - 1 teaspoon vanilla extract - 1 tablespoon honey or maple syrup (optional) - 1/2 teaspoon ground cinnamon - Pinch of salt - Coconut oil or cooking spray for greasing Using rolled oats is key. They give your pancakes a hearty texture. Bananas add natural sweetness and moisture. Almond milk keeps it light and dairy-free. If you want sweetness, use honey or maple syrup. A touch of cinnamon gives warmth and flavor. Coconut oil or cooking spray is important to keep the pancakes from sticking. Choose either based on your preference. This recipe is simple. You can find the full recipe above to guide you through the steps. Enjoy making these delicious pancakes! Start by blending 1 cup of rolled oats. You want to blend them until they are fine and powdery. This oat flour acts as the main ingredient. Next, add 2 ripe bananas that you have mashed well. Then, pour in 1 cup of almond milk. This mix gives your pancakes a nice texture. Now it’s time to make the batter. Add 1 teaspoon of baking powder, 1 teaspoon of vanilla extract, and 1 tablespoon of honey or maple syrup if you want them sweeter. Don’t forget to add 1/2 teaspoon of ground cinnamon and a pinch of salt. Blend everything together until it is smooth and uniform. The batter should look nice and creamy. Let the batter rest for about 5-10 minutes. This helps it thicken. While the batter rests, heat a skillet over medium heat. Grease it with coconut oil or cooking spray to prevent sticking. Once hot, pour about 1/4 cup of batter for each pancake. Cook until bubbles form on top, which takes about 2-3 minutes. Then, flip them over. Cook for another 2-3 minutes until they are golden brown. Repeat this with the rest of the batter. You can find the full recipe [here]. To get the best texture, let the batter rest for 5-10 minutes. This helps it thicken. A thicker batter makes fluffier pancakes. Adjust the heat on your skillet. Cook on medium heat to avoid burning. If the pan is too hot, the outside cooks fast while the inside stays raw. You can change the sweetness. Instead of honey, try maple syrup or agave. Each will give a unique taste. For more flavor, think about adding spices. Nutmeg and ginger are great choices. They add warmth and depth. A pinch of each can really enhance the pancakes. For a beautiful plate, stack your pancakes high. Top them with fresh banana slices. A drizzle of honey or syrup makes them shine. You can also sprinkle crunchy nuts on top. For a creamy touch, serve with Greek yogurt. It adds richness and pairs well with the pancakes. {{image_4}} You can easily make these pancakes gluten-free. Use certified gluten-free oats. This ensures you avoid cross-contamination. Many brands offer oats that fit this need. If you are lactose intolerant, try almond milk or coconut milk. Both options work great in this recipe. They add a nice creaminess without the dairy. Want to add more fun to your pancakes? Toss in some chocolate chips or nuts. They give a sweet crunch that’s hard to resist. You can also use walnuts or pecans for added texture. You might like to incorporate fruit purees too. Applesauce or pumpkin puree can boost flavor and moisture. Vanilla or almond extract can add depth to the taste. Meal prep is easy with these pancakes. You can make a big batch and freeze extras. Just stack them with parchment paper between each pancake. This keeps them from sticking together. These pancakes pair well with yogurt or fresh fruit. A dollop of Greek yogurt adds protein. Fresh berries or banana slices on top make a lovely presentation. For the full recipe, check it out above. Enjoy your delicious and healthy banana oat pancakes! To keep your pancakes fresh, store them properly. If you have leftover pancakes, place them in an airtight container. You can refrigerate them for up to three days. This keeps them soft and tasty. For longer storage, freeze your pancakes. Lay them flat on a baking sheet. Once they freeze, transfer them to a freezer bag. This way, they won't stick together. You can freeze them for up to three months. When you're ready to enjoy your pancakes again, reheating is simple. The best way is to use a toaster or a skillet. If you choose a skillet, heat it on low. Add a tiny bit of coconut oil or spray. Place the pancakes in the skillet for about one minute on each side. This keeps them warm and fluffy. If you're in a hurry, you can use the microwave. Heat the pancakes for about 20-30 seconds. But be careful, as this may make them a bit chewy. For the best taste, always try to reheat them gently. Enjoy your Healthy Banana Oat Pancakes! For the full recipe, check out the details above. Yes, you can use quick oats. Quick oats are thinner and cook faster. This can affect the texture of your pancakes. Rolled oats give a heartier feel. If you use quick oats, your pancakes may be softer. You might also need less liquid since quick oats absorb liquid differently. Experiment and see what you like best. To make these pancakes vegan, swap out the milk and honey. Use almond milk or any plant-based milk. For sweetness, try maple syrup instead of honey. You can skip the egg, as this recipe is already egg-free. These changes keep the pancakes tasty and plant-based. If the batter is too thick, add a bit more milk to loosen it. Start with one tablespoon at a time. Blend it again after each addition. This helps keep the flavor strong while adjusting the texture. A good batter should pour easily, but not be runny. These pancakes last about 3 to 5 days in the fridge. Keep them in an airtight container to stay fresh. You can reheat them in the microwave or on a skillet. Just make sure they are heated through for the best taste. Yes, you can make the batter ahead of time. Store it in the fridge for up to 24 hours. If you wait longer, the oats may absorb too much liquid. Just add a little milk before cooking to get the right consistency. This makes breakfast quick and easy! For the full recipe, check out the detailed guide. To make these healthy banana oat pancakes, start by blending the rolled oats until they turn into a fine flour. Then mix in the mashed bananas and almond milk. This creates a smooth batter. It is important to let the batter rest for 5-10 minutes. This helps thicken the batter and improves texture. Here are some key points to remember for successful pancakes: - Always blend the oats until fine for the best texture. - Use ripe bananas for natural sweetness. - Let the batter rest; it makes a big difference. - Grease your skillet well to prevent sticking. - Cook until bubbles form, then flip carefully. These tips will help you create pancakes that are light, fluffy, and full of flavor. Enjoy making them! You learned about making delicious pancakes with simple, healthy ingredients. We covered the essential items, step-by-step cooking instructions, and helpful tips. We also explored variations to fit diets and preferences. Lastly, we discussed how to store leftovers and answered common questions. With these insights, you can create tasty pancakes that everyone will enjoy. Get cooking and delight your family or friends with these easy-to-make treats!](https://joymealplan.com/wp-content/uploads/2025/07/586e6978-884d-467f-992a-f783d71f0243-768x768.webp)