No-Bake Chocolate Peanut Butter Oat Bars Simple Treat

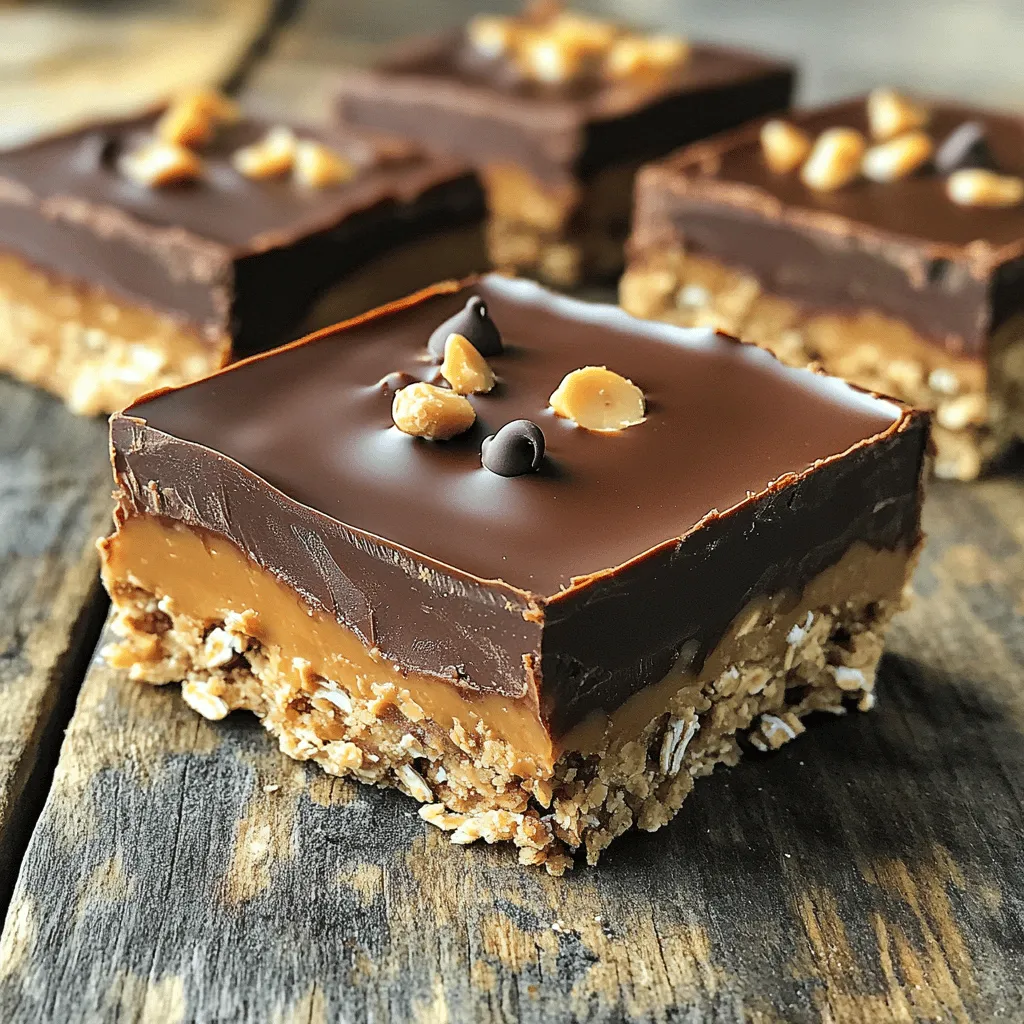
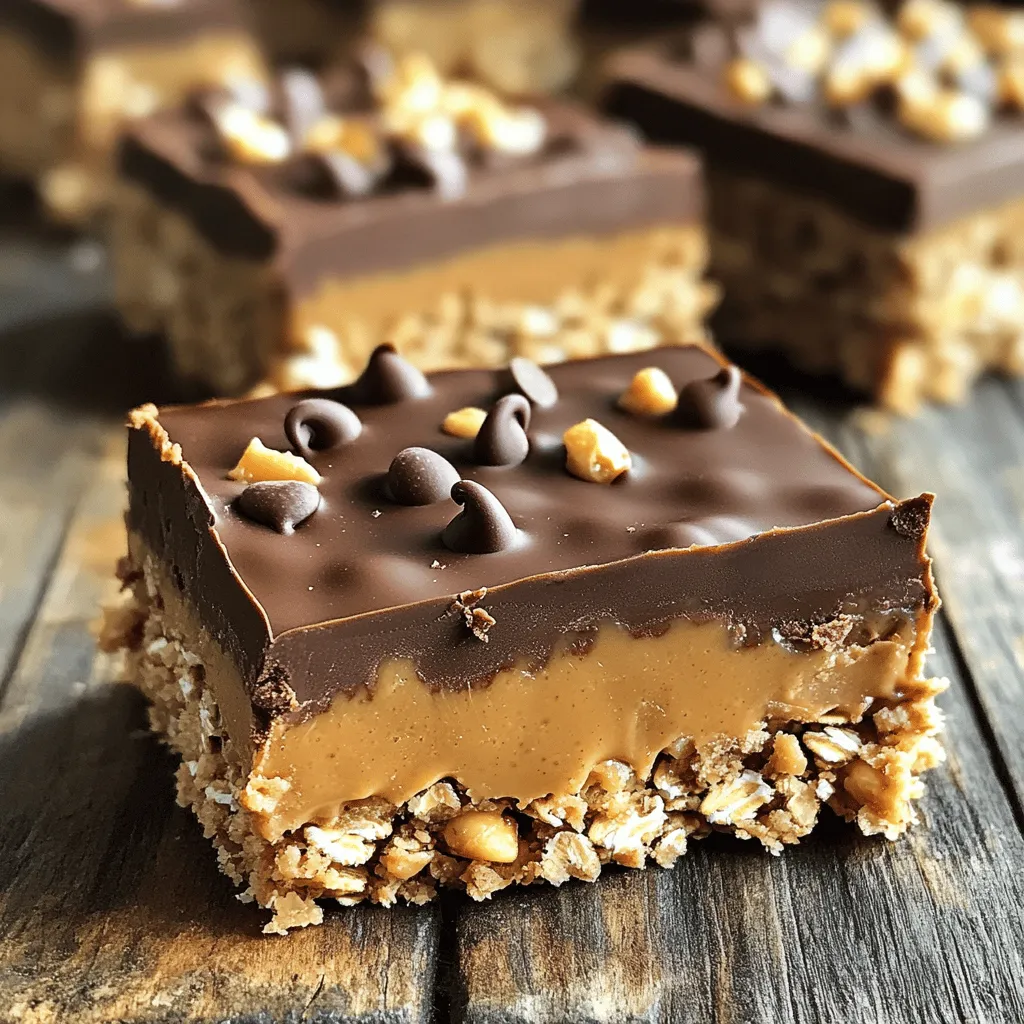
Are you ready for a delicious treat that’s easy to make? No-Bake Chocolate Peanut Butter Oat Bars are your answer! They combine rich chocolate, creamy peanut butter, and hearty oats, perfect for snacks or desserts. In this article, I’ll share a simple recipe to whip up these bars, along with tips, variations, and storage ideas. Let’s turn that craving for something sweet into a tasty reality!
Ingredients
List of Ingredients
– 1 cup rolled oats
– 1 cup creamy peanut butter
– 1/2 cup honey or maple syrup
– 1/2 cup unsweetened cocoa powder
– 1/2 teaspoon vanilla extract
– 1/4 teaspoon salt
– 1/2 cup chocolate chips (semi-sweet or dark)
– 1/4 cup chopped nuts (e.g., almonds or walnuts) – optional
Ingredient Notes and Substitutions
Using rolled oats gives these bars a great texture. If you want a finer texture, quick oats work too. Creamy peanut butter offers a smooth mix, but crunchy peanut butter adds a fun bite. You can swap honey for maple syrup if you prefer a vegan option. Unsweetened cocoa powder is key for rich chocolate flavor. If you don’t have cocoa powder, try carob powder for a different taste. For sweetness, honey or maple syrup works well. You can skip the vanilla extract, but it enhances the flavor. The salt balances sweetness. If you’re nut-free, skip the nuts or use seeds like sunflower seeds instead. Finally, you can use any type of chocolate chips you like.
Nutritional Information per Serving
Each bar has about 150 calories. They contain:
– 6g protein
– 7g carbs
– 12g fat
– 2g fiber
– 8g sugar
This recipe makes 12 bars. Perfect for a quick snack or dessert!
Step-by-Step Instructions
Preparation Steps Overview
Making no-bake chocolate peanut butter oat bars is easy. You only need a few steps. First, gather your ingredients. Then, mix the dry items. Next, warm the peanut butter and honey. Finally, combine everything and chill your bars.
Detailed Cooking Process
1. Start by mixing the dry ingredients. In a large bowl, add:
– 1 cup rolled oats
– 1/2 cup unsweetened cocoa powder
– 1/4 teaspoon salt
Use a whisk or spoon to blend them well.
2. Next, warm the wet mix. In a microwave-safe bowl, combine:
– 1 cup creamy peanut butter
– 1/2 cup honey or maple syrup
Heat it in the microwave for 30-40 seconds. Stir until it’s smooth.
3. Now, pour the warm mix into the dry bowl. Add:
– 1/2 teaspoon vanilla extract
Mix everything until it forms a thick batter.
4. Gently fold in the extras. Add:
– 1/2 cup chocolate chips
– 1/4 cup chopped nuts (optional)
Ensure they are well mixed in.
5. Prepare your pan. Line an 8×8-inch baking pan with parchment paper. Leave some paper hanging over the edges.
6. Transfer the mixture to the pan. Spread it out evenly. Press down hard to make it compact.
7. Chill the bars. Place the pan in the fridge for 1-2 hours. This helps them set.
8. Cut your bars. Once firm, lift them out using the parchment paper. Use a sharp knife to cut into squares.
Tips for Even Mixing and Texture
To get a great texture, mix the dry items well at first. This helps them combine smoothly with the wet mix. When you fold in the chocolate chips and nuts, do it gently. This keeps the texture nice and even. Press the mixture down firmly in the pan. This step is key to avoid crumbly bars later.
Tips & Tricks
Tips for Perfecting Your Bars
– Use fresh ingredients: Fresh oats and nut butter make a big difference.
– Warm your peanut butter: Heating it helps mix it better with other ingredients.
– Press firmly: When spreading the mixture in the pan, press down hard. This helps the bars hold together.
– Let them chill: Allow enough time in the fridge to set. Two hours is best.
– Add a pinch of salt: This enhances the flavors. Just a little goes a long way.
Common Mistakes to Avoid
– Not measuring accurately: Use proper measuring cups for best results.
– Skipping the chilling step: Don’t rush this part; it’s key for firmness.
– Overmixing: Mix just until combined. Overmixing can make the bars too tough.
– Forgetting the parchment paper: This makes removing the bars easier.
Recommended Tools and Equipment
– Mixing bowls: Use large bowls for easy mixing. A whisk helps combine dry ingredients.
– Microwave-safe bowl: For warming the peanut butter and honey.
– Spatula: A strong spatula helps mix and spread the mixture evenly.
– Baking pan: An 8×8-inch pan works best for this recipe.
– Sharp knife: Use this to cut the bars into neat squares.
These tips and tricks will help you create the best no-bake chocolate peanut butter oat bars. Enjoy the process!

Variations
Flavor Variations
You can change the taste of these bars easily. Try adding spices like cinnamon or nutmeg. Just a pinch can warm up the flavor. If you want a sweeter touch, add a few drops of almond or coconut extract. These small changes can make a big difference.
Ingredient Substitutions
If you need a nut-free option, swap creamy peanut butter for sunflower seed butter. It gives a nice taste without nuts. For a lower-calorie option, use Greek yogurt instead of peanut butter. This keeps the texture smooth while cutting some calories. You can also use maple syrup instead of honey for a vegan version.
Healthier Options
To make these bars healthier, try using less sugar. You can reduce honey or maple syrup by a quarter cup. Add a scoop of protein powder to boost nutrition. This will keep you full longer. Another idea is to use dark chocolate chips. They have less sugar and more antioxidants. Each of these options can help fit your health goals while keeping the bars yummy.
Storage Info
Best Way to Store No-Bake Bars
To keep your no-bake bars fresh, store them in an airtight container. Place a layer of parchment paper between bars to prevent sticking. You can keep them in the fridge for about a week. This keeps them cool and helps maintain their texture. If you want them to last longer, consider freezing them.
Freezing Instructions and Tips
To freeze these bars, wrap them tightly in plastic wrap. Then, place the wrapped bars in a freezer-safe bag or container. This helps prevent freezer burn. They can last up to three months in the freezer. When you want to enjoy them, take them out and let them thaw in the fridge for a few hours. This way, they stay firm and tasty.
Shelf Life and Signs of Spoilage
If stored properly, no-bake bars last about a week in the fridge. Look for signs of spoilage, like an off smell or a change in color. If they feel dry or crumbly, they might not taste good. Always use your senses to check if they are still fresh. Enjoy your sweet treat while it’s at its best!
FAQs
Can I make this recipe vegan?
Yes, you can easily make this recipe vegan. To do this, use maple syrup instead of honey. Maple syrup is a great sweetener for a vegan diet. Also, make sure to use dark chocolate chips that are dairy-free. This way, you keep all the great taste while sticking to vegan choices.
How do I replace the honey in the recipe?
If you want to replace honey, maple syrup is a perfect choice. It gives the bars a nice sweetness without changing the texture. You can also try agave nectar, which works well too. Just use the same amount as the honey called for in the recipe.
What can I use instead of peanut butter?
You can use almond butter or cashew butter instead of peanut butter. Both options bring a rich flavor. Sunflower seed butter is another great choice, especially for nut allergies. These substitutes keep your bars creamy and delicious while adding a unique taste.
In this blog post, we covered how to make no-bake bars. We discussed the ingredients you need and offered tips for better mixing. I shared storage info and how to avoid common mistakes. You can also enjoy many variations.
In conclusion, making no-bake bars is easy and fun. With the right tips and ingredients, you can create tasty snacks for any diet. Enjoy experimenting with flavors and find what works best for you!


![- 1 ½ cups all-purpose flour - 1 cup coconut sugar - ½ cup unsweetened cocoa powder - ½ cup dairy-free chocolate chips (optional) The main ingredients in this vegan chocolate cake make it rich and delightful. The all-purpose flour provides structure. Coconut sugar adds a slight caramel flavor, enhancing the cake's taste. Unsweetened cocoa powder gives the cake its deep chocolate flavor. If you want an extra treat, add dairy-free chocolate chips. They melt beautifully and create pockets of chocolatey goodness. - Plant-based milk options - Sugar substitutes for a healthier cake - Oil alternatives If you need a milk substitute, try almond, soy, or oat milk. Each brings its unique flavor but stays creamy. For sugar, you can use maple syrup or agave nectar. They add sweetness without refined sugar. If you want to cut back on oil, use applesauce or mashed bananas. These swaps keep the cake moist while lowering fat. Each alternative keeps your cake tasty while meeting your diet needs. For a detailed look at the full recipe, check out the Full Recipe section. Grease your cake pan with a thin layer of oil. You can also line it with parchment paper. This step helps the cake come out easily after baking. Next, preheat your oven to 350°F (175°C). Preheating ensures your cake bakes evenly and rises well. Start by sifting your dry ingredients together. This process breaks up clumps and helps mix them well. Use a whisk to combine the all-purpose flour, coconut sugar, cocoa powder, baking soda, and salt. If you see clumps in the cocoa powder, sift it again. It makes your cake smoother and more delicious. Use room temperature ingredients for the best results. Cold ingredients can cause the batter to be lumpy. In a bowl, mix the almond milk, vegetable oil, vanilla extract, and apple cider vinegar. The vinegar helps the cake rise and adds a nice texture. Whisk these ingredients until they blend well. Pour the wet mixture into the dry ingredients. Stir gently until just combined. Pour the batter into your prepared pan. Bake for 30 to 35 minutes. Check for doneness by inserting a toothpick in the center. It should come out clean or with a few moist crumbs. Let the cake cool for about 10 minutes in the pan, then transfer it to a wire rack. This cooling step helps the cake set and makes it easier to frost later. For the full recipe, you can refer to the complete instructions above. To get the best texture, avoid overmixing the batter. When you mix too much, the cake can turn out dense. Just mix until the dry and wet ingredients blend. This keeps the cake light and fluffy. The temperature of your ingredients matters too. Use room temperature milk and oil. Cold ingredients can slow down the rising process, making your cake less airy. Adding spices can take your cake to the next level. A pinch of cinnamon or a dash of espresso powder adds depth. You can also try vanilla extract or almond extract for a flavor boost. For a more indulgent cake, fold in dairy-free chocolate chips. They add richness and texture that you will love. When your cake is baked and cooled, it's time to make it pretty. Lightly dust the top with powdered sugar. You can also top it with fresh berries for a pop of color. For serving, consider a dollop of coconut whipped cream. This adds flavor and impresses your guests. For the full recipe, check out the link. Enjoy the process and the delightful results! {{image_4}} You can easily change the flavor of your vegan chocolate cake. Adding fruits or nuts can make it exciting. Try folding in chopped bananas, apples, or walnuts into the batter. These additions bring a new texture and taste. You can also use different types of cocoa powder. Dark cocoa gives a richer flavor, while raw cocoa offers a lighter taste. Experiment with both to see what you like best! This cake can fit many diets. If you need a gluten-free option, swap out all-purpose flour for almond or oat flour. Both work well and keep the cake moist. If you need nut-free alternatives, use rice milk or oat milk instead of almond milk. You can also use sunflower oil instead of vegetable oil to keep it nut-free. There are fun ways to serve this cake. You can layer cakes or make cupcakes for easy sharing. Layer cakes look great and taste amazing. You can also create mini vegan chocolate cakes for individual servings. These are perfect for parties or special events. Each person gets their own cake, making it a delightful treat! To keep your vegan chocolate cake fresh, place it in an airtight container. This helps lock in moisture and flavor. If you have leftover slices, separate them with parchment paper. This prevents them from sticking together. Store the cake at room temperature for up to three days. If you want to keep it longer, consider freezing it. To freeze the cake, wrap it tightly in plastic wrap. Then, place it in a freezer-safe bag. This helps avoid freezer burn. You can freeze the cake for up to three months. When you are ready to eat, thaw it in the fridge overnight. For best results, let it come to room temperature before serving. Enjoy the same great taste and texture as the day you made it! Yes, you can! Here are some good substitutes for all-purpose flour: - Whole wheat flour - Almond flour - Oat flour - Gluten-free flour blend Each option will change the texture and taste. Whole wheat flour adds a nutty flavor. Almond flour makes the cake moist. Oat flour gives a soft texture. Gluten-free blends work well for those with gluten issues. Always check the ratio for the best results. Yes, vinegar plays a key role in vegan baking. It helps the cake rise and stay light. When mixed with baking soda, it creates a reaction that makes the cake fluffy. If you skip the vinegar, the cake may turn out dense. Apple cider vinegar is the best choice for this recipe. You can easily boost the chocolate flavor! Here are some options: - Add an extra ¼ cup of unsweetened cocoa powder to the batter. - Drizzle chocolate ganache on top after baking. Using dairy-free chocolate chips also enhances the chocolate flavor. Mixing in some melted dark chocolate can make it richer. Each option adds depth, so feel free to experiment! You have many tasty options for frosting! Here are a few suggestions: - Vegan chocolate ganache - Coconut whipped cream - Peanut butter frosting Chocolate ganache is rich and creamy. Coconut whipped cream adds a light, fluffy touch. Peanut butter frosting gives a nutty contrast. Choose what you love best for a perfect pairing! For the full recipe, check out the [Full Recipe]. In this post, we covered how to make a delicious vegan chocolate cake from start to finish. You learned about key ingredients, alternatives, and step-by-step instructions to bake it perfectly. I shared tips for texture and flavor, plus creative serving ideas. Remember, you can customize this cake to fit different diets and tastes easily. Whether you’re baking for yourself or others, this cake is sure to impress. Enjoy the process and the tasty results you create!](https://joymealplan.com/wp-content/uploads/2025/06/282c7cbd-7bac-4bac-839f-8ad7be604c23-768x768.webp)


![- 3 cups unsweetened shredded coconut - 1/2 cup sweetened condensed milk - 2 large egg whites - 1/4 teaspoon vanilla extract - 1/4 teaspoon almond extract - Pinch of salt - 1/2 cup dark chocolate chips (optional) These ingredients create the base for your coconut macaroons. The unsweetened shredded coconut gives it that chewy texture. Sweetened condensed milk adds creaminess and sweetness, making each bite delightful. The egg whites are crucial for lightness and fluffiness. The extracts bring in a lovely depth of flavor. If you want to add a twist, dark chocolate chips can add a rich touch. - Gluten-free options: This recipe is naturally gluten-free, perfect for those with gluten issues. - Nut-free alternatives: You can enjoy these macaroons without nuts, making them safe for nut allergies. - Vegan substitutions: For a vegan version, try using aquafaba instead of egg whites and a plant-based condensed milk. These options help everyone enjoy this treat. Whether you have dietary needs or just want to try something new, there’s a way for you to make these coconut macaroons. You can find the full recipe above to get started! Start by preheating your oven to 325°F (160°C). This step is key to baking your macaroons evenly. While the oven heats, line a baking sheet with parchment paper. This helps prevent sticking and makes cleaning up easier later. In a large mixing bowl, combine 3 cups of unsweetened shredded coconut and 1/2 cup of sweetened condensed milk. Add 1/4 teaspoon of vanilla extract, 1/4 teaspoon of almond extract, and a pinch of salt. Stir well until everything is mixed together nicely. Now, in a separate bowl, take 2 large egg whites and whip them until they form stiff peaks. This is an important step because it gives your macaroons a light and airy texture. Next, gently fold the whipped egg whites into the coconut mixture. Use a spatula and be careful not to stir too hard. You want to keep the air in the egg whites. Fold until the egg whites are just mixed in; some lumps are okay. Using a tablespoon or a small cookie scoop, portion out the mixture onto the prepared baking sheet. Make sure to space each mound about 2 inches apart. This allows them to spread a bit while baking. Now, place the baking sheet in your preheated oven. Bake the macaroons for about 20 to 25 minutes. You want them to turn a lovely golden brown. Once done, take the tray out and let the macaroons cool for about 5 minutes on the sheet. This helps them firm up. After that, transfer them to a wire rack to cool completely. For those who love chocolate, you can melt some dark chocolate chips and dip the bottoms of each macaroon. Let the chocolate set on the parchment paper. Enjoy these delightful treats from the full recipe! To make great coconut macaroons, focus on the egg whites. Whipping them correctly is key. Use a clean bowl and beaters. Beat until stiff peaks form. This step adds lightness to the macaroons. Avoid overmixing when you fold them into the coconut mix. Gently combine the ingredients. Some lumps are okay. A light touch keeps the texture airy and nice. You can boost the flavor of your macaroons in fun ways. Try adding a pinch of cinnamon or nutmeg for warmth. These spices bring depth and richness. Another idea is to add citrus zest. Lemon or lime zest gives a fresh twist. Just a small amount can make a big difference in taste. How you serve your macaroons can impress your guests. Place them on a decorative platter to catch the eye. You can garnish with shredded coconut or fresh fruit. This adds color and flair. Arrange them in clusters for an inviting look. These small touches make your dessert stand out and look professional. For the full recipe, check out the Tropical Coconut Macaroons section. {{image_4}} You can make your macaroons even better by adding chocolate. Start by melting dark chocolate chips. Use a microwave-safe bowl. Heat in 30-second bursts, stirring after each. This helps prevent burning. Alternatively, you can use a double boiler for even heating. Once the chocolate is melted, dip the bottom of each macaroon in it. Make sure to coat it well. Place the dipped macaroons back on the parchment paper. Let the chocolate harden before serving. This adds a rich flavor that complements the coconut. Want to add some nuts? Almonds and pecans work great. Simply chop them finely and mix them in with the coconut. This adds a nice crunch to the soft macaroons. If you have nut allergies, you can skip the nuts. The recipe still tastes great without them. You can also use seeds like sunflower or pumpkin for a similar texture. Always be cautious and adjust based on your needs. There are endless flavor combinations for your macaroons. One tasty option is coconut-lime. Just add lime zest and a bit of lime juice to the coconut mixture. This gives a fresh twist. Another option is vanilla bean macaroons. Instead of vanilla extract, use the seeds from a vanilla bean. This adds a lovely fragrance and flavor. You can also mix in spices like cinnamon for a warm touch. Each variation brings a new taste to your delightful tropical treats. For the complete recipe, refer to the [Full Recipe]. Store your coconut macaroons at room temperature for the best taste. Keep them in a cool, dry place. Use an airtight container to keep them fresh. This helps avoid moisture and keeps them soft. If you live in a warm climate, consider refrigerating them. The cold can help them last longer. However, be aware that refrigeration may change their texture slightly. To freeze macaroons, let them cool completely first. Once cooled, place them in a single layer on a baking sheet. Freeze for about one hour. This step prevents them from sticking together. After they are firm, transfer them to a freezer-safe bag or container. When you want to enjoy a macaroon, take it out of the freezer. Let it thaw in the fridge overnight. For a quick thaw, leave it at room temperature for a few hours. Coconut macaroons can last up to one week at room temperature. If stored in the fridge, they can last for about two weeks. Check for signs of spoilage before eating. Look for changes in texture, color, or a sour smell. If you see any of these, it’s best to toss them out. Yes, you can make coconut macaroons without egg whites. Instead, use ground flaxseed or chia seeds mixed with water. This mixture acts as a binder. For every egg white, mix 1 tablespoon of ground flaxseed or chia seeds with 2.5 tablespoons of water. Let it sit for about 10 minutes to thicken. This will give your macaroons a nice texture while keeping them egg-free. To keep your macaroons from falling apart, mix the ingredients gently. Overmixing can cause them to break. When you fold in the egg whites, do it slowly and carefully. This helps maintain air and keeps the macaroons light. Make sure to space them well on the baking sheet. This allows them to bake evenly. A good tip is to form them tightly with your hands. This will help them hold their shape during baking. Leftover shredded coconut can be used in many ways. You can add it to smoothies for extra texture. It works well in oatmeal or yogurt for a tropical twist. Consider making coconut pancakes or muffins. You can also toast it for a crunchy topping on salads or desserts. If you enjoy baking, use it in granola or energy balls. This way, you won't waste any coconut, and you'll enjoy its rich flavor in other dishes. You now know how to make coconut macaroons from scratch. We covered the essential ingredients, step-by-step instructions, and storage tips. You learned about variations, dietary options, and how to enhance flavors. Give these tasty treats a try! They are fun to make and share. Don’t forget to experiment with flavors or coatings. Enjoy your baking, and let your creativity shine!](https://joymealplan.com/wp-content/uploads/2025/06/e4df15b8-ca64-4a89-a5eb-245e13ac6d80-768x768.webp)
