No-Bake Oreo Cheesecake Simple and Tasty Dessert

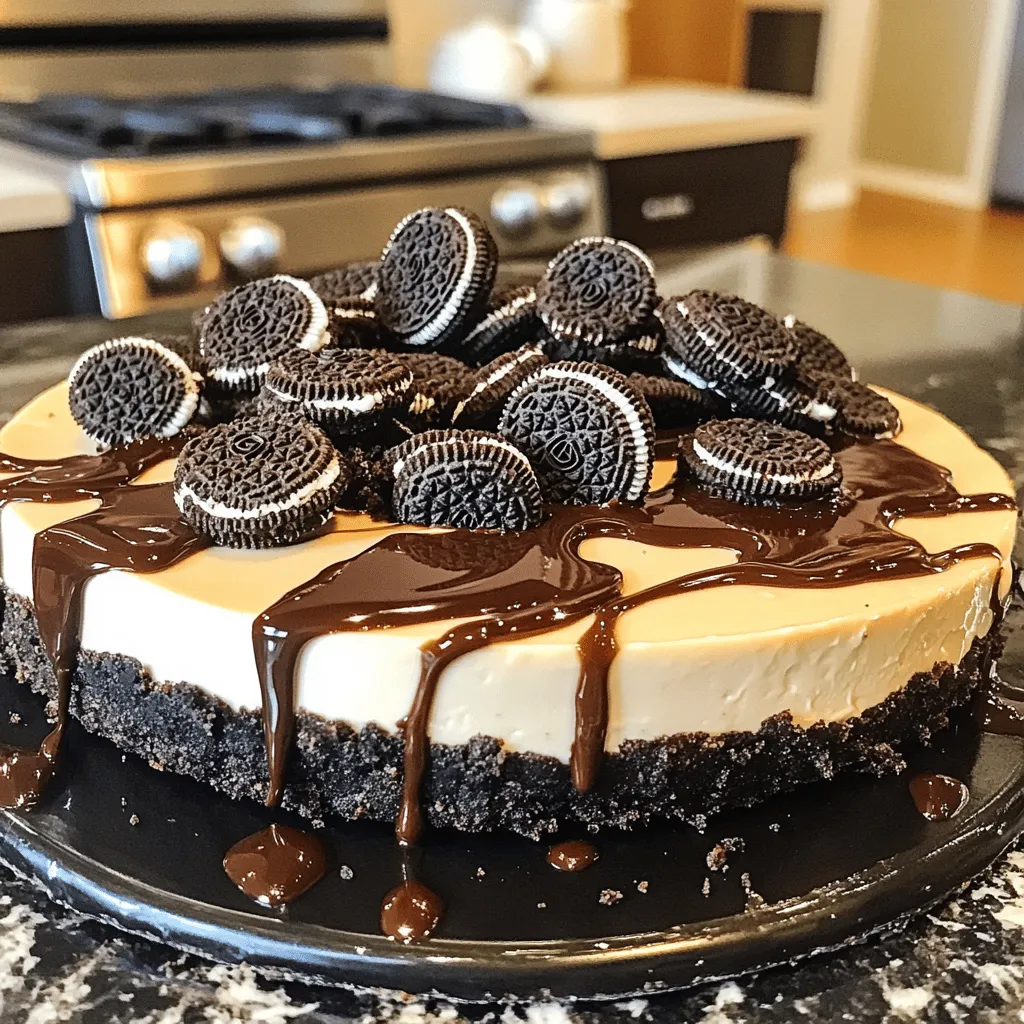
If you’re craving a dessert that’s both simple and delicious, look no further than No-Bake Oreo Cheesecake. This recipe packs the rich flavor of Oreos into a creamy, dreamy cheesecake—without any baking required! With just a handful of ingredients, you can whip up this treat in no time. Let’s dive into how you can create this mouthwatering dessert that’s perfect for any occasion!
Ingredients
Required Ingredients
– 24 Oreo cookies, finely crushed
– 5 tablespoons unsalted butter, melted
– 16 oz cream cheese, at room temperature
– 1 cup powdered sugar, sifted
– 1 teaspoon pure vanilla extract
– 1 cup heavy whipping cream, chilled
– 8 Oreo cookies, coarsely chopped (for mixing into filling)
– Additional whole Oreo cookies for garnish
Optional Ingredients
– Chocolate syrup for drizzling
– Fresh berries for garnish
Equipment Needed
– 9-inch springform pan
– Medium-sized mixing bowl
– Large mixing bowl
– Electric mixer
– Spatula
To make the no-bake Oreo cheesecake, gather these ingredients first. Each one plays a key role in creating a creamy and delicious dessert. The Oreo cookies give the dessert its classic flavor. The cream cheese provides the rich, smooth texture that makes cheesecakes special.
You can add chocolate syrup or fresh berries for a fun twist. I often use them to enhance the look and taste.
Next, make sure you have the right equipment. A springform pan is best for easy removal. An electric mixer saves time and effort when you need to whip the cream and mix the filling.This dessert is a crowd-pleaser that is fun to make!
Step-by-Step Instructions
Preparing the Crust
To start, I take 24 Oreo cookies and crush them finely. I mix the crushed cookies with 5 tablespoons of melted butter in a medium bowl. This creates a wet crumb mixture. Next, I press this mixture firmly into the bottom of a 9-inch springform pan. I use the flat side of a measuring cup to ensure a solid crust. I then place the crust in the refrigerator to set while I prepare the filling.
Making the Cheesecake Filling
For the filling, I first beat 16 oz of cream cheese in a large bowl until it’s smooth. This takes about 2-3 minutes. Next, I slowly add 1 cup of sifted powdered sugar and 1 teaspoon of pure vanilla extract. I mix this until it becomes fluffy. In another bowl, I whip 1 cup of heavy cream until stiff peaks form. This makes the filling light and airy.
Folding Ingredients Together
Now, I gently fold the whipped cream into the cream cheese mixture using a spatula. It’s important to do this carefully to keep the air in the cream. After that, I fold in 8 coarsely chopped Oreo cookies. This adds those tasty cookie bits throughout the filling.
Assembling the Cheesecake
I then pour the cheesecake filling into the chilled crust. Using a spatula, I smooth the top evenly. It looks so good at this stage!
Chilling the Cheesecake
Next, I cover the cheesecake with plastic wrap. I refrigerate it for at least 4 hours. If I can wait overnight, I know the texture and flavor will be even better.
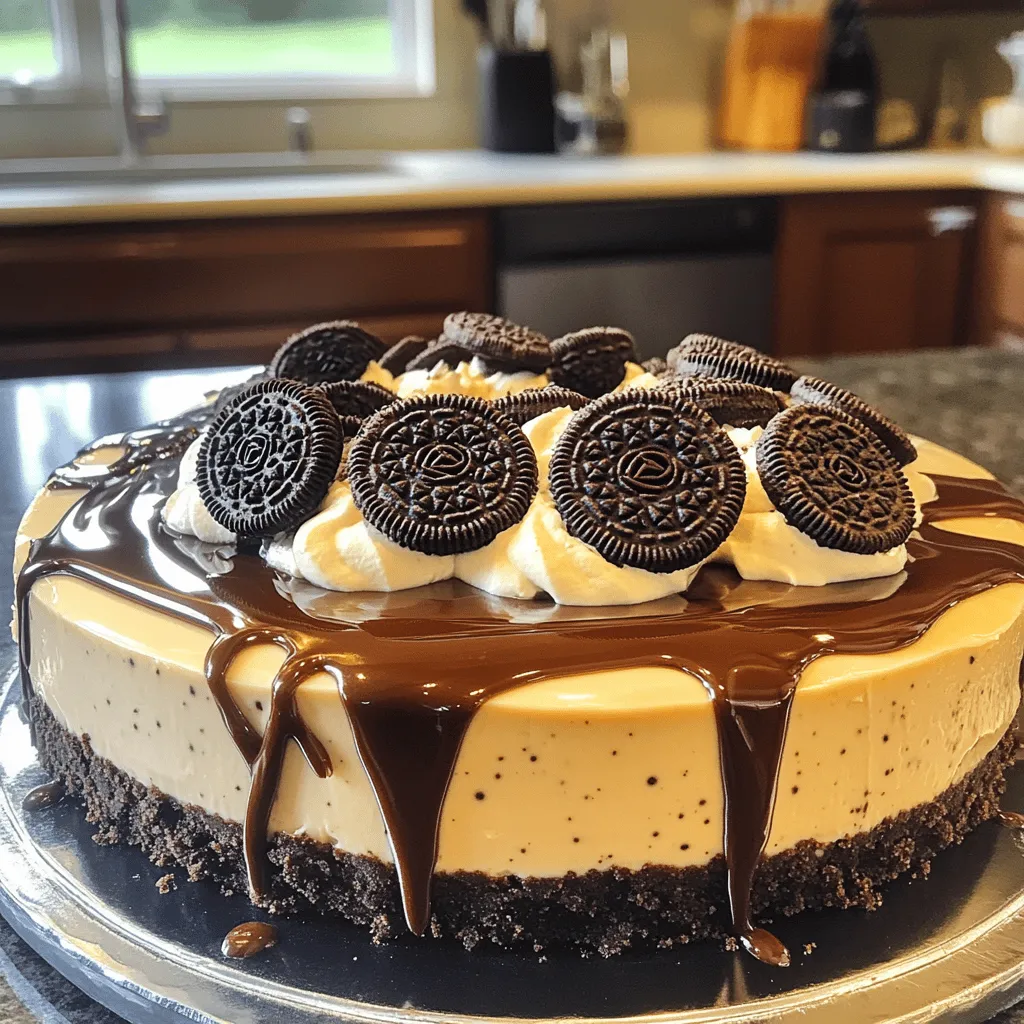
Serving the Cheesecake
Finally, I carefully remove the cheesecake from the springform pan. I garnish the top with whole Oreo cookies for extra flair. Then, I slice it into 12 equal pieces. It’s a perfect treat for any occasion.
Tips & Tricks
Perfecting the Texture
To get the best texture for your no-bake Oreo cheesecake, start with your cream cheese. Make sure it is at room temperature. This step helps it mix smoothly. Next, whip your heavy cream until it forms stiff peaks. This adds lightness to your cheesecake. These two tips will help you achieve that perfect, creamy texture.
Customizing Flavors
You can have fun with flavors! Try adding melted chocolate or peanut butter to the filling. These options can give your cheesecake a new twist. You can also experiment with toppings. Fresh fruit, chocolate shavings, or even more crushed Oreos can make it even better. Let your taste guide you.
Ensuring Minimal Cracking
Chilling your cheesecake slowly is key. This helps the temperature spread evenly throughout the cheesecake. If you chill it too fast, you might see cracks form on the top. Also, be careful not to over-mix your filling. Gently fold in the whipped cream and other mix-ins. This keeps the airiness intact and helps prevent cracking.

Variations
Oreo Cheesecake with a Twist
You can switch up the classic Oreo cheesecake in fun ways. Here are two tasty ideas:
– Mint Oreo Cheesecake: Use mint-flavored Oreos for a fresh twist. This adds a cool flavor to your dessert.It’s a refreshing change that’s great for summer.
– Peanut Butter Oreo Cheesecake: For peanut butter lovers, mix in creamy peanut butter. Add half a cup of peanut butter to the cream cheese mixture. This will give your cheesecake a rich, nutty flavor. Trust me, it’s a treat you won’t forget!
Ingredient Substitutions
Sometimes, you need to swap ingredients based on your diet or availability. Here are some smart substitutions:
– Dairy-free cream cheese options: If you want a dairy-free dessert, look for brands that offer cream cheese made from nuts or soy. These options taste great and work well in the cheesecake.
– Gluten-free Oreo cookies: If you need gluten-free, use gluten-free Oreos. They taste just as good and keep your dessert safe for everyone to enjoy.
Serving Suggestions
How you serve your cheesecake can add to the fun. Here are a couple of ideas:
– Pair with ice cream or whipped topping: A scoop of vanilla ice cream or a dollop of whipped cream makes this dessert even more delicious. The creaminess complements the rich cheesecake.
– Serve with a side of fresh fruit: Fresh berries or sliced bananas add a nice fruity touch. They brighten up the plate and add a pop of color to your dessert. Plus, the sweetness of the fruit balances the rich cheesecake.
Storage Info
Short-Term Storage
You can keep your no-bake Oreo cheesecake in the fridge for up to 5 days. This dessert stays fresh and tasty when stored properly. Use an airtight container to keep it safe from other fridge odors.
Freezing Instructions
If you want to freeze the cheesecake, wrap it well with plastic wrap and then foil. This prevents freezer burn. You can freeze it for up to 2 months. When ready to eat, take it out and place it in the fridge overnight to thaw. You can also let it sit at room temperature for about 2 hours before serving.
Signs of Spoilage
Check your cheesecake for any changes in smell or color. If it smells sour or looks discolored, it is best to throw it away. Also, if you see any mold, do not eat it. Trust your senses!
FAQs
How do I make No-Bake Oreo Cheesecake?
To make a No-Bake Oreo Cheesecake, follow these steps:
1. Prepare the Crust: Mix 24 crushed Oreo cookies with 5 tablespoons of melted butter. Press this mix into a 9-inch springform pan.
2. Make the Filling: Beat 16 oz of room temperature cream cheese until smooth. Gradually add 1 cup of sifted powdered sugar and 1 teaspoon of vanilla extract. Mix until fluffy.
3. Whip the Cream: In a separate bowl, whip 1 cup of heavy cream until stiff peaks form.
4. Combine: Fold the whipped cream into the cream cheese mix gently. Add 8 coarsely chopped Oreos for more flavor.
5. Fill the Crust: Pour the filling into the crust and smooth the top.
6. Chill: Cover and refrigerate for at least 4 hours. Overnight is best for perfect texture.
Can I use low-fat cream cheese?
Yes, you can use low-fat cream cheese. However, it may change the texture and flavor. The cheesecake might be less creamy and more dense. For a lighter taste, be sure to whip the cream well.
How long can I store No-Bake Oreo Cheesecake?
You can store the cheesecake in the fridge for up to 5 days. Keep it covered to maintain freshness. If you notice any changes in smell or texture, it’s best to discard it.
Can I make this recipe ahead of time?
Yes, this recipe is great to make ahead. Refrigerate it for at least 4 hours, or overnight for the best results. Just remember to cover it tightly so it doesn’t absorb other fridge smells.
This Oreo cheesecake recipe is easy and fun to make. With just a few steps, you combine crushed cookies, cream cheese, and whipped cream for a delicious dessert. Remember, chilling is key for the best texture. You can also customize it with toppings or flavors. Enjoy it fresh, or freeze for later. Your loved ones will love this treat. Make it your own!


![- 3 cups unsweetened shredded coconut - 1/2 cup sweetened condensed milk - 2 large egg whites - 1/4 teaspoon vanilla extract - 1/4 teaspoon almond extract - Pinch of salt - 1/2 cup dark chocolate chips (optional) These ingredients create the base for your coconut macaroons. The unsweetened shredded coconut gives it that chewy texture. Sweetened condensed milk adds creaminess and sweetness, making each bite delightful. The egg whites are crucial for lightness and fluffiness. The extracts bring in a lovely depth of flavor. If you want to add a twist, dark chocolate chips can add a rich touch. - Gluten-free options: This recipe is naturally gluten-free, perfect for those with gluten issues. - Nut-free alternatives: You can enjoy these macaroons without nuts, making them safe for nut allergies. - Vegan substitutions: For a vegan version, try using aquafaba instead of egg whites and a plant-based condensed milk. These options help everyone enjoy this treat. Whether you have dietary needs or just want to try something new, there’s a way for you to make these coconut macaroons. You can find the full recipe above to get started! Start by preheating your oven to 325°F (160°C). This step is key to baking your macaroons evenly. While the oven heats, line a baking sheet with parchment paper. This helps prevent sticking and makes cleaning up easier later. In a large mixing bowl, combine 3 cups of unsweetened shredded coconut and 1/2 cup of sweetened condensed milk. Add 1/4 teaspoon of vanilla extract, 1/4 teaspoon of almond extract, and a pinch of salt. Stir well until everything is mixed together nicely. Now, in a separate bowl, take 2 large egg whites and whip them until they form stiff peaks. This is an important step because it gives your macaroons a light and airy texture. Next, gently fold the whipped egg whites into the coconut mixture. Use a spatula and be careful not to stir too hard. You want to keep the air in the egg whites. Fold until the egg whites are just mixed in; some lumps are okay. Using a tablespoon or a small cookie scoop, portion out the mixture onto the prepared baking sheet. Make sure to space each mound about 2 inches apart. This allows them to spread a bit while baking. Now, place the baking sheet in your preheated oven. Bake the macaroons for about 20 to 25 minutes. You want them to turn a lovely golden brown. Once done, take the tray out and let the macaroons cool for about 5 minutes on the sheet. This helps them firm up. After that, transfer them to a wire rack to cool completely. For those who love chocolate, you can melt some dark chocolate chips and dip the bottoms of each macaroon. Let the chocolate set on the parchment paper. Enjoy these delightful treats from the full recipe! To make great coconut macaroons, focus on the egg whites. Whipping them correctly is key. Use a clean bowl and beaters. Beat until stiff peaks form. This step adds lightness to the macaroons. Avoid overmixing when you fold them into the coconut mix. Gently combine the ingredients. Some lumps are okay. A light touch keeps the texture airy and nice. You can boost the flavor of your macaroons in fun ways. Try adding a pinch of cinnamon or nutmeg for warmth. These spices bring depth and richness. Another idea is to add citrus zest. Lemon or lime zest gives a fresh twist. Just a small amount can make a big difference in taste. How you serve your macaroons can impress your guests. Place them on a decorative platter to catch the eye. You can garnish with shredded coconut or fresh fruit. This adds color and flair. Arrange them in clusters for an inviting look. These small touches make your dessert stand out and look professional. For the full recipe, check out the Tropical Coconut Macaroons section. {{image_4}} You can make your macaroons even better by adding chocolate. Start by melting dark chocolate chips. Use a microwave-safe bowl. Heat in 30-second bursts, stirring after each. This helps prevent burning. Alternatively, you can use a double boiler for even heating. Once the chocolate is melted, dip the bottom of each macaroon in it. Make sure to coat it well. Place the dipped macaroons back on the parchment paper. Let the chocolate harden before serving. This adds a rich flavor that complements the coconut. Want to add some nuts? Almonds and pecans work great. Simply chop them finely and mix them in with the coconut. This adds a nice crunch to the soft macaroons. If you have nut allergies, you can skip the nuts. The recipe still tastes great without them. You can also use seeds like sunflower or pumpkin for a similar texture. Always be cautious and adjust based on your needs. There are endless flavor combinations for your macaroons. One tasty option is coconut-lime. Just add lime zest and a bit of lime juice to the coconut mixture. This gives a fresh twist. Another option is vanilla bean macaroons. Instead of vanilla extract, use the seeds from a vanilla bean. This adds a lovely fragrance and flavor. You can also mix in spices like cinnamon for a warm touch. Each variation brings a new taste to your delightful tropical treats. For the complete recipe, refer to the [Full Recipe]. Store your coconut macaroons at room temperature for the best taste. Keep them in a cool, dry place. Use an airtight container to keep them fresh. This helps avoid moisture and keeps them soft. If you live in a warm climate, consider refrigerating them. The cold can help them last longer. However, be aware that refrigeration may change their texture slightly. To freeze macaroons, let them cool completely first. Once cooled, place them in a single layer on a baking sheet. Freeze for about one hour. This step prevents them from sticking together. After they are firm, transfer them to a freezer-safe bag or container. When you want to enjoy a macaroon, take it out of the freezer. Let it thaw in the fridge overnight. For a quick thaw, leave it at room temperature for a few hours. Coconut macaroons can last up to one week at room temperature. If stored in the fridge, they can last for about two weeks. Check for signs of spoilage before eating. Look for changes in texture, color, or a sour smell. If you see any of these, it’s best to toss them out. Yes, you can make coconut macaroons without egg whites. Instead, use ground flaxseed or chia seeds mixed with water. This mixture acts as a binder. For every egg white, mix 1 tablespoon of ground flaxseed or chia seeds with 2.5 tablespoons of water. Let it sit for about 10 minutes to thicken. This will give your macaroons a nice texture while keeping them egg-free. To keep your macaroons from falling apart, mix the ingredients gently. Overmixing can cause them to break. When you fold in the egg whites, do it slowly and carefully. This helps maintain air and keeps the macaroons light. Make sure to space them well on the baking sheet. This allows them to bake evenly. A good tip is to form them tightly with your hands. This will help them hold their shape during baking. Leftover shredded coconut can be used in many ways. You can add it to smoothies for extra texture. It works well in oatmeal or yogurt for a tropical twist. Consider making coconut pancakes or muffins. You can also toast it for a crunchy topping on salads or desserts. If you enjoy baking, use it in granola or energy balls. This way, you won't waste any coconut, and you'll enjoy its rich flavor in other dishes. You now know how to make coconut macaroons from scratch. We covered the essential ingredients, step-by-step instructions, and storage tips. You learned about variations, dietary options, and how to enhance flavors. Give these tasty treats a try! They are fun to make and share. Don’t forget to experiment with flavors or coatings. Enjoy your baking, and let your creativity shine!](https://joymealplan.com/wp-content/uploads/2025/06/e4df15b8-ca64-4a89-a5eb-245e13ac6d80-768x768.webp)


![- Ripe avocados: Choose avocados that feel soft but not mushy. Ripe avocados add creaminess. They bring healthy fats and nutrients to the mousse. When selecting avocados, look for dark green skin. A little give when pressed is a good sign. Avoid avocados with large dark spots or cracks. - Cocoa powder: The type of cocoa powder you use matters. Choose high-quality, unsweetened cocoa for the best flavor. Dutch-processed cocoa has a smooth taste. Regular cocoa has a rich chocolate flavor. Both are great choices. - Sweeteners: Maple syrup and agave syrup are both tasty options. Maple syrup gives a unique flavor. It adds a slight caramel note. Agave syrup is milder and sweeter. It blends well without changing the taste much. You can adjust the sweetness based on your preference. - Non-dairy milk options: You can use almond, coconut, or oat milk. Almond milk is light and nutty. Coconut milk adds creaminess and a hint of tropical flavor. Oat milk is thick and wholesome. Any of these choices work well to create a smooth texture. - Flavor enhancers: Vanilla extract adds warmth and depth. A little cinnamon gives an extra layer of flavor. Both options are simple and enhance the chocolate taste. You can try adding a pinch to see what you like best. - Garnish suggestions: Dark chocolate shavings are a rich topping. They add elegance and extra chocolate flavor. Fresh berries like raspberries or strawberries bring brightness. Their color and tartness balance the rich mousse perfectly. These garnishes make the dish even more appealing. You can find the full recipe at the beginning of this article. First, you need to prepare your avocados. To peel and pit them easily, slice the avocado in half. Twist the halves apart. Use a spoon to scoop out the pit. Then, scoop the green flesh into a bowl. Next, measure your ingredients. For this mousse, you will need: - 2 ripe avocados, peeled and pitted - 1/2 cup unsweetened cocoa powder - 1/3 cup maple syrup (or agave syrup) - 1/4 cup almond milk (or any non-dairy milk of your choice) - 1 teaspoon vanilla extract - 1/4 teaspoon sea salt - A pinch of cinnamon (optional) Combine all these ingredients in a food processor. Now, let’s blend for that creamy texture. Start blending on high speed. Stop occasionally to scrape down the sides. This ensures everything mixes well. Blend until it’s smooth. Taste your mousse after blending. If you desire more sweetness, add extra maple syrup. Blend again to mix in the syrup. Adjust to your liking for the best flavor. Chilling the mousse is very important. It allows the flavors to develop and the mousse to thicken. Cover the individual dishes with plastic wrap. Chill them in the fridge for at least 30 minutes. For serving, get creative! Garnish your mousse with dark chocolate shavings or fresh berries. This adds a pop of color and texture. You can serve it in small bowls or glasses for a fun touch. Enjoy your rich and creamy vegan chocolate avocado mousse! - Over-blending the mousse: Blending too long makes it thin. Blend just until smooth. You want a creamy texture, not soup. - Using unripe avocados: Unripe avocados are hard and bitter. Always pick ripe ones. They should feel slightly soft. - Balancing sweetness: Taste your mousse before serving. If it's too bitter, add more maple syrup. Start with a little more. Keep tasting until it’s just right. - Experimenting with additional flavorings: You can try adding a pinch of espresso or a drop of peppermint extract. These flavors can make the mousse even more exciting. - Best food processors for smooth blending: Look for a powerful food processor. A 600-watt model works well. It blends the ingredients evenly and quickly. - Storage containers for chilling the mousse: Use small bowls with lids. This keeps the mousse fresh. Glass containers are a great choice. They help keep the mousse cool and tasty. For the full recipe, check out the [Full Recipe]. {{image_4}} You can make your Vegan Chocolate Avocado Mousse even more fun by adding nut butters. Try almond or peanut butter for a rich and creamy taste. These nut butters enhance the texture and add healthy fats. You can also infuse flavors like coffee or mint. A splash of coffee brings a deep, bold taste. Mint adds a refreshing twist that brightens up the dessert. Both options create a unique mousse that surprises and delights. For those with dietary needs, gluten-free variations are easy to make. All the ingredients in this mousse are naturally gluten-free. This makes it a great choice for anyone avoiding gluten. You can also opt for sugar-free alternatives. Using stevia or monk fruit keeps the mousse sweet without added sugar. These substitutes do not change the creamy texture. You can enjoy a guilt-free treat that still tastes amazing. Transform your mousse into parfaits for a stunning dessert. Layer the mousse with fresh fruits or granola in clear cups. This adds color and texture, making your dessert look beautiful. You can use the mousse as a filling for cakes or other desserts. It works well between layers of cake or as a filling for tart shells. This gives you a chance to be creative with your presentation. For the complete recipe, check out the Full Recipe section. To keep your Vegan Chocolate Avocado Mousse fresh, follow these steps: - Chill the mousse: After making it, cover your mousse with plastic wrap or a lid. This helps prevent air from getting in. - Use airtight containers: Store the mousse in airtight containers. This keeps it from absorbing other flavors in the fridge. - Refrigerate promptly: Place it in the fridge as soon as it's ready. This helps maintain its creamy texture. The mousse stays fresh for about 3 to 5 days in the fridge. Always check for any changes in smell or texture before serving. Can you freeze Vegan Chocolate Avocado Mousse? Yes, you can! Freezing is a great option if you want to store it longer. - Portion it out: Divide the mousse into small portions before freezing. This makes it easy to thaw only what you need. - Use freezer-safe containers: Make sure to use containers that are safe for freezing. This prevents freezer burn. When you're ready to enjoy it again, follow these steps to thaw: - Thaw in the fridge: Place the frozen mousse in the fridge overnight. This keeps it at a safe temperature while it thaws. - Stir before serving: After thawing, give the mousse a quick stir. This helps regain its smooth texture. By following these storage and freezing tips, you can enjoy your Vegan Chocolate Avocado Mousse at its best. For the complete recipe, check out the Full Recipe section. Yes, you can use different sweeteners. Honey or agave syrup works well too. Each sweetener changes the taste slightly. Honey adds a floral note, while agave is milder. You can experiment to find your favorite. Just keep the amount similar to maple syrup for the best results. This mousse stays fresh for about three days in the fridge. Store it in an airtight container to keep it from drying out. The mousse may thicken as it sits, so stirring it gently can help restore its creamy texture. Enjoy it within this timeframe for the best flavor and quality. Yes, this dessert is quite healthy! Avocados are full of good fats and nutrients. They can boost heart health and provide fiber. Cocoa powder is also rich in antioxidants, adding to the health benefits. This mousse is a guilt-free treat that satisfies your sweet tooth while nourishing your body. Absolutely! To make it nut-free, choose oat milk or soy milk instead of almond milk. Both options work well and keep the mousse creamy. Ensure your cocoa powder is also nut-free. With these swaps, you can enjoy this tasty dessert without any nut allergy concerns. Vegan Chocolate Avocado Mousse is simple and fun to make. You learned about key ingredients like ripe avocados, cocoa powder, and sweeteners. I shared tips on preparation, blending, and storing your mousse. Mixing in flavors or making parfaits adds creativity. Remember, use ripe avocados for the best taste. This mousse is healthy and easily customizable for different diets. Enjoy your tasty treat, and don't hesitate to share your own variations!](https://joymealplan.com/wp-content/uploads/2025/06/f08f53b2-ba89-49fb-bc73-48bd2b3a08b2-768x768.webp)