No Churn Oreo Ice Cream Simple and Delicious Dessert

- 2 cups heavy cream - 1 cup sweetened condensed milk - 1 teaspoon vanilla extract - 1 cup crushed Oreo cookies (plus extra for garnish) - 1/4 cup chocolate syrup (optional) - Mixing bowls - Electric mixer - Rubber spatula - Freezer-safe container or loaf pan When making No Churn Oreo Ice Cream, you need a few key items. First, heavy cream is a must. It gives the ice cream its rich and creamy texture. Sweetened condensed milk adds sweetness and helps the mixture stay smooth. Vanilla extract brings warmth and depth to the flavor. Don’t forget about the Oreo cookies! You’ll crush them up to mix in. This adds a crunchy chocolate flavor that everyone loves. If you want to be extra fancy, consider adding chocolate syrup for a sweet drizzle. Next, gather your kitchen tools. You will need mixing bowls to combine your ingredients. An electric mixer is essential for whipping the cream to the right texture. A rubber spatula helps you fold everything gently, keeping the cream light and airy. Finally, you need a freezer-safe container to hold your ice cream while it freezes. With these ingredients and tools, you can make a simple and delicious dessert that everyone will enjoy. For the full recipe, check out the details provided above. Start by pouring 2 cups of heavy cream into a large bowl. Use an electric mixer to whip the cream on medium-high speed. Whip for about 3 to 5 minutes until you see stiff peaks. The peaks should stand tall when you lift the whisk. This step is key for a light and fluffy ice cream. In another bowl, mix 1 cup of sweetened condensed milk with 1 teaspoon of vanilla extract. Stir them together until smooth. This mixture adds sweetness and a rich flavor to your ice cream. Now, gently combine the whipped cream with the condensed milk mixture. Use a large spatula for this. Carefully fold the whipped cream into the condensed milk. This keeps the air in the cream, making your ice cream light and creamy. Once mixed, fold in 1 cup of crushed Oreo cookies. Make sure they are evenly spread out in the mixture. If you want, drizzle in 1/4 cup of chocolate syrup as you fold. This adds extra flavor and makes it more decadent. Pour the ice cream mixture into a 9x5 inch loaf pan or any container that can go in the freezer. Use your spatula to smooth the top. If you like, sprinkle extra crushed Oreos on top for a nice touch. Cover the container tightly with plastic wrap or a lid. This helps avoid ice crystals. Freeze for at least 6 hours, or until solid. After the ice cream has frozen completely, scoop it into bowls or cones. Enjoy it with friends and family. For a fun twist, serve it in waffle cones or decorative bowls. Garnish with more crushed Oreos and a drizzle of chocolate syrup. This makes it look as good as it tastes! Whipping cream is key for a light texture. Start with cold cream for best results. Use a large bowl to give the cream room to expand. Whip until you see stiff peaks. This means the cream stands tall when you lift the whisk. Don't rush this step; it makes your ice cream fluffy. Ice crystals can ruin your ice cream's smoothness. To prevent this, cover the container tightly. Use plastic wrap or a lid to keep air out. Store it in the coldest part of your freezer. This keeps your ice cream creamy and delicious. If you open the freezer often, ice crystals may form. Be mindful of how you store it. Feel free to make this recipe your own! Add mix-ins like nuts, candies, or even fruit. You can also adjust the sweetness. If you want a sweeter treat, add more condensed milk. For less sweetness, use fewer Oreos. This recipe is flexible, so have fun experimenting. Check out the Full Recipe for more ideas! {{image_4}} You can mix up the flavors for this no-churn Oreo ice cream. Seasonal flavors add fun. For winter, try peppermint or mint. A mint flavor gives a fresh twist. In fall, pumpkin spice is a great choice. It adds warmth and comfort. Just swap out the Oreo cookies for crushed mint or pumpkin-flavored cookies. You can enjoy a new taste with every season. You don’t have to stick to Oreos. Other cookies work too! Try chocolate sandwich cookies for a similar taste. Vanilla cookies can add a lighter flavor. You can even use gluten-free cookies for a tasty treat. This choice opens up many flavor options. Mix and match to find your favorite. Be creative and have fun with this recipe! Want a vegan version? You can make this ice cream dairy-free! Use coconut cream instead of heavy cream. It gives a rich and creamy texture. Swap the sweetened condensed milk for a dairy-free option, like coconut milk. This keeps the sweetness without dairy. You can still mix in your favorite cookies. Enjoy a delicious treat that fits your diet! For the full recipe, check out the earlier sections. To keep your no churn Oreo ice cream fresh, store it in a freezer-safe container. Make sure the lid fits tightly. If you use a loaf pan, cover it with plastic wrap to avoid ice crystals. This keeps the ice cream smooth and creamy. When stored correctly, your ice cream can last up to two weeks in the freezer. It may lose some texture after that, but it should still be safe to eat. Always check for any ice crystals or off smells before enjoying. If you have leftovers, you can refreeze your ice cream. Just let it sit at room temperature for a few minutes before scooping. This makes it easier to serve. Avoid refreezing ice cream multiple times, as it can change the texture. Enjoy your homemade treat! Yes, it is designed to be no-churn. This means you can make it without any special tools. Just whip the cream and mix the ingredients in a bowl. You will get a creamy dessert without the hassle of an ice cream maker. It will take about six hours to freeze completely. I suggest leaving it in the freezer overnight for the best results. This time allows the flavors to meld and the texture to set perfectly. Yes! You can get creative with toppings. Here are some ideas: - Whipped cream - Chocolate chips - Crushed nuts - Fresh fruit - More crushed Oreo cookies You can also mix in fun flavors like peanut butter or caramel sauce. These add a nice twist to the classic Oreo taste. This no-churn Oreo ice cream recipe uses simple ingredients and tools. You prepare it by whipping the cream and gently combining it with the rest. Freezing solidifies the tasty mix, creating a sweet treat. Remember to cover the ice cream well to avoid ice crystals. You can customize it with different flavors or cookies. With these tips and tricks, you’ll enjoy creamy, delicious ice cream anytime. Dive into your ice cream-making adventure and savor every bite.

WANT TO SAVE THIS RECIPE?

Craving a sweet treat that’s easy to make? Look no further! My No Churn Oreo Ice Cream is a simple, delightful dessert that anyone can whip up at home. With just a few ingredients, no ice cream maker needed, you can enjoy a creamy, cookie-filled indulgence in no time. Get ready to impress your friends and family with this delicious recipe that brings joy in every scoop! Let’s dive into the details.

Ingredients

Main Ingredients

– 2 cups heavy cream

– 1 cup sweetened condensed milk

– 1 teaspoon vanilla extract

– 1 cup crushed Oreo cookies (plus extra for garnish)

– 1/4 cup chocolate syrup (optional)

Kitchen Tools Needed

– Mixing bowls

– Electric mixer

– Rubber spatula

– Freezer-safe container or loaf pan

When making No Churn Oreo Ice Cream, you need a few key items. First, heavy cream is a must. It gives the ice cream its rich and creamy texture. Sweetened condensed milk adds sweetness and helps the mixture stay smooth. Vanilla extract brings warmth and depth to the flavor.

Don’t forget about the Oreo cookies! You’ll crush them up to mix in. This adds a crunchy chocolate flavor that everyone loves. If you want to be extra fancy, consider adding chocolate syrup for a sweet drizzle.

Next, gather your kitchen tools. You will need mixing bowls to combine your ingredients. An electric mixer is essential for whipping the cream to the right texture. A rubber spatula helps you fold everything gently, keeping the cream light and airy. Finally, you need a freezer-safe container to hold your ice cream while it freezes.

With these ingredients and tools, you can make a simple and delicious dessert that everyone will enjoy.

Step-by-Step Instructions

Preparing the Cream

Start by pouring 2 cups of heavy cream into a large bowl. Use an electric mixer to whip the cream on medium-high speed. Whip for about 3 to 5 minutes until you see stiff peaks. The peaks should stand tall when you lift the whisk. This step is key for a light and fluffy ice cream.

Combining Key Ingredients

In another bowl, mix 1 cup of sweetened condensed milk with 1 teaspoon of vanilla extract. Stir them together until smooth. This mixture adds sweetness and a rich flavor to your ice cream.

Folding Techniques

Now, gently combine the whipped cream with the condensed milk mixture. Use a large spatula for this. Carefully fold the whipped cream into the condensed milk. This keeps the air in the cream, making your ice cream light and creamy.

Oreo Integration

Once mixed, fold in 1 cup of crushed Oreo cookies. Make sure they are evenly spread out in the mixture. If you want, drizzle in 1/4 cup of chocolate syrup as you fold. This adds extra flavor and makes it more decadent.

Freezing Process

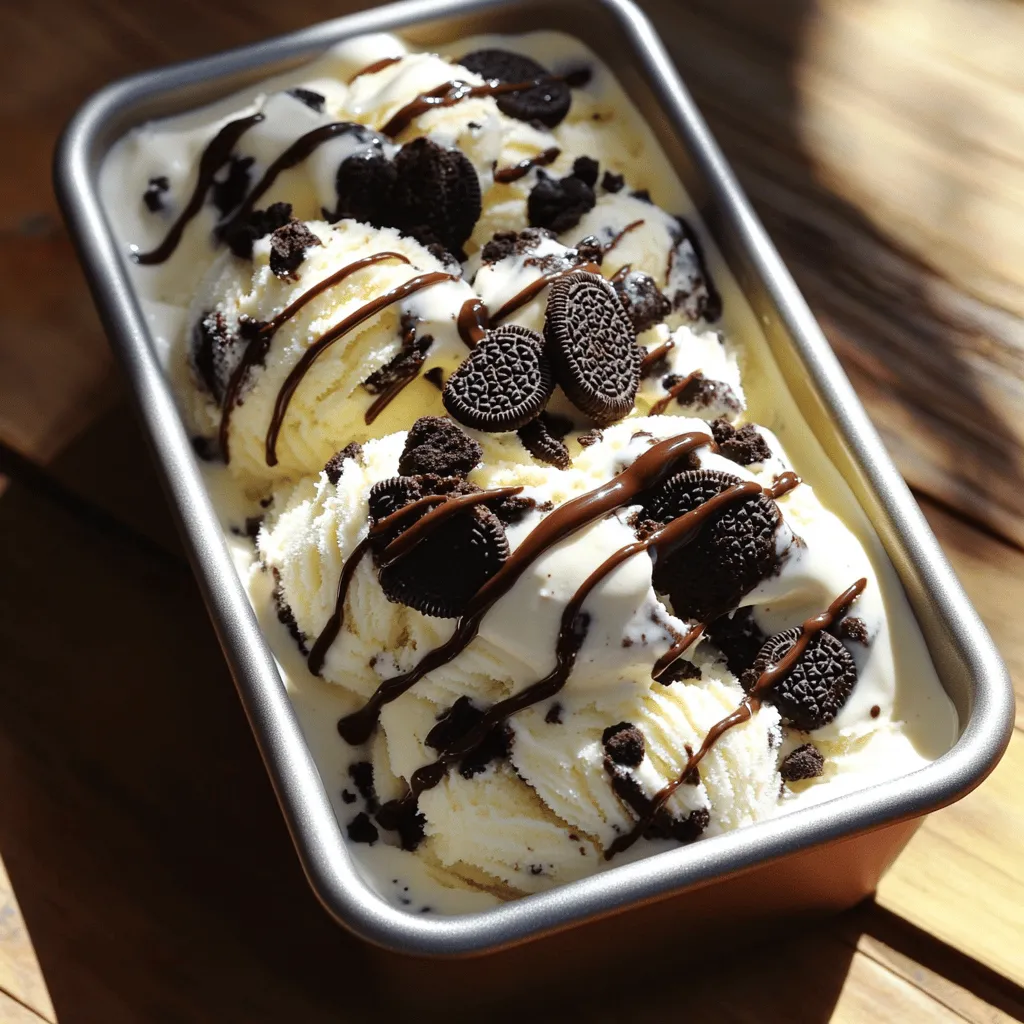
Pour the ice cream mixture into a 9×5 inch loaf pan or any container that can go in the freezer. Use your spatula to smooth the top. If you like, sprinkle extra crushed Oreos on top for a nice touch. Cover the container tightly with plastic wrap or a lid. This helps avoid ice crystals. Freeze for at least 6 hours, or until solid.

Serving Suggestions

After the ice cream has frozen completely, scoop it into bowls or cones. Enjoy it with friends and family. For a fun twist, serve it in waffle cones or decorative bowls. Garnish with more crushed Oreos and a drizzle of chocolate syrup. This makes it look as good as it tastes!

Tips & Tricks

Essential Tips for Success

Whipping cream is key for a light texture. Start with cold cream for best results. Use a large bowl to give the cream room to expand. Whip until you see stiff peaks. This means the cream stands tall when you lift the whisk. Don’t rush this step; it makes your ice cream fluffy.

Avoiding Ice Crystals

Ice crystals can ruin your ice cream’s smoothness. To prevent this, cover the container tightly. Use plastic wrap or a lid to keep air out. Store it in the coldest part of your freezer. This keeps your ice cream creamy and delicious. If you open the freezer often, ice crystals may form. Be mindful of how you store it.

Customization Tips

Feel free to make this recipe your own! Add mix-ins like nuts, candies, or even fruit. You can also adjust the sweetness. If you want a sweeter treat, add more condensed milk. For less sweetness, use fewer Oreos. This recipe is flexible, so have fun experimenting.

Variations

Different Flavor Options

You can mix up the flavors for this no-churn Oreo ice cream. Seasonal flavors add fun. For winter, try peppermint or mint. A mint flavor gives a fresh twist. In fall, pumpkin spice is a great choice. It adds warmth and comfort. Just swap out the Oreo cookies for crushed mint or pumpkin-flavored cookies. You can enjoy a new taste with every season.

Using Different Cookies

You don’t have to stick to Oreos. Other cookies work too! Try chocolate sandwich cookies for a similar taste. Vanilla cookies can add a lighter flavor. You can even use gluten-free cookies for a tasty treat. This choice opens up many flavor options. Mix and match to find your favorite. Be creative and have fun with this recipe!

Dairy-free Options

Want a vegan version? You can make this ice cream dairy-free! Use coconut cream instead of heavy cream. It gives a rich and creamy texture. Swap the sweetened condensed milk for a dairy-free option, like coconut milk. This keeps the sweetness without dairy. You can still mix in your favorite cookies. Enjoy a delicious treat that fits your diet!

Storage Info

How to Store No Churn Oreo Ice Cream

To keep your no churn Oreo ice cream fresh, store it in a freezer-safe container. Make sure the lid fits tightly. If you use a loaf pan, cover it with plastic wrap to avoid ice crystals. This keeps the ice cream smooth and creamy.

Shelf Life

When stored correctly, your ice cream can last up to two weeks in the freezer. It may lose some texture after that, but it should still be safe to eat. Always check for any ice crystals or off smells before enjoying.

Re-freezing Guidelines

If you have leftovers, you can refreeze your ice cream. Just let it sit at room temperature for a few minutes before scooping. This makes it easier to serve. Avoid refreezing ice cream multiple times, as it can change the texture. Enjoy your homemade treat!

FAQs

Can I make this recipe without an ice cream maker?

Yes, it is designed to be no-churn. This means you can make it without any special tools. Just whip the cream and mix the ingredients in a bowl. You will get a creamy dessert without the hassle of an ice cream maker.

How long will it take to freeze completely?

It will take about six hours to freeze completely. I suggest leaving it in the freezer overnight for the best results. This time allows the flavors to meld and the texture to set perfectly.

Can I add other toppings?

Yes! You can get creative with toppings. Here are some ideas:

– Whipped cream

– Chocolate chips

– Crushed nuts

– Fresh fruit

– More crushed Oreo cookies

You can also mix in fun flavors like peanut butter or caramel sauce. These add a nice twist to the classic Oreo taste.

This no-churn Oreo ice cream recipe uses simple ingredients and tools. You prepare it by whipping the cream and gently combining it with the rest. Freezing solidifies the tasty mix, creating a sweet treat. Remember to cover the ice cream well to avoid ice crystals. You can customize it with different flavors or cookies. With these tips and tricks, you’ll enjoy creamy, delicious ice cream anytime. Dive into your ice cream-making adventure and savor every bite.

- 2 cups heavy cream - 1 cup sweetened condensed milk - 1 teaspoon vanilla extract - 1 cup crushed Oreo cookies (plus extra for garnish) - 1/4 cup chocolate syrup (optional) - Mixing bowls - Electric mixer - Rubber spatula - Freezer-safe container or loaf pan When making No Churn Oreo Ice Cream, you need a few key items. First, heavy cream is a must. It gives the ice cream its rich and creamy texture. Sweetened condensed milk adds sweetness and helps the mixture stay smooth. Vanilla extract brings warmth and depth to the flavor. Don’t forget about the Oreo cookies! You’ll crush them up to mix in. This adds a crunchy chocolate flavor that everyone loves. If you want to be extra fancy, consider adding chocolate syrup for a sweet drizzle. Next, gather your kitchen tools. You will need mixing bowls to combine your ingredients. An electric mixer is essential for whipping the cream to the right texture. A rubber spatula helps you fold everything gently, keeping the cream light and airy. Finally, you need a freezer-safe container to hold your ice cream while it freezes. With these ingredients and tools, you can make a simple and delicious dessert that everyone will enjoy. For the full recipe, check out the details provided above. Start by pouring 2 cups of heavy cream into a large bowl. Use an electric mixer to whip the cream on medium-high speed. Whip for about 3 to 5 minutes until you see stiff peaks. The peaks should stand tall when you lift the whisk. This step is key for a light and fluffy ice cream. In another bowl, mix 1 cup of sweetened condensed milk with 1 teaspoon of vanilla extract. Stir them together until smooth. This mixture adds sweetness and a rich flavor to your ice cream. Now, gently combine the whipped cream with the condensed milk mixture. Use a large spatula for this. Carefully fold the whipped cream into the condensed milk. This keeps the air in the cream, making your ice cream light and creamy. Once mixed, fold in 1 cup of crushed Oreo cookies. Make sure they are evenly spread out in the mixture. If you want, drizzle in 1/4 cup of chocolate syrup as you fold. This adds extra flavor and makes it more decadent. Pour the ice cream mixture into a 9x5 inch loaf pan or any container that can go in the freezer. Use your spatula to smooth the top. If you like, sprinkle extra crushed Oreos on top for a nice touch. Cover the container tightly with plastic wrap or a lid. This helps avoid ice crystals. Freeze for at least 6 hours, or until solid. After the ice cream has frozen completely, scoop it into bowls or cones. Enjoy it with friends and family. For a fun twist, serve it in waffle cones or decorative bowls. Garnish with more crushed Oreos and a drizzle of chocolate syrup. This makes it look as good as it tastes! Whipping cream is key for a light texture. Start with cold cream for best results. Use a large bowl to give the cream room to expand. Whip until you see stiff peaks. This means the cream stands tall when you lift the whisk. Don't rush this step; it makes your ice cream fluffy. Ice crystals can ruin your ice cream's smoothness. To prevent this, cover the container tightly. Use plastic wrap or a lid to keep air out. Store it in the coldest part of your freezer. This keeps your ice cream creamy and delicious. If you open the freezer often, ice crystals may form. Be mindful of how you store it. Feel free to make this recipe your own! Add mix-ins like nuts, candies, or even fruit. You can also adjust the sweetness. If you want a sweeter treat, add more condensed milk. For less sweetness, use fewer Oreos. This recipe is flexible, so have fun experimenting. Check out the Full Recipe for more ideas! {{image_4}} You can mix up the flavors for this no-churn Oreo ice cream. Seasonal flavors add fun. For winter, try peppermint or mint. A mint flavor gives a fresh twist. In fall, pumpkin spice is a great choice. It adds warmth and comfort. Just swap out the Oreo cookies for crushed mint or pumpkin-flavored cookies. You can enjoy a new taste with every season. You don’t have to stick to Oreos. Other cookies work too! Try chocolate sandwich cookies for a similar taste. Vanilla cookies can add a lighter flavor. You can even use gluten-free cookies for a tasty treat. This choice opens up many flavor options. Mix and match to find your favorite. Be creative and have fun with this recipe! Want a vegan version? You can make this ice cream dairy-free! Use coconut cream instead of heavy cream. It gives a rich and creamy texture. Swap the sweetened condensed milk for a dairy-free option, like coconut milk. This keeps the sweetness without dairy. You can still mix in your favorite cookies. Enjoy a delicious treat that fits your diet! For the full recipe, check out the earlier sections. To keep your no churn Oreo ice cream fresh, store it in a freezer-safe container. Make sure the lid fits tightly. If you use a loaf pan, cover it with plastic wrap to avoid ice crystals. This keeps the ice cream smooth and creamy. When stored correctly, your ice cream can last up to two weeks in the freezer. It may lose some texture after that, but it should still be safe to eat. Always check for any ice crystals or off smells before enjoying. If you have leftovers, you can refreeze your ice cream. Just let it sit at room temperature for a few minutes before scooping. This makes it easier to serve. Avoid refreezing ice cream multiple times, as it can change the texture. Enjoy your homemade treat! Yes, it is designed to be no-churn. This means you can make it without any special tools. Just whip the cream and mix the ingredients in a bowl. You will get a creamy dessert without the hassle of an ice cream maker. It will take about six hours to freeze completely. I suggest leaving it in the freezer overnight for the best results. This time allows the flavors to meld and the texture to set perfectly. Yes! You can get creative with toppings. Here are some ideas: - Whipped cream - Chocolate chips - Crushed nuts - Fresh fruit - More crushed Oreo cookies You can also mix in fun flavors like peanut butter or caramel sauce. These add a nice twist to the classic Oreo taste. This no-churn Oreo ice cream recipe uses simple ingredients and tools. You prepare it by whipping the cream and gently combining it with the rest. Freezing solidifies the tasty mix, creating a sweet treat. Remember to cover the ice cream well to avoid ice crystals. You can customize it with different flavors or cookies. With these tips and tricks, you’ll enjoy creamy, delicious ice cream anytime. Dive into your ice cream-making adventure and savor every bite.

No Churn Oreo Ice Cream

Satisfy your sweet tooth with this easy Oreo Delight No Churn Ice Cream recipe! With just a few simple ingredients like heavy cream and crushed Oreos, you can create a creamy, indulgent treat without an ice cream maker. Perfect for hot summer days or anytime you crave something sweet, this recipe is sure to impress.

Ingredients
  

2 cups heavy cream

1 cup sweetened condensed milk

1 teaspoon vanilla extract

1 cup Oreo cookies, crushed (plus extra for garnish)

1/4 cup chocolate syrup (optional)

Instructions
 

Whip the Cream: Begin by pouring 2 cups of heavy cream into a large mixing bowl. Using an electric mixer, whip the cream on medium-high speed for about 3 to 5 minutes, or until you achieve stiff peaks. The cream should form peaks that hold their shape when you lift the whisk.

    Combine Condensed Milk and Vanilla: In a separate bowl, whisk together 1 cup of sweetened condensed milk and 1 teaspoon of vanilla extract. Stir until the mixture is smooth and both ingredients are well blended.

      Fold the Mixtures Together: Carefully incorporate the whipped cream into the condensed milk mixture. Use a large spatula to gently fold the whipped cream into the condensed milk, making sure to preserve the airy texture of the cream. This step is crucial, so take your time to avoid deflating the whipped cream.

        Add Oreos and Chocolate Syrup: Once the whipped cream is fully incorporated, gently fold in 1 cup of crushed Oreo cookies until they are evenly distributed throughout the mixture. For an added touch of indulgence, feel free to drizzle in the 1/4 cup of chocolate syrup as you fold in the cookies.

          Transfer to Freezing Container: Pour the Oreo ice cream mixture into a 9x5 inch loaf pan or any freezer-safe container of your choice. Use a spatula to smooth the top of the mixture. For an extra special touch, sprinkle additional crushed Oreos on top as a garnish.

            Freeze the Ice Cream: Cover the container tightly with plastic wrap or a lid to prevent ice crystals from forming. Place it in the freezer and allow it to freeze for at least 6 hours, or until the ice cream is completely solid.

              Serve and Enjoy: After the ice cream has fully set, scoop generous portions into bowls or cones. Enjoy your delightful homemade no-churn Oreo ice cream with friends and family for a perfect treat!

                Prep Time: 10 minutes | Total Time: 6 hours 10 minutes | Servings: 6-8

                  - Presentation Tips: Serve scoops of ice cream in waffle cones or decorative bowls. Garnish with additional crushed Oreos and a drizzle of chocolate syrup for a stunning finish!

                    WANT TO SAVE THIS RECIPE?

                    Related Posts