One Pot Creamy Spinach Artichoke Pasta Delight

Welcome to your new favorite dinner solution: One Pot Creamy Spinach Artichoke Pasta Delight! If you love easy, tasty meals, this dish is made for you. It combines rich flavors and creamy textures—all in one pot. I’ll guide you through the simple steps, tips, and tricks to make it perfect. Let’s dive into the creamy goodness and elevate your weeknight dinners!
Ingredients
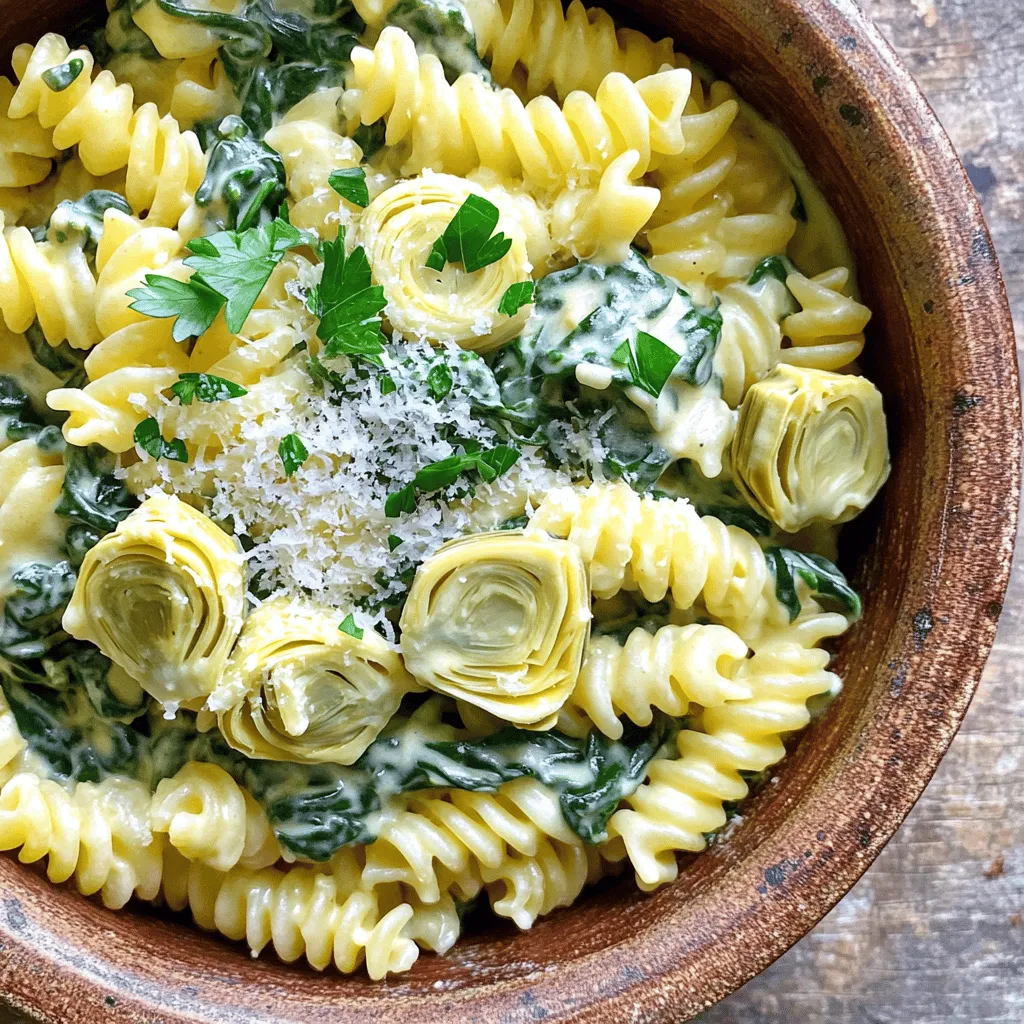
List of Required Ingredients
To make One Pot Creamy Spinach Artichoke Pasta, gather these main ingredients:
– 12 oz pasta (fusilli or penne recommended)
– 1 tablespoon olive oil
– 3 cloves garlic, finely minced
– 1 can (14 oz) artichoke hearts, drained and cut into quarters
– 4 cups fresh spinach, packed
– 1 cup heavy cream (or coconut cream for a dairy-free alternative)
– 1 cup vegetable broth
– 1 cup grated Parmesan cheese (or nutritional yeast for a dairy-free option)
– 1 teaspoon Italian seasoning
– Salt and pepper, to taste
– Fresh parsley, chopped (for garnish)
Optional ingredients for customization
You can add some ingredients to make this dish your own:
– Sun-dried tomatoes for a burst of flavor
– Crushed red pepper for heat
– Grilled chicken or shrimp for protein
Substitutes for dietary restrictions
If you have dietary needs, try these substitutes:
– Use gluten-free pasta for a gluten-free option.
– Coconut cream works well for a dairy-free base.
– Nutritional yeast can replace Parmesan for a vegan choice.
These ingredients set the stage for a creamy, delightful meal that you can enjoy any day!
Step-by-Step Instructions
Cooking Preparations
– Start by gathering all your ingredients.
– Chop the garlic finely and cut the artichoke hearts into quarters.
– Rinse the fresh spinach and pack it tightly to measure four cups.
– For cooking, choose a large, heavy-bottomed pot. This type of pot helps heat evenly and prevents burning.
Cooking Process
– Heat one tablespoon of olive oil in the pot over medium heat.
– Add three cloves of minced garlic. Sauté it for about one minute. Stop when it smells good but not brown.
– Next, add the quartered artichokes to the pot. Cook them for two to three minutes until they warm up.
– Gently mix in the fresh spinach. Stir it until the spinach wilts down, which takes about two minutes.
– Pour in one cup of vegetable broth and one cup of heavy cream. Stir to combine everything into a creamy mix.
– Add 12 ounces of pasta and one teaspoon of Italian seasoning. Make sure the pasta is fully under the liquid.
– Bring the mixture to a boil. Then lower the heat and cover the pot. Let it simmer for 12 to 15 minutes. Stir occasionally to keep the pasta from sticking.
– When the pasta is al dente, take the pot off the heat. Stir in one cup of grated Parmesan cheese. Taste it, then add salt and pepper as needed.
– If the sauce seems too thick, add a bit more vegetable broth or cream to thin it out.
You can now enjoy your One Pot Creamy Spinach Artichoke Pasta.
Tips & Tricks
Perfecting the Recipe
To get the best creamy texture, use heavy cream or coconut cream. These options blend well and add rich flavor. Stir in the cheese at the end for a smooth finish. If you want a lighter sauce, add more broth slowly until you reach the right consistency.
For cooking pasta perfectly in one pot, choose fusilli or penne. These shapes hold sauce well. Add the pasta when the liquids are boiling. Make sure the pasta is fully submerged. Stir it occasionally to stop it from sticking.
Enhancements
To boost flavor, consider adding spices like red pepper flakes or smoked paprika. Fresh herbs, such as basil or thyme, can also add a nice touch.
For those with dietary needs, try using nutritional yeast instead of Parmesan cheese. It gives a cheesy flavor without dairy. If you need to skip cream, coconut cream is a great option too.

Variations
Ingredient Substitutions
You can make this dish fit your diet. For a dairy-free option, use coconut cream instead of heavy cream. Nutritional yeast is a great cheese swap. It adds a savory flavor without dairy.
Want more protein? Add cooked chicken or shrimp. They cook fast and add great taste. Just toss them in when you add the spinach. They will soak up the creamy sauce.
Flavor Variations
Changing herbs or spices can change the whole dish. Try adding fresh basil or thyme for a new twist. A pinch of red pepper flakes adds a nice kick if you like heat.
You can also mix in other veggies. Broccoli or bell peppers work well here. Chop them small and add them with the spinach. They will cook down and blend nicely with the sauce.
Storage Info
Short-term Storage
To store leftover pasta in the fridge, let it cool first. Place it in an airtight container. Make sure to seal it well to keep out air. Leftovers will stay fresh for up to three days.
The best containers for storage are glass or BPA-free plastic. They help keep the pasta fresh. Avoid metal containers, as they can react with the cream.
Long-term Storage
Yes, this dish can be frozen. To freeze, cool the pasta completely and place it in a freezer-safe container. It’s best to use a container that can hold liquids well. You can freeze the pasta for up to three months.
When reheating, use low heat to maintain creaminess. Add a splash of vegetable broth or cream while warming. Stir gently to mix it well. This will help bring back its creamy texture.
FAQs
Common Questions
Can I use whole wheat pasta or gluten-free alternatives?
Yes, you can use whole wheat pasta. It adds more fiber and flavor. Gluten-free pasta works too. Just check the cooking time on the package. These types may need a little more or less time than regular pasta.
How do I prevent the pasta from sticking?
To stop pasta from sticking, stir it often while it cooks. Use a large pot with enough water. Adding a bit of olive oil to the water can help too. Once the pasta is in the pot, keep it moving. This keeps it from clumping together.
What to do if the sauce is too thick or thin?
If your sauce is too thick, add more vegetable broth or cream. Stir it in slowly. For a thin sauce, let it cook a little longer. This helps it thicken up. You can also add a bit of grated cheese to help with thickness.
This post covered the key ingredients and steps for making One Pot Creamy Spinach Artichoke Pasta. I shared tips on cooking, enhancing flavors, and storing leftovers. You can easily adapt this recipe to fit your diet and taste. Remember, cooking should be fun and flexible. Experiment with different ingredients and enjoy your tasty dish. You’ll impress everyone with this creamy pasta meal!


![- 1 pound boneless chicken thighs, cut into bite-sized pieces - 1 cup all-purpose flour - 2 large eggs, beaten - 1 cup panko breadcrumbs - 1 cup freshly squeezed orange juice - Zest of 1 medium orange - 1/4 cup honey - 2 tablespoons soy sauce - Salt and freshly ground pepper to taste - Oil for frying - 1 tablespoon cornstarch I love using chicken thighs for this dish. They stay juicy and tender. The all-purpose flour creates a great base for the breading. Beating the eggs helps the breadcrumbs stick. Panko breadcrumbs give that extra crunch. For the orange sauce, fresh juice is the best choice. It gives a bright flavor. The zest adds even more orange goodness. Honey brings a nice sweetness. Low-sodium soy sauce keeps the salt level balanced. Don’t forget the salt and pepper! They enhance the chicken's taste. Oil is key for frying; it makes everything crispy. Cornstarch helps thicken the sauce so it coats the chicken well. If you want the full recipe, you can find it above. Enjoy making this dish! First, season the chicken pieces with salt and pepper. This adds flavor and enhances the dish. Next, create a breading station. Set up three bowls: one with all-purpose flour, another with beaten eggs, and the last with panko breadcrumbs mixed with cornstarch. The cornstarch adds extra crispiness to the coating. Now it's time for the fun part. Take a piece of chicken and dredge it in the flour. Make sure to shake off any extra flour. After that, dip it into the beaten eggs, ensuring it is fully coated. Then roll the chicken in the panko breadcrumbs. Press gently to help the crumbs stick. Place the breaded chicken on a wire rack to rest for at least ten minutes. This resting time is crucial. It helps the coating stay on during frying. In a medium saucepan, pour in the fresh orange juice. Then add the orange zest, honey, soy sauce, rice vinegar, minced ginger, and minced garlic. Stir everything together. Heat the pan over medium heat until it simmers. This allows the flavors to blend nicely. To thicken the sauce, stir in the cornstarch mixed with cold water. Keep stirring for two to three minutes. You'll notice the sauce thickens and gets shiny. Once it's just right, remove the saucepan from heat. Set the orange sauce aside for later. For the complete recipe, check out the [Full Recipe]. To get that perfect crispy texture, start by picking the right frying oil. Use oils with high smoke points like canola or peanut oil. These oils can handle high heat without burning. Double frying is also key. After the first fry, let the chicken rest. Then, fry it again for a few minutes. This makes the chicken extra crunchy. When it comes to orange juice, always choose fresh over bottled. Fresh juice has a bright taste that really shines. Adding orange zest gives your dish an extra zing. Zest is the outer peel of the orange. It holds a lot of flavor, so don’t skip it! For garnishes, sesame seeds and chopped green onions are great choices. They add color and a nice crunch. Pair your crispy orange chicken with steamed rice or stir-fried veggies. These sides balance the dish and make it even more satisfying. For the full recipe, check out the details above! {{image_4}} You can bake the chicken instead of frying it. Baking reduces oil and calories. To bake, coat the chicken as usual, then place it on a lined baking sheet. Bake at 400°F for about 20-25 minutes. This method gives a crispy texture without frying. Adjust the sauce for a low-sodium option. Use low-sodium soy sauce to cut the salt. This change keeps the flavor but makes it healthier. You can use tofu or shrimp instead of chicken. For tofu, press it to remove moisture, then cut it into cubes. Coat and cook it the same way as chicken. Shrimp cooks quickly, so reduce the frying time to 2-3 minutes until they turn pink. For vegetarians, replace chicken with veggies. Bell peppers, broccoli, or snap peas work well. Coat these in the same way and fry until crispy. Want some heat? Add chili flakes or hot sauce to the orange sauce. Start with a teaspoon and adjust to your taste. You can also use different peppers. Try jalapeños or serranos for a fresh kick. These peppers add flavor and heat to the dish. To keep your crispy orange chicken fresh, refrigerate it promptly. Place the chicken in an airtight container. This method helps prevent moisture loss and keeps the chicken tasty. Make sure to cool the chicken to room temperature before sealing. This step avoids condensation that can make the chicken soggy. When it’s time to enjoy leftovers, you have two main options: oven or microwave. The oven is best for keeping the chicken crispy. Preheat it to 350°F (175°C). Spread the chicken on a baking sheet and heat for about 10-15 minutes. For a quicker method, use the microwave but be cautious. Heat in short bursts to prevent sogginess. If you choose this method, you can add a paper towel on top to absorb moisture. Freezing is a great option for long-term storage. To freeze, first allow the chicken to cool completely. Then place it in a freezer-safe bag or container. Remove as much air as possible to avoid freezer burn. The chicken stays good for about 2-3 months. When you're ready to eat it, thaw in the fridge overnight. Reheat as mentioned above for the best results. Yes, you can use chicken breast. However, thighs have more fat. This fat gives extra flavor. Chicken thighs stay juicy, while breasts can dry out. If you use breasts, be careful not to overcook them. They cook faster than thighs. To thicken the sauce, add more cornstarch. Mix one tablespoon of cornstarch with two tablespoons of cold water. Stir this mixture into the sauce while it simmers. Cook for a few minutes until thick. For a thinner sauce, add more orange juice or water. Just remember to adjust the flavor as needed. You can use maple syrup or agave nectar instead of honey. Brown sugar is another option. If you want a sugar-free choice, try stevia or monk fruit sweetener. These alternatives change the taste slightly, but they work. Yes, you can make it ahead. Cook the chicken and sauce separately. Store them in the fridge in airtight containers. When you’re ready to eat, reheat the chicken in the oven. This keeps it crispy. Then, heat the sauce on the stove. Toss them together just before serving. Crispy Orange Chicken is a popular dish in Chinese-American cuisine. It combines sweet and savory flavors. The dish likely came from Hunan cuisine, which uses oranges in cooking. It gained fame in the U.S. in the 1980s. Many enjoy its crunchy texture and bright taste. This blog post covered the key steps to making Crispy Orange Chicken. We discussed the main ingredients, such as chicken, flour, and a tasty orange sauce. I shared tips to achieve a crispy texture and offered serving ideas. You learned about healthier options and variations like spicy orange chicken. Proper storage and reheating tips were also included for your convenience. In summary, this dish is fun to make and enjoy. Don't hesitate to get creative with flavors and substitutions. Happy cooking!](https://joymealplan.com/wp-content/uploads/2025/06/e5d29336-8dbd-4ed1-97b7-adaf34762187-768x768.webp)


