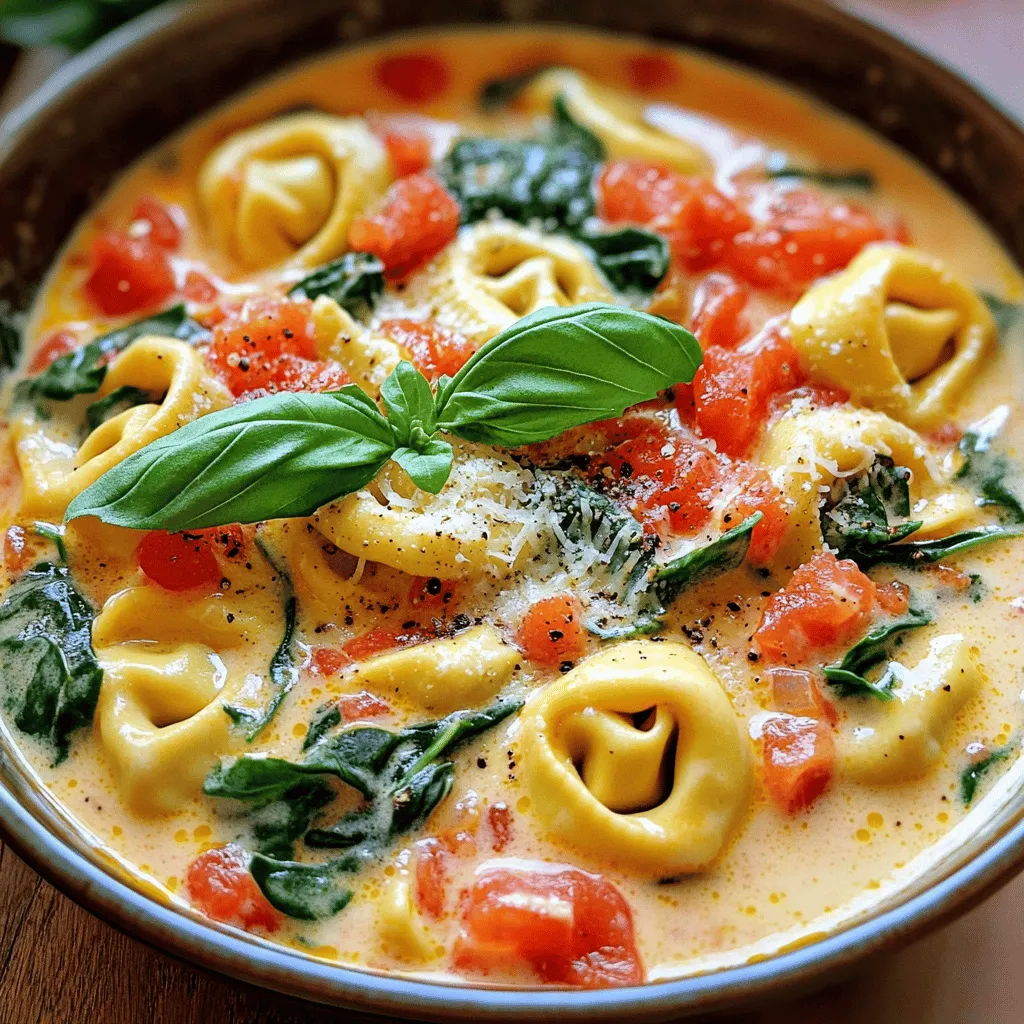
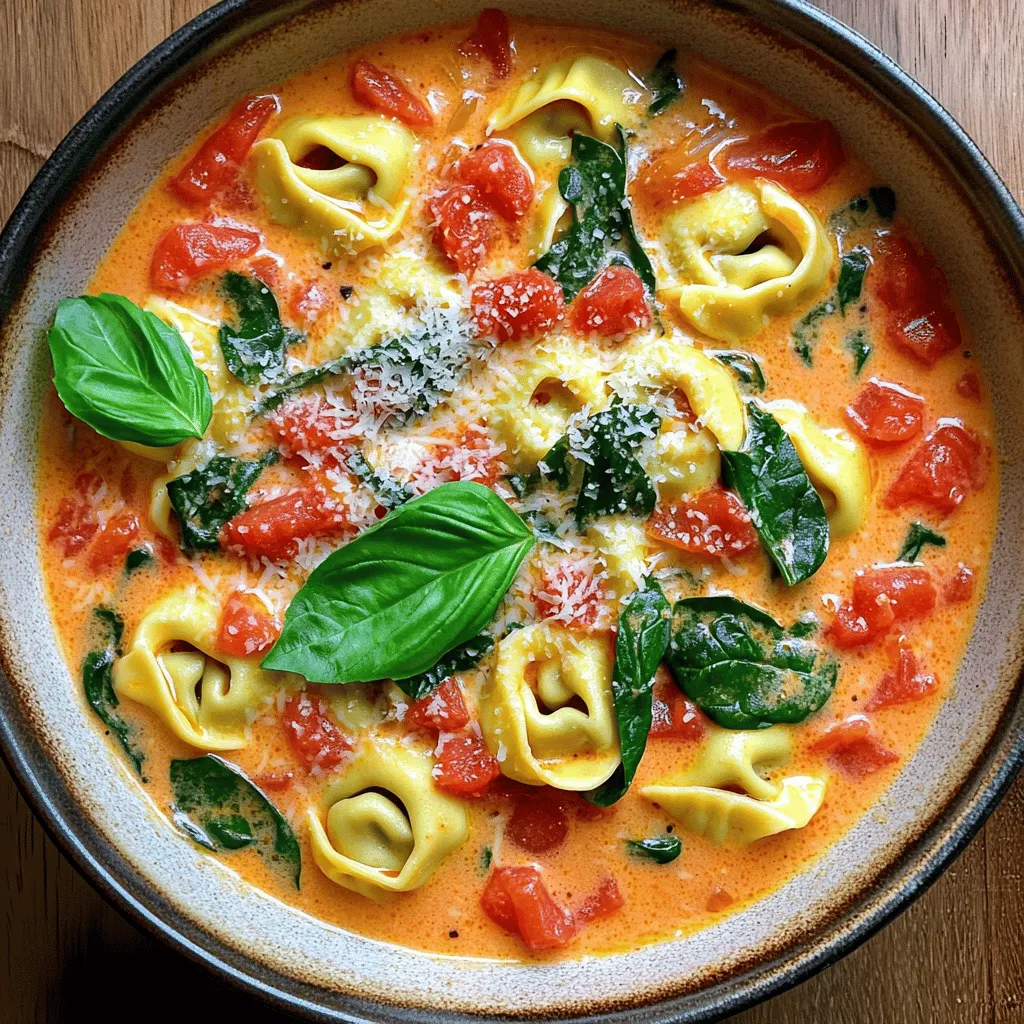
Welcome to a creamy, dreamy delight that’s quick and easy! This One-Pot Creamy Tomato Basil Tortellini recipe will change your dinner game forever. With just a handful of simple ingredients and minimal cleanup, you’ll be savoring rich flavors in no time. Whether you’re a busy parent or a student on a tight schedule, this meal promises comfort and taste. Let’s dive into how to create this delicious dish!
Ingredients
Main Ingredients for One-Pot Creamy Tomato Basil Tortellini
For this creamy dish, you will need:
– 2 cups cheese tortellini (fresh or frozen)
– 1 can (14 oz) diced tomatoes, including juices
– 2 cups vegetable broth
– 1 cup heavy cream (or coconut cream)
– 1 cup fresh spinach, roughly chopped
– 1/2 cup freshly grated Parmesan cheese (plus extra for serving)
– 2 cloves garlic, minced finely
– 1 teaspoon dried basil (or 1 tablespoon fresh basil, chopped finely)
– 1 teaspoon onion powder
– Salt and pepper to taste
– 1 tablespoon extra virgin olive oil
– Fresh basil leaves for garnish
Optional Ingredients for Customization
You can add your own twist to this dish! Here are some ideas:
– Cherry tomatoes for extra sweetness
– Red pepper flakes for heat
– Mushrooms, sautéed for an earthy flavor
– Zucchini, diced for added texture
– A splash of lemon juice for brightness
Equipment Needed
You don’t need much to make this dish. Here’s what you’ll need:
– A large pot or deep skillet
– A spatula for stirring
– A cutting board and knife for chopping
– Measuring cups and spoons for precise amounts
These simple ingredients and tools will help you create a delightful meal. Enjoy the process as you bring this creamy tomato basil tortellini to life!
Step-by-Step Instructions
Preparing the Aromatics
First, gather your ingredients. Keep them nearby for easy access. Heat a large pot over medium heat. Add one tablespoon of extra virgin olive oil. Once the oil is hot, toss in two cloves of minced garlic. Sauté the garlic for 1-2 minutes. Stir it often so it doesn’t burn. You want it to smell great and turn golden.
Next, open your can of diced tomatoes. Pour the tomatoes, with their juices, into the pot. Then, add two cups of vegetable broth. Use a spatula to mix everything well. The flavors need to blend together.
Cooking the Tortellini
Now, let’s bring the mixture to a gentle boil. Increase the heat until you see bubbles. Once boiling, add two cups of cheese tortellini. Stir gently to coat them in the sauce. Reduce the heat to a simmer. Cook for 5-7 minutes, stirring occasionally. The tortellini should be tender and cooked through.
After the tortellini are done, lower the heat. Mix in one cup of heavy cream or coconut cream. Add one cup of chopped spinach and half a cup of grated Parmesan cheese. Don’t forget one teaspoon of dried basil and one teaspoon of onion powder. Stir everything until well combined. The spinach will wilt nicely.
Finishing Touches and Serving
Let the sauce simmer for 2-3 more minutes. Stir occasionally to avoid sticking. The sauce should thicken slightly. Now, taste it. Add salt and pepper as needed.
Once done, remove the pot from the heat. Let it rest for a couple of minutes. This helps the flavors meld together. For serving, use shallow bowls. Top with extra Parmesan cheese and fresh basil leaves. Enjoy the creamy tortellini with a slice of crusty bread on the side.
Tips & Tricks
How to Achieve the Perfect Creaminess
To get that smooth, creamy texture, use heavy cream. You can also try coconut cream for a lighter taste. When you add the cream, lower the heat. This helps the cream blend well without curdling. Stir it in slowly to keep everything mixed.
Recommended Garnishes
Garnishes can make your dish look great and taste better. I suggest using fresh basil leaves on top. They add color and a nice aroma. Grated Parmesan cheese is a must for extra flavor. A drizzle of olive oil can also enhance the look and taste.
Time-Saving Suggestions
Want to save time? Use pre-made cheese tortellini. This cuts down your cooking time. You can also chop your spinach and garlic ahead of time. Keep them in the fridge for quick use. If you want to make this dish even faster, prepare the sauce while the tortellini cook. This way, you’ll have a meal ready in no time.
Variations
Vegetarian and Vegan Options
You can easily make this dish vegetarian. Simply use vegetable broth and heavy cream. For a vegan version, switch to coconut cream. Make sure to choose vegan tortellini. You can find many brands that offer plant-based options. This way, you still enjoy rich flavors without animal products. Adding more veggies like mushrooms or bell peppers can boost nutrition and taste.
Protein Additions
If you want extra protein, consider adding cooked chicken or sausage. You can also use shrimp for a seafood twist. Just add your choice of protein when cooking the tortellini. This adds flavor and makes the dish more filling. For a plant-based option, add chickpeas or lentils. They blend well and enhance the creamy sauce.
Different Sauce and Flavor Profiles
Feel free to switch up the sauce for a new taste. Try adding pesto for a fresh twist. A splash of balsamic vinegar can add depth. If you want heat, toss in some red pepper flakes. For a different flavor, experiment with herbs like oregano or thyme. These changes can create a unique dish every time you make it. You can explore countless flavor profiles while still enjoying the creamy base of this recipe.
Storage Info
How to Store Leftover Tortellini
After enjoying your One-Pot Creamy Tomato Basil Tortellini, store any leftovers in an airtight container. Make sure the dish cools down before sealing it. Store it in the fridge for up to three days. Keeping it tightly sealed helps prevent it from absorbing other odors in the fridge.
Reheating Instructions
When you’re ready to enjoy the leftovers, reheat them gently. Place the tortellini in a saucepan over low heat. Add a splash of vegetable broth or cream to help thin the sauce. Stir often to avoid sticking. Heat until warm, about five to seven minutes. You can also use a microwave. Transfer the tortellini to a microwave-safe bowl. Heat in short bursts, about 30 seconds each, stirring in between.
Freezing the Dish
You can freeze this dish if you want to save it for later. Allow the tortellini to cool completely. Then, place it in a freezer-safe container or bag. Be sure to remove as much air as possible to avoid freezer burn. It can last up to three months in the freezer. To thaw, move it to the fridge overnight. Reheat as described above for the best taste and texture. Enjoy your delicious meal anytime!
FAQs
Can I use frozen tortellini?
Yes, you can use frozen tortellini in this recipe. Just add it directly to the pot without thawing. Frozen tortellini cooks well in the creamy sauce. It saves time and gives you a delicious meal.
How do I make this dish gluten-free?
To make this dish gluten-free, use gluten-free tortellini. Many brands offer great options made from rice or other gluten-free grains. Check the package for cooking instructions, as they may differ from regular tortellini.
What can I substitute for heavy cream?
You can substitute heavy cream with coconut cream for a lighter option. This gives a nice flavor and keeps it creamy. Almond milk or soy milk can also work, but they may not be as rich.
In this article, we explored how to make a creamy tomato basil tortellini. You learned about key ingredients, equipment needed, and step-by-step instructions for cooking. We also shared helpful tips for achieving the perfect creaminess and offered variations to suit different tastes. Storing and reheating tips ensure you can enjoy leftovers.
Now you’re ready to create a delicious dish that satisfies everyone. With a little creativity, you can make it your own! Enjoy your cooking journey!


