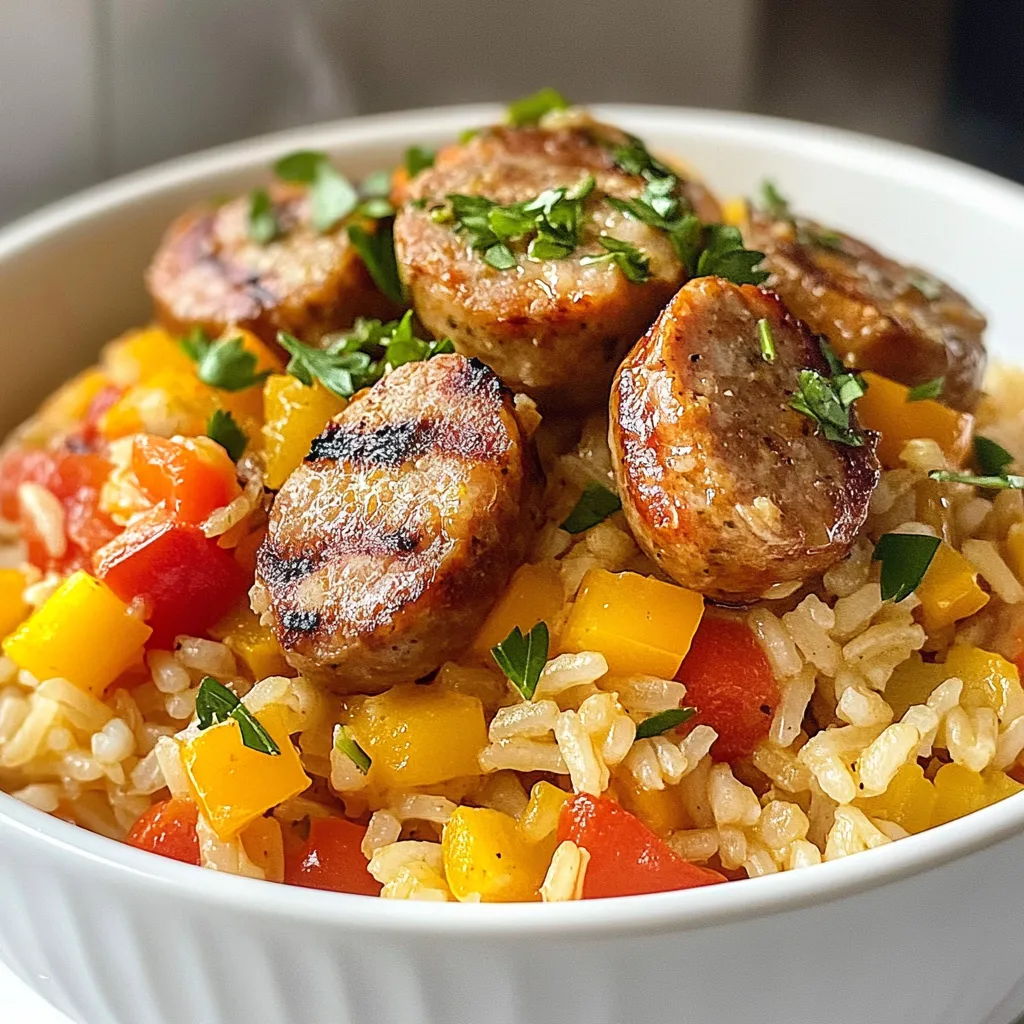
If you’re looking for a quick, tasty dinner, I have just the recipe for you! This One Pot Sausage and Rice dish is packed with flavor and requires minimal cleanup. You’ll find simple steps and tips to make cooking easy. Plus, I’ll share optional ingredients to spice things up! Ready to dive into this hearty meal that everyone will love? Let’s get started!
Why I Love This Recipe
- Quick and Easy: This one-pot meal comes together in just 35 minutes, making it perfect for busy weeknights.
- Flavorful Ingredients: The combination of chicken sausage, smoked paprika, and fresh vegetables creates a deliciously satisfying dish.
- Versatile: You can easily customize this recipe by adding your favorite vegetables or adjusting the spice levels to suit your taste.
- Minimal Cleanup: Since everything is cooked in a single pot, you save time on both cooking and washing up afterward.
Ingredients
List of Ingredients
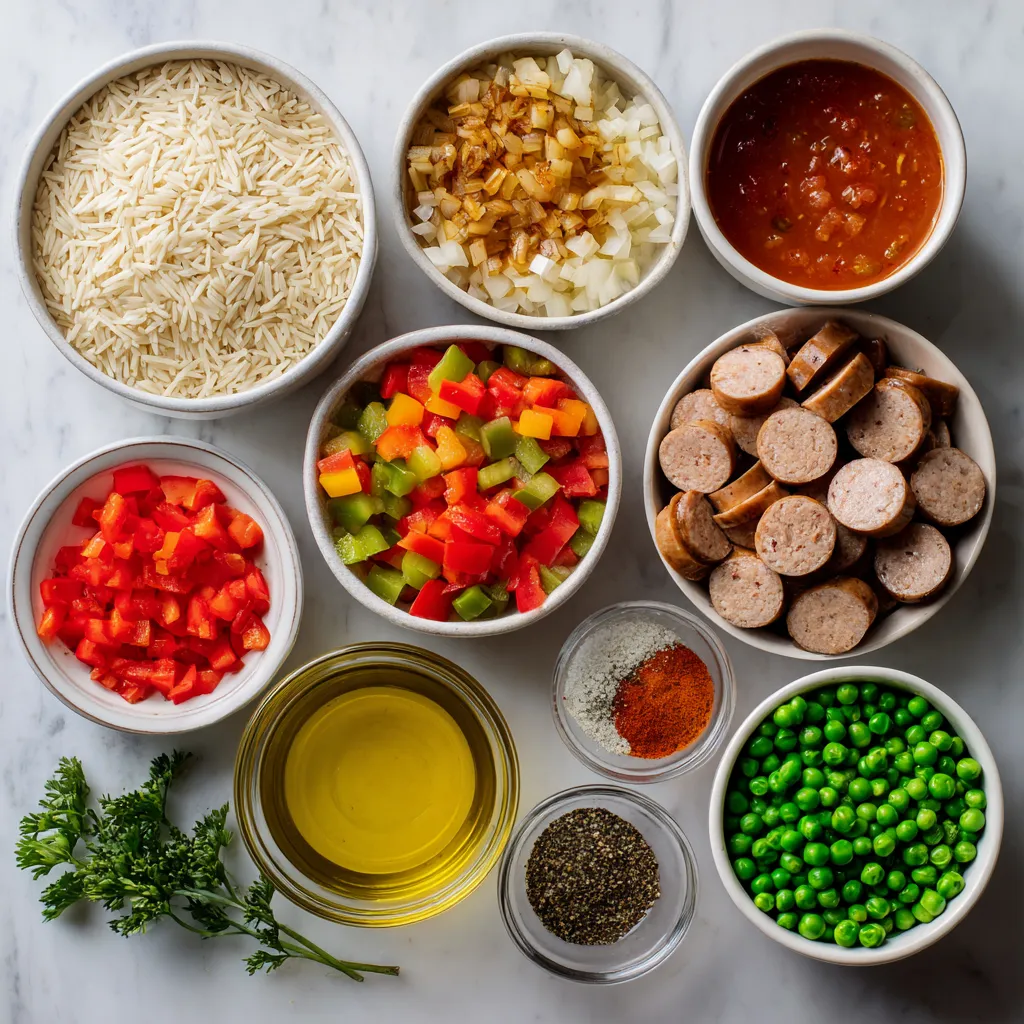
To cook One Pot Sausage and Rice, gather these items:
– 1 lb chicken sausage, sliced into bite-sized pieces
– 1 cup long-grain rice, thoroughly rinsed and drained
– 1 medium onion, finely diced
– 2 cloves garlic, minced
– 1 bell pepper (your choice of red or green), diced
– 1 can (14.5 oz) diced tomatoes, with their juice
– 2 cups chicken broth (low-sodium preferred)
– 1 teaspoon smoked paprika
– 1 teaspoon dried thyme
– ½ teaspoon cayenne pepper (optional, adjust according to heat preference)
– Salt and freshly cracked black pepper, to taste
– 1 cup frozen peas, no need to thaw
– 2 tablespoons extra virgin olive oil
– Fresh parsley, finely chopped, for garnish
Optional Ingredients for Extra Flavor
You can add some fun flavors with these options:
– 1 teaspoon Italian seasoning for a herby twist
– ½ cup corn for sweetness and color
– A dash of lemon juice to brighten the dish
Nutritional Information Overview
This dish is balanced and full of flavors. Here’s a quick look at the nutrition:
– Serving size: 1 cup
– Calories: About 400
– Protein: 25g
– Carbohydrates: 45g
– Fat: 12g
– Fiber: 4g
– Sodium: Varies based on broth choice
This meal is hearty and satisfying while providing good nutrition.
Step-by-Step Instructions
Preparation Overview
This one pot sausage and rice dish is easy to make. You will need a few key ingredients. Gather everything before you start cooking. This will help you stay organized. Here’s what you need to prepare:
– 1 lb chicken sausage, sliced into bite-sized pieces
– 1 cup long-grain rice, thoroughly rinsed and drained
– 1 medium onion, finely diced
– 2 cloves garlic, minced
– 1 bell pepper, diced
– 1 can (14.5 oz) diced tomatoes, with their juice
– 2 cups chicken broth
– 1 teaspoon smoked paprika
– 1 teaspoon dried thyme
– ½ teaspoon cayenne pepper
– Salt and freshly cracked black pepper, to taste
– 1 cup frozen peas
– 2 tablespoons extra virgin olive oil
– Fresh parsley, finely chopped, for garnish
Detailed Cooking Steps
1. Heat the olive oil in a large pot over medium heat. Wait until it shimmers.
2. Add the sliced chicken sausage. Sauté for about 5-7 minutes. Stir occasionally until browned. Remove the sausage and set aside.
3. In the same pot, add the diced onion and bell pepper. Sauté for 4-5 minutes until softened.
4. Add the minced garlic and cook for one more minute. Stir constantly to release the aroma.
5. Add the rinsed rice, stirring well to mix. Toast the rice for 2-3 minutes. This adds flavor and prevents sticking.
6. Pour in the diced tomatoes and chicken broth. Add smoked paprika, dried thyme, cayenne, salt, and pepper. Stir to combine everything.
7. Bring the mixture to a gentle boil. Once boiling, lower the heat and cover the pot. Let it simmer for 15 minutes without lifting the lid.
8. After 15 minutes, remove the lid carefully. Add the sausage and frozen peas. Gently fold everything together. Cover and cook for another 5-10 minutes. The rice should be tender.
9. Remove the pot from heat and let it sit covered for 5 minutes. This helps fluff the rice.
10. Fluff the rice gently with a fork. Garnish with freshly chopped parsley before serving.
Tips for Sautéing and Cooking Rice
– Use medium heat for sautéing. This helps avoid burning the garlic and veggies.
– Rinse the rice well to remove excess starch. This keeps the rice from becoming sticky.
– Stir often when toasting the rice. This enhances the nutty flavor and prevents burning.
– Don’t lift the lid while simmering. This keeps the steam inside for fluffy rice.
– Let the dish rest before serving. This allows flavors to meld together nicely.
Tips & Tricks
How to Achieve Perfectly Cooked Rice
To get perfectly cooked rice, rinse it well before using. Rinsing removes excess starch. This helps keep the rice from getting sticky. Use long-grain rice for the best texture. When you add rice to the pot, toast it for a few minutes. This boosts the flavor and gives it a nice bite. Keep an eye on the liquid. If your rice seems dry, add a little more chicken broth.
Adjusting Spice Levels for Personal Taste
If you like heat, add cayenne pepper. Start with a half teaspoon. You can always add more later. If you prefer it mild, leave out the cayenne. Instead, try adding more smoked paprika. This adds a rich flavor without the heat. Taste as you cook. This way, you can adjust the spices to suit your taste.
Enhancing Flavor with Fresh Herbs
Fresh parsley adds a bright touch to your dish. Chop it finely before adding it as a garnish. You can use other herbs too. Fresh thyme or basil work well. Add them at the end of cooking for the best flavor. If you want a stronger herb taste, mix some in during cooking. This gives your meal a fresh and vibrant kick.
Pro Tips
- Use Fresh Ingredients: Fresh vegetables and high-quality sausage can significantly enhance the flavor of your dish.
- Adjust Spice Levels: Feel free to modify the amount of cayenne pepper based on your heat preference, or omit it entirely for a milder dish.
- Let It Rest: Allowing the dish to sit covered for a few minutes after cooking helps the flavors meld and the rice to finish cooking perfectly.
- Garnish for Color: Adding fresh parsley not only adds a pop of color but also a fresh flavor that complements the dish beautifully.
Variations
Substituting Different Sausages
You can switch up the sausage for more flavor. Try turkey sausage for a leaner option. If you want a kick, use spicy Italian sausage. Bratwurst or chorizo also work well. Just slice them like the chicken sausage. Each type adds a unique taste to your dish.
Introducing Vegetables for Added Nutrition
Adding veggies boosts the meal’s nutrition. You can mix in spinach, carrots, or zucchini. Chop them small so they cook well. Try mushrooms for an earthy flavor, or corn for sweetness. These additions make your dish colorful and healthy.
Alternative Cooking Methods (Instant Pot/Slow Cooker)
You can easily make this meal in an Instant Pot or slow cooker. For the Instant Pot, use the “sauté” function for the sausage and veggies. Then add the rice and broth. Cook on high pressure for about 10 minutes. For a slow cooker, just add all ingredients and cook on low for 6-8 hours. Both methods keep the dish tasty and easy.
Storage Info
How to Store Leftovers Safely
To store your leftover one pot sausage and rice, let it cool first. Transfer it to an airtight container. Make sure to cover it tightly. This helps keep the dish fresh. Store it in the fridge for up to three days. If you want to keep it longer, freezing is a great option.
Reheating Guidelines for Optimal Taste
When you are ready to eat your leftovers, heat them gently. You can use the microwave or a pot on the stove. If using the microwave, place the food in a bowl. Add a splash of water to keep it moist. Heat in 30-second bursts, stirring in between. If using the stove, add a bit of broth or water to the pot. Stir while heating until it’s warm and tasty.
Freezing for Future Meals
To freeze your one pot sausage and rice, let it cool completely. Portion it into freezer-safe containers. Label each container with the date. This helps you know when to use it. You can freeze it for up to three months. When you want to eat it, thaw it overnight in the fridge. Reheat it as mentioned earlier for best results.
FAQs
Can I use uncooked sausage instead of pre-cooked?
Yes, you can use uncooked sausage. Just cook it longer to ensure it is fully done. Start by browning the uncooked sausage in the pot. Once it is brown, remove it and follow the steps as usual. This adds great flavor and juiciness to the dish.
What type of rice is best for this recipe?
For this recipe, long-grain rice works best. It cooks evenly and stays fluffy. You could also use basmati or jasmine rice for a fragrant twist. Just remember to rinse the rice well before cooking. This removes extra starch and prevents it from getting sticky.
Can I make this recipe vegetarian?
Yes, you can make this recipe vegetarian. Simply swap the sausage for your favorite plant-based sausage. Use vegetable broth instead of chicken broth for flavor. You can also add more veggies like mushrooms or zucchini for added texture and taste. Enjoy a delicious meal that fits your diet!
This blog post covered key ingredients and helpful cooking steps for a tasty dish. You learned about optional ingredients that add flavor, along with essential tips for perfect rice. I also shared variations to keep meals interesting. Proper storage and reheating can help you enjoy leftovers.
In the end, this recipe is versatile and straightforward. You can customize it to fit your taste. Now, get cooking and enjoy your mea


