Oven Baked Chicken Bites Crispy and Flavorful Treat

Looking for a delicious and easy snack? These Oven Baked Chicken Bites are crispy, flavorful, and perfect for any occasion! I’ll guide you through simple steps, from selecting the freshest chicken to baking the perfect bite-sized treats. With tips on flavor variations and storage, you’ll have a tasty dish ready in no time. Let’s dive into this flavorful recipe that everyone will love!
Why I Love This Recipe
- Crispy Texture: The use of panko breadcrumbs gives these chicken bites an unbeatable crunch that is simply irresistible.
- Flavorful Herb Blend: The combination of Italian herbs and spices infuses each bite with a delightful aroma and taste.
- Easy to Make: This recipe is straightforward and quick, making it perfect for busy weeknights or impromptu gatherings.
- Customizable: You can easily adapt this recipe by adding your favorite spices or serving it with various dipping sauces.
Ingredients
List of Ingredients
– 1 pound boneless, skinless chicken breast, cut into bite-sized pieces
– 1 cup breadcrumbs (panko recommended for an extra crunch)
– 1/2 cup finely grated Parmesan cheese
– 1 tablespoon dried Italian herbs (a blend of oregano, basil, and thyme works wonderfully)
– 1 teaspoon garlic powder
– 1/2 teaspoon smoked paprika (for a subtle smoky flavor)
– Salt and freshly ground black pepper, to taste
– 2 large eggs, beaten until frothy
– 1 tablespoon extra virgin olive oil
– Fresh parsley, finely chopped (for a vibrant garnish)
Recommended Substitutions
If you need a change, there are options to try. You can swap chicken for turkey. It works well too. Use whole wheat breadcrumbs if you want more fiber. For a dairy-free version, try nutritional yeast instead of Parmesan. If you like heat, add cayenne pepper to your spices.
Tips for Selecting Fresh Chicken
Choosing fresh chicken makes a big difference. Look for chicken that is pink and moist. Avoid any that looks dull or has dark spots. Smell is also key; fresh chicken should have no strong odor. If you can, buy from a trusted butcher or local farm. Always inspect the sell-by date. Fresh chicken should be used quickly for best taste.

Step-by-Step Instructions
Prepping the Oven and Baking Sheet
First, you need to preheat your oven to 400°F (200°C). This temperature helps the chicken bites become crispy. While the oven heats, line a baking sheet with parchment paper. This paper keeps the bites from sticking.
Mixing the Coating
In a mixing bowl, combine the breadcrumbs, grated Parmesan cheese, dried Italian herbs, garlic powder, smoked paprika, salt, and pepper. Stir until everything blends well. This mixture creates a tasty coating.
Coating the Chicken Bites
Take your chicken pieces and dip each one into the beaten eggs. Make sure each piece gets fully coated. Then, roll the chicken in the breadcrumb mixture. Press gently to ensure the coating sticks well. This step is key for a crunchy bite.
Baking Time and Temperature
Place the coated chicken bites on the prepared baking sheet. Leave space between each piece. This air helps them cook evenly. Bake for 15-20 minutes. You want them golden brown and crispy. Check the internal temperature; it should reach 165°F (74°C). Enjoy the smell while they bake!
Tips & Tricks
Achieving Maximum Crispiness
To get your chicken bites super crispy, use panko breadcrumbs. They add great texture. Make sure to space them on the baking sheet. This helps hot air circulate. You can also mist them lightly with olive oil before baking. This extra step will help achieve a golden crust.
Flavor Enhancements
Add a twist to the flavor by mixing in some spices. Try cayenne pepper for heat or lemon zest for brightness. Fresh herbs can also elevate the taste. Use parsley or basil and mix them into the breadcrumb coating. These small changes make a big impact.
Common Mistakes to Avoid
One common mistake is overcrowding the baking sheet. It can lead to soggy bites. Always keep space between each piece. Another mistake is not preheating the oven. This can affect cooking time and texture. Lastly, avoid skipping the egg wash. It helps the coating stick and ensures a crispy bite.
Pro Tips
- Use Fresh Herbs: Fresh herbs can elevate the flavor profile of your chicken bites. Consider using fresh basil, parsley, or thyme for an aromatic touch.
- Let It Rest: Allow the chicken bites to rest for a few minutes after baking. This helps retain moisture and enhances the overall texture.
- Experiment with Spices: Feel free to customize the seasoning mix by adding spices like cayenne pepper for heat or lemon zest for brightness.
- Batch Cooking: Make a larger batch and freeze leftovers in an airtight container. They reheat well in the oven for a quick snack or meal.

Variations
Different Flavor Profiles (e.g., Spicy, BBQ)
You can change the flavor of your chicken bites easily. For a spicy kick, add cayenne pepper or hot sauce to the egg mixture. This will give your bites a nice heat. If you love BBQ, mix BBQ sauce into the egg before dipping the chicken. Then, coat the chicken in a blend of breadcrumbs and smoked paprika for that sweet and smoky taste.
Adding Vegetables or Other Proteins
You can make these bites even better by adding veggies. Try mixing in finely chopped bell peppers or zucchini with the breadcrumbs. This adds color and nutrients. You can also swap chicken for shrimp or tofu for a fun twist. Just remember to adjust the baking time based on your new protein choice.
Gluten-Free Options
Want a gluten-free version? Use gluten-free breadcrumbs instead of regular ones. You can also make your own by grinding gluten-free crackers or oats. Check the labels to ensure all ingredients are gluten-free. This way, everyone can enjoy your crispy chicken bites!
Storage Info
Best Practices for Storing Leftovers
To keep your chicken bites fresh, store them in an airtight container. Let them cool down before sealing. This way, they won’t get soggy from steam. Leftovers can stay good in the fridge for up to three days. If you want to keep them longer, freezing is a great option.
Reheating Tips for Optimal Texture
When you reheat chicken bites, use the oven if possible. Preheat it to 350°F (175°C). Place the bites on a baking sheet lined with parchment paper. This will help them regain their crispiness. Heat for about 10-15 minutes or until they’re warm. Avoid microwaving, as it can make them chewy.
Freezing Chicken Bites
To freeze chicken bites, let them cool completely first. Arrange them in a single layer on a baking sheet and freeze for about an hour. This prevents them from sticking together. Once frozen, transfer them to a freezer-safe bag. They can last for up to three months in the freezer. When ready to eat, bake them straight from the freezer. Just add a few extra minutes to the cooking time.
FAQs
How long do I bake chicken bites?
You bake chicken bites for 15 to 20 minutes. Set your oven to 400°F (200°C). Check the chicken when it turns golden brown and crispy. The internal temperature should read 165°F (74°C) for safety.
Can I use frozen chicken for this recipe?
Yes, you can use frozen chicken, but it must be thawed first. This ensures even cooking and helps the coating stick well. Always thaw the chicken in the fridge overnight for best results.
What to serve with oven-baked chicken bites?
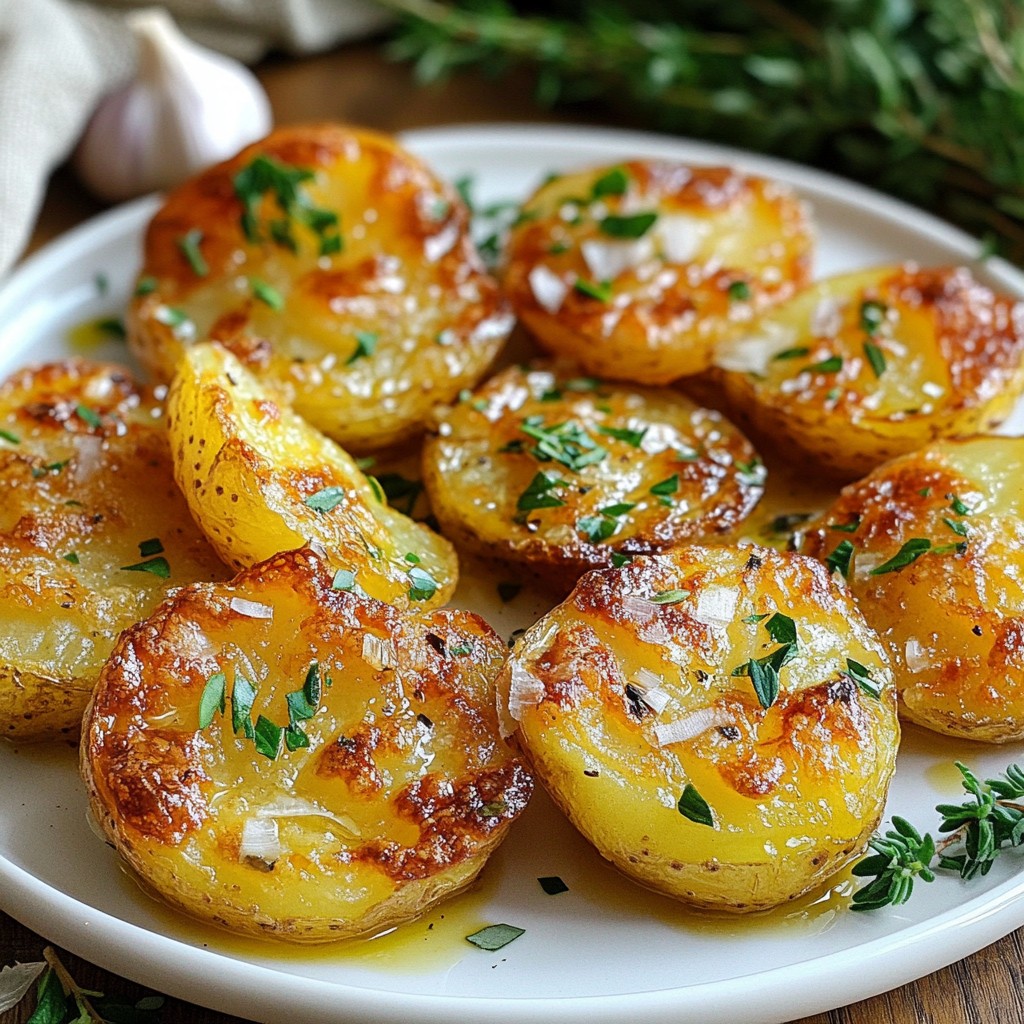
These chicken bites pair well with many sides. Try serving them with marinara sauce or honey mustard for dipping. Fresh veggies or a light salad work great, too. You can also add some crispy fries or roasted potatoes.
How to tell when the chicken is done cooking?
The best way to tell if the chicken is done is by using a meat thermometer. When it reaches 165°F (74°C), it’s safe to eat. You can also cut into a piece; the meat should be white, not pink.
Can I make these chicken bites ahead of time?
Yes, you can prep the chicken bites ahead of time. Coat the chicken and store it in the fridge for up to 24 hours. Just bake them when you’re ready for a tasty treat. They stay crispy and delicious!
This article covered the key elements for making tasty oven-baked chicken bites. We discussed the best ingredients and kitchen tips. You can achieve great texture with the right methods. Remember to experiment with flavor variations and keep your leftovers fresh. Use this guide to perfect your chicken bites, and you’ll impress everyone at the table. Keep these tips in mind for a fun cooking experience, and enjoy every bit

Crispy Herb-Packed Oven Baked Chicken Bites
Ingredients
- 1 pound boneless, skinless chicken breast, cut into bite-sized pieces
- 1 cup breadcrumbs (panko recommended for an extra crunch)
- 0.5 cup finely grated Parmesan cheese
- 1 tablespoon dried Italian herbs (a blend of oregano, basil, and thyme)
- 1 teaspoon garlic powder
- 0.5 teaspoon smoked paprika
- to taste salt and freshly ground black pepper
- 2 large eggs, beaten until frothy
- 1 tablespoon extra virgin olive oil
- to taste fresh parsley, finely chopped (for garnish)
Instructions
- Preheat your oven to 400°F (200°C) and prepare a baking sheet by lining it with parchment paper.
- In a mixing bowl, combine the breadcrumbs, Parmesan cheese, dried Italian herbs, garlic powder, smoked paprika, salt, and pepper. Mix thoroughly.
- In a separate bowl, beat the eggs until frothy, then stir in the olive oil.
- Dip each piece of chicken into the egg mixture, then roll in the breadcrumb mixture, pressing gently.
- Arrange the breaded chicken bites on the prepared baking sheet, spaced evenly.
- Bake for 15-20 minutes, or until golden brown and the internal temperature reaches 165°F (74°C).
- Remove from the oven and allow to cool for a few minutes. Sprinkle with fresh parsley before serving.


![- Tortilla chips - Black beans - Corn kernels - Cherry tomatoes - Avocado - Cheddar cheese (or dairy-free alternative) - Pickled jalapeños - Red onion - Fresh cilantro - Olive oil - Ground cumin - Smoked paprika - Salt and pepper - Optional toppings: Sour cream or Greek yogurt, lime wedges To make loaded veggie nachos, gather fresh and flavorful ingredients. I love using crispy tortilla chips as the base. They hold all the toppings without getting soggy. Black beans add protein and texture. Rinsing and draining them keeps the flavors bright. Corn kernels bring sweetness and crunch. I often use fresh corn when it’s in season, but canned works well too. Next, halved cherry tomatoes burst with flavor. Diced avocado brings creaminess. I prefer ripe avocados for the best taste. Cheddar cheese is a must for gooey goodness. You can use a dairy-free version if needed. Pickled jalapeños give a nice kick, so add as many as you like. Red onion adds a sharp taste and crunch. Fresh cilantro brings brightness. I love the fresh herb flavor it adds. For the dressing, use olive oil, ground cumin, and smoked paprika. They bring warmth and depth. Lastly, don’t forget salt and pepper to enhance all the flavors. You can serve these nachos with optional toppings like sour cream or Greek yogurt. Lime wedges add a zesty finish. For the full recipe, check out the Ultimate Loaded Veggie Nachos. Start by preheating your oven to 350°F (175°C). This temperature helps the cheese melt just right. While the oven warms up, grab a mixing bowl for the veggies. Combine 1 cup of black beans, 1 cup of corn, 1 cup of halved cherry tomatoes, 1 ripe diced avocado, and 1/4 cup of chopped red onion. Drizzle 1 tablespoon of olive oil over this mix. Sprinkle in 1 teaspoon of ground cumin, 1 teaspoon of smoked paprika, and add salt and pepper to taste. Gently toss to blend the flavors. Now take a large baking sheet. Spread an even layer of tortilla chips across it. Make sure they are not crowded. This helps the chips stay crisp. Next, generously spoon the veggie mixture over the chips. Try to cover as many chips as you can. This way, each bite is packed with flavor. Sprinkle 1 cup of shredded cheddar cheese evenly over the veggie-covered chips. If you like spice, add pickled jalapeños on top. Place the baking sheet in your preheated oven. Bake for about 10 to 15 minutes. Watch closely until the cheese is melted and bubbly, but not burnt. Once baked, carefully take the nachos out of the oven. Garnish with 1/4 cup of freshly chopped cilantro. Serve them with lime wedges on the side. For a creamy touch, add sour cream or Greek yogurt. These extra touches make every bite a treat. Serve them on a large platter or in bowls. Enjoy this savory delight with friends or family! For the full recipe, check the detailed instructions above. Choose the right cheese for your nachos. I love using cheddar, but you can try Monterey Jack or a dairy-free alternative. These cheeses melt well and add rich flavor. For the best texture, shred your cheese fresh from the block. Pre-shredded cheese often has anti-clumping agents that can affect melting. When baking, keep an eye on the nachos. You want the cheese to bubble and slightly brown, which usually takes 10 to 15 minutes at 350°F. To kick up the flavor, think about adding spices. A pinch of chili powder or a dash of hot sauce can do wonders. If you enjoy tang, drizzle some lime juice over the nachos before serving. Fresh herbs like cilantro or green onions can also brighten the dish. Chopped jalapeños, fresh or pickled, add heat and flavor. Experiment with different combinations to find your favorite mix. I often serve nachos on a large platter, letting everyone dig in. For individual servings, use small bowls. This makes for a fun, personal touch. Pair your nachos with drinks like soda, beer, or a margarita for a complete experience. Dips like guacamole or salsa work great on the side too. They add extra flavor and keep the meal exciting. Remember to keep lime wedges handy for a fresh burst of flavor. For the complete recipe, check out the [Full Recipe]. {{image_4}} You can easily make loaded veggie nachos vegan. First, swap the cheddar cheese for a dairy-free cheese. Look for brands made from nuts or soy. These options melt well and taste great. For extra vegan toppings, try using cashew cream instead of sour cream. You can also add sliced black olives, diced bell peppers, or fresh spinach. These ingredients boost flavor and nutrients. To make gluten-free nachos, choose tortilla chips marked gluten-free. Many brands offer this option. Always check the label to ensure safety. You can also use other bases like baked sweet potatoes or zucchini slices. These alternatives add a unique twist and keep things healthy. Get creative with your toppings! You can add other veggies like mushrooms, bell peppers, or even roasted zucchini. For proteins, consider topping with lentils, chickpeas, or tofu. Specialty toppings can add unique flavors. Try fresh herbs like basil or mint, or drizzle with hot sauce for a kick. You can also scatter some pomegranate seeds for a sweet touch. After enjoying your loaded veggie nachos, store any leftovers properly. This helps maintain their taste and texture. Start by letting the nachos cool down. Place them in an airtight container. If you have extra toppings, like sour cream or avocado, store those separately. Use a small bowl or a bag to keep them fresh. Refrigerate the container within two hours. The nachos will stay good for about three days. To reheat your nachos, use the oven for best results. Preheat it to 350°F (175°C). Spread the nachos on a baking sheet in a single layer. Heat them for about 10 minutes. This helps revive their crunch. If you’re in a hurry, the microwave works too. Use a microwave-safe plate and heat for 30 seconds at a time. Keep an eye on them to avoid sogginess. Enjoy your nachos as if they were just made! Making homemade tortilla chips is easy and fun! Start with corn tortillas. Cut each tortilla into six triangles. Heat oil in a pan over medium heat. When the oil is hot, add a few triangles. Fry them until they turn golden brown. Remove them and place them on paper towels to drain excess oil. Sprinkle with salt while they are hot. Enjoy your fresh chips with loaded veggie nachos! Yes, you can prepare some parts in advance. You can chop the veggies and mix them a few hours before cooking. Store the veggie mixture in the fridge. However, I recommend adding the chips and cheese just before baking. This keeps the chips crispy and delicious! You can get creative with toppings! Try adding: - Sliced black olives - Diced bell peppers - Sliced radishes - Fresh spinach - Grilled chicken or beef - Different types of cheese like pepper jack or feta These options add fun flavors and textures to your nachos. Freezing nachos is tricky. I do not recommend freezing fully assembled nachos. The chips become soggy when thawed. However, you can freeze the veggie mixture and cheese separately. When you’re ready to eat, simply bake fresh chips and top them with the thawed mixture. It’s a great way to enjoy nachos anytime! For the full recipe, check out the Ultimate Loaded Veggie Nachos. In this blog post, I covered how to make delicious nachos, highlighting key ingredients and simple steps. You learned about assembling layers and baking for the best results. I shared tips for perfect cheese melting, flavor boosts, and customizable options to fit your needs. Don't forget storage advice and reheating methods to enjoy leftovers. Nachos are easy to make and adapt, so get creative and enjoy! Your nacho journey starts here, and I hope you relish every bite.](https://joymealplan.com/wp-content/uploads/2025/06/0185d0b5-b46a-4930-af15-477191a5be30-768x768.webp)
![To make whipped feta dip, you need some key ingredients: - 1 cup crumbled feta cheese - 1/2 cup softened cream cheese - 1/4 cup creamy Greek yogurt - 2 tablespoons extra virgin olive oil - 1 tablespoon fresh lemon juice - 2 cloves garlic, minced finely - 1 teaspoon fresh thyme leaves (or 1/2 teaspoon dried thyme) - Salt and black pepper to taste These ingredients create a smooth and creamy base. The feta gives it a salty taste. The cream cheese and yogurt add richness. Olive oil adds a nice touch of flavor. Lemon juice brightens the dip, while garlic and thyme add depth. Toppings can elevate your dip and add color. Here are some great options: - Halved cherry tomatoes - Pitted olives - A sprinkle of fresh herbs Adding these toppings not only enhances the taste but also makes your dip look beautiful. Fresh herbs like parsley or basil pair well with feta's flavor. You can customize this dip with some easy swaps. If you want a lighter dip, use low-fat cream cheese or yogurt. For a vegan version, try using cashew cream instead of cream cheese. You can also use fresh herbs like oregano or dill in place of thyme. These changes let you enjoy the dip while fitting your taste or dietary needs. For the full recipe, you can refer to the recipe section above. Start by gathering your cheese ingredients. You need crumbled feta, cream cheese, and Greek yogurt. In a large bowl, mix them together. Make sure the cream cheese is soft. This helps it blend well. Use a spatula to combine them first. This step makes blending easier later. Next, grab your electric mixer or food processor. Blend the cheese mixture on medium speed. This should take about 2-3 minutes. You want it to be smooth and creamy. If you see lumps, keep blending. The goal is to make it fluffy. After blending, add olive oil, lemon juice, minced garlic, and thyme. Sprinkle in some salt and pepper. Blend again until everything is mixed well. Taste your dip and adjust seasoning if needed. When ready, transfer it to a nice bowl. Make a small well in the center and drizzle olive oil. For a pretty touch, add halved cherry tomatoes, olives, or fresh herbs on top. Serve it with pita chips or fresh veggies. Enjoy this creamy delight! For the full recipe, check out the Whipped Feta Delight Dip. To get the best texture, start with room-temperature cream cheese. It mixes better. Use a mixer or food processor for a smooth finish. Blend the cheeses for 2-3 minutes. This gives you a light and fluffy dip. If you want it creamier, add more yogurt or olive oil. The key to great flavor lies in your seasonings. Fresh garlic adds a strong kick. I love using fresh thyme. It brings a nice herbal touch. A squeeze of lemon juice brightens the dip. Taste as you go; adjust salt and pepper to your liking. If you want a little heat, add a pinch of red pepper flakes. Serve your whipped feta dip with crispy pita chips. Fresh veggies like carrots and cucumbers are great too. For a fun twist, use crusty bread. Garnish with cherry tomatoes or olives for color. This adds a nice pop to your dish. Explore different serving bowls to make it look fancy. You can find the Full Recipe above for more details. {{image_4}} To create a Mediterranean twist, add sun-dried tomatoes and black olives. These ingredients bring a burst of flavor that pairs perfectly with feta. You might also include fresh basil or mint for a refreshing note. Serve this dip with warm pita bread or crunchy veggies for a delightful snack. If you love heat, consider adding red pepper flakes or diced jalapeños. This will give your dip a fiery kick. You can also mix in a splash of hot sauce for an extra layer of flavor. Try serving with spicy tortilla chips or crispy celery sticks for a fun twist. For a vegan version, swap the feta and cream cheese for silken tofu and nutritional yeast. Blend them together with olive oil and lemon juice. This mix creates a creamy base that tastes great. Add your favorite herbs and spices for added flavor. Serve with fresh veggies for a healthy snack. Explore the [Full Recipe] to make your own whipped feta dip and customize it with these variations! To store whipped feta dip, place it in an airtight container. This keeps moisture out and flavors in. Make sure to press plastic wrap directly onto the dip before sealing the container. This extra layer helps prevent air from changing the dip's taste. You can enjoy whipped feta dip cold or warm. If you prefer it warm, gently heat it in the microwave. Start with 15 seconds, stir, and then heat in short bursts. Be careful not to overheat; you want it creamy, not hot. Whipped feta dip lasts about 4 to 5 days in the fridge. Check for any off odors or mold before using it. If it smells sour or looks different, toss it out. Freshness is key for this tasty dip! The best way to serve whipped feta dip is with a variety of dippers. I love using crispy pita chips, fresh veggies, or crusty bread. You can also pair it with crackers for added crunch. Place the dip in a nice bowl and drizzle some olive oil on top. Add colorful toppings like cherry tomatoes or olives for a pop of color. This makes the dip look great and taste even better. Yes, you can make whipped feta dip ahead of time. It stays fresh in the fridge for up to three days. Just store it in an airtight container. When you’re ready to serve, give it a quick stir. This keeps it creamy and smooth. If it thickens, add a little olive oil or yogurt to loosen it up. This way, you save time when guests arrive. If your dip is too salty, don't worry. You can fix it! Add a little more cream cheese or Greek yogurt to balance the salt. Blend it well to mix. You can also add a splash of lemon juice. This brings freshness and brightens the flavor. If you’re in a pinch, a pinch of sugar can help too. Taste as you go, so you get the flavor just right. We explored all about whipped feta dip, from essential ingredients to fun variations. You learned how to create a creamy dip that impresses friends. Remember, you can customize toppings and even make vegan options. Proper storage keeps your dip fresh and tasty. With these tips, whipping up this dish is easy and fun. Enjoy sharing your whipped feta dip at your next gathering. Trust me, it’s a crowd-pleaser!](https://joymealplan.com/wp-content/uploads/2025/07/35a48388-1c52-4076-af09-d3ade9d891c4-768x768.webp)
. Spicy Dill Pickle Hummus combines chickpeas, tahini, and pickles for a flavorful dip. You can enhance the taste with garlic, olive oil, and spices like smoked paprika. Remember to adjust flavors to your liking and store it right for freshness. This hummus is versatile; try variations with jalapeños or different herbs. It’s easy to make, nutritious, and perfect for snacks or meals. Enjoy creating this tasty treat and share it with friends!](https://joymealplan.com/wp-content/uploads/2025/07/3a5f2aa9-5489-447e-8fd1-d193bfa563b1-768x768.webp)