Oven Baked Zucchini Chips Crunchy and Flavorful Snack

Are you ready for a healthy snack that’s crunchy and full of flavor? Oven baked zucchini chips are the answer! I’ll guide you step by step, making this tasty treat easy and fun. With just a few simple ingredients and some helpful tips, you’ll achieve a perfect snack that everyone will love. Let’s turn those zucchinis into something special that’s both good for you and satisfies your cravings!
Ingredients
Main ingredients for Oven Baked Zucchini Chips
To make tasty zucchini chips, you will need:
– 2 medium zucchinis
– 2 tablespoons olive oil
– 1 teaspoon garlic powder
– 1 teaspoon onion powder
– 1 teaspoon smoked paprika
– ½ teaspoon sea salt
– ½ teaspoon black pepper
These basic ingredients create a flavorful base for your chips, making them both crunchy and delicious.
Optional ingredients for extra flavor
To add a cheesy twist, consider these options:
– ¼ cup grated Parmesan cheese
– Nutritional yeast (for a vegan option)
These add-ons boost the flavor of your chips. They make the snack more fun and tasty.
Tools needed for preparation
You will need a few tools to make the process smooth:
– A sharp knife or mandoline slicer
– A large mixing bowl
– A baking sheet
– Parchment paper
Using the right tools makes slicing and baking easy. With these ingredients and tools, you will create a crunchy, flavorful snack.
Step-by-Step Instructions
Preparation of zucchini and seasoning
Start by washing the zucchinis well. This removes any dirt and ensures clean chips. Slice them into thin rounds, about 1/8 inch thick. A mandoline slicer can help you make even slices quickly. Next, take a large bowl and add the zucchini slices. Drizzle 2 tablespoons of olive oil over them. Sprinkle in 1 teaspoon of garlic powder, 1 teaspoon of onion powder, 1 teaspoon of smoked paprika, ½ teaspoon of sea salt, and ½ teaspoon of black pepper. Toss the zucchini gently to coat each slice evenly in the seasonings.
Baking steps for optimal crispiness
Preheat your oven to 225°F (110°C). Line a large baking sheet with parchment paper. Arrange the seasoned zucchini slices in a single layer on the sheet, making sure they don’t overlap. This helps them bake evenly. For extra flavor, you can sprinkle ¼ cup of grated Parmesan cheese or nutritional yeast on top. Place the baking sheet in the oven and bake for 2 to 2.5 hours. Flip the chips halfway through to ensure they crisp up on both sides.
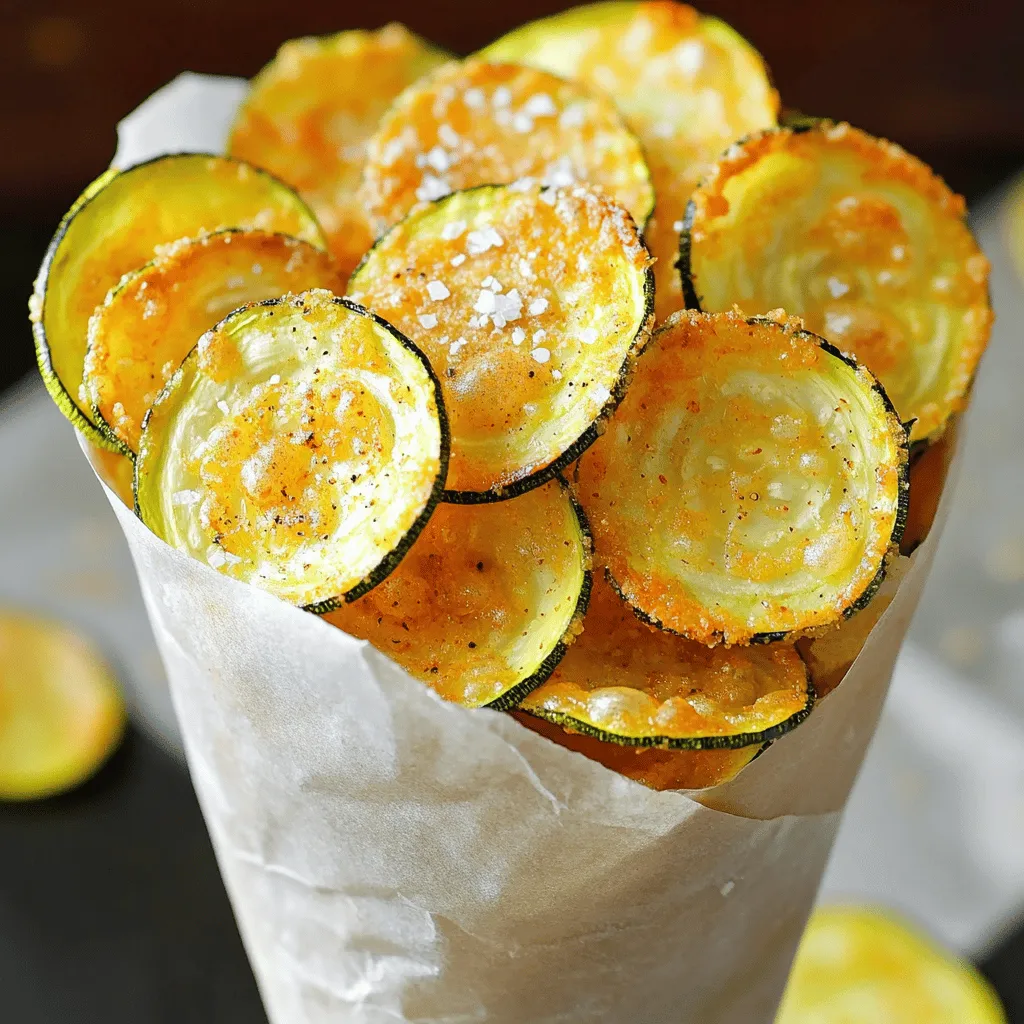
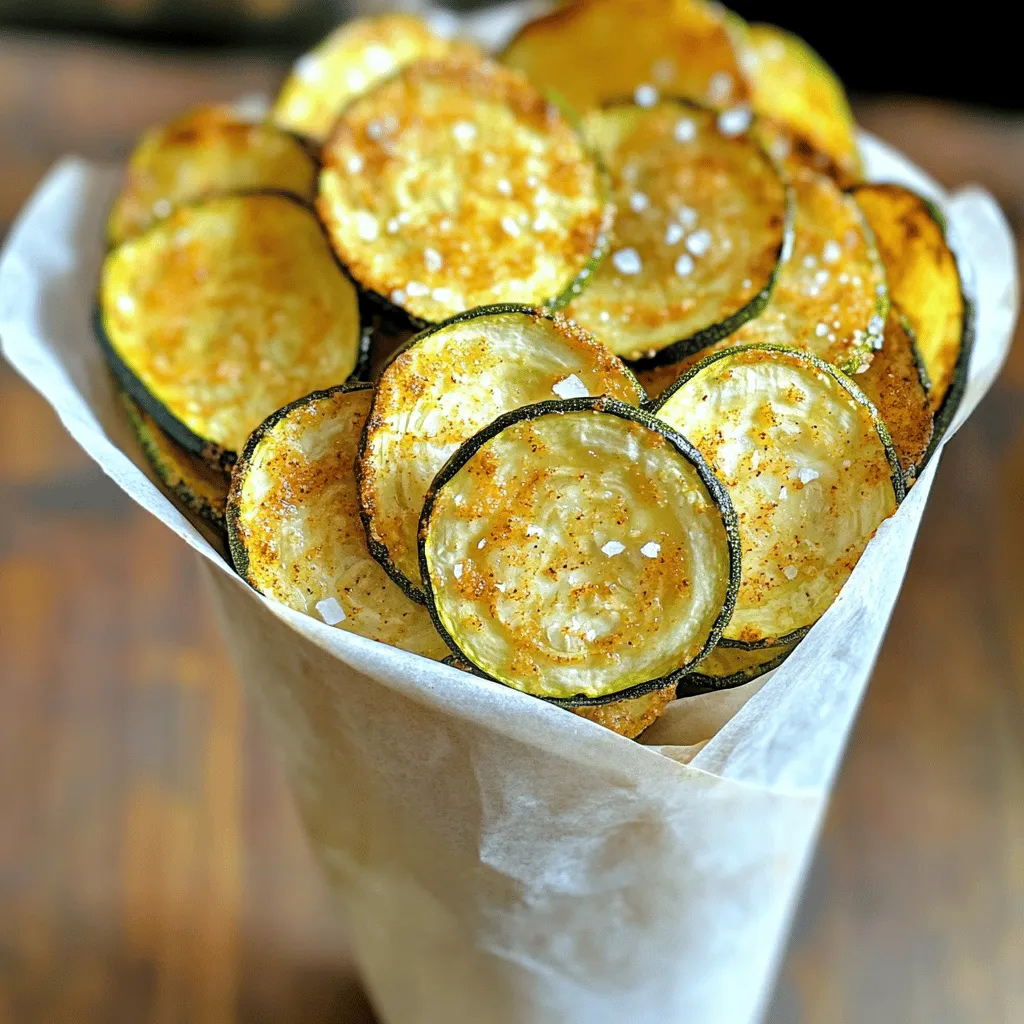
Cooling and serving suggestions
After baking, remove the zucchini chips from the oven. Let them cool on the baking sheet for about 10 minutes. This cooling time helps them become even crispier. For a fun presentation, serve the chips in a cone made from parchment paper. Drizzle with a bit of olive oil and finish with a sprinkle of sea salt. Enjoy your crispy, healthy snack!
Tips & Tricks
Ideal thickness for zucchini slices
The best thickness for zucchini slices is about 1/8 inch. This size helps them bake evenly. If they are too thick, they may stay soft. If they are too thin, they can burn easily. Using a mandoline slicer is great for making even slices. This tool ensures all your chips cook at the same rate.
Best baking techniques for crispiness
To get crispy zucchini chips, you need low heat and slow cooking. Set your oven to 225°F (110°C). This low temperature lets the moisture escape slowly. Space the zucchini slices out on the baking sheet. Make sure they don’t overlap. Flipping them halfway through baking helps them crisp up on both sides.
Common mistakes to avoid when making zucchini chips
One common mistake is not drying the zucchini. After washing, pat them dry with a towel. Extra moisture can make your chips soggy. Another mistake is overcrowding the baking sheet. This prevents air from circulating around each slice. Lastly, don’t skip the cooling time after baking. Letting them rest helps them firm up and become crunchier.

Variations
Flavor variations with different seasonings
You can change the taste of your zucchini chips by trying new seasonings. Instead of garlic powder, use onion powder or chili powder for a spicy kick. You might also enjoy using Italian herbs like oregano and basil. For a smoky flavor, add a hint of chipotle powder. Experiment with curry powder for an exotic twist. Each seasoning brings a unique flavor, making your chips fun to eat.
Alternative garnishes or toppings
Adding garnishes can elevate your zucchini chips. After baking, sprinkle fresh herbs like parsley or cilantro for a burst of color and flavor. You might also drizzle a little balsamic glaze on top for a sweet and tangy touch. If you love cheese, try crumbled feta or goat cheese instead of Parmesan. For a vegan option, nutritional yeast adds a cheesy flavor without dairy.
Using other vegetables for chips
Zucchini isn’t the only veggie you can use. Try making chips from sweet potatoes, beets, or carrots. Each vegetable brings its own taste and texture. Slice them thin, just like zucchini, and follow the same baking steps. Sweet potato chips have a natural sweetness, while beet chips offer an earthy flavor. Mixing different veggies can also create a colorful and tasty snack.
Storage Info
How to store leftover zucchini chips
After enjoying your zucchini chips, store any leftovers in an airtight container. This helps keep them fresh and crispy. If you want to keep them extra crunchy, place a paper towel in the container. The towel absorbs moisture and prevents sogginess. You can store them at room temperature for one to two days.
Best methods for reheating
When you want to enjoy your leftover zucchini chips, the oven is the best option. Preheat your oven to 350°F (175°C). Spread the chips on a baking sheet in a single layer. Heat them for about 5 to 10 minutes. This method helps restore their original crunch. Avoid using the microwave; it makes them soft and chewy.
Shelf life and signs of spoilage
Zucchini chips can last for about three days when stored properly. If they start to lose their crunch or become soft, it’s time to toss them out. Look for any signs of mold or an off smell. These are clear signs that they have spoiled. Enjoy your crispy snack while it’s fresh for the best taste!
FAQs
Can I use frozen zucchini for this recipe?
No, I do not recommend using frozen zucchini for this recipe. Frozen zucchini has more moisture than fresh zucchini. This extra moisture will make it hard to achieve a crispy texture. Fresh zucchini gives the best results for oven-baked chips.
What is the nutritional value of zucchini chips?
Zucchini chips are low in calories and high in nutrients. One serving of zucchini chips contains:
– Calories: About 50
– Fat: 3g
– Carbohydrates: 6g
– Fiber: 1g
– Protein: 2g
Zucchini is also rich in vitamins A and C, potassium, and antioxidants. This makes zucchini chips a healthy snack option.
How can I make zucchini chips without cheese?
You can easily make zucchini chips without cheese. Just skip the Parmesan or nutritional yeast. Focus on using spices to add flavor. Garlic powder, onion powder, and smoked paprika work great. You can also add a squeeze of lemon juice after baking for a fresh taste. This keeps your zucchini chips tasty and dairy-free.
Zucchini chips are a tasty snack that you can make easily at home. We covered key ingredients needed, tools required, and step-by-step baking instructions. I shared tips for crispiness and mistakes to avoid. Also, we explored fun variations with flavors and other veggies. Finally, I discussed how to store them for later. Enjoying homemade zucchini chips is simple and fun. Try making them your own, and delight in a healthy snack option!


![- 2 large chicken breasts, diced into bite-sized pieces - 1 tablespoon olive oil - 1 teaspoon taco seasoning - 1 teaspoon smoked paprika - 1 jalapeño, finely chopped - 1 cup corn kernels - 1 cup black beans - 1 cup shredded cheddar cheese - 1 cup shredded Monterey Jack cheese - 4 large flour tortillas - Salt and pepper, to taste - 1/4 cup fresh cilantro, chopped - Sour cream and salsa, for serving When I cook spicy chicken quesadillas, I focus on fresh and simple ingredients. The chicken breasts are the star here. I like to cut them into small pieces for quick cooking. This way, they soak up all the flavors from spices like taco seasoning and smoked paprika. Next, I add a jalapeño for heat, but you can remove the seeds for less spice. Corn and black beans add sweetness and texture. Together, they create a colorful filling. Cheese is crucial for that melty goodness. I mix cheddar and Monterey Jack for a creamy blend. Don’t forget the large flour tortillas; they wrap everything up nicely. Finally, I season with salt and pepper. Fresh cilantro is my go-to garnish. It brightens the dish. I serve these quesadillas with sour cream and salsa. These additions bring out the best flavors. For the full recipe, check the details above. - Heat olive oil in a large skillet. - Add diced chicken and season with taco seasoning and smoked paprika. - Cook until chicken is thoroughly cooked, about 7-10 minutes. In this step, make sure the skillet is hot enough. You want the chicken to sizzle when it hits the pan. The taco seasoning adds a great flavor. Smoked paprika gives a nice smoky touch. Stir the chicken often. This helps it cook evenly. You’ll know it’s ready when there’s no pink left. - Stir in chopped jalapeño, corn, and black beans. - Cook for an additional 2-3 minutes. Now, it’s time to boost the flavor. Adding jalapeños brings some heat. If you want it milder, remove the seeds. The corn adds sweetness, while black beans give protein. Mix everything well. Let them cook together for a few minutes. This melds the flavors nicely. - Place flour tortilla in a skillet and sprinkle with cheese. - Add chicken and vegetable mixture and fold. - Cook until golden brown on both sides. Grab a large skillet again. Place one tortilla in it and sprinkle half the cheese on top. Next, scoop some of the chicken and vegetable mix onto one half. Fold the tortilla over. This creates a pocket of goodness! Cook until the bottom is golden brown. Flip it carefully. Both sides should be crispy and brown. - Slice quesadillas into wedges. - Garnish with cilantro and serve with sour cream and salsa. Once cooked, take the quesadilla out. Let it cool for a minute. Then, slice it into wedges. This makes dipping easy. Sprinkle fresh cilantro on top for a burst of flavor. Serve with sour cream and salsa on the side. These add a creamy and tangy element to your dish. For the full recipe, check out the details above! - Ensure chicken is thoroughly cooked to avoid any raw texture. - Use a non-stick skillet for easier flipping. When cooking chicken, make sure it reaches an internal temperature of 165°F. This keeps it safe and tasty. I often check by cutting a piece in half to see if it's no longer pink. A non-stick skillet helps prevent the quesadillas from sticking. This way, flipping them becomes a breeze. - Experiment with different cheeses for added flavor. - Adjust jalapeño amount based on spice preference. Trying different cheeses can change the whole dish. You might love a mix of pepper jack and cheddar for a spicy kick! If you like it mild, reduce the jalapeño. On the other hand, if you crave heat, toss in more. Every bite should be just right for you. - Pair with Mexican rice or a fresh salad. - Serve with lime wedges for a citrusy twist. I love serving these quesadillas with Mexican rice. It adds a nice touch and makes the meal more filling. A fresh salad with crunchy veggies offers a great contrast. Don’t forget lime wedges! A squeeze of lime adds a bright flavor that complements the spices perfectly. For the full recipe, check out the section above. {{image_4}} You can make spicy chicken quesadillas vegetarian by swapping chicken for grilled vegetables or tofu. Try using bell peppers, zucchini, or mushrooms. These veggies will soak up the spices and add great taste. Tofu gives a nice texture and protein. Just make sure to season them well with taco seasoning. If you prefer other meats, use beef or shrimp instead of chicken. Both will bring their own unique flavors. For beef, consider using ground beef or steak strips. For shrimp, use peeled and deveined shrimp. Explore different marinades for varied flavors. A spicy marinade can add excitement to your filling! Cheese is key in quesadillas. You can try pepper jack cheese for some extra heat. Its creamy texture matches well with the spicy filling. Goat cheese is another option for a creamy twist. It melts nicely and adds a tangy flavor. Mixing different cheeses can create a rich, delicious taste! For the full recipe, check out the [Full Recipe]. Store any leftover quesadillas in an airtight container. They will last in the fridge for up to 3 days. This way, you can enjoy them again and save time on cooking. You can freeze uncooked quesadillas for later use. Just prepare them as you normally would, but do not cook them. Wrap each quesadilla tightly in plastic wrap. Cooked quesadillas can also be frozen for up to one month. This is a great way to have a quick meal ready. To reheat, use a skillet for the best texture. Heat the skillet over medium heat and add the quesadilla. Cook until heated through and crispy. If you need a quick option, a microwave works too. Just place the quesadilla on a plate, cover it with a paper towel, and heat for about 30 seconds to 1 minute. Enjoy your tasty meal! You can use beans or grilled vegetables as a filling. Black beans work well. They add protein and fiber. Grilled peppers or zucchini also give a great taste. This option is tasty and healthy. Common sides include guacamole, rice, or a fresh salsa. Guacamole adds creaminess. Rice provides a nice base. Fresh salsa gives a tangy kick. These sides make your meal complete and fun. Yes, corn tortillas can be used, but they may require more care while cooking. They can break easily, so handle them gently. Warm them first to soften. This will help with folding and cooking. Add sliced jalapeños or chopped habaneros to the filling. These peppers boost the heat level. You can also use spicy cheese like pepper jack. This adds flavor and spice all at once. For the full recipe, check out the details above. This blog post discussed how to make delicious spicy chicken quesadillas. We started with the main and additional ingredients, like chicken, jalapeños, corn, and beans. Next, I detailed a step-by-step cooking guide, from preparing the chicken to serving the filled quesadillas. I also shared helpful tips, variations, and storage methods to enhance your experience. Make these quesadillas your own by trying new ingredients. Enjoy the process and share them with friends!](https://joymealplan.com/wp-content/uploads/2025/06/eac4fc54-0f3b-4254-8def-89065c9b0855-768x768.webp)

![To make Buffalo Cauliflower Bites, you'll need the following ingredients. Each item plays a key role in creating that crispy and flavorful snack we all love. - 1 large head of cauliflower, cut into bite-sized florets - 1 cup all-purpose flour - 1 cup almond milk (or your choice of non-dairy milk) - 1 teaspoon garlic powder - 1 teaspoon onion powder - 1 teaspoon smoked paprika - 1/2 teaspoon salt - 1/2 teaspoon black pepper - 1 cup buffalo sauce (store-bought or homemade) - 2 tablespoons coconut oil, melted When choosing your ingredients, I suggest using fresh cauliflower. It gives the best texture and taste. For flour, any brand works, but all-purpose is great for a crispy batter. Almond milk adds a nice touch, but feel free to use your favorite non-dairy option. For buffalo sauce, you can buy it or make your own. Homemade sauce allows you to adjust the heat. Using high-quality spices, like smoked paprika, can elevate your dish. I recommend checking for freshness on all spices. This ensures your bites are packed with flavor. If you want a unique twist, try different sauces or spices. You can even add a little more garlic powder if you love that flavor. Now that you have your list ready, let's move on to the next steps in the recipe! 1. Start by preheating your oven to 450°F (230°C). This heat will make the cauliflower crispy. Line a baking sheet with parchment paper. This step helps with easy clean-up. 2. In a large bowl, combine the all-purpose flour, almond milk, garlic powder, onion powder, smoked paprika, salt, and black pepper. Use a whisk to mix until you have a smooth batter. The batter should not be too thick or too runny. 3. Now, take each cauliflower floret and dip it into the batter. Make sure it is coated well on all sides. Place the battered florets on the baking sheet in a single layer. Repeat until all florets are coated. 1. Bake the cauliflower in the oven for 20 minutes. This will make the florets tender. The batter will also start to get crispy. 2. While the cauliflower bakes, mix the buffalo sauce and melted coconut oil in another bowl. Stir well to combine. This sauce will give the bites their famous flavor. 3. After 20 minutes, take the baking sheet out of the oven. Carefully toss the baked cauliflower in the buffalo sauce mixture. Make sure each piece is coated evenly. 4. Spread the coated florets back onto the baking sheet. Return them to the oven for another 10 to 15 minutes. Keep an eye on them for your desired crispiness. 5. Once they are baked to your liking, take them out of the oven. Let the cauliflower bites cool for a few minutes before serving. This resting time helps the flavors settle. Now you're ready to enjoy these crispy and flavorful buffalo cauliflower bites! Check out the Full Recipe for more details. To make the batter just right, start with the flour. Use all-purpose flour for a good base. Then mix in your almond milk slowly. This helps you see the thickness. You want it to be smooth, not too thick or thin. A good batter will stick well to the cauliflower. For crispier bites, try a few tricks. First, bake the cauliflower for a little longer. Keep an eye on them; you want them golden brown. Another tip is to space the florets well on the baking sheet. This lets hot air flow around and makes them crispier. If you want an extra crunch, you can sprinkle some breadcrumbs before the final bake. To add more flavor, consider extra spices. A pinch of cayenne pepper gives a nice kick. You might also enjoy adding some cumin for a smoky taste. Mixing in these spices can create new flavors that excite your taste buds. When it comes to dipping, ranch or blue cheese dressing works great. If you like a sweeter touch, try honey mustard. You can even mix some sriracha with your ranch for a spicy twist. These sauces can make your buffalo cauliflower bites even more tasty. For the best experience, serve your bites hot and fresh! For the full recipe, check out the detailed steps above. {{image_4}} You have options for cooking buffalo cauliflower bites. The air fryer is a great choice. It can make the bites crispy without much oil. Here’s how to do it: 1. Preheat your air fryer to 400°F (200°C). 2. Coat the cauliflower florets with the batter just like in the oven method. 3. Place the florets in the air fryer basket. Make sure they are in a single layer. 4. Cook them for about 12-15 minutes, shaking the basket halfway through for even cooking. Grilling is another fun option. It adds a smoky flavor that pairs well with buffalo sauce. Here’s how to grill them: 1. Preheat your grill to medium-high heat. 2. Use skewers to hold the cauliflower florets. This makes flipping easier. 3. Brush the florets with oil and sprinkle with salt. 4. Grill for about 10-12 minutes, turning them until they are charred and tender. You can spice things up with sauce variations. If you love heat, add more hot sauce or cayenne pepper to your buffalo sauce. This will give your bites an extra kick. You can also try different sauces for unique flavors. A honey mustard sauce offers sweetness that balances the heat. You can mix honey, mustard, and a dash of hot sauce for a tasty alternative. Another option is a barbecue sauce for a smoky flavor. Simply toss your baked cauliflower bites in the sauce after baking. For more ideas, check the [Full Recipe]. These variations keep things interesting and let you customize your snack for any occasion. To keep your buffalo cauliflower bites fresh, store them in an airtight container. Place a paper towel inside to absorb moisture. This helps maintain their crispy texture. You can store them in the fridge for up to three days. When it’s time to reheat, avoid using the microwave. Instead, use the oven. Preheat it to 350°F (175°C). Spread the bites on a baking sheet. Heat for about 10 minutes, or until they are warm and crispy again. You can freeze these bites, but there are two ways to do it. 1. Freezing uncooked bites: Prepare the cauliflower bites, but do not bake them. Place the coated florets on a baking sheet and freeze them. Once frozen, transfer them to a freezer bag. They will last for about three months. 2. Freezing cooked bites: If you have leftover baked bites, let them cool completely. Then, store them in an airtight container or freezer bag. They can also last for about three months. To thaw, move them to the fridge overnight. For reheating, follow the same oven method as before. Bake at 350°F (175°C) for about 15 minutes, or until heated through. This keeps them crispy and tasty. You can serve buffalo cauliflower bites with many great sides. Some popular options include: - Ranch dressing - Blue cheese dressing - Celery sticks - Carrot sticks - Fresh parsley for garnish These options add crunch and flavor. They also make a nice contrast to the spicy bites. Yes, you can make this recipe gluten-free. Just replace the all-purpose flour with gluten-free flour. Almond flour or chickpea flour works well. The batter will still coat the cauliflower well and create that crispy texture. You will know the bites are done when they are golden brown. They should have a crispy texture. Check them after 20 minutes of baking and then again after the second bake. A fork should easily pierce the cauliflower. Absolutely! You can use other vegetables like: - Broccoli florets - Brussels sprouts - Zucchini slices These veggies will absorb the buffalo sauce flavor too. Just adjust the baking time as needed. Enjoy experimenting! For the full recipe, click here: [Full Recipe]. In this post, you learned how to make buffalo cauliflower bites. We covered each ingredient, from measurements to brand suggestions. The step-by-step instructions helped you prepare and bake for crispiness. Tips for enhancing flavor and storing leftovers were also shared. Remember, you can also try cooking methods like air frying or grilling. Feel free to mix up sauces for new tastes. Enjoy your cooking adventure, and have fun experimenting!](https://joymealplan.com/wp-content/uploads/2025/07/3e0c7ac8-f5c4-4624-a75b-d39bdd09bf1f-768x768.webp)

![This Zesty Lemon Tahini Dressing is a bright and tasty addition to many dishes. It takes just 10 minutes to make and serves four people. You can use it on salads, grain bowls, or as a dip for veggies. The balanced mix of flavors will make your meals pop! - 1/4 cup tahini paste - 1/4 cup freshly squeezed lemon juice (approximately 2 medium lemons) - 2 tablespoons extra virgin olive oil - 1 garlic clove, finely minced - 1 tablespoon maple syrup or honey (to taste) - 2-3 tablespoons filtered water (adjust for desired consistency) - Sea salt and freshly cracked black pepper, to taste - Zest of 1 lemon (for an aromatic finish) - Tahini paste provides healthy fats and protein, making it creamy and rich. - Lemon juice adds vitamin C and a bright, zesty flavor that lifts your dishes. - Extra virgin olive oil is a heart-healthy fat with a smooth taste that enhances the dressing. - Garlic brings flavor and has health benefits like boosting immunity. - Maple syrup or honey adds a hint of sweetness, balancing the tang of lemon. - Sea salt and black pepper enhance all the flavors, making every bite enjoyable. - Lemon zest gives an aromatic finish that deepens the lemon taste. This dressing is not only simple to make, but it also packs a punch of flavor and nutrition. You can easily adjust the sweetness and thickness to fit your taste. To make Zesty Lemon Tahini Dressing, start with the right ingredients. Gather your tahini paste, lemon juice, olive oil, garlic, maple syrup, water, salt, pepper, and lemon zest. Use fresh lemons for the best taste. Squeeze enough juice to fill 1/4 cup. A good juicer helps extract the juice easily. In a medium mixing bowl, add the tahini paste first. This helps create a smooth base. Pour in the lemon juice, extra virgin olive oil, and minced garlic. Next, add the maple syrup or honey for sweetness. Use a whisk to mix these ingredients together until smooth. Make sure there are no lumps left in the tahini. This step is key for a creamy dressing. Once the mixture is smooth, it’s time to adjust the consistency. Slowly add filtered water, one tablespoon at a time. If you want a thinner dressing, add more water. For a thicker dip, use less. Taste your dressing and decide if you need more salt, pepper, or lemon juice. The zest adds a nice aromatic touch. For best results, chill the dressing for about 10 minutes before serving. This enhances the flavors. This recipe makes about four servings of a fresh and zesty dressing. Enjoy experimenting with it on salads or as a dip! To make the best Zesty Lemon Tahini Dressing, I focus on balance. Each ingredient plays a role. The tahini brings creaminess, while the lemon adds bright zest. Use fresh lemon juice for the best taste. The garlic gives a nice kick, and sweet maple syrup rounds it out. Taste your dressing as you mix. Adjust the sweetness or tartness as needed. If it's too thick, add more water slowly. This dressing shines on salads. It pairs well with leafy greens or roasted veggies. I love to drizzle it over grain bowls with quinoa or farro. Use it as a dip for fresh veggies or pita chips. You can even spread it on wraps for extra flavor. The options are endless, so get creative with your meals! How you present the dressing matters. I like to serve it in a small, stylish bowl. Drizzle a little extra olive oil on top for shine. Sprinkle sesame seeds for texture and a nice look. You can also add lemon slices around the bowl for a colorful touch. This makes it eye-catching and fun to enjoy. For a truly gourmet touch, pair it with your favorite dishes and watch everyone enjoy! {{image_4}} You can tweak this recipe to suit your tastes. Try using sunflower seed butter in place of tahini. This adds a nutty flavor without sesame. If you're allergic to nuts, sunflower butter is a good choice. You can also use lime juice for a different citrus kick. It gives the dressing a unique twist. For a creamier texture, try adding Greek yogurt. This will thicken the dressing and add protein. Want to boost the flavor? Add fresh herbs like parsley, cilantro, or dill. These herbs bring freshness and color. For a spicy kick, mix in red pepper flakes or a dash of hot sauce. This adds heat and complexity. If you love garlic, increase the amount or add roasted garlic for a sweeter taste. A pinch of cumin can also deepen the flavor profile. This dressing works with many cuisines. It pairs well with Mediterranean dishes like falafel or grilled vegetables. Drizzle it over a fresh Greek salad for a zesty touch. You can also use it in Asian dishes, like a cold noodle salad. The lemon tahini dressing complements sesame flavors well. It is perfect for drizzling on grain bowls filled with quinoa or brown rice. For a fun twist, use it as a dip for fresh spring rolls. Explore the [Full Recipe] for all the delicious details! Store your Zesty Lemon Tahini Dressing in an airtight container. Glass jars work great. Make sure the lid is tight. This keeps the flavors fresh. Always use a clean spoon to scoop out the dressing. This way, you avoid adding germs. Keep your dressing in the fridge. It helps maintain its zesty flavor. If you leave it out, it can spoil quickly. Always chill it right after you make it. The colder it is, the better it tastes. Your dressing lasts up to a week in the fridge. After that, it may not taste good. Watch for changes in color or smell. If it smells sour or looks odd, throw it away. Trust your senses; they guide you well. This dressing is already vegan! It uses tahini, lemon juice, and maple syrup or honey. If you prefer, just stick with maple syrup. It gives a sweet touch and keeps everything plant-based. I don’t recommend freezing this dressing. Freezing can change its texture. When thawed, it may separate and lose its creamy feel. Instead, store it in the fridge for fresh use. This dressing shines on salads, grain bowls, and roasted veggies. Try it with fresh greens, quinoa, or as a dip for crisp veggies. It adds a zesty kick to any meal. To cut calories, reduce the olive oil or use less tahini. You can also add more water for a thinner dressing. This keeps the flavor while lowering the calorie count. For the full recipe, check the details above. In this post, we explored the key ingredients, step-by-step instructions, and helpful tips for Zesty Lemon Tahini Dressing. You learned about the benefits of each ingredient and how to achieve the perfect flavor balance. We also discussed variations and storage tips. To wrap up, this dressing is versatile and easy to make. With the right approach, you can impress your guests and enjoy tasty meals. Use this dressing often to enhance your dishes.](https://joymealplan.com/wp-content/uploads/2025/06/f654f103-f68b-4d89-afc0-0ab326df6c5a-768x768.webp)
