Peanut Butter Banana Overnight Oats Easy Breakfast Recipe

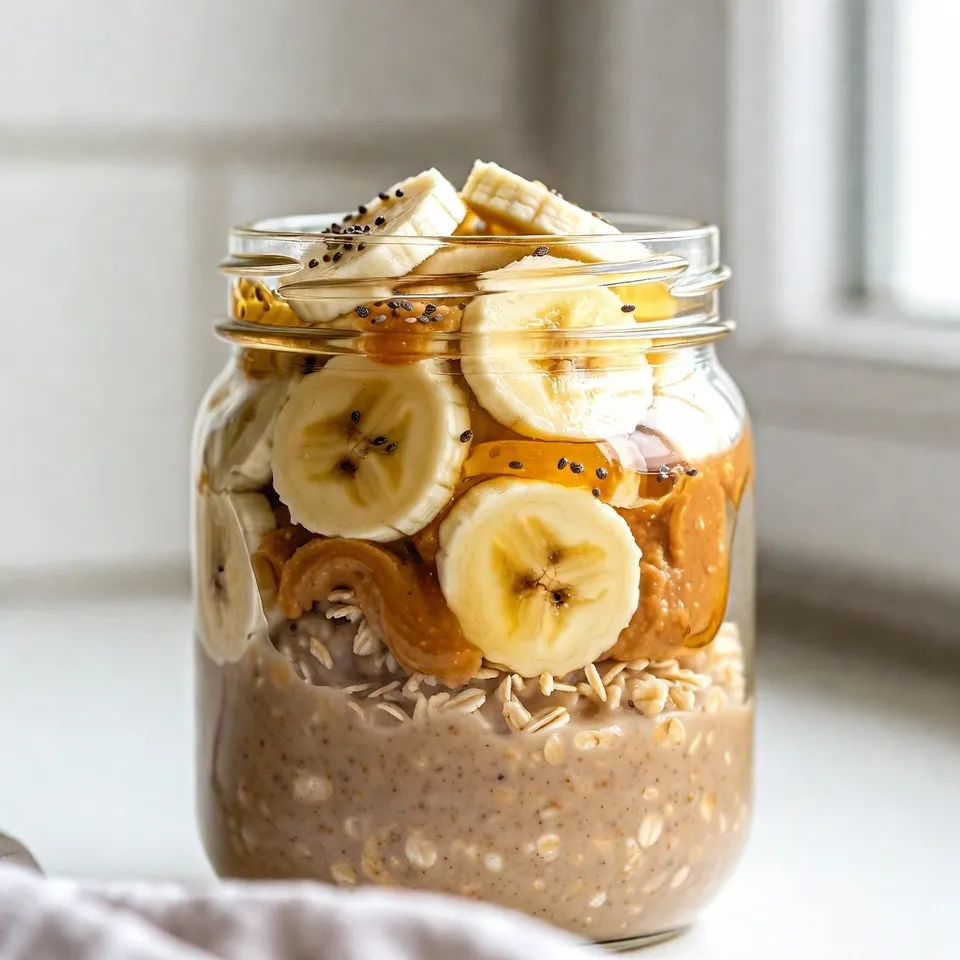
Ready to start your day with a delicious and easy breakfast? Peanut Butter Banana Overnight Oats are the perfect solution! They’re creamy, sweet, and packed with energy. Plus, you can prepare them in just a few minutes the night before. In this guide, I’ll share simple steps, tasty variations, and smart tips to make your mornings a breeze. Let’s dive into this fun and yummy recipe!
Why I Love This Recipe
- Quick and Easy: This recipe takes just 10 minutes to prep, making it perfect for busy mornings.
- Nutritious and Filling: With rolled oats, peanut butter, and chia seeds, this dish offers a great balance of protein, fiber, and healthy fats.
- Customizable: You can easily adjust the sweetness and toppings to suit your taste, whether you prefer honey or maple syrup.
- Make-Ahead Convenience: Prep it the night before for a quick and delicious breakfast ready to go in the morning.
Ingredients
Main Ingredients for Peanut Butter Banana Overnight Oats
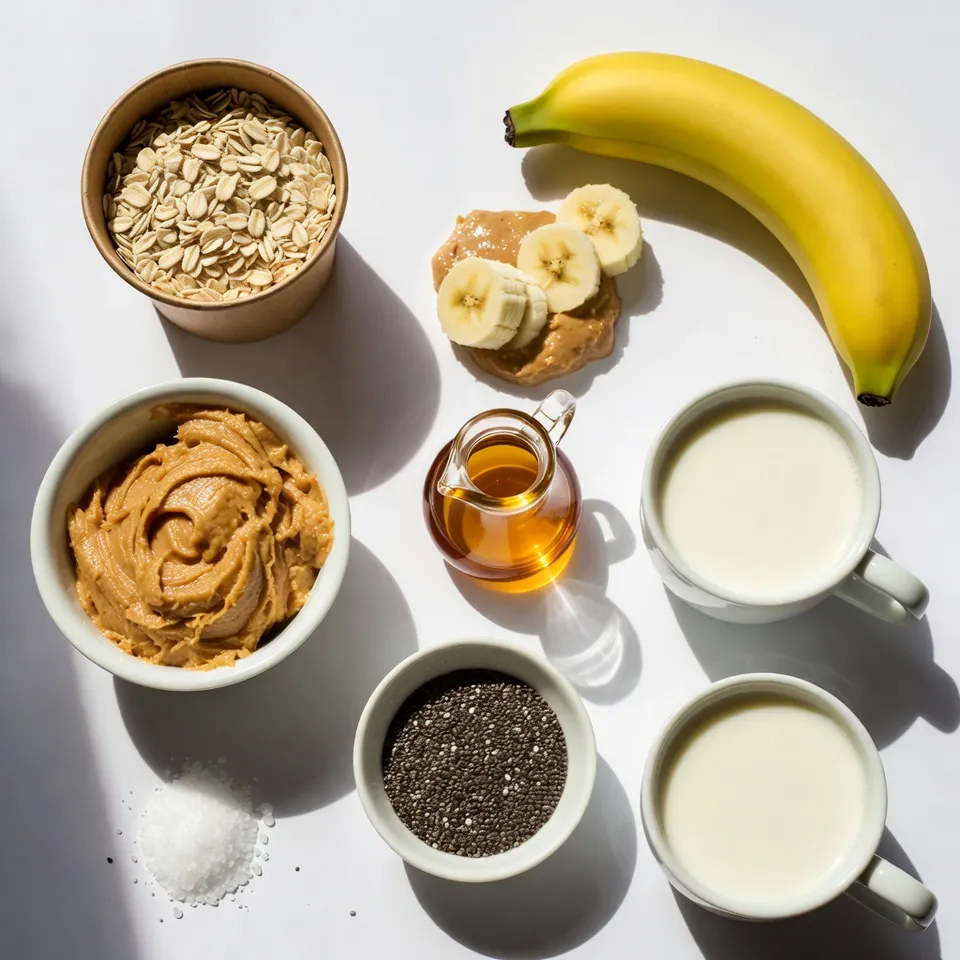
To make Peanut Butter Banana Overnight Oats, you need these key ingredients:
– 1 cup rolled oats
– 2 tablespoons peanut butter (smooth or crunchy)
– 1 medium banana, sliced
– 2 cups milk (dairy or almond milk)
– 1 tablespoon chia seeds
– ½ teaspoon vanilla extract
– A pinch of salt
These main ingredients create a creamy, tasty base. The oats absorb the milk overnight, making them soft and ready to eat in the morning.
Optional Sweeteners and Flavor Enhancers
You can add a touch of sweetness to your oats if you like. Consider these options:
– 1 tablespoon honey
– 1 tablespoon maple syrup
These sweeteners can enhance the flavor of your oats. Adjust the amount to your taste. If you want a little extra flavor, a dash of cinnamon or nutmeg can work well too.
Suggested Toppings for Serving
Toppings can make your oats more fun and delicious. Here are some ideas:
– Extra banana slices
– A drizzle of peanut butter
– A sprinkle of cinnamon
– Chopped nuts or seeds
– Fresh berries
These toppings not only add flavor but also make your breakfast look great. Enjoy your oats in a clear jar to show off those lovely layers!

Step-by-Step Instructions
Preparation of the Dry Ingredients
Start with a mixing bowl. Add 1 cup of rolled oats, 1 tablespoon of chia seeds, and a pinch of salt. Mix these dry ingredients well. This step is key for even flavor.
Creating the Peanut Butter Mixture
In another bowl, take 2 cups of milk. You can use dairy or almond milk. Add 2 tablespoons of peanut butter. If you like sweetness, add 1 tablespoon of honey or maple syrup. Then, add ½ teaspoon of vanilla extract. Whisk everything together until smooth.
Combining Ingredients and Portioning
Pour the wet mixture over the dry oats. Stir gently until all the oats are coated. Next, fold in 1 medium banana, sliced. Be careful to keep the banana slices whole. Divide the mixture into jars or airtight containers. Seal them tightly to keep them fresh. Put the jars in the fridge overnight, or for at least 4 hours. This lets the oats soak up the milk and flavors. In the morning, stir the oats before enjoying. You can eat them cold or warm them for a cozy breakfast.
Tips & Tricks
How to Achieve the Perfect Texture
To get the right texture in your oats, use rolled oats instead of instant oats. Rolled oats absorb liquid well and create a creamy base. Mix the oats with chia seeds. They help thicken the mixture and add nutrition. Keep the ratio of oats to milk at one cup of oats to two cups of milk. This balance makes your oats soft but not too mushy.
Suggestions for Making Ahead of Time
You can make these oats up to three days in advance. This saves time on busy mornings. Just prepare the jars and place them in the fridge. If you use ripe bananas, they can get mushy faster. To avoid this, add the banana slices in the morning. This keeps them fresh and firm.
Usage of Storage Containers
Choose clear jars or airtight containers for storage. Clear jars let you see the layers of oats and banana, making them look great. Airtight containers keep the oats fresh longer. Seal them well to avoid any odors from the fridge. Label the jars with a date for easy tracking.
Pro Tips
- Choose Your Oats Wisely: Use rolled oats for a creamy texture, but if you’re looking for a chewier bite, steel-cut oats can be a great alternative. Just remember to adjust the soaking time!
- Banana Ripeness Matters: The riper the banana, the sweeter and creamier your oats will be. Opt for bananas with brown spots for the best flavor and texture.
- Mix It Up: Feel free to add other ingredients such as berries, nuts, or seeds for added flavor and nutrition. Experiment with different toppings to keep it exciting!
- Meal Prep for Efficiency: Make a batch of these bliss oats for the week. They store well in the fridge, making them a quick and healthy breakfast option on busy mornings.

Variations
Alternative Nut Butters
You can switch peanut butter for other nut butters. Almond butter adds a sweet, nutty taste. Cashew butter is creamy and smooth. Sunflower seed butter is a great choice for nut-free diets. Each option gives a unique flavor and texture to your oats. Feel free to mix and match based on your taste.
Different Fruit Additions
While banana is tasty, try other fruits. Fresh berries add a burst of color and flavor. Chopped apples bring a nice crunch. You can also use peaches or mango for a tropical twist. You can even stir in some raisins or dried cranberries for extra sweetness. The fruit you choose can change the whole vibe of your oats.
Dairy-Free and Vegan Options
You can make this dish dairy-free and vegan. Simply use almond milk or oat milk instead of cow’s milk. Replace honey with maple syrup or agave nectar for sweetness. These swaps keep the recipe healthy while still tasty. It’s a great way to enjoy a wholesome breakfast that fits your diet.
Storage Info
How to Store Peanut Butter Banana Overnight Oats
To store your Peanut Butter Banana Overnight Oats, place them in airtight containers. Glass jars work well, as they keep the oats fresh. Make sure to seal the lids tightly. This keeps out air and moisture, which can spoil your oats.
Best Practices for Freshness and Flavor Preservation
For the best taste, eat your oats within three to four days. Keep them in the fridge. Avoid adding toppings until you’re ready to eat. This keeps the oats from getting soggy. If you want to add nuts or seeds, store them separately until serving.
Shelf Life of Prepared Oats
Prepared Peanut Butter Banana Overnight Oats last about four days in the fridge. After that, they may lose flavor and texture. Always check for any off smells or changes in color before eating. If they look or smell strange, it’s best to throw them out.
FAQs
Can I use quick oats instead of rolled oats?
Yes, you can use quick oats. Quick oats will cook faster. They will absorb the liquid well but may have a softer texture. If you like a creamier mix, quick oats are fine. If you want more chew, stick with rolled oats.
How long can I keep overnight oats in the fridge?
You can keep overnight oats in the fridge for up to five days. Store them in airtight jars. This way, they stay fresh and tasty. Just make sure to check for any signs of spoilage before eating.
Can I freeze Peanut Butter Banana Overnight Oats?
Yes, you can freeze them! Fill your jars but leave some space at the top. The oats will expand when frozen. To eat, thaw them in the fridge overnight. You can also warm them in the microwave for a quick breakfast.
Peanut Butter Banana Overnight Oats are simple and fun to make. We covered key ingredients, handy tips, and tasty variations. You can mix, match, and create the perfect bowl. Remember to store them right for the best taste. Enjoy your oats fresh for breakfast or a snack. With these tips, you’re ready to get creative in the kitchen. Make it your own, and enjoy every bit

Peanut Butter Banana Bliss Oats
Ingredients
- 1 cup rolled oats
- 2 tablespoons peanut butter
- 1 medium banana, sliced
- 2 cups milk
- 1 tablespoon chia seeds
- 1 tablespoon honey or maple syrup
- ½ teaspoon vanilla extract
- a pinch salt
Instructions
- In a mixing bowl, combine the rolled oats, chia seeds, and a pinch of salt. Stir the mixture well to ensure the dry ingredients are evenly combined.
- In another bowl, whisk together the milk, peanut butter, honey or maple syrup (if using), and vanilla extract until the mixture is smooth and fully blended.
- Pour the wet mixture over the dry ingredients, and stir gently until all the oats are well coated with the peanut butter mixture.
- Carefully fold in the sliced banana to avoid mashing them, preserving their beautiful shape.
- Divide the mixture evenly into jars or airtight containers, ensuring they are sealed tightly to lock in freshness.
- Place the jars in the refrigerator overnight, or allow them to chill for at least 4 hours. This will give the oats time to absorb the liquid and soften to a creamy texture.
- In the morning, give your bliss oats a good stir before enjoying them cold. If you prefer, warm them in the microwave for approximately 30-60 seconds until they reach your desired temperature.


. Enjoy mixing these ingredients for an easy and delicious treat! Start by placing the softened cream cheese and cookie butter into a mixing bowl. Use an electric mixer to beat them together on medium speed. You want the mixture to be smooth and creamy. This base creates a rich and tasty dip. Next, add the pumpkin puree to the bowl. Blend everything together on low speed. This helps to combine the flavors well. You should see a uniform texture. Gradually sift in the powdered sugar. Add it in small amounts to avoid lumps. Mix after each addition until fully incorporated. This step ensures your dip is just sweet enough without being overpowering. Now, stir in the vanilla extract, ground cinnamon, nutmeg, ginger powder, and a pinch of salt. Mixing these ingredients together makes the dip fragrant and flavorful. Keep blending until everything is well combined. Taste your dip. If you want it sweeter or spicier, adjust it to your liking. You can add a bit more powdered sugar or spices. Blend again until mixed well. Finally, scoop the dip into a serving bowl. Cover it with plastic wrap. Place it in the fridge for at least 30 minutes. Chilling enhances the flavors and makes it even better. For the full recipe, check out the details provided earlier. Softened cream cheese is key. It makes mixing easy and helps avoid lumps. If your cream cheese is cold, it won’t blend well. Leave it out for about 30 minutes before you start. When you mix, use an electric mixer on medium speed. This helps create a smooth and creamy dip. To prevent lumps, combine the cream cheese and cookie butter first. Mix until the texture is silky. Then, add the pumpkin puree slowly. Mixing on low speed at this stage helps keep the dip smooth. You might want to tweak the sweetness. If you like it sweeter, add more powdered sugar. Remember to mix well each time you add sugar. Taste as you go! Spices can also be adjusted. If you love cinnamon, add a bit more. For a spicy kick, try adding more ginger. Personalizing the flavors makes the dip your own. Serving bowl choice matters. Use a fall-themed bowl to match the season. It makes your dip look festive. For a fun twist, try a bowl with patterns or colors that pop. When arranging dippers, think about color and texture. Place ginger snaps on one side and apple slices on the other. This contrast creates a beautiful display. For a touch of elegance, use the back of a spoon to swirl the dip. This simple detail makes the dip look gourmet. For the complete recipe, check out the Full Recipe. {{image_4}} You can make Cookie Butter Pumpkin Dip even more exciting with different flavors. Adding extra spices can really enhance the taste. Try a dash of allspice or cloves for a warm kick. If you want a sweeter note, a bit of brown sugar will do the trick. You can also add a splash of maple syrup for a rich flavor. Seasonal flavors can change the game too. Consider mixing in some finely chopped cranberries or pecans for texture. These add a nice crunch and a burst of flavor. You can also fold in some caramel sauce for a sweet twist. Each of these suggestions creates a unique dip that is fun to explore. When it comes to dipping, the options are endless! For a healthy twist, try fresh vegetable sticks like carrots or celery. These add a nice crunch and balance the sweet dip. You can also use rice cakes for a low-calorie choice. For sweet pairings, think about using pretzels or graham crackers. Their saltiness pairs well with the dip’s sweetness. You might even enjoy chocolate-covered strawberries for a fun treat. Mixing sweet and savory dippers creates a fun tasting experience. If you have dietary needs, there are great options! For gluten-free dippers, use apple slices or gluten-free cookies. These are tasty and safe for everyone. You can also swap in gluten-free graham crackers for a sweet treat. For a vegan version, use dairy-free cream cheese. Many brands offer great options that taste just as good. You can also use coconut whipped cream instead of regular cream cheese. These swaps keep the dip creamy and delicious, while fitting various diets. For the full recipe, check out the Cookie Butter Pumpkin Dip recipe to create your own delightful version! To store your leftover Cookie Butter Pumpkin Dip, place it in an airtight container. This keeps it fresh and prevents it from absorbing other fridge smells. Use a glass or plastic container with a tight lid for the best results. Make sure to let the dip cool to room temperature before sealing it. This helps avoid condensation inside the container. If you want to save some dip for later, freezing works well. First, scoop the dip into a freezer-safe container. Leave some space at the top, as the dip may expand when frozen. Seal it tightly and label it with the date. To thaw, move it to the fridge for several hours or overnight before you serve it again. Stir well after thawing to restore the smooth texture. In the fridge, your dip can last about four to five days. Look for any changes in color or smell as signs of spoilage. If it has a watery layer on top or smells off, it's best to toss it. Enjoy this dip while it’s fresh for the best taste! Yes, you can make this dip ahead of time. Just prepare the dip and place it in a bowl. Cover it tightly with plastic wrap or a lid. Store it in the fridge for up to two days. This allows the flavors to blend well. It also makes your party prep easier. Just remember to give it a good stir before serving. If you need a substitute for cookie butter, try sunflower seed butter or almond butter. They add a nutty flavor. For a sweet touch, mix in some brown sugar or maple syrup. These options are great for those with nut allergies. Each choice will give the dip a unique twist! You can serve the dip warm if you prefer. To heat it, place the dip in a microwave-safe bowl. Heat it in short bursts, stirring in between. This helps keep the texture smooth. Warm dip pairs well with dippers like pretzels or warm bread. The best dippers include: - Ginger snaps - Apple slices - Graham crackers - Soft pretzels - Carrot sticks These options bring a nice mix of flavors and textures. You can even try cookies or biscotti for a fun twist! This dip is perfect for parties! It serves about 6 to 8 people. You can easily double the recipe for larger gatherings. Guests love the creamy texture and sweet flavor. Arrange the dip with a variety of dippers for a colorful spread. This will please any crowd! For the full recipe, check out the earlier sections. This dip brings great flavors and fun for everyone. By mixing pumpkin, cookie butter, and spices, you create a delicious treat. Remember to chill for the best taste. Get creative with dippers and toppings to impress your guests. Explore variations and alternatives based on your needs. With easy storage tips, you can enjoy this dip later. Now, you're ready to delight friends and family at any gathering!](https://joymealplan.com/wp-content/uploads/2025/07/ca44b838-8d60-4193-b164-21c1eb441ebf-768x768.webp)