Looking for a quick and tasty breakfast? Peanut Butter Banana Overnight Oats are your answer! These oats are packed with flavor and nutrition, making them perfect for busy mornings. I’ll guide you through the easy steps to whip them up, share tips to avoid common mistakes, and even suggest fun variations. Get ready to elevate your breakfast game with this simple, healthy dish!
Ingredients
List of Required Ingredients
To make Peanut Butter Banana Overnight Oats, gather these simple ingredients:
– 1 cup rolled oats
– 2 cups almond milk (or any milk of your choice)
– 2 ripe bananas, mashed
– 4 tablespoons peanut butter (smooth or crunchy)
– 2 tablespoons honey or maple syrup (optional)
– 1 teaspoon vanilla extract
– 1/2 teaspoon ground cinnamon
– Pinch of salt
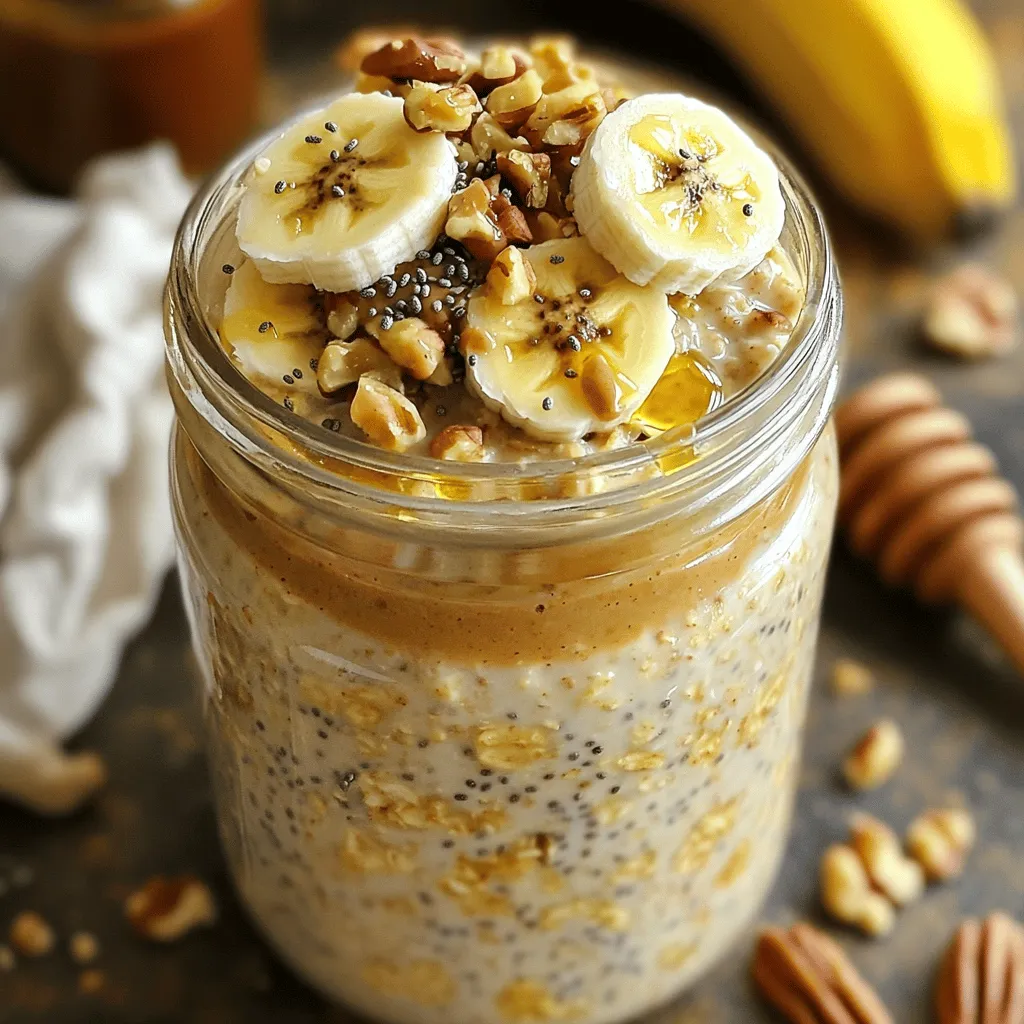
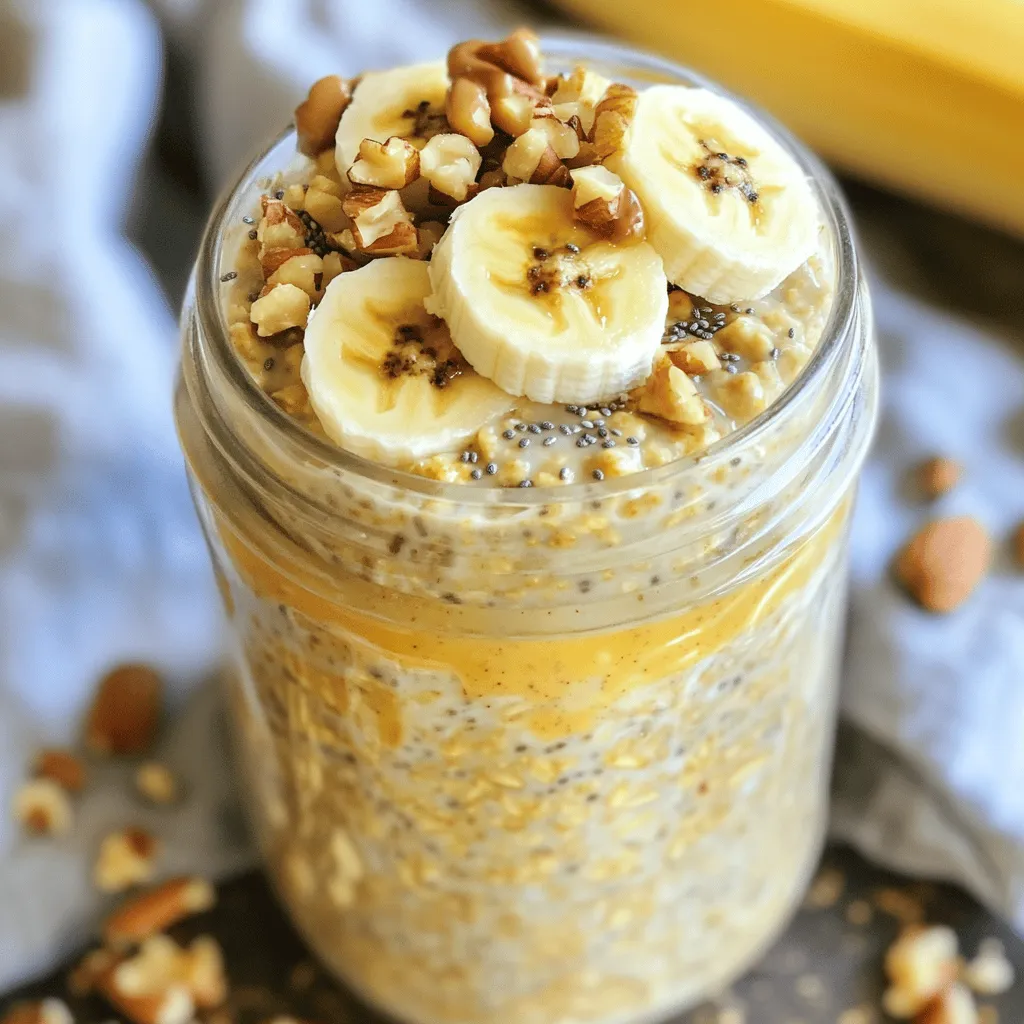
– Toppings: sliced bananas, chopped nuts (such as almonds or walnuts), chia seeds, or dark chocolate chips
Recommended Ingredient Substitutions
You can swap some ingredients for a different flavor or texture:
– Use oat milk or coconut milk instead of almond milk for a creamier taste.
– Replace honey or maple syrup with agave nectar for a vegan option.
– Try sun butter if you have a nut allergy.
– Use flaxseed meal instead of chia seeds for a similar crunch.
Nutritional Benefits of Key Ingredients
Each ingredient brings its own health benefits:
– Rolled oats are high in fiber. They help keep you full longer.
– Bananas provide potassium, which supports heart health.
– Peanut butter is a great source of protein and healthy fats.
– Almond milk is low in calories and rich in vitamins.
– Honey adds natural sweetness and has antioxidants.
– Cinnamon can help regulate blood sugar levels.
Enjoy the tasty mix and all these health benefits in your breakfast!
Step-by-Step Instructions
Preparation Steps Overview
To make Peanut Butter Banana Overnight Oats, you need just a few steps. First, gather your ingredients. You will need rolled oats, milk, bananas, peanut butter, honey, vanilla, cinnamon, and salt. This simple recipe takes about 10 minutes to prep. After mixing, let the oats chill in the fridge overnight.
Detailed Mixing Instructions
1. Start by adding 1 cup of rolled oats to a large bowl.
2. Pour in 2 cups of almond milk. This creates a creamy base.
3. Next, mash 2 ripe bananas in a separate bowl. Add them to the oat mixture.
4. Now, add 4 tablespoons of peanut butter. You can use smooth or crunchy.
5. If you want extra sweetness, mix in 2 tablespoons of honey or maple syrup.
6. Don’t forget 1 teaspoon of vanilla extract and 1/2 teaspoon of ground cinnamon.
7. Finally, add a pinch of salt. Stir everything well until combined.
8. Divide the mixture into jars or containers. You can make two to four servings.
9. Seal the jars and place them in the fridge overnight, or for at least 4 hours.
Tips for Perfect Texture
To get the best texture, let the oats soak long enough. The oats should absorb the milk fully. If your oats seem too thick in the morning, just add a splash of milk. Stir well to mix in any extra liquid. This will give you a smooth and creamy texture. For added fun, top your oats with sliced bananas, nuts, or chocolate chips before serving. This adds both flavor and crunch!
Tips & Tricks
Expert Tips for Making Overnight Oats
– Use fresh, ripe bananas for the best flavor and sweetness.
– Choose rolled oats, as they soak up liquid well and stay chewy.
– Mix everything in a big bowl for easy combining. This helps with even taste.
– Adjust the almond milk based on how thick you like your oats.
– Let the oats sit overnight for the best flavor and texture.
Common Mistakes to Avoid
– Don’t skip the salt. It boosts the flavor of the oats.
– Avoid using too much liquid. Start with the recipe’s amount first.
– Don’t forget to stir before serving. It helps blend the flavors.
– Be careful with toppings. Add them right before you eat. This keeps them fresh.
– Don’t use very overripe bananas. They can make the oats too mushy.
Serving Suggestions for Every Occasion
– For a special breakfast, layer your oats with fresh fruits in a clear jar.
– Add a dollop of yogurt on top for extra creaminess and protein.
– Serve with a side of toast for a filling meal.
– Pack a jar for a quick snack at work or school.
– Try it as a dessert by adding chocolate chips or a drizzle of caramel.
Variations
Flavor Variations: Add-ins and Toppings
You can make your Peanut Butter Banana Overnight Oats even more fun! Try adding different mix-ins. Here are some ideas:
– Chia seeds for extra fiber and omega-3s.
– Cocoa powder to add a rich chocolate taste.
– Berries like blueberries or strawberries for a fruity twist.
– Yogurt for creaminess and a protein boost.
– Granola for a crunchy texture on top.
Toppings are important too! Slice fresh bananas or sprinkle nuts on top. You can even add some dark chocolate chips for a sweet treat. Mix it up each time for a new experience!
Dietary Adaptations for Vegan or Gluten-Free
If you want to make this recipe vegan, just swap honey for maple syrup. Use plant-based yogurt or skip it if you prefer. For gluten-free oats, check the label to ensure they are certified gluten-free. This makes the oats safe for anyone with a gluten intolerance. You can enjoy your breakfast without worry!
Creative Serving Ideas: Smoothies and Parfaits
Want to change how you eat your oats? Try blending them into a smoothie! Just add your oats, some milk, and extra fruit into a blender. Blend until smooth for a quick, tasty drink.
You can also make parfaits! Layer the oat mixture in a glass with yogurt and fruit. This looks pretty and tastes great! It’s a fun way to enjoy your oats and impress friends or family.
Storage Info
How to Store Overnight Oats
To keep your peanut butter banana overnight oats fresh, use airtight containers. Glass jars or plastic containers work well. Make sure the lids seal tightly to avoid air and moisture. You can store them in the fridge for easy access.
Shelf Life and Best Practices for Freshness
These oats last about 3 to 5 days in the fridge. After that, they may lose their taste and texture. To keep them fresh, always use ripe bananas and good-quality peanut butter. Avoid adding toppings until you are ready to eat. This prevents sogginess and keeps your oats tasty.
Reheating or Using Leftovers
You can enjoy your oats cold or warm them up. If you want to heat them, place the oats in a bowl. Add a splash of almond milk to make them creamy again. Microwave for about 30 seconds. Stir and check the temperature. Enjoy your leftovers as a quick breakfast or a healthy snack!
FAQs
What is the best milk to use for overnight oats?
The best milk for overnight oats is almond milk. It has a nice flavor and is low in calories. You can also use regular milk, coconut milk, or oat milk. Each type gives a unique taste. Choose what you like best for your oats.
Can I make Peanut Butter Banana Overnight Oats ahead of time?
Yes, you can make these oats ahead of time. They taste great after sitting overnight. Just mix all the ingredients and store them in jars. Keep them in the fridge for up to five days. This makes breakfast super easy and quick!
How can I make this recipe lower in calories?
To lower calories, use less peanut butter. You can also use unsweetened almond milk instead of regular milk. Replace honey or syrup with a sugar-free sweetener. Lastly, add fewer toppings like nuts or chocolate chips. You’ll still enjoy a tasty meal!
Can I use different fruits in this recipe?
Absolutely! You can swap bananas for berries, apples, or peaches. Just mash or chop the fruit and mix it in. Each fruit adds its own flavor and fun twist to your oats.
How can I make this recipe more filling?
Add seeds like chia or flaxseed for extra fiber. You can also mix in Greek yogurt for creaminess and protein. Both options will keep you full longer while still tasting great.
Is this recipe good for kids?
Yes, kids usually love the taste! It’s sweet and creamy, plus it’s healthy. They can help make it, too. Let them add their favorite toppings for a fun breakfast activity.
Overnight oats are easy and fun to make. We covered the best ingredients, how to mix, and tips for texture. I shared flavor ideas and dietary swaps for everyone. Remember to store them right to keep them fresh.
In the end, enjoy your oats with any toppings you love. Trying new things will make breakfast exciting and healthy. You have all the tools to create tasty, nutritious meals. Start today and build your own perfect jar of overnight oats.


