
Are you ready to whip up a meal that packs a flavor punch with a tropical twist? In this post, I will share my easy recipe for Pineapple Fried Rice. With just a few simple ingredients, like jasmine rice and fresh pineapple, you’ll create a dish that’s both delicious and colorful. Whether you want a quick weeknight dinner or something fancy for guests, this recipe has you covered! Let’s dive in and start cooking!
Ingredients
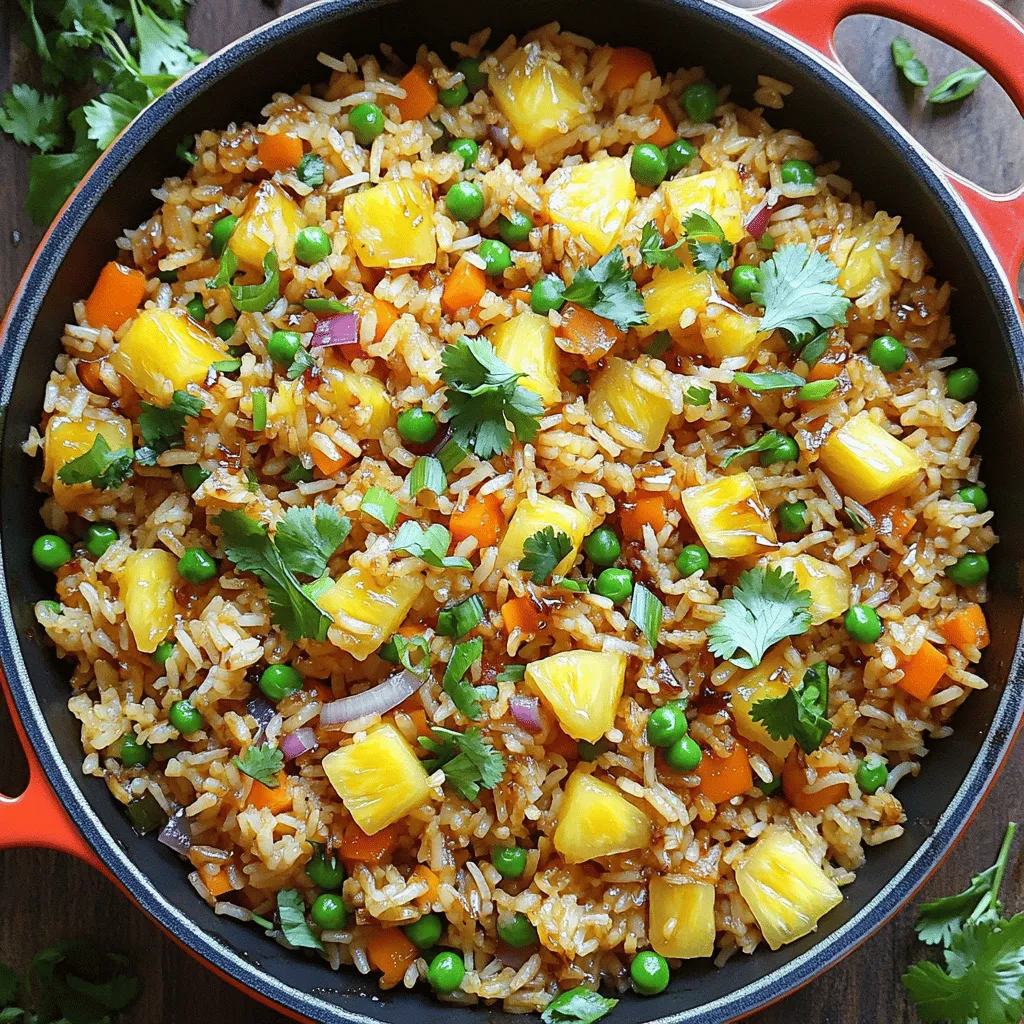
Main Ingredients
– 2 cups cooked jasmine rice
– 1 cup fresh pineapple, diced
– 1/2 cup frozen peas and carrots
Optional Ingredients
– 2 eggs, beaten
– Fresh cilantro or parsley for garnishing
Seasoning and Flavors
– 2 tablespoons low-sodium soy sauce
– 1 tablespoon sesame oil
– 1/2 tablespoon curry powder
When you cook Pineapple Fried Rice, you need the right ingredients. Start with jasmine rice. I find that day-old rice works best. It has a firmer texture. Freshly cooked rice can be too soft.
Next, use fresh pineapple. Diced pineapple adds sweetness and bright color. Frozen peas and carrots bring in great texture and flavor. They are easy and quick to use.
For extra protein, consider adding beaten eggs. They make the dish richer and more filling. Fresh cilantro or parsley adds a pop of color and freshness. It’s a nice touch on top.
Now, let’s talk about seasoning. Low-sodium soy sauce is key. It gives umami without being too salty. The sesame oil adds a nutty flavor. Lastly, curry powder gives a warm twist. It makes your fried rice unique.
This combo of ingredients makes your Pineapple Fried Rice tasty and fun.Enjoy cooking!
Step-by-Step Instructions
Preparation of Rice
Using day-old rice is best for pineapple fried rice. It dries out a bit, making it less sticky. If you only have fresh rice, don’t worry! Spread it on a baking sheet. Let it cool for about 30 minutes. This cools the rice and helps it firm up.
Cooking Process
Start by heating a large skillet or wok. Add sesame oil over medium-high heat. Once hot, toss in finely chopped red onion and minced garlic. Sauté for 2-3 minutes. You want them fragrant and soft, but not brown. Next, stir in diced bell pepper, frozen peas, and carrots. Cook them for another 2-3 minutes. This step keeps the veggies crisp and colorful.
Final Assembly
Now it’s time to mix in the pineapple. Add the diced pineapple to the pan and stir gently. This allows the pineapple to caramelize and brings out its sweetness. Next, add the cooled jasmine rice, soy sauce, and curry powder. Use a spatula to combine everything well. Stir-fry for 5-7 minutes, letting the flavors blend. If you want added protein, create a space in the pan. Pour in beaten eggs and scramble until cooked. Mix the eggs into the rice. Finally, taste and adjust with salt and pepper if needed. Fold in chopped green onions for a fresh touch. Serve hot and enjoy this tasty dish!
Tips & Tricks
Achieving Optimal Texture
Using day-old rice is key for great pineapple fried rice. Freshly cooked rice may clump together. Day-old rice has dried out slightly, which helps it fry better. This method gives you that nice, fluffy texture. When you stir-fry, use a high heat and keep the rice moving. This prevents it from getting mushy. Make sure not to overcrowd the pan. If you do, the rice will steam instead of fry.
Enhancing Flavor
To take your fried rice up a notch, try adding more seasonings. A splash of lime juice can brighten the dish. You might also add a pinch of red pepper flakes for heat. For a unique twist, incorporate diced bell peppers or cashews for crunch. You can also add protein like shrimp or chicken if you want more substance. Each ingredient changes the flavor and texture, so feel free to experiment.
Presentation Tips
A beautiful dish makes for a great meal. Use fresh herbs like cilantro or parsley as a garnish. They add color and freshness to your plate. You can also serve the rice in a hollowed-out pineapple for a fun twist. For special occasions, consider adding sliced green onions on top. This not only looks nice but also adds a burst of flavor. Serve it hot and enjoy the smiles around the table!
Variations
Vegetarian and Vegan Options
To make pineapple fried rice vegetarian, simply skip the eggs. You can replace them with tofu or chickpea flour. Tofu adds protein and texture. Use firm tofu, and cube it before cooking. For a vegan option, consider using nutritional yeast for added flavor. This way, you keep the dish hearty and satisfying.
Global Twists
You can play with different vegetables to change the flavor. Try adding broccoli, corn, or snap peas. Each brings its own taste and crunch. For a fusion twist, mix in spices from other cuisines. Think about adding curry spices for a unique flair. Thai basil or lime juice can also enhance the dish. These small changes can make your fried rice exciting and new.
Protein Additions
You can add a variety of proteins to your fried rice. Shrimp, chicken, or tofu all work well. For shrimp, cook them for 2-3 minutes until pink. Chicken should be cooked through, which takes about 5-7 minutes. Tofu needs about 4-5 minutes to brown nicely. Each protein adds its own flavor and makes the dish more filling. Remember to adjust the cooking time based on what you choose.
Storage Info
Refrigeration Guidelines
Store your leftover pineapple fried rice in an airtight container. This keeps it fresh and tasty. It’s best to eat it within 3 days. After that, the flavor and texture may change. When cooling, let it sit for no more than two hours. This helps avoid bacteria growth.
Freezing Pineapple Fried Rice
You can freeze pineapple fried rice for later use. First, let it cool completely. Then, pack it in a freezer-safe bag or container. Remove as much air as possible to avoid freezer burn. It can last for about 2 months in the freezer. When you’re ready to eat it, thaw it overnight in the fridge. This helps keep its taste and texture.
Reheating Instructions
To reheat fried rice, use a skillet on medium heat. Add a splash of water or oil to keep it moist. Stir it often to avoid sticking. You can also use the microwave. Place it in a bowl with a lid. Heat in short bursts, stirring in between. This helps heat evenly and keeps it from getting soggy. Enjoy your delicious meal just like it was fresh!
FAQs
What type of rice is best for fried rice?
For fried rice, jasmine rice works best. It has a lovely aroma and a light texture. Day-old jasmine rice is ideal. It dries out a bit, which helps it stay firm when you fry it. Other good options include basmati rice and long-grain rice. These types also stay fluffy and do not clump together.
Can I make Pineapple Fried Rice in advance?
Yes, you can make pineapple fried rice ahead of time. It stores well in the fridge for up to three days. To keep it fresh, place it in an airtight container. You can also freeze it for up to three months. Just make sure to cool it down before storing to avoid extra moisture.
How do I prevent my fried rice from becoming mushy?
To keep your fried rice from getting mushy, avoid using freshly cooked rice. Always use day-old rice. If you must use fresh rice, spread it out on a baking sheet to cool. This helps remove excess moisture. Stir-fry quickly over high heat and avoid crowding the pan. This keeps the rice from steaming and turning mushy.
Pineapple fried rice is simple and fun to make. We discussed essential ingredients, key steps, and creative variations. Remember, using day-old rice helps achieve great texture. Customize the dish with different proteins or veggies for a unique taste. Proper storage lets you enjoy leftovers later. Experiment with flavors and presentations to impress your friends. Happy cooking, and enjoy your delicious meal!


