Pulled Beef Sandwiches Slow Cooker Simple Delight

Are you ready to savor a delicious pulled beef sandwich without the fuss? My slow cooker recipe is so easy, you’ll wonder why you haven’t tried it before! Whether you’re planning a family meal or a fun gathering, this hearty dish fits perfectly. Get ready to learn about the best ingredients, simple steps, and tasty variations that will satisfy everyone’s cravings. Let’s dive into this simple delight together!
Ingredients
Main Ingredients for Pulled Beef Sandwiches
To create the tasty pulled beef sandwiches, gather these main ingredients:
– 2 lbs beef chuck roast
– 1 medium onion, sliced
– 3 cloves garlic, minced
– 1 cup beef broth
– 1 cup of your favorite barbecue sauce
– 1 tablespoon Worcestershire sauce
– 2 teaspoons smoked paprika
– 1 teaspoon ground cumin
– 1 teaspoon black pepper
– 1 teaspoon salt
– 1 tablespoon brown sugar
– 4 to 6 burger buns
These ingredients work together to give your sandwich rich flavor. The beef chuck roast is ideal as it becomes tender and juicy during cooking. The spices and sauces enhance the taste, making every bite delightful.
Optional Toppings
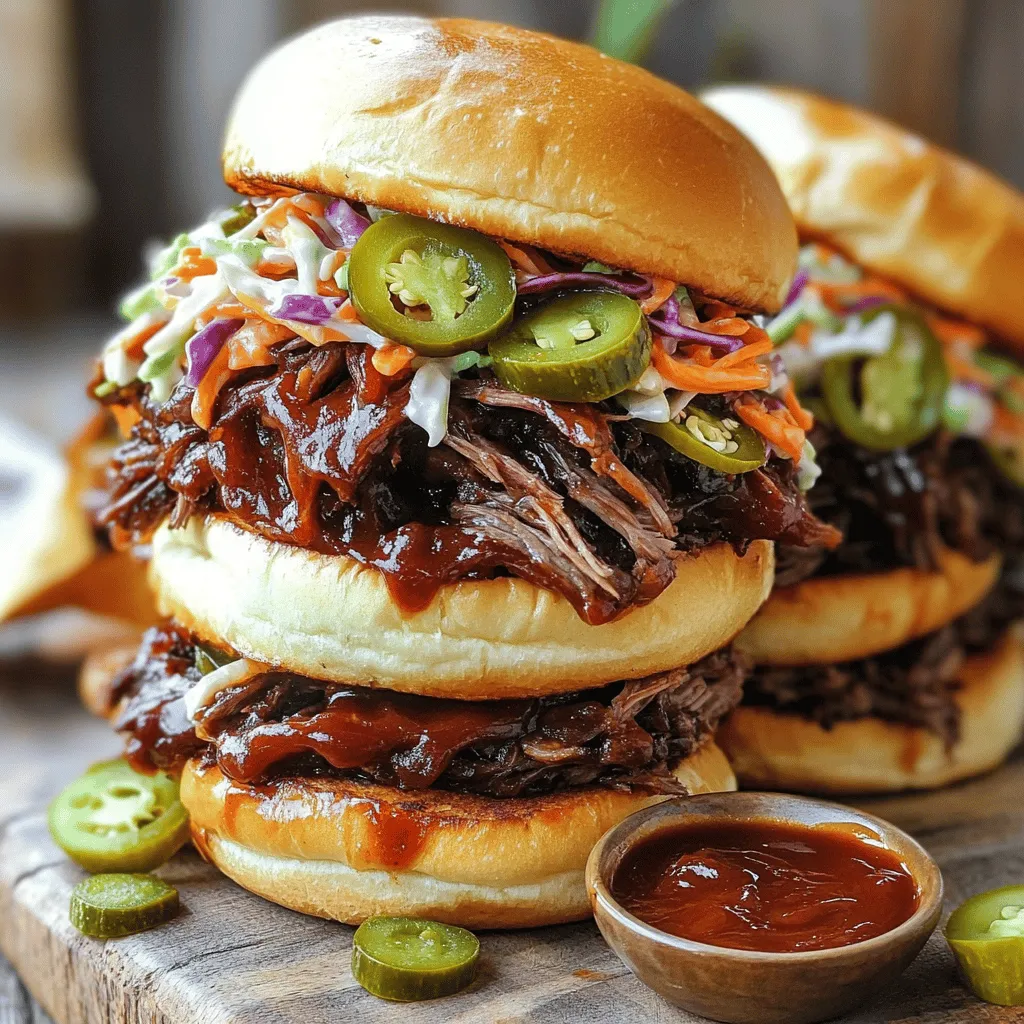
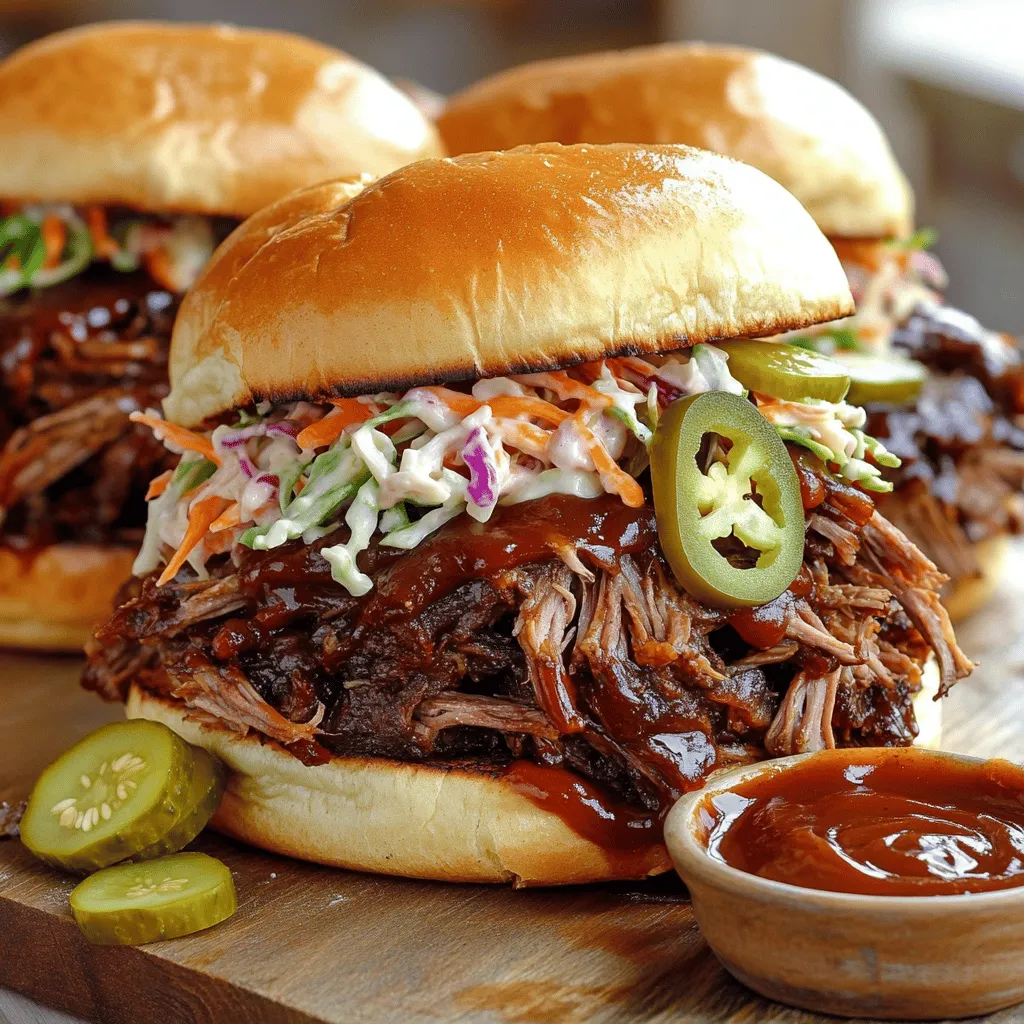
To make your pulled beef sandwiches even better, consider these optional toppings:
– Coleslaw
– Pickles
– Sliced jalapeños
These toppings add crunch and freshness. Coleslaw offers a cool contrast, while pickles bring tang. Sliced jalapeños add a spicy kick, perfect for those who enjoy heat.
Recommended Side Dishes
Pair your sandwiches with these side dishes for a complete meal:
– Potato chips
– French fries
– Sweet potato fries
– A simple green salad
These sides are easy to prepare and complement the flavors of the pulled beef. You can even mix and match based on what you have at home. Enjoy your meal with friends or family!
Step-by-Step Instructions
Preparing the Beef
Start by trimming any extra fat from the beef chuck roast. This helps the meat cook better. Next, season the roast with salt, black pepper, smoked paprika, cumin, and brown sugar. Rub the spices all over the meat. This makes sure every bite is full of flavor.
Sautéing the Aromatics
In a medium skillet, heat a splash of olive oil over medium heat. Add the sliced onion and sauté until soft and clear. This should take about 5 minutes. Next, toss in the minced garlic and cook for one more minute. The garlic will smell great as it cooks.
Cooking in the Slow Cooker
Now, place the seasoned beef chuck roast in your slow cooker. Add the sautéed onions and garlic on top. Pour in the beef broth, barbecue sauce, and Worcestershire sauce. This will make the meat juicy and tasty.
Shredding the Beef
After cooking, take the beef out of the slow cooker using tongs. Next, shred the meat with two forks. Pull it apart into small pieces. This makes it easy to eat. Return the shredded beef to the slow cooker. Stir it with the juices to soak up all the flavor.
Assembling the Sandwiches
If you want, toast the burger buns for a nice crunch. Then, place a big scoop of pulled beef on the bottom half of each bun. This is where the magic happens!
Presentation Tips
For a great look, serve the sandwiches on a rustic wooden board or a nice platter. You can add a small bowl of extra barbecue sauce for dipping. Garnish the dish with fresh herbs like parsley or cilantro. This adds color and makes the meal even more inviting.
Tips & Tricks
Best Cuts of Beef to Use
The best cut of beef for pulled beef sandwiches is beef chuck roast. It has a good amount of fat, which keeps the meat juicy. Other great options are brisket or round roast. They also shred well and taste great. Always choose cuts with some marbling. This adds flavor and keeps the beef moist while cooking.
Achieving the Perfect Shred
To get the perfect shred, let the beef cool for a few minutes after cooking. This makes it easier to handle. Use two forks to pull the meat apart. Start at the grain and shred in the same direction. This gives you long, tender pieces. Make sure to mix the shredded beef with the cooking juices for extra flavor.
Cooking Time Adjustments
Cooking time can change based on the size of your roast. A 2-pound chuck roast needs about 8 to 10 hours on low or 4 to 6 hours on high. If you use a larger cut, add an extra hour or two. Always check for tenderness. The beef should easily pull apart with a fork. If it’s not ready, cook it longer. Keep the lid on to keep the heat in.

Variations
Different Marinades and Sauces
You can change the flavor of your pulled beef using different marinades and sauces. Try a spicy chipotle sauce for heat. A honey mustard sauce adds sweetness. You can also use teriyaki sauce for a sweet and savory mix. Mix your favorite herbs into the barbecue sauce for a fresh taste. Experimenting keeps things fun and exciting!
Serving Suggestions
Pulled beef sandwiches are versatile. You can serve them as sliders for a party. Use small buns to make bite-sized treats. Try using corn tortillas for delicious tacos. Add some fresh veggies or avocado for a healthy twist. You can even serve the pulled beef over rice for a hearty meal. The options are endless!
Alternative Cooking Methods
While a slow cooker is great, there are other ways to make pulled beef. You can use an Instant Pot for faster results. Pressure cooking takes about an hour. If you prefer, cook the beef in your oven. Wrap it in foil and bake it low and slow. This method keeps the beef tender and juicy. No matter how you cook it, the flavors will shine!
Storage Info
How to Store Leftovers
To keep your pulled beef fresh, place it in an airtight container. Make sure the beef cools down before sealing it. Store it in the fridge for up to three days. If you have extra buns, keep them in a separate bag to stay fresh.
Reheating Instructions
Reheat the pulled beef gently. Place it in a pot over low heat. Add a splash of beef broth or barbecue sauce to keep it moist. Stir occasionally until heated through. You can also use the microwave, but keep it in short bursts to avoid drying it out.
Freezing Pulled Beef
You can freeze pulled beef for up to three months. Put it in a freezer-safe container or bag. Remove as much air as possible to prevent freezer burn. When you’re ready to eat, thaw it overnight in the fridge. Reheat it as described above for a tasty meal.
FAQs
Can I use a different cut of beef?
Yes, you can use other cuts. Brisket or round roast works well, too. They may change the flavor and texture a bit. Chuck roast is the best for slow cooking. It becomes tender and shredded easily.
How long can I keep the pulled beef in the fridge?
You can keep pulled beef in the fridge for up to four days. Store it in an airtight container. This helps keep the meat fresh and tasty. If you want it to last longer, consider freezing it.
What is the best way to serve pulled beef sandwiches?
Serve pulled beef on toasted burger buns. Add toppings like coleslaw, pickles, or jalapeños. This adds flavor and crunch. You can also serve it with a side of chips or fries. For a fun twist, try it as sliders or tacos!
Can I make this recipe ahead of time?
Absolutely! You can prepare the beef a day ahead. Just cook it in the slow cooker and let it cool. Store it in the fridge. When you’re ready, heat it up before serving. This saves you time on busy days.
How do I make this recipe gluten-free?
To make this recipe gluten-free, choose a gluten-free barbecue sauce. Also, ensure the Worcestershire sauce is gluten-free. Use gluten-free buns or lettuce wraps to serve. This way, everyone can enjoy the meal!
You now know how to make delicious pulled beef sandwiches. We covered the key ingredients, tasty toppings, and perfect side dishes. You learned step-by-step how to prepare and cook the beef. I shared tips for choosing the best cuts and how to shred the meat. You also found ideas for different flavors and storage advice.
With these pointers, you can create great meals that everyone will love. Enjoy experimenting with your pulled beef sandwiches!


![To make the Spicy Sriracha Noodles, gather these ingredients: - 8 oz rice noodles - 2 tablespoons Sriracha sauce - 1 tablespoon soy sauce - 1 tablespoon sesame oil - 1 red bell pepper, thinly sliced - 1 cup snap peas, trimmed - 3 green onions, finely chopped - 2 cloves garlic, minced - 1 tablespoon fresh ginger, grated - ½ cup fresh cilantro, roughly chopped - Juice of 1 lime - Salt to taste - Sesame seeds for garnish This recipe serves about 2 to 3 people. Each serving contains: - Calories: Approximately 350 - Protein: 10g - Carbohydrates: 55g - Fats: 12g - Fiber: 5g These noodles are a great choice for a quick, flavorful meal. They balance carbs and protein while being low in calories. You can customize this recipe easily. Here are some swaps: - Rice noodles: Use whole grain or egg noodles if you prefer. - Sriracha sauce: Try chili paste or hot sauce for a different heat. - Soy sauce: Use tamari for a gluten-free option. - Sesame oil: Olive oil or coconut oil can work too. - Red bell pepper: Any bell pepper or even carrots will add crunch. - Snap peas: You can swap these for green beans or broccoli. These substitutions keep your dish exciting while still delivering great flavor. For the full recipe, check out the complete guide. Start by boiling water in a large pot. Add the rice noodles and cook them for about 4-6 minutes, or until they are soft but still firm. Drain the noodles and rinse them with cold water. This stops the cooking process and keeps them from getting sticky. Set them aside to cool. Grab a large skillet or wok and pour in the sesame oil. Heat it on medium until it shimmers. Add minced garlic and grated ginger, stirring for about 30 seconds. The smell should make your mouth water! This step adds a tasty base to your noodles. Now, toss in the sliced red bell pepper and snap peas. Stir-fry these veggies for about 3-4 minutes. They should be bright and slightly tender. In a small bowl, mix Sriracha, soy sauce, and lime juice. Pour this sauce over the veggies, stirring well. Then, gently fold in the cooked noodles, making sure everything is coated evenly. Season with salt to taste. Stir-fry for another 1-2 minutes. Finally, add chopped green onions and cilantro for a fresh kick. Serve your spicy Sriracha noodles hot, garnished with sesame seeds from the recipe provided! To get the best texture for your noodles, cook them until they are al dente. This means they should be firm to the bite. Follow the package instructions closely. After cooking, drain and rinse them with cold water. This stops the cooking process and keeps them from getting too soft. Want to adjust the spice? You can! Add more Sriracha for a hotter dish. If you prefer it milder, use less Sriracha or mix in a little soy sauce. You can also add sugar to balance the heat. Taste as you go to find your perfect level of spice. Garnishing makes your dish pop! Use fresh cilantro and green onions for color. A sprinkle of sesame seeds adds a nice crunch too. You can also add lime wedges on the side. This gives a fresh touch and looks great on the plate. Serve your noodles hot to enjoy all the flavors! {{image_4}} You can add proteins to your spicy Sriracha noodles for extra flavor and nutrition. Tofu is a great choice for a vegetarian option. Cut firm tofu into small cubes, then sauté it until golden. Add it to the noodles at the end for a satisfying bite. If you like chicken, use thinly sliced breast. Cook it in the skillet before the veggies. Shrimp is another tasty option. Toss it in after the veggies cook. Shrimp only takes a few minutes to cook. This way, you get a quick and hearty meal. Feel free to swap in different vegetables for variety. Zucchini adds a nice crunch. Slice it into thin rounds and add it to the skillet with the bell pepper. Broccoli is another great option. Cut it into small florets and steam it slightly before adding to your dish. This keeps it bright and tender. You can mix and match any veggies you have. Spinach, carrots, or bell peppers work well too. The more colors, the better your dish looks and tastes. Making this dish vegetarian or vegan is easy. Just use vegetable broth instead of chicken broth. You can also swap out the honey or sugar for maple syrup. Many store-bought Sriracha sauces are vegan, but check the label. You want to keep the flavors bold and spicy while ensuring it fits your diet. Try adding more herbs or spices, like basil or cilantro, for extra depth. The main goal is to keep it fresh and flavorful. This dish can fit any diet with simple swaps. For the full recipe, check above. After enjoying your spicy Sriracha noodles, store any leftovers in an airtight container. Make sure to let them cool first. This helps keep the noodles fresh and tasty. Refrigerate them right away. They will stay good for up to three days. If you want to enjoy them later, it’s best to eat them within this time frame. When you’re ready to eat your leftovers, there are a few ways to reheat them. You can use a microwave or a skillet. For the microwave, place the noodles in a bowl. Add a splash of water to keep them moist. Heat them for about 1-2 minutes, stirring halfway through. If you choose the skillet, warm it over medium heat. Add a little oil and toss the noodles until they are hot. This method helps keep the texture nice. You can freeze these noodles if you want to save them for later. First, let them cool completely. Then pack them in a freezer-safe container or bag. Make sure to remove as much air as possible. The noodles can last up to two months in the freezer. When you’re ready to eat, thaw them in the fridge overnight. Reheat as mentioned above. This way, you can enjoy your spicy Sriracha noodles even after some time. For the full recipe, check out the previous section. You can easily make Spicy Sriracha Noodles vegetarian. Just skip any meat or seafood. Use vegetables like bell peppers, snap peas, and carrots. You can also add tofu for extra protein. Tofu soaks up the sauce well and adds a nice texture. Make sure to use soy sauce that is vegetarian to keep it meat-free. These noodles pair well with many sides. You could serve a light salad, like a cucumber salad, for a refreshing crunch. Spring rolls or dumplings also make great sides. You can also try some grilled veggies for a hearty touch. If you want something warm, a bowl of miso soup works wonderfully too. Yes, you can use different types of noodles. Rice noodles are great, but you can try egg noodles or udon noodles too. Each type will bring its own flavor and texture. Just cook them according to the package instructions. For the best results, pick a noodle that absorbs the sauce well. Check the [Full Recipe] for cooking tips. In this blog post, we explored key steps to make delicious spicy Sriracha noodles. We discussed ingredients, including nutritional info and possible swaps. You learned how to cook the noodles and sauté the aromatics for great flavor. Tips helped you achieve the perfect texture and customize spice levels. You can even add proteins or veggies for extra variety. Now, you can enjoy a tasty meal that fits your taste and needs. Happy cooking!](https://joymealplan.com/wp-content/uploads/2025/06/8df2442a-c8e4-418c-8d77-15c525c42243-768x768.webp)

![- 1 cup orzo pasta - 2 tablespoons extra virgin olive oil - 4 cloves garlic, finely minced - 3 cups vegetable broth - 1 cup fresh spinach, chopped - 1/2 cup freshly grated Parmesan cheese - 1 teaspoon lemon zest - Salt and black pepper to taste - Fresh parsley for garnish The star of this dish is orzo pasta. It’s small and cooks fast. I love how it soaks up flavors. The extra virgin olive oil adds a rich taste. Garlic is key here too; it brings a warm aroma. I prefer fresh garlic, as it packs a punch. The vegetable broth makes this dish savory and adds depth. Fresh spinach gives color and nutrients. Parmesan cheese gives that creamy finish. Lemon zest brightens everything up. A dash of salt and pepper helps balance the flavors. - Red pepper flakes for added spice - Additional vegetables (e.g., cherry tomatoes, peas) If you like heat, add red pepper flakes. They give a nice kick. You can also toss in more veggies. Cherry tomatoes add sweetness, while peas bring a pop of color. These extras make the dish even more fun. - Caloric value per serving - Key nutrients present Each serving of Garlic Parmesan Orzo has around 250 calories. It's rich in carbohydrates, which gives you energy. The spinach adds iron and vitamins. Parmesan brings protein and calcium. This dish is not just tasty, it’s also good for you! For the full recipe, check out Garlic Parmesan Orzo Delight. 1. In a medium pot, bring 3 cups of vegetable broth to a rolling boil. 2. Once boiling, add 1 cup of orzo pasta. Cook it until al dente, which takes about 8-10 minutes. Stir it occasionally to prevent sticking. 1. While the orzo cooks, heat 2 tablespoons of extra virgin olive oil in a large skillet over medium heat. 2. Add 4 cloves of finely minced garlic to the skillet. Sauté it for about 1 minute. The garlic should smell fragrant, but don’t let it brown. 1. Once the orzo is cooked, reserve about 1/2 cup of the broth. Drain the rest. 2. Add the cooked orzo to the skillet with the garlic. 3. Pour in the reserved broth and stir gently to combine. 4. Next, add 1 cup of roughly chopped fresh spinach to the skillet. Cook for 2-3 minutes until the spinach wilts. 5. Remove the skillet from heat, then fold in 1/2 cup of freshly grated Parmesan cheese and 1 teaspoon of lemon zest. 6. Season to taste with salt and freshly cracked black pepper. 7. Transfer the garlic Parmesan orzo to a serving dish. Garnish with fresh parsley for a pop of color. For the full recipe, check out the detailed instructions above. Enjoy your flavorful and simple side dish! - How to avoid overcooking orzo: Keep a close eye on the orzo as it cooks. Stir it often to prevent sticking. Start checking for doneness a minute or two before the package time ends. You want it al dente, which means it should still have a little bite. - Tips for perfectly sautéed garlic: Use a medium heat for your skillet. Add minced garlic and stir constantly. Cook it for about one minute until it smells great. Be careful not to let it brown, as this can make it taste bitter. - Best practices for garnishing: Always garnish your dish right before serving. Fresh parsley adds a nice color and flavor. A sprinkle of extra Parmesan on top makes it even better. - Suggested pairings: Garlic Parmesan orzo pairs well with a light salad or grilled chicken. You can also serve it with roasted vegetables for a balanced meal. - How to store leftovers: Let the orzo cool to room temperature. Then, place it in an airtight container. Store it in the fridge for up to three days. - Reheating recommendations: When reheating, add a splash of vegetable broth to prevent it from drying out. Heat on low in a skillet or microwave until warm. For the full recipe, check out the Garlic Parmesan Orzo Delight. {{image_4}} You can easily adapt Garlic Parmesan Orzo to fit a vegetarian diet. One way is by substituting different greens. Instead of spinach, try kale or arugula. Both add unique flavors and textures. You can also boost protein by adding beans or tofu. These options make the dish heartier and more filling. Want to change the flavor profile? Experiment with herbs and spices. Fresh basil or thyme can bring a new twist. You can also add a splash of lemon juice for extra tanginess. This brightens the dish and enhances the garlic and cheese. Don't be afraid to get creative! If you need a gluten-free option, use gluten-free pasta. Many brands offer orzo made from rice or quinoa. Just remember to adjust the cook times. Gluten-free pasta may cook faster than regular orzo. Keep an eye on it to ensure it doesn’t get mushy. For the full recipe, check out [Full Recipe]. Garlic Parmesan Orzo is a tasty and easy side dish. It combines orzo pasta with garlic, cheese, and fresh spinach. This dish is perfect for any meal. You can enjoy it with chicken, fish, or even as a main dish. - Prep Time: 10 minutes - Total Time: 20 minutes - Servings: 4 Serve the orzo in warm bowls. This keeps it cozy and inviting. You can add extra Parmesan on top for flavor. A sprinkle of fresh parsley adds color. For a complete meal, pair it with a light side salad or grilled vegetables. You can also try it alongside roasted chicken or fish for a balanced plate! Making Garlic Parmesan Orzo is quick and easy. You will need about 10 minutes to prep. Cooking takes around 10 minutes. So, in total, it takes about 20 minutes. This dish is perfect for busy nights when you need a tasty side fast. Yes, you can make Garlic Parmesan Orzo ahead of time. Prepare it a few hours before serving. Just store it in an airtight container in the fridge. When you are ready to eat, reheat it gently on the stove. Add a splash of broth or water to keep it moist. Absolutely! This Garlic Parmesan Orzo works well for meal prep. You can portion it into containers. Store in the fridge for up to four days. It reheats easily, making it a great side for any meal. You can even add different proteins or veggies to mix things up! This blog post shared a simple Garlic Parmesan Orzo recipe. You learned about the main ingredients and optional add-ins. I detailed preparation and cooking steps to make your dish shine. Tips and variations catered to your taste and dietary needs. Cooking orzo should be fun and easy. You can experiment with flavors while enjoying a hearty meal. Remember, this recipe is flexible and can fit many diets. Enjoy making your orzo, and share it with friends and family!](https://joymealplan.com/wp-content/uploads/2025/07/b2d855f4-c1dc-4e96-adea-f1579eb882d3-768x768.webp)


