Pumpkin Donut Holes Simple and Tasty Dessert

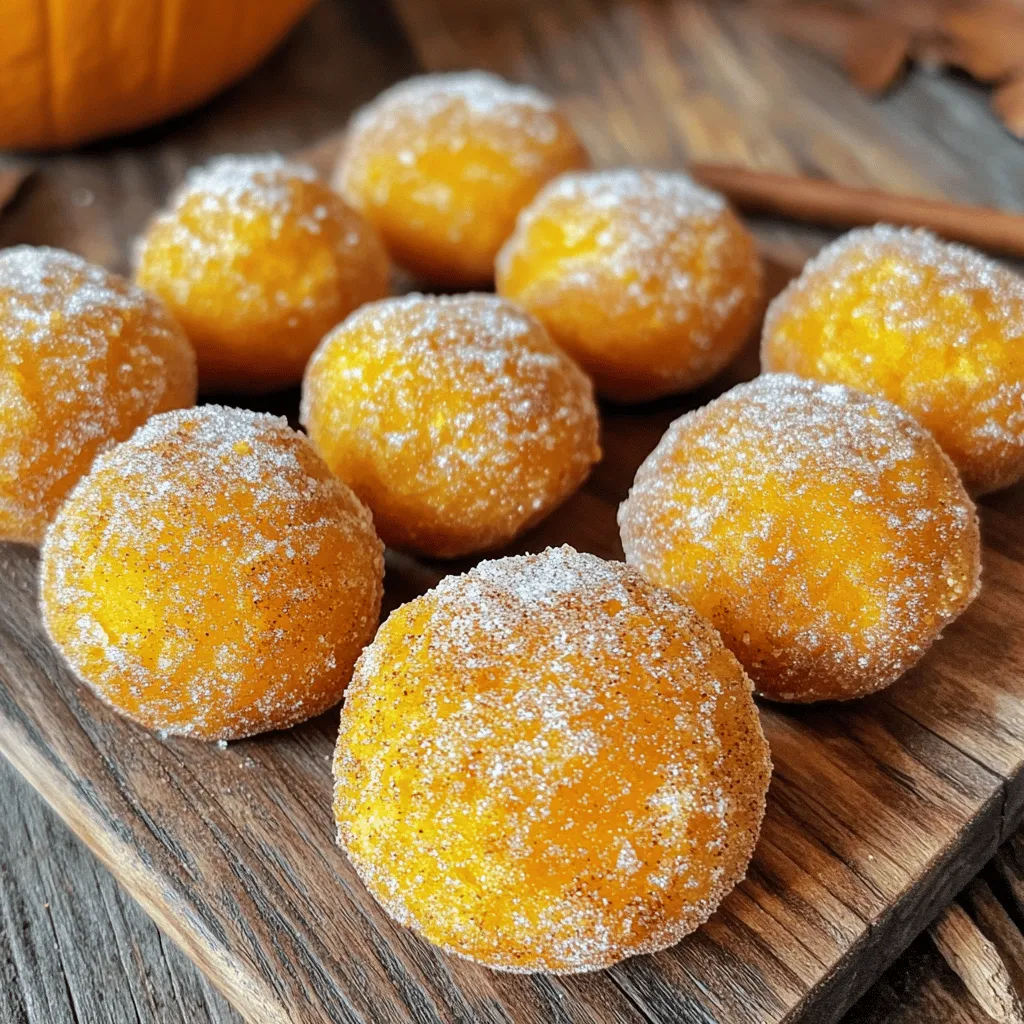
Are you ready to indulge in a fall favorite? These pumpkin donut holes are a simple and tasty treat that will make your taste buds sing! In this post, I’ll guide you step-by-step through the process of making these delightful bites. With just a few easy ingredients, you’ll create a warm, spiced dessert perfect for any gathering. Let’s dive in and get those ovens preheated!
Ingredients
Essential Ingredients for Pumpkin Donut Holes
To make delightful pumpkin donut holes, you need a few simple ingredients. Here’s what you’ll need:
– 1 cup all-purpose flour
– 1/2 cup pure pumpkin puree
– 1/4 cup granulated sugar
– 1/2 teaspoon baking powder
– 1/2 teaspoon baking soda
– 1/2 teaspoon ground cinnamon
– 1/4 teaspoon ground nutmeg
– 1/4 teaspoon ground ginger
– 1/4 teaspoon salt
– 1/2 cup plain yogurt or buttermilk
– 1 large egg
– 3 tablespoons unsalted butter
– 1 teaspoon pure vanilla extract
– 1/2 cup powdered sugar for coating
– 2 tablespoons cinnamon sugar for coating
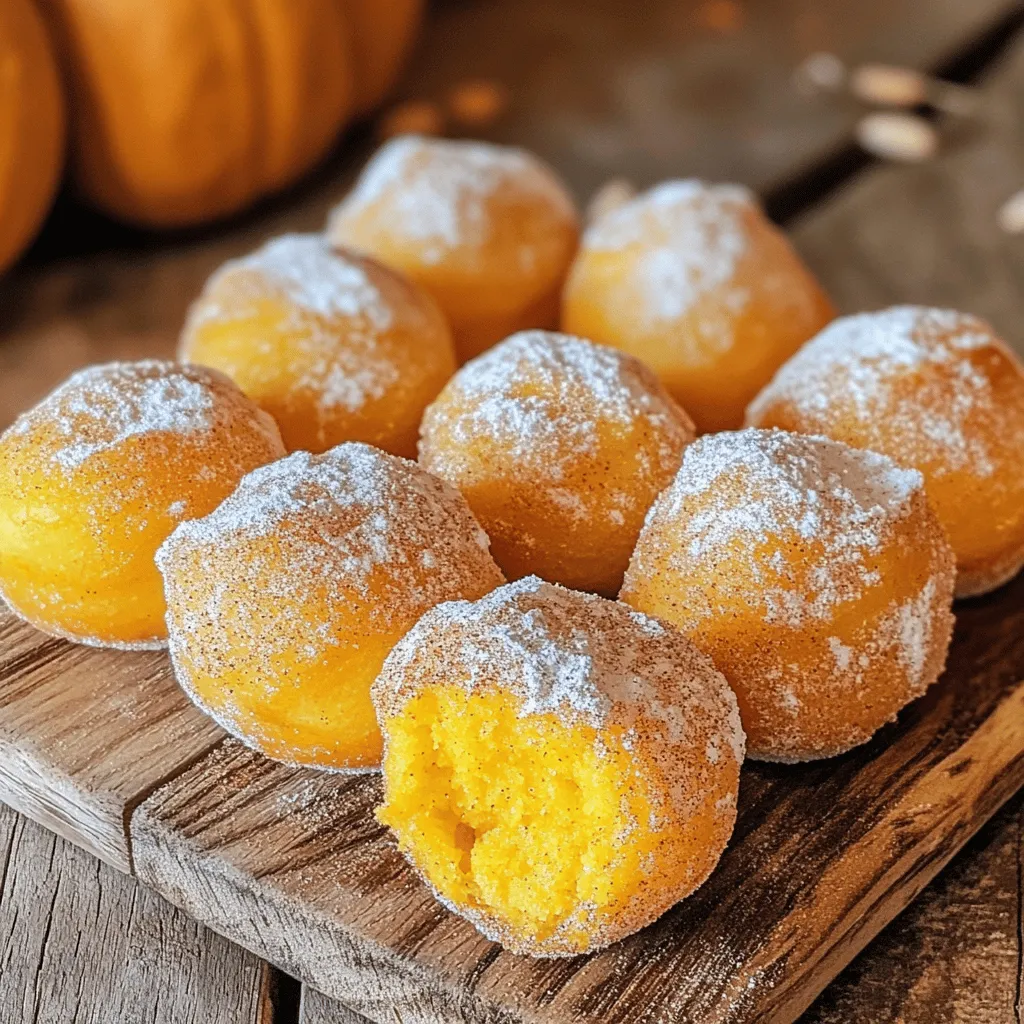
These ingredients work together to create soft, tasty donut holes. The pumpkin puree adds moisture and flavor, while the spices bring warmth. The yogurt or buttermilk helps keep the donut holes fluffy. Each ingredient plays a key role in making the perfect treat.
Using fresh pumpkin puree can give your donut holes a richer taste. If you want a tangy twist, use buttermilk instead of yogurt. Add in your favorite spices for different flavor profiles. Get ready to mix these ingredients into a delicious, warm treat!
Step-by-Step Instructions
Preparation Steps
– Preheat your oven to 350°F (175°C).
– Prepare a mini muffin pan or donut hole pan. Lightly grease it with non-stick spray or butter.
Mixing the Ingredients
– In a large mixing bowl, combine:
– 1 cup all-purpose flour
– 1/4 cup granulated sugar
– 1/2 teaspoon baking powder
– 1/2 teaspoon baking soda
– 1/2 teaspoon ground cinnamon
– 1/4 teaspoon ground nutmeg
– 1/4 teaspoon ground ginger
– 1/4 teaspoon salt
Whisk these dry ingredients together until fluffy.
– In a separate bowl, mix:
– 1/2 cup pure pumpkin puree
– 1/2 cup plain yogurt (or buttermilk for a tangy taste)
– 1 large egg, at room temperature
– 3 tablespoons melted unsalted butter
– 1 teaspoon pure vanilla extract
Whisk until smooth and creamy.
Baking and Cooling
– Gradually pour the wet mix into the dry mix.
– With a spatula, fold until just combined. A few lumps are fine!
– Fill each section of the pan about two-thirds full with batter.
– Bake for 10-12 minutes. They are done when a toothpick comes out clean.
– Cool in the pan for 5 minutes.
– Transfer to a wire rack to cool completely.
– While warm, roll each donut hole in a mix of:
– 1/2 cup powdered sugar
– 2 tablespoons cinnamon sugar
Coat them well for a sweet finish.
Tips & Tricks
Pro Tips for Perfect Pumpkin Donut Holes
– Avoiding overmixing: Mix the wet and dry ingredients until just combined. Lumps are fine. Overmixing can make the donut holes tough. You want them light and fluffy.
– Ensuring even baking: Fill each section of your pan evenly. This helps them bake at the same rate. Rotate the pan halfway through baking for golden-brown goodness on all sides.
Presentation Ideas
– Decorative serving suggestions: Use a pretty bowl to display your donut holes. Sprinkle some cinnamon sugar on top for a pop of color.
– Accompaniments for serving: Serve with warm maple syrup or a side of cream cheese frosting. These dips add extra flavor and make the treat even more fun!

Variations
Gluten-Free Pumpkin Donut Holes
You can make tasty gluten-free donut holes easily. Start by swapping regular flour. Here are some great substitutes:
– 1 cup almond flour
– 1 cup oat flour
– 1 cup gluten-free all-purpose flour
These flours work well and keep the texture light.
For the right texture, remember these tips:
– Add a bit more baking powder. This helps them rise.
– Mix in a tablespoon of ground flaxseed. It helps bind the ingredients.
– Keep an eye on the baking time. Gluten-free dough can bake faster.
Vegan Pumpkin Donut Holes
Making vegan pumpkin donut holes is also simple. Replace dairy ingredients with plant-based options. Here are some swaps:
– Use almond milk or oat milk instead of yogurt.
– For butter, try coconut oil or vegan butter.
Eggs can be tricky, but you have options. Use these alternatives:
– 1 tablespoon ground flaxseed mixed with 2.5 tablespoons water. Let it sit for a few minutes.
– 1/4 cup unsweetened applesauce can work too.
These swaps keep the flavor while making them vegan. Enjoy your baking!
Storage Info
Storing Pumpkin Donut Holes
To keep your pumpkin donut holes fresh, use an airtight container. This helps prevent them from drying out. You can store them at room temperature for up to three days. If you want to keep them longer, place them in the fridge. They will last for about a week in the fridge.
For longer storage, you can freeze them. Place the donut holes in a freezer-safe bag. They can last up to three months in the freezer. Just remember to label the bag with the date.
Reheating Tips
When you’re ready to enjoy your donut holes again, reheating is easy. Preheat your oven to 350°F (175°C). Place the donut holes on a baking sheet. Heat them for about five to seven minutes. This will help them regain their soft texture.
If you prefer a quicker method, you can use the microwave. Heat them in 10-second bursts until warm. However, this may make them a bit softer than baking. To keep the flavor, consider adding a sprinkle of cinnamon sugar after reheating.
FAQs
Common Questions about Pumpkin Donut Holes
How long do pumpkin donut holes last?
Pumpkin donut holes last about 2 to 3 days at room temperature. You can store them in an airtight container. If you want them to last longer, keep them in the fridge for up to a week.
Can I freeze pumpkin donut holes?
Yes, you can freeze pumpkin donut holes. Place them in a single layer on a baking sheet. Once frozen, transfer them to a freezer bag. They can last for up to 3 months in the freezer. Just thaw them at room temperature before enjoying.
What can I substitute for pumpkin puree?
You can use applesauce or mashed banana as a substitute for pumpkin puree. Both add moisture and sweetness. You can also use homemade pumpkin puree if you have it on hand.
Are pumpkin donut holes healthy?
Pumpkin donut holes are a treat but can be healthier than regular donuts. They use pumpkin, which is rich in vitamins. Using yogurt or buttermilk adds some protein. However, they still have sugar and butter, so enjoy them in moderation!
You now have all the steps to make tasty pumpkin donut holes. We covered the key ingredients, preparation methods, and helpful tips to ensure success. Whether you need gluten-free or vegan options, I provided simple swaps. Remember to store your donut holes properly to keep them fresh. Enjoy these delightful treats at any event or just for fun. Happy baking!


![- Ripe avocados: Choose avocados that feel soft but not mushy. Ripe avocados add creaminess. They bring healthy fats and nutrients to the mousse. When selecting avocados, look for dark green skin. A little give when pressed is a good sign. Avoid avocados with large dark spots or cracks. - Cocoa powder: The type of cocoa powder you use matters. Choose high-quality, unsweetened cocoa for the best flavor. Dutch-processed cocoa has a smooth taste. Regular cocoa has a rich chocolate flavor. Both are great choices. - Sweeteners: Maple syrup and agave syrup are both tasty options. Maple syrup gives a unique flavor. It adds a slight caramel note. Agave syrup is milder and sweeter. It blends well without changing the taste much. You can adjust the sweetness based on your preference. - Non-dairy milk options: You can use almond, coconut, or oat milk. Almond milk is light and nutty. Coconut milk adds creaminess and a hint of tropical flavor. Oat milk is thick and wholesome. Any of these choices work well to create a smooth texture. - Flavor enhancers: Vanilla extract adds warmth and depth. A little cinnamon gives an extra layer of flavor. Both options are simple and enhance the chocolate taste. You can try adding a pinch to see what you like best. - Garnish suggestions: Dark chocolate shavings are a rich topping. They add elegance and extra chocolate flavor. Fresh berries like raspberries or strawberries bring brightness. Their color and tartness balance the rich mousse perfectly. These garnishes make the dish even more appealing. You can find the full recipe at the beginning of this article. First, you need to prepare your avocados. To peel and pit them easily, slice the avocado in half. Twist the halves apart. Use a spoon to scoop out the pit. Then, scoop the green flesh into a bowl. Next, measure your ingredients. For this mousse, you will need: - 2 ripe avocados, peeled and pitted - 1/2 cup unsweetened cocoa powder - 1/3 cup maple syrup (or agave syrup) - 1/4 cup almond milk (or any non-dairy milk of your choice) - 1 teaspoon vanilla extract - 1/4 teaspoon sea salt - A pinch of cinnamon (optional) Combine all these ingredients in a food processor. Now, let’s blend for that creamy texture. Start blending on high speed. Stop occasionally to scrape down the sides. This ensures everything mixes well. Blend until it’s smooth. Taste your mousse after blending. If you desire more sweetness, add extra maple syrup. Blend again to mix in the syrup. Adjust to your liking for the best flavor. Chilling the mousse is very important. It allows the flavors to develop and the mousse to thicken. Cover the individual dishes with plastic wrap. Chill them in the fridge for at least 30 minutes. For serving, get creative! Garnish your mousse with dark chocolate shavings or fresh berries. This adds a pop of color and texture. You can serve it in small bowls or glasses for a fun touch. Enjoy your rich and creamy vegan chocolate avocado mousse! - Over-blending the mousse: Blending too long makes it thin. Blend just until smooth. You want a creamy texture, not soup. - Using unripe avocados: Unripe avocados are hard and bitter. Always pick ripe ones. They should feel slightly soft. - Balancing sweetness: Taste your mousse before serving. If it's too bitter, add more maple syrup. Start with a little more. Keep tasting until it’s just right. - Experimenting with additional flavorings: You can try adding a pinch of espresso or a drop of peppermint extract. These flavors can make the mousse even more exciting. - Best food processors for smooth blending: Look for a powerful food processor. A 600-watt model works well. It blends the ingredients evenly and quickly. - Storage containers for chilling the mousse: Use small bowls with lids. This keeps the mousse fresh. Glass containers are a great choice. They help keep the mousse cool and tasty. For the full recipe, check out the [Full Recipe]. {{image_4}} You can make your Vegan Chocolate Avocado Mousse even more fun by adding nut butters. Try almond or peanut butter for a rich and creamy taste. These nut butters enhance the texture and add healthy fats. You can also infuse flavors like coffee or mint. A splash of coffee brings a deep, bold taste. Mint adds a refreshing twist that brightens up the dessert. Both options create a unique mousse that surprises and delights. For those with dietary needs, gluten-free variations are easy to make. All the ingredients in this mousse are naturally gluten-free. This makes it a great choice for anyone avoiding gluten. You can also opt for sugar-free alternatives. Using stevia or monk fruit keeps the mousse sweet without added sugar. These substitutes do not change the creamy texture. You can enjoy a guilt-free treat that still tastes amazing. Transform your mousse into parfaits for a stunning dessert. Layer the mousse with fresh fruits or granola in clear cups. This adds color and texture, making your dessert look beautiful. You can use the mousse as a filling for cakes or other desserts. It works well between layers of cake or as a filling for tart shells. This gives you a chance to be creative with your presentation. For the complete recipe, check out the Full Recipe section. To keep your Vegan Chocolate Avocado Mousse fresh, follow these steps: - Chill the mousse: After making it, cover your mousse with plastic wrap or a lid. This helps prevent air from getting in. - Use airtight containers: Store the mousse in airtight containers. This keeps it from absorbing other flavors in the fridge. - Refrigerate promptly: Place it in the fridge as soon as it's ready. This helps maintain its creamy texture. The mousse stays fresh for about 3 to 5 days in the fridge. Always check for any changes in smell or texture before serving. Can you freeze Vegan Chocolate Avocado Mousse? Yes, you can! Freezing is a great option if you want to store it longer. - Portion it out: Divide the mousse into small portions before freezing. This makes it easy to thaw only what you need. - Use freezer-safe containers: Make sure to use containers that are safe for freezing. This prevents freezer burn. When you're ready to enjoy it again, follow these steps to thaw: - Thaw in the fridge: Place the frozen mousse in the fridge overnight. This keeps it at a safe temperature while it thaws. - Stir before serving: After thawing, give the mousse a quick stir. This helps regain its smooth texture. By following these storage and freezing tips, you can enjoy your Vegan Chocolate Avocado Mousse at its best. For the complete recipe, check out the Full Recipe section. Yes, you can use different sweeteners. Honey or agave syrup works well too. Each sweetener changes the taste slightly. Honey adds a floral note, while agave is milder. You can experiment to find your favorite. Just keep the amount similar to maple syrup for the best results. This mousse stays fresh for about three days in the fridge. Store it in an airtight container to keep it from drying out. The mousse may thicken as it sits, so stirring it gently can help restore its creamy texture. Enjoy it within this timeframe for the best flavor and quality. Yes, this dessert is quite healthy! Avocados are full of good fats and nutrients. They can boost heart health and provide fiber. Cocoa powder is also rich in antioxidants, adding to the health benefits. This mousse is a guilt-free treat that satisfies your sweet tooth while nourishing your body. Absolutely! To make it nut-free, choose oat milk or soy milk instead of almond milk. Both options work well and keep the mousse creamy. Ensure your cocoa powder is also nut-free. With these swaps, you can enjoy this tasty dessert without any nut allergy concerns. Vegan Chocolate Avocado Mousse is simple and fun to make. You learned about key ingredients like ripe avocados, cocoa powder, and sweeteners. I shared tips on preparation, blending, and storing your mousse. Mixing in flavors or making parfaits adds creativity. Remember, use ripe avocados for the best taste. This mousse is healthy and easily customizable for different diets. Enjoy your tasty treat, and don't hesitate to share your own variations!](https://joymealplan.com/wp-content/uploads/2025/06/f08f53b2-ba89-49fb-bc73-48bd2b3a08b2-768x768.webp)
![- 1 cup rolled oats - 2 ripe bananas - 1 cup almond milk - 1 teaspoon baking powder - 1 teaspoon vanilla extract - 1 tablespoon honey or maple syrup (optional) - 1/2 teaspoon ground cinnamon - Pinch of salt - Coconut oil or cooking spray for greasing Using rolled oats is key. They give your pancakes a hearty texture. Bananas add natural sweetness and moisture. Almond milk keeps it light and dairy-free. If you want sweetness, use honey or maple syrup. A touch of cinnamon gives warmth and flavor. Coconut oil or cooking spray is important to keep the pancakes from sticking. Choose either based on your preference. This recipe is simple. You can find the full recipe above to guide you through the steps. Enjoy making these delicious pancakes! Start by blending 1 cup of rolled oats. You want to blend them until they are fine and powdery. This oat flour acts as the main ingredient. Next, add 2 ripe bananas that you have mashed well. Then, pour in 1 cup of almond milk. This mix gives your pancakes a nice texture. Now it’s time to make the batter. Add 1 teaspoon of baking powder, 1 teaspoon of vanilla extract, and 1 tablespoon of honey or maple syrup if you want them sweeter. Don’t forget to add 1/2 teaspoon of ground cinnamon and a pinch of salt. Blend everything together until it is smooth and uniform. The batter should look nice and creamy. Let the batter rest for about 5-10 minutes. This helps it thicken. While the batter rests, heat a skillet over medium heat. Grease it with coconut oil or cooking spray to prevent sticking. Once hot, pour about 1/4 cup of batter for each pancake. Cook until bubbles form on top, which takes about 2-3 minutes. Then, flip them over. Cook for another 2-3 minutes until they are golden brown. Repeat this with the rest of the batter. You can find the full recipe [here]. To get the best texture, let the batter rest for 5-10 minutes. This helps it thicken. A thicker batter makes fluffier pancakes. Adjust the heat on your skillet. Cook on medium heat to avoid burning. If the pan is too hot, the outside cooks fast while the inside stays raw. You can change the sweetness. Instead of honey, try maple syrup or agave. Each will give a unique taste. For more flavor, think about adding spices. Nutmeg and ginger are great choices. They add warmth and depth. A pinch of each can really enhance the pancakes. For a beautiful plate, stack your pancakes high. Top them with fresh banana slices. A drizzle of honey or syrup makes them shine. You can also sprinkle crunchy nuts on top. For a creamy touch, serve with Greek yogurt. It adds richness and pairs well with the pancakes. {{image_4}} You can easily make these pancakes gluten-free. Use certified gluten-free oats. This ensures you avoid cross-contamination. Many brands offer oats that fit this need. If you are lactose intolerant, try almond milk or coconut milk. Both options work great in this recipe. They add a nice creaminess without the dairy. Want to add more fun to your pancakes? Toss in some chocolate chips or nuts. They give a sweet crunch that’s hard to resist. You can also use walnuts or pecans for added texture. You might like to incorporate fruit purees too. Applesauce or pumpkin puree can boost flavor and moisture. Vanilla or almond extract can add depth to the taste. Meal prep is easy with these pancakes. You can make a big batch and freeze extras. Just stack them with parchment paper between each pancake. This keeps them from sticking together. These pancakes pair well with yogurt or fresh fruit. A dollop of Greek yogurt adds protein. Fresh berries or banana slices on top make a lovely presentation. For the full recipe, check it out above. Enjoy your delicious and healthy banana oat pancakes! To keep your pancakes fresh, store them properly. If you have leftover pancakes, place them in an airtight container. You can refrigerate them for up to three days. This keeps them soft and tasty. For longer storage, freeze your pancakes. Lay them flat on a baking sheet. Once they freeze, transfer them to a freezer bag. This way, they won't stick together. You can freeze them for up to three months. When you're ready to enjoy your pancakes again, reheating is simple. The best way is to use a toaster or a skillet. If you choose a skillet, heat it on low. Add a tiny bit of coconut oil or spray. Place the pancakes in the skillet for about one minute on each side. This keeps them warm and fluffy. If you're in a hurry, you can use the microwave. Heat the pancakes for about 20-30 seconds. But be careful, as this may make them a bit chewy. For the best taste, always try to reheat them gently. Enjoy your Healthy Banana Oat Pancakes! For the full recipe, check out the details above. Yes, you can use quick oats. Quick oats are thinner and cook faster. This can affect the texture of your pancakes. Rolled oats give a heartier feel. If you use quick oats, your pancakes may be softer. You might also need less liquid since quick oats absorb liquid differently. Experiment and see what you like best. To make these pancakes vegan, swap out the milk and honey. Use almond milk or any plant-based milk. For sweetness, try maple syrup instead of honey. You can skip the egg, as this recipe is already egg-free. These changes keep the pancakes tasty and plant-based. If the batter is too thick, add a bit more milk to loosen it. Start with one tablespoon at a time. Blend it again after each addition. This helps keep the flavor strong while adjusting the texture. A good batter should pour easily, but not be runny. These pancakes last about 3 to 5 days in the fridge. Keep them in an airtight container to stay fresh. You can reheat them in the microwave or on a skillet. Just make sure they are heated through for the best taste. Yes, you can make the batter ahead of time. Store it in the fridge for up to 24 hours. If you wait longer, the oats may absorb too much liquid. Just add a little milk before cooking to get the right consistency. This makes breakfast quick and easy! For the full recipe, check out the detailed guide. To make these healthy banana oat pancakes, start by blending the rolled oats until they turn into a fine flour. Then mix in the mashed bananas and almond milk. This creates a smooth batter. It is important to let the batter rest for 5-10 minutes. This helps thicken the batter and improves texture. Here are some key points to remember for successful pancakes: - Always blend the oats until fine for the best texture. - Use ripe bananas for natural sweetness. - Let the batter rest; it makes a big difference. - Grease your skillet well to prevent sticking. - Cook until bubbles form, then flip carefully. These tips will help you create pancakes that are light, fluffy, and full of flavor. Enjoy making them! You learned about making delicious pancakes with simple, healthy ingredients. We covered the essential items, step-by-step cooking instructions, and helpful tips. We also explored variations to fit diets and preferences. Lastly, we discussed how to store leftovers and answered common questions. With these insights, you can create tasty pancakes that everyone will enjoy. Get cooking and delight your family or friends with these easy-to-make treats!](https://joymealplan.com/wp-content/uploads/2025/07/586e6978-884d-467f-992a-f783d71f0243-768x768.webp)