Pumpkin Spice Cream Cheese Cinnamon Rolls Delight

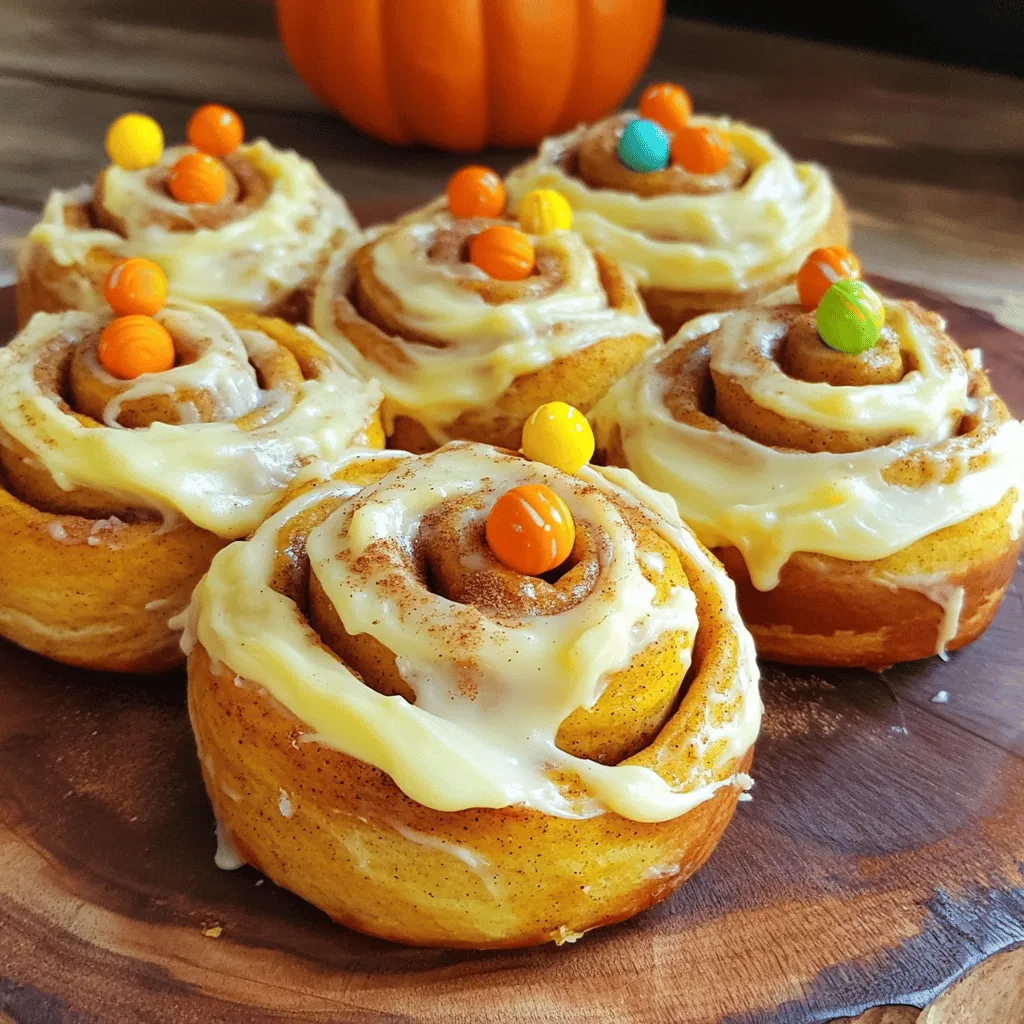
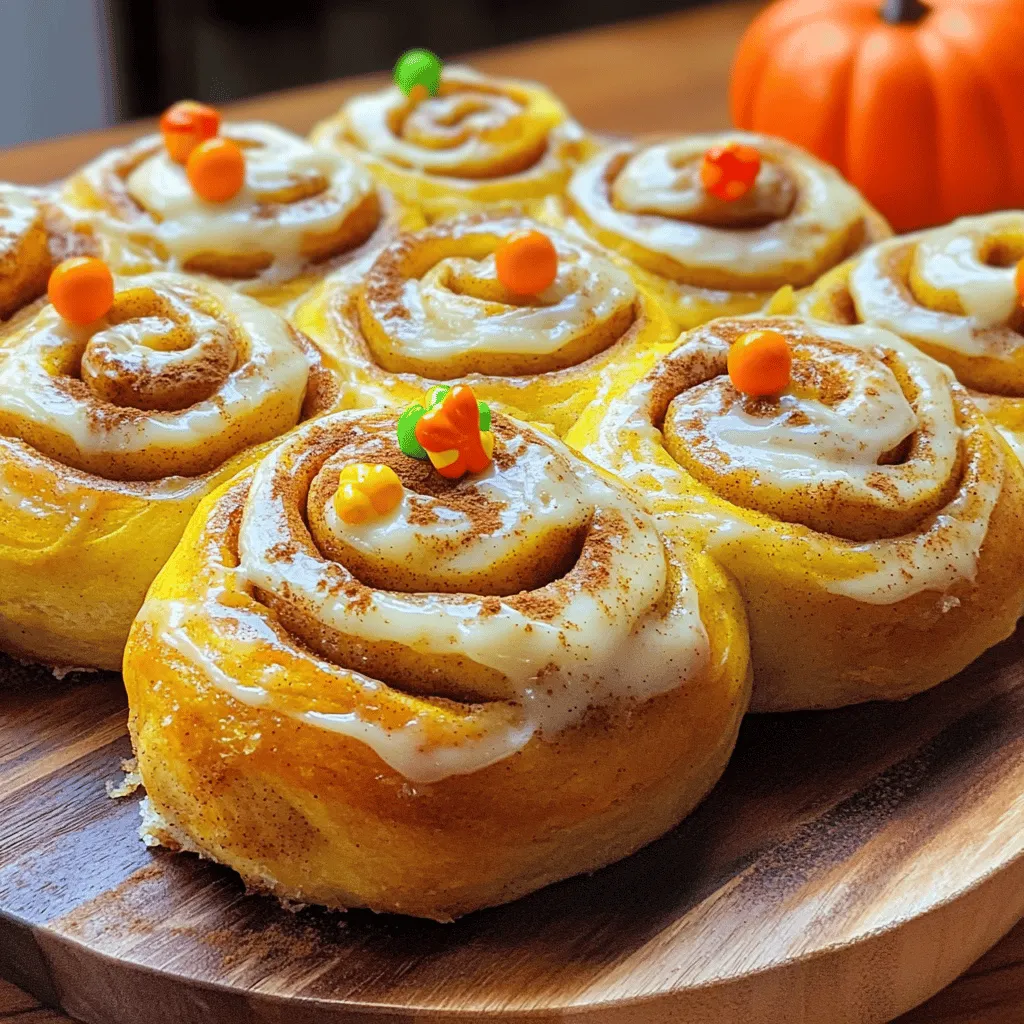
Get ready to indulge in autumn’s favorite treat: Pumpkin Spice Cream Cheese Cinnamon Rolls! These soft, fluffy rolls combine rich pumpkin goodness with sweet cream cheese, making them a perfect fall delight. Whether you’re a baking novice or a seasoned pro, this step-by-step guide will help you create a warm, cozy treat that impresses everyone. Let’s dive in and make your kitchen smell irresistible!
Ingredients
List of Ingredients
– 2 ½ cups all-purpose flour
– ¼ cup granulated sugar
– 1 packet (2 ¼ teaspoons) active dry yeast
– ½ teaspoon salt
– ½ teaspoon ground cinnamon
– ½ teaspoon ground nutmeg
– ½ cup warm milk (about 110°F)
– ¼ cup unsalted butter, melted
– 1 large egg
– ½ cup pumpkin puree
– 1 teaspoon vanilla extract
– ½ cup brown sugar (for filling)
– 1 tablespoon ground cinnamon (for filling)
– ½ cup cream cheese, softened
– 1 cup powdered sugar (for frosting)
– 2 tablespoons milk (for frosting)
– 1 teaspoon vanilla extract (for frosting)
Gathering these ingredients will help you create the best pumpkin spice cream cheese cinnamon rolls. Each ingredient plays a key role in flavor and texture.
All-purpose flour gives the rolls their structure, while granulated sugar adds sweetness. Active dry yeast helps the rolls rise, making them light and fluffy. Salt enhances the flavors, and the spices—cinnamon and nutmeg—bring that warm, cozy taste.
Warm milk activates the yeast, while melted butter adds moisture. The egg binds the ingredients together. Pumpkin puree is the star, adding rich flavor and moisture. Vanilla extract boosts the taste. For the filling, brown sugar and cinnamon create a sweet contrast to the cream cheese.
Finally, the frosting made with powdered sugar, milk, and vanilla is the perfect sweet finish. Each ingredient works together to create delicious rolls. Enjoy the blend of tastes and textures in every bite!
Step-by-Step Instructions
Prep the Dough
1. Start by combining warm milk, sugar, and yeast in a large bowl.
2. Let it sit for about 5-10 minutes. The mixture should become frothy and bubbly.
3. Once ready, mix in the melted butter, egg, pumpkin puree, and vanilla extract.
4. Add in the ground cinnamon and nutmeg, and stir well.
5. Gradually add the flour and salt until a soft dough forms. If it sticks, add more flour, a tablespoon at a time.
Kneading and Rising
1. Transfer the dough to a floured surface.
2. Knead the dough for 5-7 minutes until it is smooth and elastic.
3. Place the dough in a greased bowl and cover it with a damp cloth.
4. Let it rise in a warm place for about 1 hour, or until it doubles in size.
Preparing the Filling and Shaping Rolls
1. While the dough rises, mix brown sugar and cinnamon in a small bowl.
2. After the dough has risen, punch it down gently.
3. Roll it out on a floured surface into a rectangle, about 12×18 inches.
4. Spread the softened cream cheese evenly over the dough.
5. Sprinkle the cinnamon-brown sugar mixture across the cream cheese layer.
6. Starting from the long edge, roll the dough tightly into a log.
7. Pinch the seam closed to seal it well.
Final Rising and Baking
1. Cut the rolled dough into 12 equal pieces.
2. Arrange the slices in a greased 9×13 inch baking pan, leaving space between them.
3. Cover the pan with a clean cloth and let the rolls rise for another 30 minutes.
4. Preheat your oven to 350°F (175°C).
5. Bake the rolls for 25 to 30 minutes, or until golden brown on top.
Tips & Tricks
Perfecting the Dough
To make great cinnamon rolls, you need to activate the yeast. Start with warm milk, around 110°F. This warmth helps the yeast grow. If your yeast does not froth, it may be old or inactive.
Humidity can change how much flour you need. On humid days, use less flour. If your dough feels sticky, add a little more flour. Keep mixing until it feels smooth.
Filling Techniques
Spreading cream cheese evenly takes practice. Use a spatula or a butter knife. Start from the middle and push outward. Be gentle to keep the dough intact.
When rolling the dough, start at one end. Roll it tightly but not too tight. You want to keep the filling inside. Pinch the seam closed to hold everything together.
Frosting Tips
You can change the frosting to fit your taste. Add more vanilla for extra flavor. You can also mix in spices like nutmeg or cinnamon.
For the right frosting consistency, whisk with milk slowly. Aim for a smooth, drizzling texture. If it’s too thick, add more milk a teaspoon at a time.

Variations
Flavor Adjustments
You can make these rolls even better! Try adding chocolate chips. The sweet chocolate adds a fun twist. Nuts also work great. Chopped pecans or walnuts give a nice crunch. You can also switch up the spices. Instead of just cinnamon and nutmeg, try ginger or allspice. Each spice can change the taste in a unique way.
Dietary Modifications
Want a gluten-free version? Use gluten-free flour. It works well in this recipe. You can also make it dairy-free. Replace cream cheese with a dairy-free spread. Use almond milk or coconut milk instead of regular milk. This makes the rolls kinder to those with dietary needs.
Creative Serving Ideas
These rolls taste amazing with seasonal fruits. Serve them with fresh apples or pears. The sweetness pairs well with the spice. You can also enjoy them with drinks. A warm cup of coffee or tea makes a perfect match. The flavors blend together for a cozy treat.
Storage Info
Short-Term Storage
To store leftover cinnamon rolls, let them cool completely. Place them in an airtight container. You can also wrap them in plastic wrap. Store them at room temperature for up to three days. If you want to keep them fresh longer, place them in the fridge. They can last about a week in the fridge.
Long-Term Storage
If you want to save cinnamon rolls for later, freezing is a great option. First, let them cool down to room temperature. Wrap each roll tightly in plastic wrap, then in aluminum foil. This keeps them fresh and prevents freezer burn. You can freeze them for up to three months.
When you’re ready to enjoy them again, take them out of the freezer. Place them in the fridge overnight to thaw. For reheating, preheat your oven to 350°F (175°C). Place the rolls on a baking sheet and warm them for about 10-15 minutes. This will make them soft and tasty again.
FAQs
What can I substitute for pumpkin puree?
You can use mashed sweet potatoes or butternut squash. Both add a similar texture and flavor. If you need a quick fix, you can also use canned pumpkin pie filling. Just remember, it has added spices and sugar.
How do I know when my rolls are done baking?
Look for a golden brown color on top. You can also insert a toothpick into the center. If it comes out clean, your rolls are ready. The rolls should feel soft and spring back when touched.
Can I make the dough ahead of time?
Yes, you can! Prepare the dough, let it rise, then punch it down. Wrap it tightly and store it in the fridge for up to 24 hours. When ready, let it come to room temperature before shaping the rolls.
How long will the cinnamon rolls stay fresh?
These rolls stay fresh for about 2-3 days at room temperature. Keep them in an airtight container. If you want to keep them longer, freeze them for up to 3 months. Just thaw them overnight in the fridge before enjoying.
Can I use a bread machine for this recipe?
Absolutely! You can use the dough cycle on your bread machine. Simply add the ingredients in the order recommended by the machine. Once it’s done, shape and bake your rolls as usual.
Making these cinnamon rolls is fun and rewarding. We covered the key ingredients, from flour and sugar to pumpkin puree and cream cheese. You learned step-by-step instructions to prep, knead, and bake these tasty treats. Plus, we shared helpful tips on perfecting your dough, filling techniques, and even frosting variations.
Remember, you can get creative with flavors and dietary needs. Store them properly for a longer shelf life. Enjoy these warm rolls for breakfast, dessert, or any time! Your kitchen will smell amazing, and you’ll impress everyone with your baking skills.


![To make classic banana pudding, you need these key ingredients: - 4 ripe bananas, sliced into rounds - 1 cup heavy cream - 1 cup whole milk - 1/2 cup granulated sugar - 1/4 cup cornstarch - 1/4 teaspoon kosher salt - 1 teaspoon pure vanilla extract - 2 large egg yolks - 1 package (approximately 200g) vanilla wafers - Whipped cream for topping (optional) - Additional banana slices for garnish These ingredients create the creamy base and the delightful layers that make banana pudding so special. The ripe bananas add a natural sweetness. The vanilla wafers provide crunch and texture. You can enhance your banana pudding with a few optional ingredients: - A hint of cinnamon for warmth - Chocolate chips for a sweet twist - A splash of rum extract for depth These additions can give your pudding a unique flavor. Experiment with them to find your favorite mix! If you’re missing a few ingredients, don’t worry. Here are some common substitutions you can use: - Use almond milk instead of whole milk for a dairy-free option. - Substitute coconut cream for heavy cream for a tropical flair. - Replace granulated sugar with honey or maple syrup for sweetness. These substitutions will still give you a tasty result. Just remember to adjust measurements based on taste. For the full recipe, check the [Full Recipe]. To start, gather all your ingredients. You need milk, cream, sugar, cornstarch, salt, and eggs. In a medium saucepan, mix the whole milk, heavy cream, sugar, cornstarch, and salt. Use a whisk to blend everything until smooth. Make sure there are no lumps from the cornstarch. Heat this mix over medium heat. Stir it often with a wooden spoon. You want it to thicken and bubble, which takes about 5 to 7 minutes. Next, crack the two large eggs, separating the yolks into a bowl. Whisk the yolks until they look smooth and pale. To temper the yolks, take a few spoonfuls of the hot mix and whisk them into the yolks. This step keeps the eggs from cooking too fast. After that, pour the yolk mix back into the saucepan. Cook for another 2 to 3 minutes while stirring. The pudding should be thick and creamy when done. Remove it from heat and stir in the vanilla extract. Let it cool for about 10 minutes. Now it’s time to build your pudding layers. Start with a large serving dish or individual cups. Place a layer of vanilla wafers at the bottom. Next, add a layer of sliced bananas. Pour a generous amount of pudding over the bananas and cookies. Repeat this layering until you use all ingredients. Make sure the last layer is pudding. This creates a beautiful top. After layering, cover the dish tightly with plastic wrap. This step helps keep the pudding moist. Next, place it in the fridge for at least 4 hours. This time lets the pudding chill and firm up. When you’re ready to serve, add a dollop of whipped cream on top. You can also garnish with extra banana slices for a nice touch. This dessert looks as good as it tastes! If you'd like to see the complete guide, check out the Full Recipe for more details. To get that smooth, creamy texture, follow these tips: - Whisk well: When mixing the milk and cornstarch, make sure to whisk until there are no lumps. - Stir constantly: While cooking the pudding base, stir it continuously to prevent sticking and burning. - Temper the eggs: Slowly add hot mixture to egg yolks. This helps keep them from cooking too fast. - Cool gradually: Let the pudding cool for about 10 minutes before layering. It will thicken more as it cools. To keep your pudding fresh: - Cover tightly: Use plastic wrap to seal the dish. This keeps moisture out. - Refrigerate: Always store it in the fridge. It stays good for 2-3 days. - Layer with care: If you have leftovers, keep layers separate. This avoids mushy bananas. Want to make your banana pudding even better? Try these ideas: - Add spices: A pinch of cinnamon or nutmeg can add warmth. - Use flavored wafers: Try lemon or chocolate wafers for a fun twist. - Incorporate extracts: Add a drop of almond extract for an extra layer of flavor. - Top it off: Fresh berries or nuts can give a nice crunch and taste contrast. For the full recipe, check out the details above! {{image_4}} To make chocolate banana pudding, simply add cocoa powder. Use 1/3 cup of unsweetened cocoa powder. Mix it into the milk mixture after combining the sugar and cornstarch. This gives your pudding a rich chocolate flavor. Layer it just like the classic recipe. The chocolate pairs well with bananas, creating a great dessert. For a nutty twist, add chopped pecans or walnuts. You can mix in 1/2 cup of nuts into the pudding. You can also sprinkle some on each layer. This adds a delightful crunch to each bite. The nuts contrast nicely with the creamy pudding and soft bananas. To create a vegan version, swap dairy for plant-based options. Use almond or coconut milk instead of whole milk and cream. Replace egg yolks with 1/4 cup of silken tofu blended until smooth. Sweeten with maple syrup or coconut sugar. This makes a tasty, dairy-free pudding that everyone can enjoy. Each of these variations adds a new twist to the classic banana pudding. They keep the spirit of the dessert while offering different flavors and textures. For the full recipe, make sure to check out the details above. Banana pudding has a rich history that dates back to the 19th century. This dish first appeared in American cookbooks in the late 1800s. It gained popularity in the Southern states, where fresh bananas were easy to find. The sweet, creamy dessert combined layers of pudding, bananas, and vanilla wafers. This simple yet delicious treat quickly became a staple at family gatherings and potlucks. Over the years, banana pudding has evolved in many ways. In the 1930s, brands like Nabisco made vanilla wafers popular in homes. Many cooks began using these cookies as a key ingredient. Today, you can find various versions, including chocolate and vegan options. Some recipes even add whipped cream or meringue on top for extra flavor and texture. This evolution shows how versatile and beloved banana pudding truly is. In Southern cuisine, banana pudding holds a special place. It represents comfort and warmth. Families often serve it at holidays, birthdays, and reunions. Many people have fond memories of enjoying this sweet treat with loved ones. This dessert is not just a dish; it’s a tradition passed down through generations. The combination of flavors and textures captures the essence of Southern hospitality, making it a cherished part of the culture. Yes, you can use other types of bananas. While ripe Cavendish bananas are common, you can try red or plantain bananas. Each type brings a unique flavor. Red bananas are sweeter and softer. Plantains are firmer and less sweet. Just remember, the texture and taste will change. To keep bananas from browning, you can use lemon juice. Just squeeze a little juice over the banana slices. This helps slow down oxidation. You can also cover the bananas tightly with plastic wrap. Keeping them chilled also helps. Serve the pudding soon for the best look. If you don’t have vanilla wafers, don’t worry! You can use graham crackers or shortbread cookies. Both options add a nice crunch. You can even use sponge cake for a softer layer. Get creative! The pudding will still taste great, no matter what you use. This blog shows you how to make classic banana pudding. We covered key ingredients, optional add-ins, and substitutions. I also shared simple steps for preparing, layering, and chilling the pudding. You learned tips for perfect texture and storing leftovers. Plus, I explored fun variations like chocolate and vegan options. Finally, we discussed the history and cultural roots of this dish. Banana pudding is more than a dessert; it's a beloved tradition. Enjoy creating your own version and sharing it with friends and family.](https://joymealplan.com/wp-content/uploads/2025/06/2270da16-0b21-4017-a800-73ddf1839134-768x768.webp)
![- Strawberries - Blueberries - Kiwi - Mango - Pineapple When making honey lime fruit salad, choose bright and fresh fruits. Fresh strawberries add sweetness, while blueberries offer a burst of flavor. Kiwi adds a tangy kick, and mango brings a tropical twist. Pineapple adds juicy texture and sweetness. Each fruit shines in this salad. - Pure honey - Freshly squeezed lime juice - Lime zest The honey and lime mixture brightens the salad. Use pure honey for a rich flavor. Fresh lime juice offers a zesty taste, and lime zest adds a fragrant note. Mix these ingredients well to create a smooth dressing. This blend enhances the fruits and ties everything together. - Fresh mint leaves for decoration Fresh mint leaves add a pop of color and a refreshing aroma. They make the salad look beautiful and inviting. Just sprinkle them on top before serving. This final touch makes the dish feel special and fun. For the full recipe, check out the details above. Start by cleaning the fruits well. Rinse strawberries in cold water and hull them. Slice them into thin pieces. For blueberries, just rinse them off and set them aside. Peel the kiwi and dice it into small chunks. Next, peel the mango and cut it into cubes. Finally, chop the pineapple into bite-sized pieces. Using fresh fruits makes the salad taste better and look bright. Fresh fruits add flavor and nutrition to your dish. Grab a small bowl and add two tablespoons of pure honey. Next, squeeze two tablespoons of fresh lime juice into the bowl. Then, use a zester to add the zest from one lime. Using a whisk, mix these three ingredients together. You want the honey to blend smoothly with the lime juice and zest. This dressing brings a sweet and tangy flavor to your fruit salad. Now, pour the honey lime dressing over the bowl of fruits. Use a large spoon to gently toss everything together. Be careful! You want to coat the fruits without bruising them. After mixing, let the salad rest for about 10 minutes. This time helps the flavors blend together. Just before serving, stir the salad again. If you wish, add a bit more honey to sweeten it. Enjoy this refreshing dish served in bowls or on a platter. When picking fruits, go for seasonal options. They taste best and are often cheaper. Seasonal fruits are ripe and ready to eat. Off-season fruits can be harder and less sweet. Always check for ripeness. Squeeze the fruit gently; it should feel slightly soft. Look for bright colors, which show freshness. Avoid fruits with bruises or dark spots. To make your salad even better, adjust the sweetness. If you want it sweeter, add more honey. A little goes a long way. You can also add a small pinch of salt. It may seem odd, but salt brings out the natural sweetness. Just a touch can make a big difference. How you serve the fruit salad matters. You can use bowls for individual servings or a platter for a group. A platter looks nice and allows everyone to help themselves. To make it more appealing, use fresh mint leaves. They add color and a fresh scent. Just sprinkle a few on top right before serving. For a full guide on making this dish, check the [Full Recipe]. {{image_4}} You can mix in many fruits for more flavor. Try adding bananas for creaminess. Apples give a nice crunch. You can also use grapes or pomegranate seeds. These fruits add color and taste. They can also change the texture, making it fun to eat. Adding nuts or seeds brings a crunchy twist. Chia seeds are a great choice. They add fiber and healthy fats. Walnuts or almonds give a rich, nutty flavor. Just sprinkle them on top before serving. This will make your salad even more satisfying. You can turn your fruit salad into a meal. Adding protein makes it hearty. Greek yogurt is a tasty option. It adds creaminess and protein. Cottage cheese is another great choice. Both give a nice balance to the sweetness of the fruits. You can serve it in a bowl or mix it right in. Enjoy your Honey Lime Fruit Salad Delight! For the full recipe, check the section above. To keep your Honey Lime Fruit Salad fresh, use airtight containers. These containers help lock in moisture and flavors. Glass or plastic containers work well. If you don’t have these, a bowl covered tightly with plastic wrap can also be a good option. To prevent browning in fruits like apples or bananas, use lemon juice. You can also add extra lime juice to the salad. The acidity slows down oxidation. Keep your fruit salad in the fridge to stay crisp and tasty. For the best taste, eat the salad within three days. After this, the fruits may lose their texture. If you store it properly, it can last up to five days. However, the fresher, the better! Enjoy it while it's full of flavor. For the full recipe, check out the earlier section. Yes, you can use other sweeteners. Some good options are maple syrup and agave nectar. Each sweetener has a unique flavor. Maple syrup adds warmth, while agave is mild. Adjust the amount based on your taste. Use the same amount of these sweeteners as honey. This keeps the balance of flavors intact. You can prepare this salad ahead, but keep some tips in mind. Cut the fruits and store them separately. This helps keep them fresh. Mix the honey lime dressing and store it in the fridge. Combine everything just before serving. This keeps the fruits from getting mushy and preserves the crunchiness. Certain fruits may not mix well with lime. Avoid bananas, as they brown quickly and can turn mushy. Apples may also not hold up well with lime juice. Citrus fruits like oranges can overpower the salad. Stick to fruits that stay fresh and vibrant for the best taste. This blog post showed you how to create a delightful fruit salad. We covered the best fresh fruits like strawberries and mangoes, and the sweet honey-lime dressing. You learned how to prepare and combine the ingredients for a tasty dish. We shared tips on choosing fruits, enhancing flavors, and presentation tricks. In the end, you can make this salad your own by adding nuts or different fruits. With these steps, your salad will be fresh and enjoyable every time. Now, you’re ready to impress with your new skills!](https://joymealplan.com/wp-content/uploads/2025/06/73b51031-810e-4f51-94b6-bb966ad7c4ea-768x768.webp)


