Pumpkin Spice Latte Tiramisu Creamy Delight Recipe

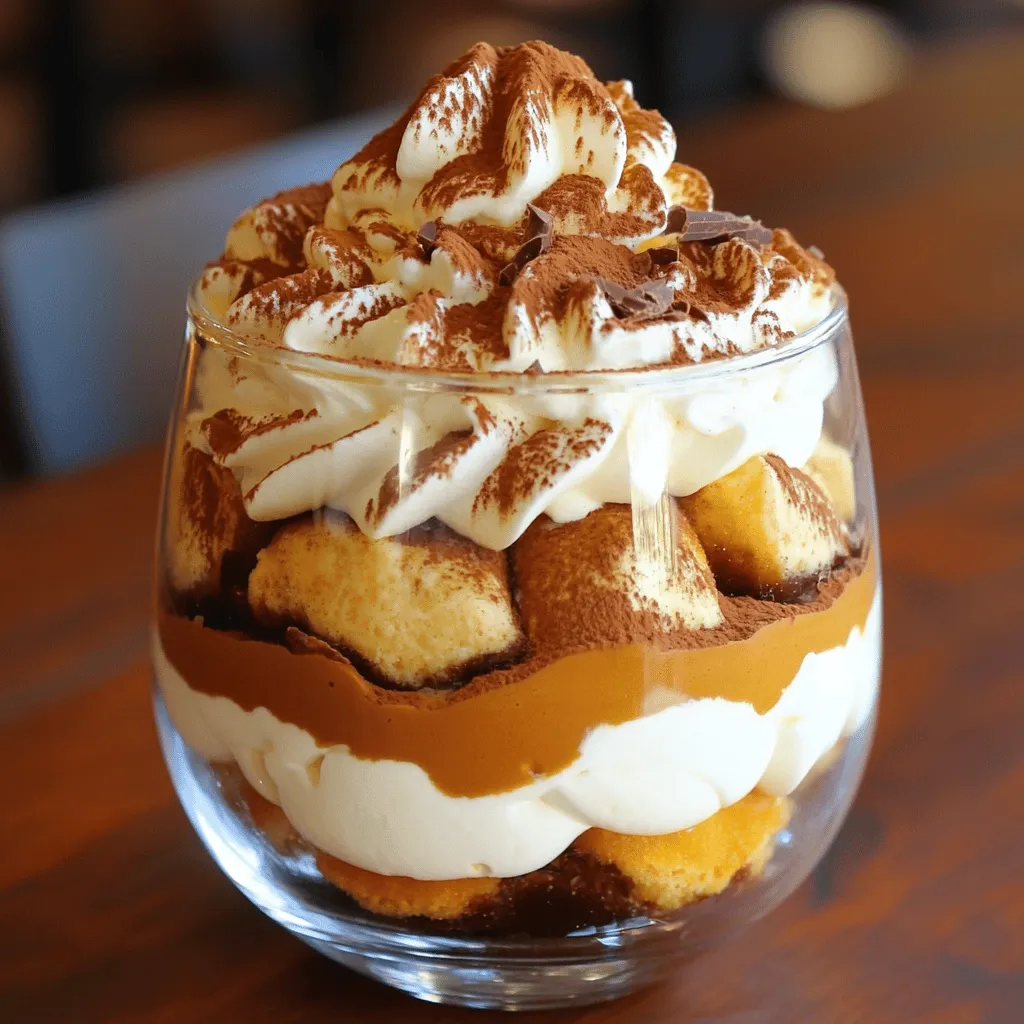
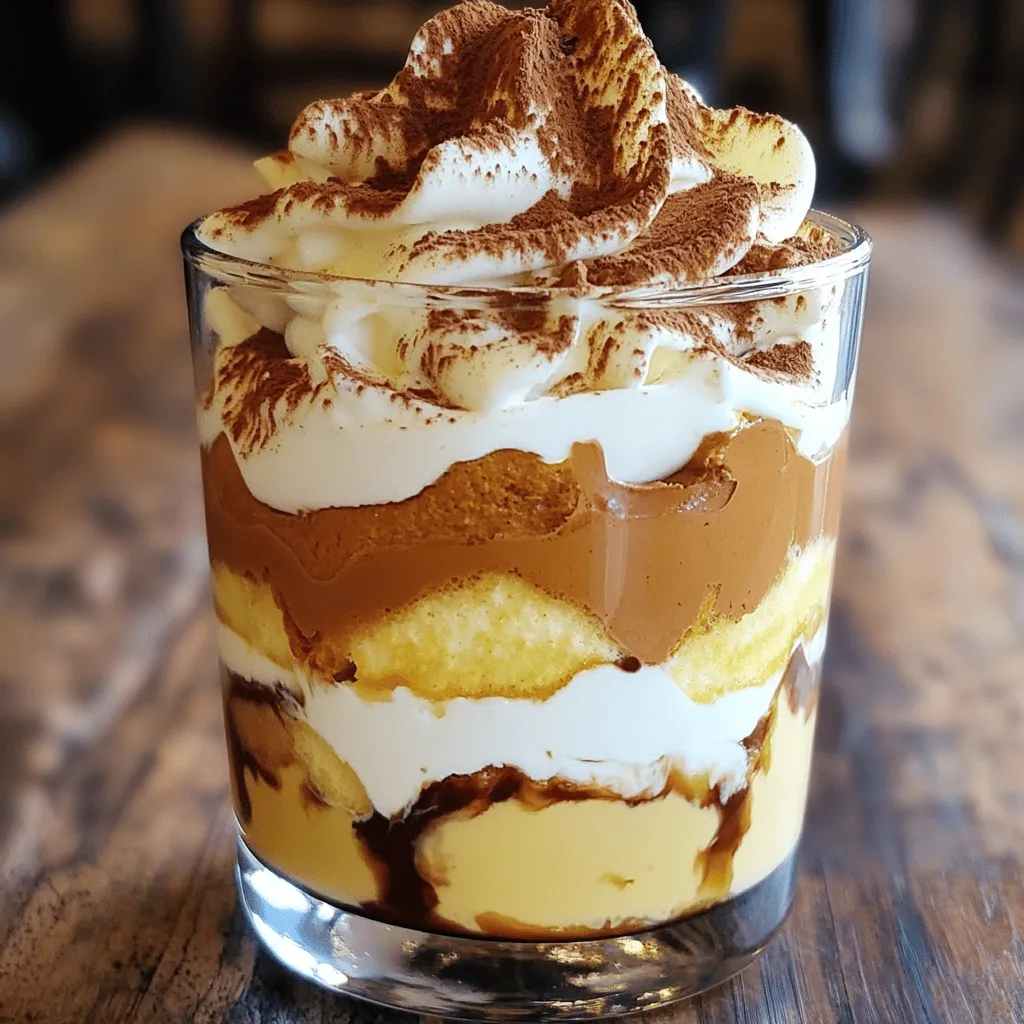
Fall is here, and it’s time to treat yourself to a creamy delight: Pumpkin Spice Latte Tiramisu! This twist on the classic dessert combines rich coffee and autumn spices with layers of velvety mascarpone. In just a few simple steps, you’ll impress your friends and family with a seasonal favorite. Get ready to dive into this delicious recipe and discover how to make this festive treat shine on your table!
Ingredients
List of Ingredients
– 1 cup strong brewed coffee, at room temperature
– 2 tablespoons pumpkin spice syrup (store-bought or homemade)
– 1 cup mascarpone cheese
– 1 cup heavy cream
– 1/2 cup powdered sugar
– 1 teaspoon vanilla extract
– 1 cup ladyfinger cookies (savoiardi)
– 1/2 teaspoon pumpkin spice blend
– Unsweetened cocoa powder for dusting
– Optional garnishes (chocolate shavings, ground cinnamon)
You will need simple items for this tasty dessert. I love using strong brewed coffee for bold flavor. Pumpkin spice syrup adds sweetness and warmth. Mascarpone cheese gives the dessert its creamy texture. Heavy cream whips up fluffy and light.
Powdered sugar sweetens without adding grit. Vanilla extract boosts flavor. Ladyfinger cookies soak up the coffee and become soft. The pumpkin spice blend enhances the scent and taste. Unsweetened cocoa powder tops it off and adds a slight bitterness.
Lastly, optional garnishes like chocolate shavings and ground cinnamon make it pretty. Each ingredient plays a part in making this treat special. Gather these items, and you’ll be ready to create a delicious pumpkin spice latte tiramisu!
Step-by-Step Instructions
Preparing the Coffee Mixture
To start, brew strong coffee. Use a coffee maker or French press. Let it cool to room temperature. Then, mix in two tablespoons of pumpkin spice syrup. Stir well until combined. This mixture adds rich flavor to your tiramisu.
Whipping the Cream
Next, take a mixing bowl and add one cup of heavy cream. Use an electric mixer. Whip the cream on medium speed. Watch for soft peaks to form. Gradually add half a cup of powdered sugar and one teaspoon of vanilla extract. Continue to whip until you see stiff peaks. The cream should be light and fluffy.
Combining Mascarpone and Cream
Now, take another bowl. Add one cup of mascarpone cheese. Gently blend in the whipped cream from before. Use a spatula for this step. Fold the mascarpone into the cream carefully. You want to keep the airiness of the whipped cream.
Layering the Tiramisu
Next, quickly dip ladyfinger cookies into the coffee mixture. Make sure they soak just enough to get moist. Arrange half of the soaked ladyfingers in a single layer at the bottom of your dish. Spread half of the mascarpone mixture over the ladyfingers. Smooth it out gently. Sprinkle half of the pumpkin spice blend over the top.
For the second layer, repeat the process. Use the remaining dipped ladyfingers and then the rest of the mascarpone mixture. Smooth it out for a neat finish.
Final Touches Before Chilling
To finish, dust the top with unsweetened cocoa powder. Add a sprinkle of ground cinnamon for extra flavor. If you like, add chocolate shavings for a decorative touch. Cover the dish with plastic wrap. Refrigerate for at least four hours, or overnight for the best taste.
Tips & Tricks
Perfecting the Tiramisu Texture
Chilling time is very important for the best tiramisu. It helps the flavors blend and the layers firm up. I recommend chilling it for at least four hours or, better yet, overnight. This gives the coffee and cream time to mix into a rich treat.
To avoid soggy ladyfingers, dip them quickly in the coffee mixture. Just a quick dip will make them moist without turning them mushy. You want them soft but still holding their shape.
Presentation Suggestions
Serving your tiramisu in clear glasses makes for a stunning display. You can see the beautiful layers, which adds to the experience. Each guest can enjoy their own portion, making it feel special.
For garnishing, a sprinkle of ground cinnamon adds a warm touch. You can also add a dollop of whipped cream on top for extra flair. If you want to impress, chocolate shavings give a nice richness.
Substitutions and Additions
If you want to change the sweetness, you can use alternative sweeteners like maple syrup or agave. These options can offer a different taste and reduce the sugar content.
For a non-dairy version of mascarpone, consider using cashew cream or coconut cream. These alternatives keep the flavor rich while being dairy-free, making the tiramisu suitable for more diets.

Variations
Seasonal Flavors
You can change the spice mix to fit the season. Try adding nutmeg or cardamom. These spices can bring new notes to your dessert. You can also use flavored liqueurs for a fun twist. For example, a splash of coffee liqueur can enhance the coffee flavor. Or use pumpkin liqueur for extra pumpkin spice fun.
Dietary Adaptations
If you need a gluten-free option, use gluten-free ladyfingers. They are easy to find in stores. For a dairy-free version, try using cashew cream instead of mascarpone. You can also use coconut cream for a rich texture. Both options work well and keep the dessert creamy.
Creative Twists
You can add layers of chocolate for a richer taste. Just sprinkle some chocolate chips or shavings between the layers. You might also want to swirl in some caramel. This adds a lovely sweetness. If you enjoy nuts, consider adding crushed walnuts or pecans. They add crunch and flavor, making your tiramisu unique.
Storage Info
Proper Storage Techniques
For best results, use an airtight container to chill your tiramisu. Glass or plastic containers work well. Make sure the lid seals tightly to keep air out. If you don’t have a container, cover your dish with plastic wrap. Press it down gently to avoid air pockets. This keeps the dessert fresh and tasty.
Shelf Life
Your pumpkin spice latte tiramisu stays fresh in the fridge for about three days. After that, the flavors may fade. If you want to store it longer, you can freeze it. Wrap it tightly in plastic wrap and then in foil. It can last up to two months in the freezer. When ready, thaw it overnight in the fridge before serving.
FAQs
How can I make this tiramisu in advance?
You can make this tiramisu a day ahead. Just follow these steps:
– Prepare the coffee mixture and mascarpone as usual.
– Layer the dessert in your serving dish.
– Cover it well with plastic wrap.
– Chill it overnight in the fridge.
This way, the flavors blend better, and it tastes great!
Can I use instant coffee instead?
Yes, you can use instant coffee. However, the taste may not be as rich.
– Instant coffee lacks the depth of flavor found in brewed coffee.
– If you choose instant, dissolve it in hot water first.
– Aim for a strong brew to keep the coffee flavor bold.
What can I serve with Pumpkin Spice Latte Tiramisu?
This tiramisu pairs well with many treats. Here are some ideas:
– Whipped cream adds a light touch.
– A scoop of vanilla ice cream brings creaminess.
– Serve with spiced cookies for a crunchy contrast.
– A warm cup of coffee or tea complements the flavors nicely.
Why is my tiramisu runny?
A runny tiramisu often happens due to a few common mistakes:
– If the mascarpone cheese is not whipped well, it won’t hold.
– Over-soaking the ladyfingers can cause a soggy dessert.
– Ensure to chill it enough time to set properly.
To fix it, make sure to whip the cream to stiff peaks and soak the ladyfingers briefly.
This blog post guided you through making delicious Pumpkin Spice Latte Tiramisu. You learned about key ingredients, step-by-step instructions, and tips to perfect texture and presentation. Remember to chill it well for the best results. Explore variations and adapt the recipe to suit your tastes. Storing properly keeps it fresh longer, so don’t skip that part. Enjoy sharing this treat with friends or family during the season! With these tips, you can create a delightful dessert that everyone will love.


![- 3 ripe bananas, thoroughly mashed - 1/2 cup unsweetened applesauce - 1/2 cup packed brown sugar - 1/4 cup granulated sugar - 2 large eggs, at room temperature - 1 teaspoon pure vanilla extract - 1 teaspoon baking soda - 1/2 teaspoon baking powder - 1/4 teaspoon fine salt - 1 1/2 cups all-purpose flour - 1 cup semi-sweet chocolate chips, plus an extra handful for topping - 1/2 teaspoon ground cinnamon (optional) When measuring ingredients, accuracy is key. Use standard measuring cups and spoons. For flour, spoon it into the cup and level it off with a knife. This gives you the right amount without packing it down. Bananas should be fully ripe, as this makes the bread sweeter and more flavorful. If you need alternatives, here are some options: - Substitute applesauce with yogurt for a creamier texture. - Use coconut sugar instead of brown sugar for a lower glycemic index. - If you're out of eggs, try using flaxseed meal mixed with water as a binder. - For gluten-free options, use a 1:1 gluten-free flour blend. - Swap semi-sweet chocolate chips with dark chocolate or white chocolate for a twist. These substitutions can change the flavor but keep the essence of the bread intact. You can easily customize this recipe to fit your pantry and taste! If you're curious about the full recipe, check out the Choco-Banana Bliss Bread . Start by gathering all your ingredients. You need ripe bananas, applesauce, sugars, eggs, vanilla, baking soda, baking powder, salt, flour, chocolate chips, and optional cinnamon. Preheat your oven to 350°F (175°C). Grease a 9x5-inch loaf pan with butter or cooking spray. This helps the bread come out easily after baking. In a large bowl, mash the ripe bananas until smooth. Add the applesauce, brown sugar, and granulated sugar. Mix well with a fork or whisk. Next, add the eggs and vanilla extract. Stir until everything is blended. In a separate bowl, whisk the dry ingredients: baking soda, baking powder, salt, and cinnamon if you like. Slowly add this dry mix to the wet mix. Fold gently with a spatula. Be careful not to overmix; you want a light, fluffy bread. Finally, fold in the chocolate chips, saving a few for the top. Pour the batter into the prepared loaf pan. Smooth the top with a spatula. Sprinkle the reserved chocolate chips on top for extra chocolate goodness. Bake in your preheated oven for 60-65 minutes. Check doneness by inserting a toothpick into the center. If it comes out clean or with a few moist crumbs, it's done. Once baked, let the loaf cool in the pan for 10 minutes. Then transfer it to a wire rack to cool fully before slicing. Enjoy your warm, chocolate chip banana bread! For the full recipe, check [Full Recipe]. To get the right texture in your chocolate chip banana bread, use ripe bananas. Ripe bananas are sweet and soft, making the bread moist. Mash them well to avoid lumps. Mix the wet and dry ingredients gently. Overmixing can make the bread tough. Aim for a light and fluffy loaf. Many people add too much flour, which can dry out the bread. Always measure flour correctly. Another mistake is not baking long enough. A toothpick should come out with a few moist crumbs but not wet batter. Also, don't skip the cooling time before slicing. This helps the bread set properly. For extra flavor, add ground cinnamon to your batter. It pairs well with bananas and chocolate. You can also use vanilla extract for a richer taste. If you want more texture, try adding nuts like walnuts or pecans. They add crunch and depth to your bread. For the full recipe, check out the Choco-Banana Bliss Bread details! {{image_4}} Adding nuts can give your chocolate chip banana bread a nice crunch. I often use walnuts or pecans. Chop them into small pieces. Fold in about half a cup into your batter. This step adds flavor and texture. You can also toast the nuts for extra taste. Just watch them closely to avoid burning. While semi-sweet chocolate chips are classic, feel free to switch it up. Dark chocolate chips add a rich taste. Milk chocolate chips make the bread sweeter. White chocolate creates a creamy contrast with the banana flavor. Use one type or mix them for a fun twist. Just keep the total amount around a cup. You can enhance your banana bread with spices or extracts. Ground cinnamon adds warmth. A pinch of nutmeg can make it cozy. Try adding a teaspoon of almond or coconut extract for a unique twist. These small changes can make your bread special. Get creative and find your favorite combination! To keep your chocolate chip banana bread fresh, wrap it tightly in plastic wrap or store it in an airtight container. This method helps retain moisture and flavor. You can leave it at room temperature for up to three days. If you want it to last longer, consider freezing it. Freezing banana bread is easy and smart. First, let the bread cool completely. Then, slice the bread into individual pieces. Wrap each slice in plastic wrap or foil. Place the wrapped slices in a freezer bag. You can freeze them for up to three months. For best results, label the bag with the date. When you want to enjoy your banana bread again, reheating is simple. Take out a slice and let it sit at room temperature for a few minutes. You can use a microwave for quick reheating. Heat it for about 15-20 seconds. For a crispy crust, pop it in a toaster oven for a few minutes. Enjoy your slice warm with butter or cream cheese. To ripen bananas fast, place them in a paper bag. Add an apple or a ripe banana for best results. The ethylene gas they produce speeds up ripening. Check them daily until they're soft and sweet. Yes, you can use frozen bananas. Just thaw them before mashing. Drain any excess liquid to avoid soggy bread. Frozen bananas often have more flavor, making your bread even tastier. To check if your bread is done, insert a toothpick into the center. If it comes out clean or with a few moist crumbs, it’s ready. The bread should feel firm and spring back when gently pressed. You have many options for overripe bananas! Try making smoothies for a creamy texture. You can also create banana pancakes or muffins. Another idea is to freeze them for later use in baking or smoothies. In this post, we covered key ingredients and steps for making banana bread. We explored tips to perfect its texture and avoid common mistakes. You can try fun variations by adding nuts or different chocolates. We also discussed how to store leftovers and freeze your bread. Banana bread is easy to make and delicious. Now, it’s your turn to get baking!](https://joymealplan.com/wp-content/uploads/2025/05/475bee4b-eacd-4984-83f8-73c9916382a2-768x768.webp)


![To make S’mores Cookie Bars, gather these key ingredients: - 1 cup unsalted butter, softened - 1 cup packed brown sugar - 1/2 cup granulated sugar - 2 large eggs - 1 teaspoon pure vanilla extract - 2 1/4 cups all-purpose flour - 1 teaspoon baking soda - 1/2 teaspoon salt - 1 cup semi-sweet or milk chocolate chips - 1 cup mini marshmallows - 3/4 cup crushed graham crackers - Additional chocolate chips and mini marshmallows for topping If you need swaps, here are a few ideas: - Use margarine instead of butter if needed. - Coconut sugar can replace brown sugar for a unique taste. - For a dairy-free option, try a plant-based butter and dairy-free chocolate chips. - You can also use large marshmallows cut into smaller pieces if mini ones are not available. When choosing your ingredients, consider these tips: - Select fresh butter for the best flavor. - Look for chocolate chips with a high cocoa content; they taste richer. - Check for freshness on your baking soda and flour. - Choose mini marshmallows that are soft and fluffy for the best texture. - For crushed graham crackers, buy a brand with simple, natural ingredients for the best taste. These ingredient insights will help you create the best S’mores Cookie Bars. Happy baking! 1. Preheat your oven to 350°F (175°C). 2. Prepare a 9x13 inch baking pan. You can grease it or line it with parchment paper for easy removal. 3. In a large bowl, cream 1 cup of softened butter, 1 cup of packed brown sugar, and 1/2 cup of granulated sugar. Beat until light and fluffy. 4. Add 2 large eggs, one at a time, and mix well after each addition. Stir in 1 teaspoon of pure vanilla extract. 5. In another bowl, mix together 2 1/4 cups of all-purpose flour, 1 teaspoon of baking soda, and 1/2 teaspoon of salt. 6. Gradually add the dry mix to the wet mix, stirring gently. Be careful not to overmix. 7. Fold in 1 cup of chocolate chips, 1 cup of mini marshmallows, and 3/4 cup of crushed graham crackers. Make sure they are evenly spread in the dough. 8. Take half of the cookie dough and spread it in the bottom of the pan. Press it down firmly. 9. Add a layer of chocolate chips and mini marshmallows over the dough. This will be your tasty filling. 10. With the remaining dough, dollop it over the filling. Gently spread it out, leaving some gaps for the marshmallows to peek through. 11. Top with extra chocolate chips and mini marshmallows. 12. Bake in the preheated oven for 25-30 minutes. Look for golden edges and a set center. 13. Once baked, let the bars cool in the pan for about 10 minutes. 14. Transfer the bars to a cutting board. Slice them into squares. 15. For the best experience, serve warm for a gooey bite or let them cool for firmer bars. You can even dust them with crushed graham crackers or serve with ice cream. This is a fun and easy way to enjoy S’mores in a cookie bar form. For the full recipe, check out the details above! To get the best texture for your S’mores cookie bars, focus on creaming the butter and sugars well. This step adds air to the dough, making it light. Don't overmix when adding the flour; this keeps the bars soft. Also, make sure to let your bars cool in the pan for a bit. This helps them set perfectly. One common mistake is overbaking. Keep an eye on the timer. The edges should look golden, but the center can be soft. Another mistake is not measuring the ingredients correctly. Use a kitchen scale when you can. Lastly, avoid pressing the dough too hard into the pan. You want a light touch for a better rise. To boost the flavor in your S’mores cookie bars, consider using dark chocolate instead of semi-sweet. It adds a richer taste. You can also mix in some toasted nuts for crunch. If you love a bit of spice, a pinch of cinnamon works wonders. Lastly, consider adding a dash of sea salt on top before baking. It enhances the sweetness and richness beautifully. For the full recipe, click here: [Full Recipe]. {{image_4}} You can elevate your S’mores cookie bars with gourmet ingredients. Try using high-quality chocolate, like dark chocolate or sea salt caramel chocolate. This gives a rich flavor that takes these bars to a new level. You can also add toasted coconut for a tropical twist. Another great idea is to sprinkle flaky sea salt on top right before serving. This adds a nice contrast to the sweetness. If you need a gluten-free option, you can easily adapt this recipe. Use gluten-free flour blends that measure cup-for-cup like regular flour. Make sure to check that your chocolate chips and graham crackers are also gluten-free. This way, everyone can enjoy these tasty bars without worry. For a fun twist, add unique flavors to your S’mores cookie bars. Swirl in Nutella or peanut butter into the dough before baking. You can also mix in chopped nuts for extra crunch. Try adding crushed peppermint candies for a festive touch during the holidays. The possibilities are endless, and you can customize these bars to fit any taste! For the complete recipe, check out [Full Recipe]. To keep your S’mores Cookie Bars fresh, store them in an airtight container. This helps avoid drying out. Place parchment paper between layers to prevent sticking. They will stay good at room temperature for about four days. If you want to keep them longer, refrigeration is a great option. Just remember to bring them to room temperature before serving for the best flavor. You can freeze S’mores Cookie Bars for up to three months. First, let them cool completely. Then, cut them into squares. Wrap each square in plastic wrap tightly. Place the wrapped bars in a freezer bag or container. Label it with the date. When you’re ready to enjoy, thaw them overnight in the fridge or for a few hours at room temperature. To reheat S’mores Cookie Bars, preheat your oven to 350°F (175°C). Place the bars on a baking sheet. Cover them loosely with foil to prevent burning. Heat for about 10 minutes or until warm. This will help restore their gooey texture and melt the chocolate again. Enjoy them warm for the best experience! For the full recipe, check out the recipe section above. S’mores cookie bars last about five days at room temperature. Store them in an airtight container. This keeps them fresh and soft. You can also refrigerate them for up to a week. Just remember to bring them to room temperature for the best taste. Yes, you can make these bars ahead of time. They are great for meal prep or parties. Bake and cool them completely. Then, cut them into squares and store them in an airtight container. You can also freeze them for up to three months. Just thaw them before serving. If you don't have mini marshmallows, you can use large marshmallows. Cut them into smaller pieces to fit. Alternatively, try using marshmallow fluff for a gooey texture. You can also skip marshmallows altogether and use caramel instead. This adds a different kind of sweetness. For the full recipe, visit the recipe section above. In this post, we covered how to make delicious s’mores cookie bars. We looked at the key ingredients and their best substitutes. You learned step-by-step how to prepare, bake, and serve these treats. We shared tips for perfect texture and flavor. You can also explore fun variations for added taste. Remember to store them well for freshness. With these tips, you're ready to create a tasty batch. Enjoy making and sharing your s’mores cookie bars!](https://joymealplan.com/wp-content/uploads/2025/07/947e80de-fe9c-4bdc-b9c7-cc0f2244d142-768x768.webp)
