Quick Peach Chutney Flavorful and Simple Recipe Guide
. When making chutney, you may face some common issues. One frequent mistake is using unripe peaches. Unripe peaches lack flavor and sweetness. Always pick ripe, fragrant peaches for the best taste. Another error is not allowing the mixture to rest. Resting lets the peaches release juices, creating a rich base. If you skip this step, your chutney may end up dry. Sometimes, people add too much salt. Remember, you can always add more later. Start with a small pinch and taste before adding more. Also, avoid boiling the chutney on high heat. This can burn the sugar and ruin the flavor. Always cook on medium heat for better results. To make your chutney even more delicious, consider adding spices. A pinch of cardamom or nutmeg can boost flavor. Cinnamon and cloves are great, but try mixing in some allspice for a warm twist. If you want to adjust sweetness, add more brown sugar or honey. For a tangy kick, add extra apple cider vinegar. If you like heat, increase the red pepper flakes. Start with a little and taste as you go. You control the flavor! {{image_4}} You can switch out peaches for other fruits. Apples, mangoes, or plums work great. Each fruit brings its own taste and texture. Use ripe, juicy fruits for the best flavor. Fresh seasonal fruit always wins. For example, use apples in the fall and mangoes in summer. This keeps your chutney fresh and exciting. You can change the heat and sweetness easily. For more spice, add extra red pepper flakes. If you like it sweet, add more brown sugar or honey. Try adding spices like cumin or coriander for a unique twist. You can also mix in herbs like cilantro for freshness. These small changes can craft a new flavor profile. For more ideas, check the Full Recipe for suggestions on different flavor combinations. To keep your Quick Peach Chutney fresh, follow these steps: - Use a clean glass jar with a tight lid. - Make sure the chutney cools to room temperature before sealing. - Store it in the fridge. This helps lock in the flavors. Glass jars are great because they do not absorb odors. You can also use airtight plastic containers if you prefer. Just make sure they are food-safe. Quick Peach Chutney lasts about one week in the fridge. After that, the flavors may fade. Always check for any signs of spoilage, like off smells or mold. You can freeze the chutney if you want to keep it longer. Pour it into freezer-safe containers, leaving some space for expansion. It can last up to three months in the freezer. When you want to use it, simply thaw it in the fridge overnight. This way, you can enjoy your chutney whenever you like! Yes, you can make this chutney ahead of time. In fact, it tastes better after sitting for a day or two. The flavors mix and deepen, making the chutney even more delicious. You can store it in the fridge for up to two weeks. Just keep it in an airtight container to prevent it from drying out. Peach chutney is safe for canning if you follow proper methods. You should use a water bath canner for safe preservation. Always make sure to process jars for at least 10 minutes to ensure safety. Check seals before storing them in a cool, dark place. This way, you can enjoy your chutney long after peach season has ended. Peach chutney pairs well with many dishes. You can serve it with grilled chicken or pork for a burst of flavor. It also complements cheese boards, especially with creamy cheeses. Try it on sandwiches or burgers for a sweet and tangy kick. For a simple snack, enjoy it with crackers. The options are endless! Quick Peach Chutney is simple and fun to make. We explored the main ingredients, focusing on ripe peaches and how their quality matters. I shared tips on preparation, cooking steps, and even storage options to keep your chutney fresh. We talked about common mistakes and how to adjust flavors. You can use other fruits or tweak spice levels for personal taste. Remember, chutney makes a great addition to meals and snacks. Enjoy making this easy recipe, and feel free to share your creations!](https://joymealplan.com/wp-content/uploads/2025/07/68e09f5d-054f-4bea-af91-fb6a51bc34a0.webp)
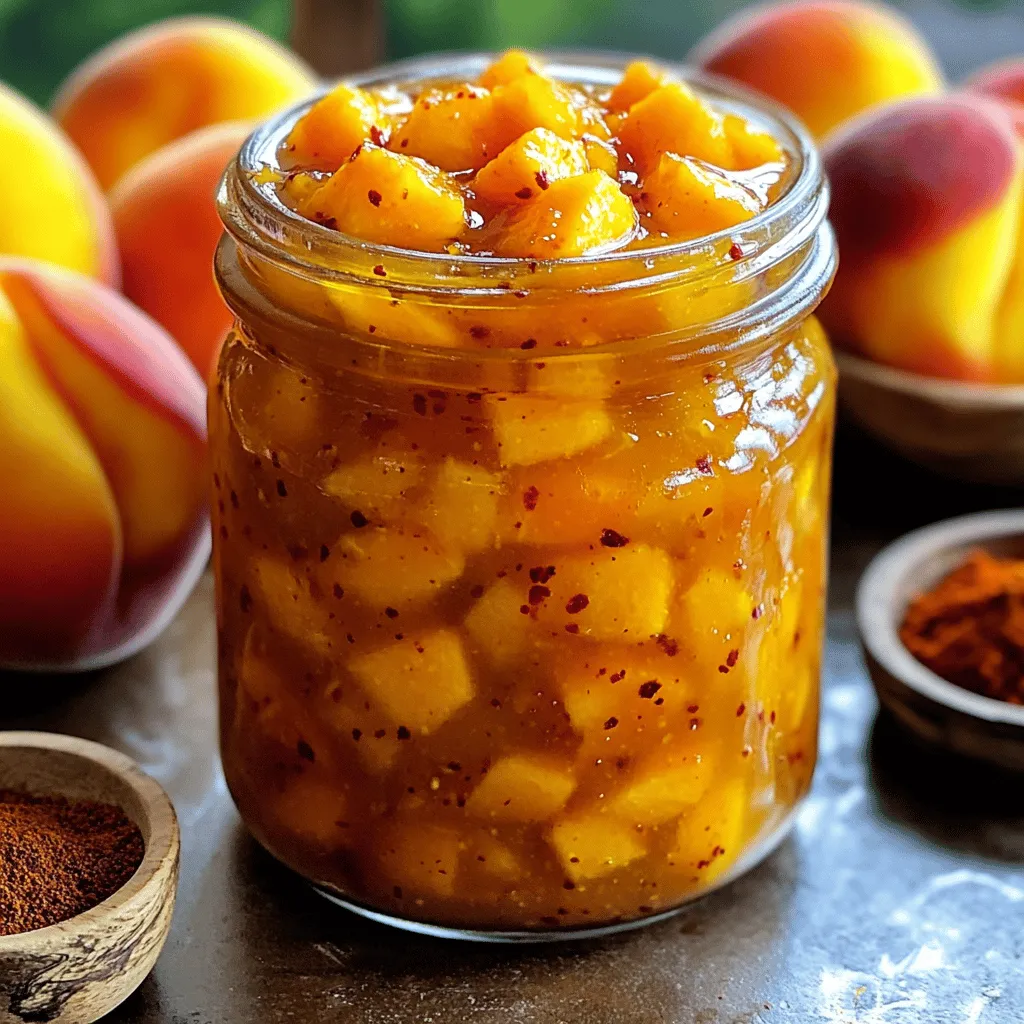
Are you ready to elevate your meals with a burst of flavor? In this guide, I’ll show you how to make Quick Peach Chutney that’s both tasty and easy to prepare. With fresh peaches and a few simple ingredients, you can whip up this delightful condiment in no time. Whether you enjoy it with grilled meats or cheese, it’s a versatile addition to your kitchen. Let’s dive in!
Ingredients
Main Ingredients
To make Quick Peach Chutney, you need a few key ingredients. Here’s what you’ll need:
– 4 ripe peaches, pitted and diced into small cubes
– 1 small onion, finely chopped
– 1/2 cup brown sugar, packed
– 1/4 cup apple cider vinegar
– 1 teaspoon fresh ginger, peeled and grated
– 1/2 teaspoon ground cinnamon
– 1/4 teaspoon ground cloves
– 1/4 teaspoon red pepper flakes (adjust according to your preferred level of heat)
– Salt, to taste
The quality of peaches is vital for this recipe. Use ripe peaches for the best flavor. Look for peaches that feel slightly soft and smell fragrant. They should have a rich, golden color. If they are too hard, they may not break down well when cooked. Overripe peaches can turn mushy, so aim for that sweet spot.
Optional Ingredients
You can add more flavor with optional ingredients. Here are some ideas to make your chutney even better:
– A splash of orange juice for brightness
– A handful of raisins for sweetness
– Fresh herbs like cilantro or mint for freshness
If you have dietary needs, consider these substitutions:
– Use coconut sugar instead of brown sugar for a lower glycemic index.
– Swap apple cider vinegar with a milder white vinegar if needed.
– Omit the red pepper flakes for a milder chutney.
These tweaks let you customize your chutney and make it your own!
Step-by-Step Instructions
Preparation
Start by gathering your ingredients. You will need:
– 4 ripe peaches, pitted and diced into small cubes
– 1 small onion, finely chopped
– 1/2 cup brown sugar, packed
– 1/4 cup apple cider vinegar
– 1 teaspoon fresh ginger, peeled and grated
– 1/2 teaspoon ground cinnamon
– 1/4 teaspoon ground cloves
– 1/4 teaspoon red pepper flakes
– Salt, to taste
Chop the peaches into small cubes. This helps them cook evenly. Finely chop the onion, too. Mix the peaches, onion, and brown sugar in a medium saucepan. Let this sit for about 5 minutes. This resting time helps the peaches release their juices, making a tasty base for your chutney.
Cooking Process
Place the saucepan over medium heat. Add apple cider vinegar, ginger, cinnamon, cloves, and red pepper flakes. Stir well to mix everything. Bring the mixture to a gentle boil. Once it boils, lower the heat and let it simmer uncovered. Stir occasionally for about 15-20 minutes. This allows the chutney to thicken and the peaches to soften.
Finalizing the Chutney
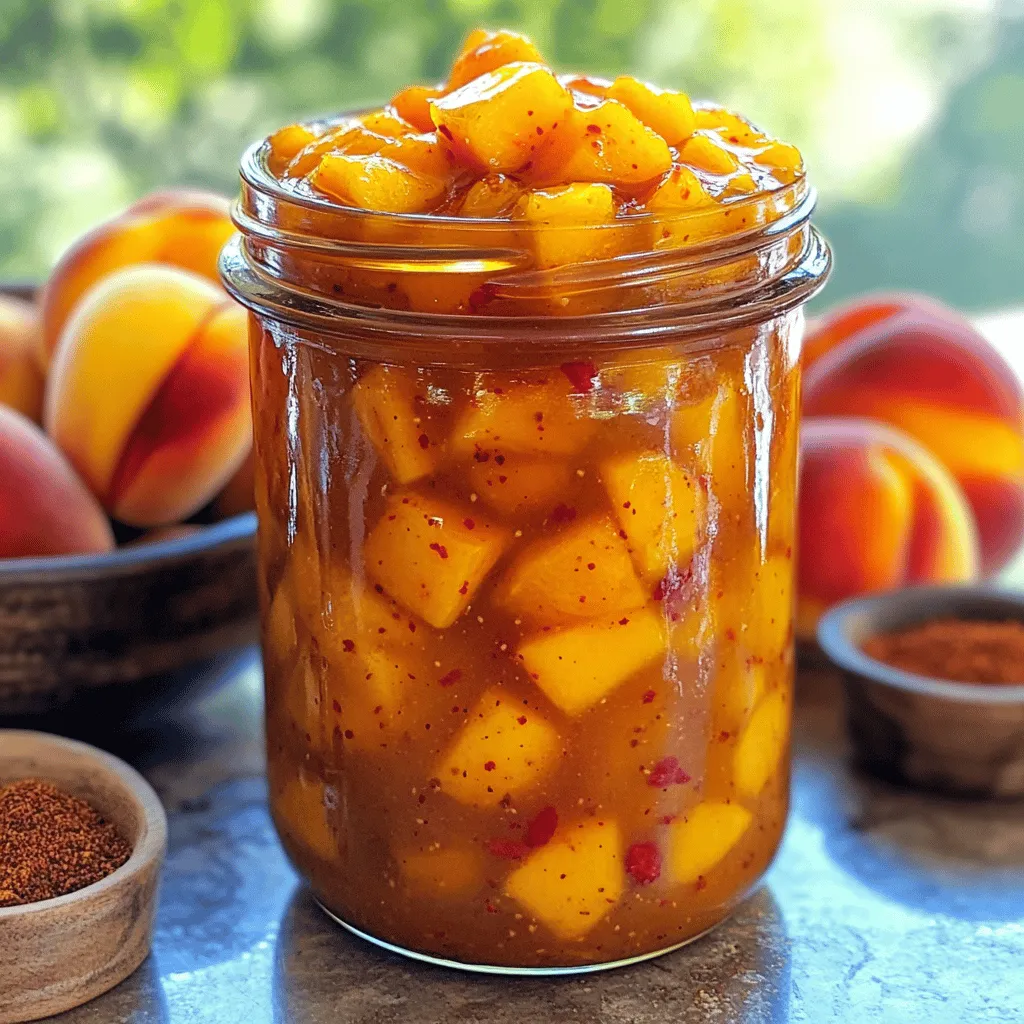
After simmering, taste your chutney. Add salt to balance the flavors. If you want it smooth, use an immersion blender to puree it to your liking. Remove the saucepan from heat and let it cool. Once cooled, transfer the chutney to a clean jar for storage. You can enjoy it warm or cold, and it will thicken more as it cools.
Tips & Tricks
Common Mistakes to Avoid
When making chutney, you may face some common issues. One frequent mistake is using unripe peaches. Unripe peaches lack flavor and sweetness. Always pick ripe, fragrant peaches for the best taste. Another error is not allowing the mixture to rest. Resting lets the peaches release juices, creating a rich base. If you skip this step, your chutney may end up dry.
Sometimes, people add too much salt. Remember, you can always add more later. Start with a small pinch and taste before adding more. Also, avoid boiling the chutney on high heat. This can burn the sugar and ruin the flavor. Always cook on medium heat for better results.
Enhancing Flavors
To make your chutney even more delicious, consider adding spices. A pinch of cardamom or nutmeg can boost flavor. Cinnamon and cloves are great, but try mixing in some allspice for a warm twist.
If you want to adjust sweetness, add more brown sugar or honey. For a tangy kick, add extra apple cider vinegar. If you like heat, increase the red pepper flakes. Start with a little and taste as you go. You control the flavor!

Variations
Fruit Variations
You can switch out peaches for other fruits. Apples, mangoes, or plums work great. Each fruit brings its own taste and texture. Use ripe, juicy fruits for the best flavor. Fresh seasonal fruit always wins. For example, use apples in the fall and mangoes in summer. This keeps your chutney fresh and exciting.
Spicy or Sweet Options
You can change the heat and sweetness easily. For more spice, add extra red pepper flakes. If you like it sweet, add more brown sugar or honey. Try adding spices like cumin or coriander for a unique twist. You can also mix in herbs like cilantro for freshness. These small changes can craft a new flavor profile.
Storage Info
How to Store Leftover Chutney
To keep your Quick Peach Chutney fresh, follow these steps:
– Use a clean glass jar with a tight lid.
– Make sure the chutney cools to room temperature before sealing.
– Store it in the fridge. This helps lock in the flavors.
Glass jars are great because they do not absorb odors. You can also use airtight plastic containers if you prefer. Just make sure they are food-safe.
Shelf Life
Quick Peach Chutney lasts about one week in the fridge. After that, the flavors may fade. Always check for any signs of spoilage, like off smells or mold.
You can freeze the chutney if you want to keep it longer. Pour it into freezer-safe containers, leaving some space for expansion. It can last up to three months in the freezer. When you want to use it, simply thaw it in the fridge overnight. This way, you can enjoy your chutney whenever you like!
FAQs
Can I make this chutney ahead of time?
Yes, you can make this chutney ahead of time. In fact, it tastes better after sitting for a day or two. The flavors mix and deepen, making the chutney even more delicious. You can store it in the fridge for up to two weeks. Just keep it in an airtight container to prevent it from drying out.
Is peach chutney safe for canning?
Peach chutney is safe for canning if you follow proper methods. You should use a water bath canner for safe preservation. Always make sure to process jars for at least 10 minutes to ensure safety. Check seals before storing them in a cool, dark place. This way, you can enjoy your chutney long after peach season has ended.
What are the best serving suggestions for peach chutney?
Peach chutney pairs well with many dishes. You can serve it with grilled chicken or pork for a burst of flavor. It also complements cheese boards, especially with creamy cheeses. Try it on sandwiches or burgers for a sweet and tangy kick. For a simple snack, enjoy it with crackers. The options are endless!
Quick Peach Chutney is simple and fun to make. We explored the main ingredients, focusing on ripe peaches and how their quality matters. I shared tips on preparation, cooking steps, and even storage options to keep your chutney fresh. We talked about common mistakes and how to adjust flavors. You can use other fruits or tweak spice levels for personal taste. Remember, chutney makes a great addition to meals and snacks. Enjoy making this easy recipe, and feel free to share your creations!
. When making chutney, you may face some common issues. One frequent mistake is using unripe peaches. Unripe peaches lack flavor and sweetness. Always pick ripe, fragrant peaches for the best taste. Another error is not allowing the mixture to rest. Resting lets the peaches release juices, creating a rich base. If you skip this step, your chutney may end up dry. Sometimes, people add too much salt. Remember, you can always add more later. Start with a small pinch and taste before adding more. Also, avoid boiling the chutney on high heat. This can burn the sugar and ruin the flavor. Always cook on medium heat for better results. To make your chutney even more delicious, consider adding spices. A pinch of cardamom or nutmeg can boost flavor. Cinnamon and cloves are great, but try mixing in some allspice for a warm twist. If you want to adjust sweetness, add more brown sugar or honey. For a tangy kick, add extra apple cider vinegar. If you like heat, increase the red pepper flakes. Start with a little and taste as you go. You control the flavor! {{image_4}} You can switch out peaches for other fruits. Apples, mangoes, or plums work great. Each fruit brings its own taste and texture. Use ripe, juicy fruits for the best flavor. Fresh seasonal fruit always wins. For example, use apples in the fall and mangoes in summer. This keeps your chutney fresh and exciting. You can change the heat and sweetness easily. For more spice, add extra red pepper flakes. If you like it sweet, add more brown sugar or honey. Try adding spices like cumin or coriander for a unique twist. You can also mix in herbs like cilantro for freshness. These small changes can craft a new flavor profile. For more ideas, check the Full Recipe for suggestions on different flavor combinations. To keep your Quick Peach Chutney fresh, follow these steps: - Use a clean glass jar with a tight lid. - Make sure the chutney cools to room temperature before sealing. - Store it in the fridge. This helps lock in the flavors. Glass jars are great because they do not absorb odors. You can also use airtight plastic containers if you prefer. Just make sure they are food-safe. Quick Peach Chutney lasts about one week in the fridge. After that, the flavors may fade. Always check for any signs of spoilage, like off smells or mold. You can freeze the chutney if you want to keep it longer. Pour it into freezer-safe containers, leaving some space for expansion. It can last up to three months in the freezer. When you want to use it, simply thaw it in the fridge overnight. This way, you can enjoy your chutney whenever you like! Yes, you can make this chutney ahead of time. In fact, it tastes better after sitting for a day or two. The flavors mix and deepen, making the chutney even more delicious. You can store it in the fridge for up to two weeks. Just keep it in an airtight container to prevent it from drying out. Peach chutney is safe for canning if you follow proper methods. You should use a water bath canner for safe preservation. Always make sure to process jars for at least 10 minutes to ensure safety. Check seals before storing them in a cool, dark place. This way, you can enjoy your chutney long after peach season has ended. Peach chutney pairs well with many dishes. You can serve it with grilled chicken or pork for a burst of flavor. It also complements cheese boards, especially with creamy cheeses. Try it on sandwiches or burgers for a sweet and tangy kick. For a simple snack, enjoy it with crackers. The options are endless! Quick Peach Chutney is simple and fun to make. We explored the main ingredients, focusing on ripe peaches and how their quality matters. I shared tips on preparation, cooking steps, and even storage options to keep your chutney fresh. We talked about common mistakes and how to adjust flavors. You can use other fruits or tweak spice levels for personal taste. Remember, chutney makes a great addition to meals and snacks. Enjoy making this easy recipe, and feel free to share your creations!](https://joymealplan.com/wp-content/uploads/2025/07/68e09f5d-054f-4bea-af91-fb6a51bc34a0-300x300.webp)

. In this blog post, we explored how to make delicious garlic butter steak bites. We discussed the key ingredients, from sirloin steak to fresh herbs. You learned step-by-step cooking tips for perfect doneness. We also covered variations, presentation ideas, and storage methods for leftovers. By following these tips, you can create a tasty dish your friends and family will love. With a little practice, you can master this recipe and impress everyone at your next meal.](https://joymealplan.com/wp-content/uploads/2025/06/dbdd8f16-fd7f-4bf6-8b38-aa3e7b5cdfe5-768x768.webp)


![- 1 block (14 oz) firm tofu, pressed and drained - 1/2 cup cornstarch - 3 tablespoons vegetable oil - 1/4 cup honey - 2 tablespoons soy sauce - 4 cloves garlic, minced - 1 teaspoon fresh ginger, grated - 1 tablespoon sesame seeds, toasted - 2 green onions, sliced - Salt and pepper to taste To make crispy honey garlic tofu, you need simple ingredients that pack big flavor. Start with firm tofu. It holds its shape well and crisps up nicely. Press and drain it to get rid of excess water. This step is key for crispy tofu. Next, grab some cornstarch. It’s your secret weapon for that crunchy coating. It sticks to the tofu and gets crispy in the hot oil. Vegetable oil helps fry the tofu evenly. Use a good amount, but don’t drown the tofu. For the sauce, honey adds sweetness. Soy sauce brings saltiness, and garlic and ginger give it a warm kick. These flavors blend perfectly. You can adjust the honey and soy sauce to fit your taste. Finally, sesame seeds and sliced green onions are for garnishing. They add a nice crunch and color to your dish. This crispy honey garlic tofu is not just tasty; it's visually appealing too. For the full recipe, check out the detailed steps. - Cut the tofu into 1-inch cubes. - Toss tofu cubes in cornstarch with salt and pepper. Start by cutting your block of firm tofu into 1-inch cubes. Make sure the pieces are even for cooking. Next, take a shallow dish and add cornstarch. Sprinkle in some salt and pepper. Toss those tofu cubes in the cornstarch mixture, coating each piece well. Shake off any extra cornstarch to keep them light and crispy. - Heat vegetable oil in a skillet over medium-high. - Sauté tofu until golden brown and crispy. Now, heat 3 tablespoons of vegetable oil in a skillet over medium-high heat. Wait until the oil is hot. Carefully place the tofu cubes in the skillet in a single layer. Sauté them for about 5 to 7 minutes. Turn the pieces so they cook evenly. You want them to turn golden brown and get nice and crispy. Once done, transfer the tofu to a paper towel-lined plate to absorb excess oil. - Sauté garlic and ginger in the skillet. - Combine honey and soy sauce, allowing to thicken. In the same skillet, lower the heat to medium. Add 4 minced garlic cloves and 1 teaspoon of grated ginger. Sauté these for about 1 minute. You'll know they're ready when they smell great and turn golden. Now, pour in 1/4 cup of honey and 2 tablespoons of soy sauce. Stir well and let it cook for 2 to 3 minutes until it thickens a bit. - Coat crispy tofu in the honey garlic sauce. - Serve with garnishes. Gently place the crispy tofu back into the skillet. Toss it in the honey garlic sauce until every piece is coated. Remove from heat and sprinkle 1 tablespoon of toasted sesame seeds and 2 sliced green onions over the dish. This adds flavor and makes it look nice. For the full recipe, check the details above! - Use firm tofu for best results: Firm tofu holds its shape and crisps up nicely. - Ensure the tofu is properly pressed and drained: Pressing removes excess water. This helps the tofu absorb flavors and get crispy. - Adjust honey and soy sauce ratios to taste: You can make it sweeter or saltier by changing these amounts. - Experiment with adding red pepper flakes for heat: A little spice can really elevate the dish. Add to your liking. - Consider using an air fryer for an even crispier finish: Air frying gives a great crunch without extra oil. - Double-fry method for ultimate crunch: Fry the tofu once, let it rest, and fry again. This makes it super crispy. For more details, check the Full Recipe. {{image_4}} You can switch tofu for other proteins. Tempeh is a great choice. It has a nutty flavor and a firmer texture. Just cut it into cubes like tofu. Cook it the same way for a tasty dish. Seitan is another option. It mimics meat well and offers a chewy texture. It absorbs flavors easily. Use seitan if you're looking for a heartier bite. Want a kick? Add sriracha to the sauce. This gives a spicy twist to the sweet honey. You can also try orange juice or maple syrup. These swaps change the flavor profile. Orange adds a fresh zest, while maple syrup gives a rich taste. Both can make your dish stand out. Crispy honey garlic tofu shines when paired with sides. Steamed vegetables bring color and nutrition. A fresh salad can add crunch. You can also use this tofu in wraps or tacos. Just fill them with your favorite veggies and tofu. It makes for a fun and easy meal. For the full recipe, follow the steps and enjoy your cooking journey! You can keep crispy honey garlic tofu in the fridge. Place it in an airtight container. It will stay fresh for up to 3 days. This way, you can enjoy it later without losing flavor. To reheat your tofu, use the oven or a skillet. This keeps it crispy and tasty. Avoid using the microwave. It makes the tofu soggy, which we want to prevent. You can also freeze cooked tofu. It will last for up to 2 months in the freezer. When you want to eat it, simply thaw it out. After thawing, re-crisp it in a skillet or oven before serving. This method helps regain its crunchy texture. Typically, crispy honey garlic tofu lasts up to 3 days when stored properly. To keep it fresh, place it in an airtight container. Ensure the tofu is cool before sealing. This helps maintain its flavor and texture. Yes, you can make this recipe vegan. Simply replace honey with agave or maple syrup. Both options add sweetness without using animal products. This change keeps the dish plant-based and equally delicious! Crispy honey garlic tofu pairs well with rice, noodles, or a fresh vegetable stir-fry. You can serve it over steamed jasmine rice for a classic combo. Noodles coated in a light sauce also work great. Adding a side of colorful stir-fried veggies brings extra nutrition and flavor. Firm or extra-firm tofu works best for a crispy texture. These types hold their shape and don’t crumble. For the best results, make sure you press and drain the tofu well before cooking. This removes excess moisture, allowing for a delightful crunch. For the full recipe, check out the [Full Recipe]. In this post, we covered how to make crispy honey garlic tofu. You learned about the key ingredients, from firm tofu to the sweet and savory sauce. I shared step-by-step cooking tips and tricks for the perfect texture and flavor. Remember, you can customize the recipe with different proteins or sauces. Store leftovers correctly to enjoy this dish later. Overall, this recipe is fun, flexible, and delicious. Give it a try, and you’ll impress your friends or family!](https://joymealplan.com/wp-content/uploads/2025/07/a62a8118-0118-41a9-8dcd-10793e5e2e73-768x768.webp)