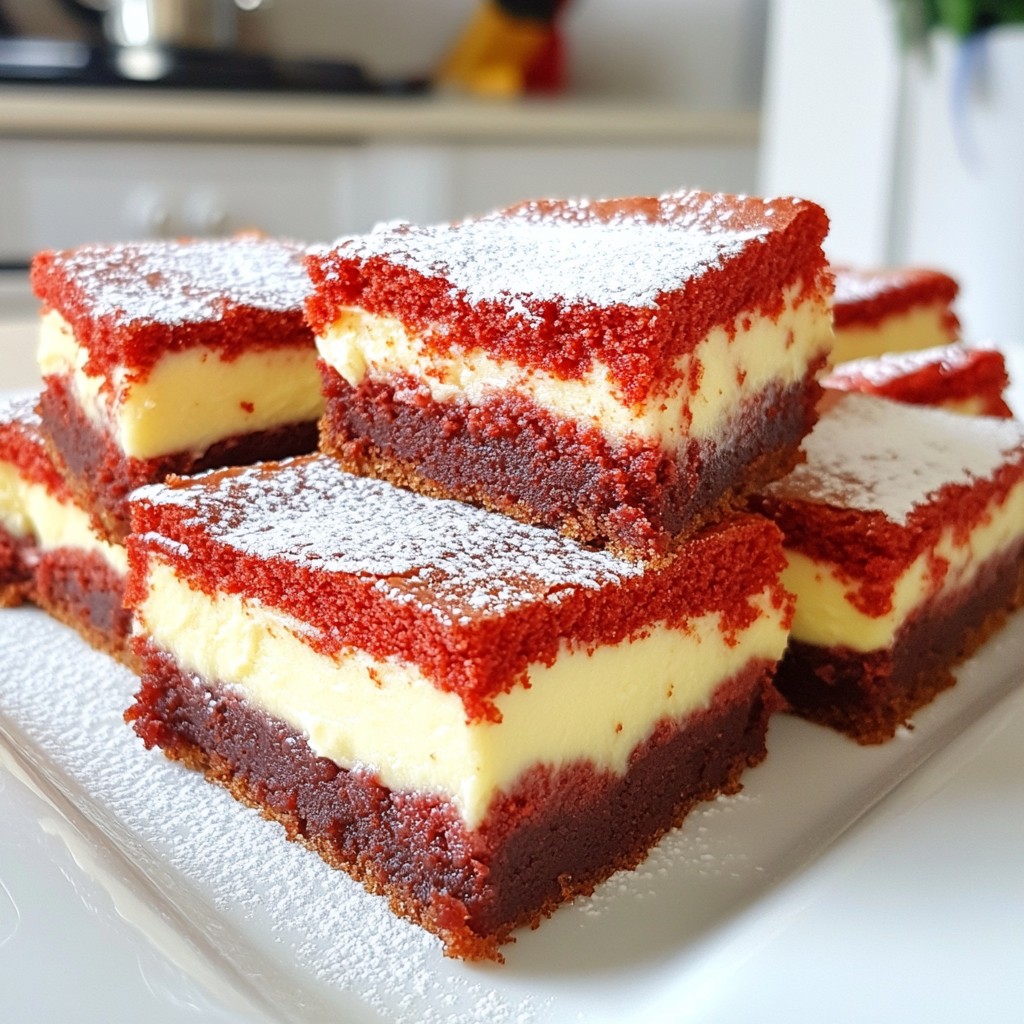
Get ready to indulge in a dessert that combines two favorites: red velvet cake and cheesecake! These Red Velvet Cheesecake Brownies are rich, creamy, and oh-so-irresistible. I’ll guide you through each step, from gathering fresh ingredients to achieving the perfect texture. Whether you're baking for a party or a cozy night in, these brownies will impress everyone. Let’s dive into the details and make your next treat unforgettable!
Why I Love This Recipe
- Decadent Flavor: The combination of rich red velvet and creamy cheesecake creates a dessert that is both indulgent and satisfying.
- Stunning Presentation: The vibrant red color contrasts beautifully with the white cheesecake layer, making it a show-stopping dessert for any occasion.
- Easy to Make: With straightforward steps and simple ingredients, these brownies are accessible for bakers of all skill levels.
- Perfect for Sharing: With 16 servings, these brownies are ideal for parties, gatherings, or simply to indulge in with family and friends.
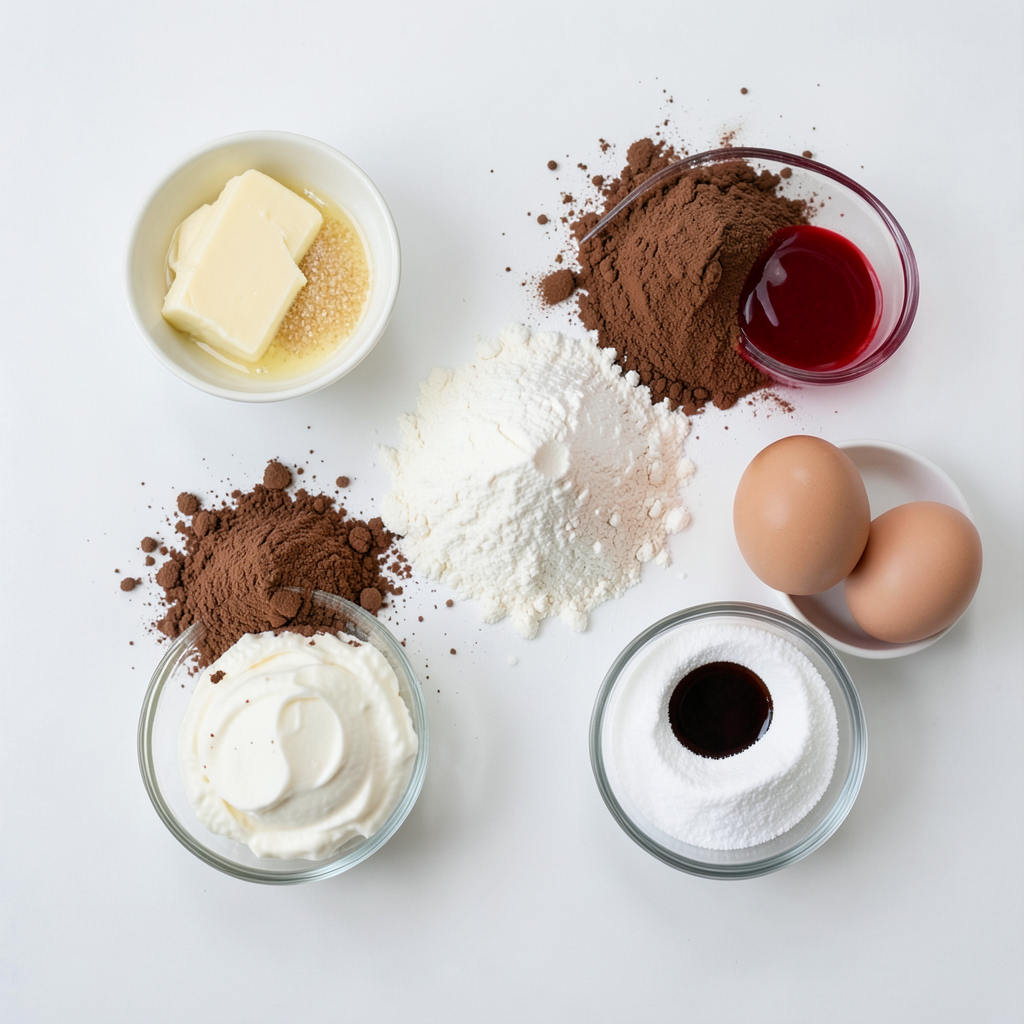
Ingredients
List of Ingredients
- 1 cup (2 sticks) unsalted butter, melted
- 2 cups granulated sugar
- 4 large eggs
- 1 teaspoon pure vanilla extract
- 2 cups all-purpose flour
- 1 tablespoon unsweetened cocoa powder
- 1 teaspoon baking powder
- 1/2 teaspoon salt
- 1 teaspoon red food coloring
- 8 oz cream cheese, softened to room temperature
- 1/2 cup powdered sugar
- 1 egg (for cream cheese layer)
- 1/2 teaspoon pure vanilla extract (for cream cheese layer)
Each ingredient plays a key role in making these brownies special. The unsalted butter gives a rich base. Granulated sugar adds sweetness and helps with texture. Eggs bind everything and make it moist. The vanilla extract brings warmth and depth. All-purpose flour is the backbone of the brownies, while cocoa powder adds a hint of chocolate flavor. Baking powder helps them rise and become fluffy.
Red food coloring is what makes these brownies red velvet. The cream cheese adds a creamy layer that contrasts the dense brownie. Powdered sugar sweetens the cream cheese layer without grittiness. Using quality ingredients matters. Fresh eggs and real vanilla make a big difference. Always choose the best cream cheese for a smooth filling. When you use high-quality ingredients, your brownies will shine.
Step-by-Step Instructions
Preparation Overview
1. Preheating the oven: Start by preheating your oven to 350°F (175°C). This helps the brownies cook evenly.
2. Preparing the baking dish: Grease a 9x13 inch baking dish with cooking spray. You can also line it with parchment paper for easy removal.
Mixing the Brownie Base
1. Combining melted butter and sugar: In a large bowl, mix the melted butter and granulated sugar. Use a whisk or mixer until smooth.
2. Incorporating eggs and vanilla: Add four large eggs and 1 teaspoon of vanilla. Whisk until the batter is creamy.
Adding Dry Ingredients
1. Whisking together flour, cocoa, and baking powder: In another bowl, mix together 2 cups of flour, 1 tablespoon of cocoa, 1 teaspoon of baking powder, and 1/2 teaspoon of salt.
2. Combining dry and wet mixtures: Gradually add this dry mix to the wet ingredients. Stir gently until just combined. Do not over-mix, or the brownies will be tough.
Coloring and Layering
1. Mixing in red food coloring: Stir in 1 teaspoon of red food coloring until the batter turns a rich red.
2. Creating the cream cheese layer: In a separate bowl, beat 8 oz of softened cream cheese with 1/2 cup powdered sugar, 1 egg, and 1/2 teaspoon vanilla. Mix until smooth.
Baking and Cooling
1. Baking time and temperature: Pour half of the red velvet batter into the dish. Spoon cream cheese dollops on top, then add the rest of the red batter. Bake for 30-35 minutes. Check doneness with a toothpick; it should have a few moist crumbs.
2. Cooling tips for the best texture: Let the brownies cool in the pan on a wire rack. Cooling helps them set and makes cutting easier.
Tips & Tricks
Expert Baking Tips
To ensure the perfect brownie texture, follow these steps:
- Use room temperature ingredients. This helps the batter mix better.
- Don’t over-mix your batter. Mix just until combined for a fudgy texture.
- Test for doneness with a toothpick. It should come out with a few moist crumbs.
Common mistakes to avoid:
- Forgetting to preheat the oven. This can lead to uneven baking.
- Skipping the cooling time. Let brownies cool to set properly before cutting.
Variation Ideas
You can explore fun flavor combinations. Try adding:
- White chocolate chips for sweetness.
- Chopped nuts for a crunchy texture.
- A hint of mint extract for a fresh twist.
For dietary restrictions, consider these substitutions:
- Use apple sauce instead of eggs for a vegan option.
- Substitute almond flour for a gluten-free version.
Presentation Suggestions
Serving options can make a big difference. Here are some ideas:
- Serve brownies on a colorful platter for a festive look.
- Dust with powdered sugar for a delicate touch.
- Top with a scoop of vanilla ice cream for extra indulgence.
Garnish with fresh berries or mint leaves for a pop of color. Enjoy your creation!
Pro Tips
- Use Room Temperature Ingredients: Ensure that your eggs and cream cheese are at room temperature before mixing. This helps achieve a smoother batter and cream cheese layer.
- Don’t Overmix: When combining the dry ingredients with the wet, mix just until combined. Overmixing can lead to tough brownies.
- Check for Doneness: Insert a toothpick into the center of the brownies; it should come out with a few moist crumbs, not wet batter. This ensures they are fudgy and not overbaked.
- Cool Before Cutting: Allow the brownies to cool completely in the pan before slicing. This helps them set and makes for cleaner cuts.
Storage Info
Best Practices for Storage
Store red velvet cheesecake brownies in an airtight container. You can keep them at room temperature for up to three days. This keeps them soft and delicious. If you live in a warm place, put them in the fridge. They will last longer this way, up to a week. Just let them warm up a bit before serving.
Freezing Tips
To freeze brownies, cut them into squares first. Wrap each piece in plastic wrap tightly. Then, place the wrapped brownies in a freezer bag. This helps keep them fresh for up to three months.
When you want to eat them, take the brownies out of the freezer. Leave them at room temperature for about an hour to thaw. For a warm treat, reheat them in the microwave for 10-15 seconds. Enjoy them with a scoop of ice cream for extra fun!
FAQs
Common Questions
What can I use instead of eggs? If you need an egg substitute, try using 1/4 cup of unsweetened applesauce for each egg. This will help keep your brownies moist and delicious. You can also use a flaxseed meal mixture. Mix 1 tablespoon of flaxseed meal with 2.5 tablespoons of water. Let it sit for about 5 minutes until it thickens. This works well in many brownie recipes.
Can I make these brownies ahead of time? Yes, you can make these brownies ahead of time. They store well for a few days at room temperature. Just cover them tightly to keep them fresh. If you want to keep them longer, refrigerate them. Brownies stay tasty for about a week in the fridge.
Recipe Troubleshooting
Why are my brownies cakey? If your brownies are too cakey, you might have overmixed the batter. Mixing too much adds air, which results in a lighter texture. Be sure to mix until just combined. Also, check your oven temperature. If it’s too hot, the brownies can bake too quickly, leading to a cakey result.
How can I achieve a marbled effect? To get a nice marbled effect, spoon dollops of cream cheese over the brownie batter. Then, use a knife to gently swirl the layers together. Don’t mix too much. You want to see the red velvet and cream cheese both!
Ingredient Substitutes
Alternatives for gluten-free baking To make these brownies gluten-free, you can use a gluten-free flour blend instead of all-purpose flour. Make sure the blend includes xanthan gum for best results. This will keep the texture close to regular brownies.
Dairy-free options for cream cheese For a dairy-free cream cheese layer, look for vegan cream cheese. Brands like Tofutti or Kite Hill work well. These can replace regular cream cheese without losing flavor or texture.
Additional Recipe Ideas
Related Dessert Recipes
If you love these red velvet cheesecake brownies, you may enjoy other cheesecake brownie variations. Try a classic chocolate cheesecake brownie. It combines rich chocolate brownie with a smooth cheesecake layer. Another great option is the pumpkin cheesecake brownie. It adds a fall twist with spices and pumpkin flavor.
For quick treats to pair with red velvet brownies, consider making chocolate-covered strawberries. They are easy and fun. A scoop of vanilla ice cream also works well. It balances the rich flavors of the brownies.
Chocolate Pairings
To enhance your dessert experience, think about the best complementary desserts and drinks. A cup of hot cocoa pairs beautifully with these brownies. You can also serve them with a chilled glass of milk or coffee. Both drinks will elevate the taste.
For special occasions, serve red velvet brownies on a fancy platter. Add fresh berries or mint leaves for color. A drizzle of chocolate sauce can also impress your guests.
Historical Context
Red velvet desserts have a rich background. They originated in the 1800s, often made with cocoa and buttermilk. The unique red color came from the reaction between cocoa and acidic ingredients.
In recent years, the popularity of red velvet recipes surged. Many people love the vibrant color and unique flavor. You'll find red velvet cakes, cupcakes, and of course, these delightful brownies.
You learned the essential ingredients, tips, and techniques for making red velvet brownies. Quality ingredients matter. Perfect technique leads to the best texture. Consider variations to suit your taste and dietary needs. Store or freeze leftovers properly for later enjoyment. Use this guide to bake confidently and impress friends. The world of baking offers endless creativity around every corner. Enjoy the process and flavors of red velvet goodness!