Salted Caramel Apple Cheesecake Delightful Treat

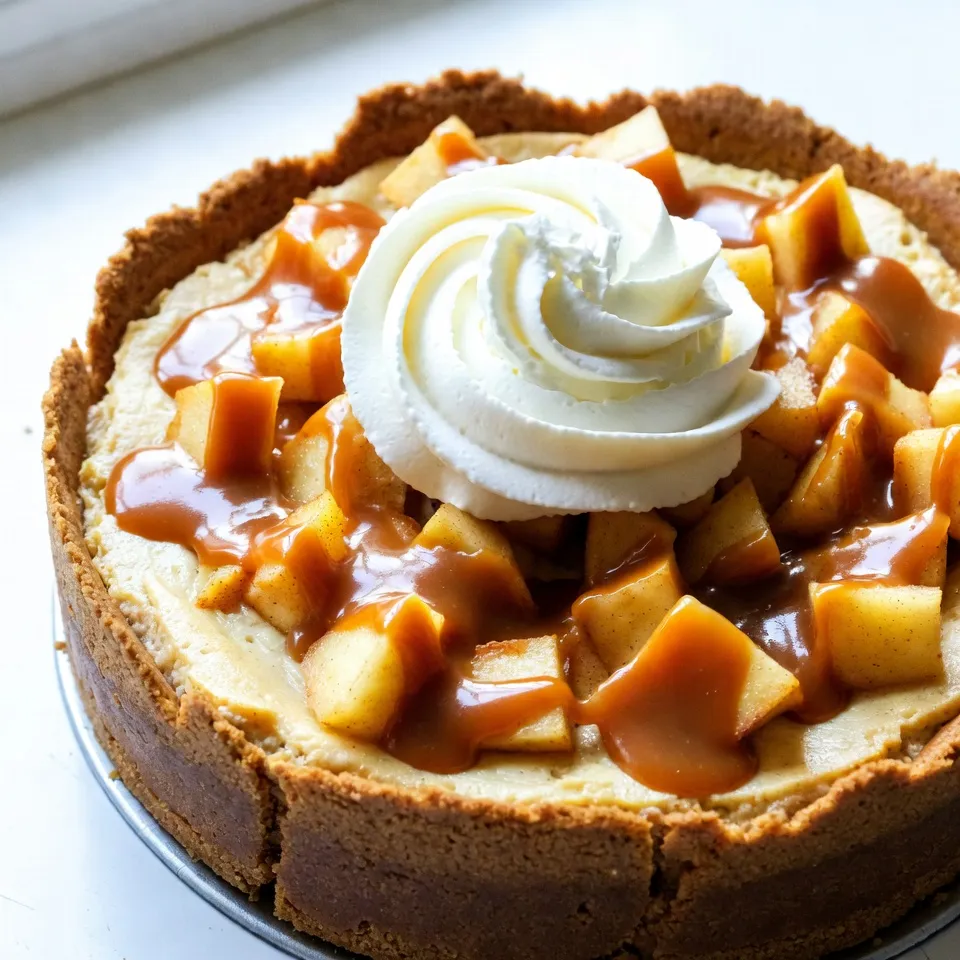
Are you ready to treat yourself? This Salted Caramel Apple Cheesecake combines creamy cheesecake with sweet, tart apples and rich caramel. In this post, I’ll guide you through each step to create this delicious dessert. From picking the best apples to perfecting the crust, you’ll find everything you need to impress your family and friends. Let’s dive into this heavenly delight!
Why I Love This Recipe
- Rich and Creamy Texture: This cheesecake boasts a smooth and luscious texture, perfectly melding the richness of cream cheese with the tartness of apples.
- Perfect Balance of Flavors: The combination of sweet salted caramel and tart Granny Smith apples creates a delightful contrast that keeps you coming back for more.
- Impressive Presentation: This dessert is not only delicious but also visually stunning, making it a showstopper at any gathering.
- Easy to Make: With simple ingredients and straightforward steps, this cheesecake is accessible for bakers of all skill levels.
Ingredients
List of Ingredients
– 1 ½ cups graham cracker crumbs
– ½ cup unsalted butter, melted
– 2 tablespoons light brown sugar
– 16 oz cream cheese, softened
– ¾ cup granulated sugar
– 3 large eggs
– 1 teaspoon pure vanilla extract
– 2 cups diced apples (Granny Smith recommended)
– ½ teaspoon ground cinnamon
– 1 cup salted caramel sauce
– Whipped cream for topping
– Additional salted caramel for drizzling
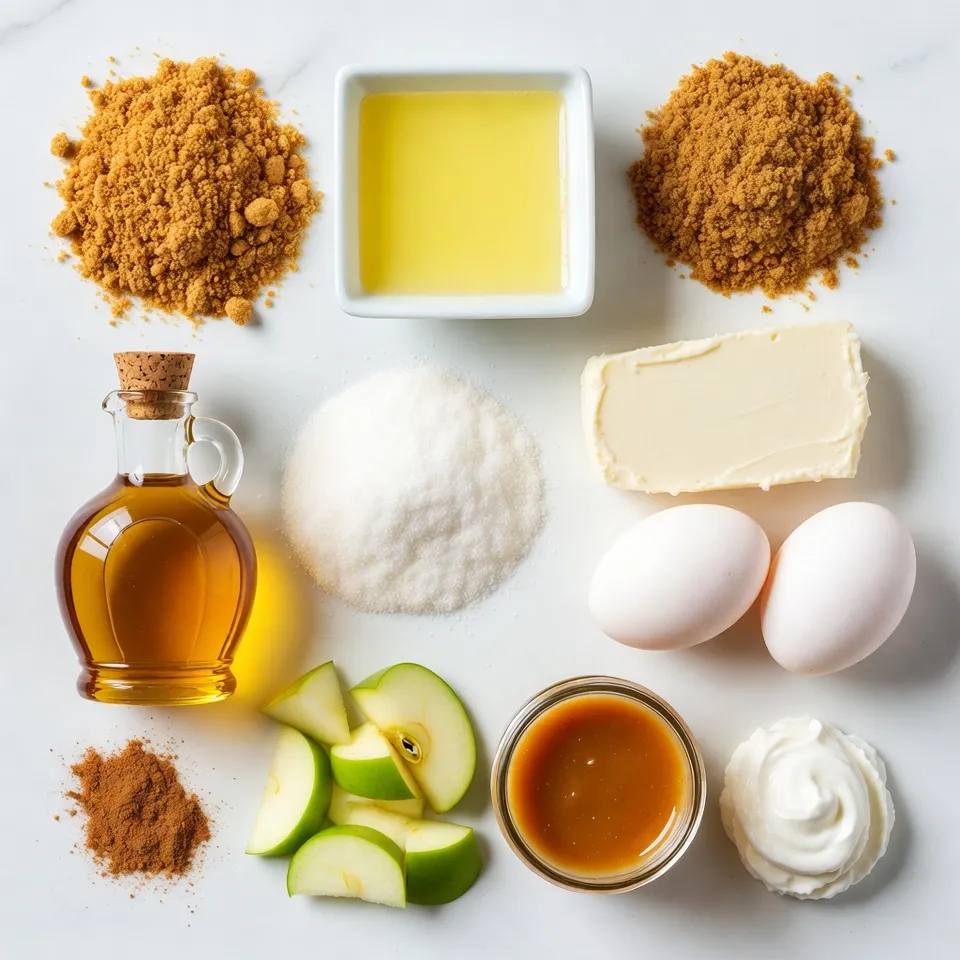
To make a great salted caramel apple cheesecake, you need simple and fresh ingredients. First, the graham cracker crumbs create a tasty crust. I mix these with melted butter and light brown sugar for a rich flavor. The cream cheese is the star of the filling. It gives the cheesecake its smooth texture.
I use three large eggs to help it set well. The pure vanilla extract adds a lovely warmth. For apples, I highly suggest Granny Smith. Their tartness balances the sweet caramel. A hint of ground cinnamon enhances the flavor, making it cozy and inviting.
The salted caramel sauce is crucial. You can buy it or make your own. I love drizzling more caramel on top before serving. Whipped cream is optional, but it looks great and tastes amazing.
Now that you know the ingredients, you can gather them and get ready to bake!

Step-by-Step Instructions
Preheating and Preparing the Springform Pan
Start by preheating your oven to 325°F (160°C). This step is key for even baking. Next, grab a 9-inch springform pan. Lightly grease the sides with cooking spray or butter. This will help the cheesecake come out easily later.
Creating the Crust
In a medium bowl, mix 1 ½ cups of graham cracker crumbs, ½ cup of melted unsalted butter, and 2 tablespoons of light brown sugar. Combine until it looks like wet sand. Press this mixture firmly into the bottom of the springform pan. Make sure it’s even and packed tight. This crust will hold your cheesecake together.
Making the Cheesecake Filling
In a large bowl, beat 16 oz of softened cream cheese. Use an electric mixer on medium speed for about 2-3 minutes. It should be smooth and creamy. Gradually add ¾ cup of granulated sugar and mix until fluffy. Then, add 3 large eggs, one at a time. Mix on low speed after each one, just until blended. Finally, stir in 1 teaspoon of pure vanilla extract. Be careful not to overmix! Fold in 2 cups of peeled and diced apples and ½ teaspoon of ground cinnamon. Use a spatula to mix gently.
Baking the Cheesecake
Pour the cheesecake batter over the crust in the springform pan. Smooth the top with a spatula. Bake in the oven for about 55-60 minutes. The center should be set, but still slightly jiggly when you shake it gently.
Cooling and Chilling Instructions
Once it’s done baking, turn off the oven. Prop the door open slightly. Let the cheesecake cool in the oven for about 1 hour. This helps prevent cracks. After that, take it out and let it cool to room temperature on a wire rack. Once cooled, cover and refrigerate it for at least 4 hours or overnight. This chilling time is crucial for the best taste and texture. When you’re ready to serve, drizzle with salted caramel sauce and add whipped cream if you like!
Tips & Tricks
Choosing the Best Apples
For this cheesecake, I suggest using Granny Smith apples. They are tart and pair well with sweet flavors. Their firm texture holds up nicely during baking, too. You can also try Honeycrisp or Fuji apples for a sweeter taste. Remember, the right apples make a big difference in flavor.
Preventing Cracks in Cheesecake
To avoid cracks, follow these steps:
– Bake at a low temperature of 325°F (160°C).
– Cool the cheesecake slowly in the oven after baking. This helps it set without sudden changes in temperature.
– Use room temperature ingredients. Cold cream cheese and eggs can cause lumps and cracks.
– Don’t overmix the batter. Mix just until smooth and combined.
These tips help create a creamy, smooth cheesecake without cracks.
Tips for Perfect Serving and Presentation
When serving, let the cheesecake sit at room temperature for 15 minutes. This makes it easier to slice. Use a warm knife for clean cuts. Dip the knife in hot water, then wipe it dry before slicing.
For presentation, drizzle extra salted caramel sauce over each slice. Top with whipped cream for a lovely look. You can also add a sprinkle of cinnamon or some diced apple for color and texture. This makes your cheesecake a true delight on any table!
Pro Tips
- Use Room Temperature Ingredients: Make sure your cream cheese and eggs are at room temperature before mixing. This helps create a smooth and creamy cheesecake without lumps.
- Choose the Right Apples: Granny Smith apples are recommended for their tartness which balances the sweetness of the caramel and cheesecake. Feel free to mix in other apple varieties for added flavor.
- Prevent Cracking: Gradually cooling the cheesecake in the oven helps prevent cracks. After baking, turn off the oven and leave the door ajar for an hour before transferring it to a wire rack.
- Chill Overnight: For the best texture and flavor, allow your cheesecake to chill in the refrigerator for at least 4 hours, but overnight is ideal for a perfect set.

Variations
Different Apple Options
You can use many types of apples in this cheesecake. Granny Smith apples add a tart bite. Honeycrisp apples give a sweet and crisp taste. Fuji apples are sweet and juicy, perfect for dessert. If you want a mix, try combining different apples. The blend of flavors will make your cheesecake even better.
Alternative Crust Options
While graham cracker crust is classic, you can switch it up. Use crushed Oreos for a chocolatey twist. Almond flour mixed with butter creates a gluten-free option. A shortbread crust adds a rich flavor. Each crust brings its own style, so choose one that excites you.
Flavor Enhancements (spices, toppings)
Adding spices can elevate your cheesecake. Consider nutmeg or ginger for extra warmth. You might add a pinch of cloves for a cozy touch. For toppings, try crushed nuts or chocolate shavings. Drizzling chocolate sauce can make it even more decadent. Experiment with flavors and toppings that fit your taste!
Storage Info
Storing the Cheesecake
You should store your cheesecake in the fridge. Always keep it in an airtight container. This keeps it fresh and tasty. The cheesecake lasts for about five days. If you plan to keep it longer, consider freezing it.
Freezing Tips
To freeze the cheesecake, let it cool first. Wrap it well in plastic wrap and then in foil. This method prevents freezer burn. You can freeze it for up to three months. When ready to eat, thaw it in the fridge overnight.
Reheating and Serving Suggestions
You don’t need to reheat cheesecake. It tastes best chilled. When serving, drizzle more salted caramel on top. Add a dollop of whipped cream for extra flavor. You can also sprinkle some cinnamon for a nice touch. Enjoy each bite of this delightful treat!
FAQs
Can I use different types of caramel sauce?
Yes, you can use any caramel sauce you like. Store-bought options work well. Homemade caramel adds a personal touch. For a twist, try butterscotch sauce. Just remember to keep it salted for that perfect balance. Each sauce will change the flavor slightly. Experiment to find your favorite!
How long can I store the cheesecake in the fridge?
You can store the cheesecake in the fridge for about five days. Keep it covered to prevent drying out. Place it in an airtight container or cover with plastic wrap. If you want it to last longer, consider freezing it. Just remember to thaw it in the fridge overnight before serving.
What can I substitute for cream cheese?
If you need a cream cheese substitute, use Greek yogurt or mascarpone. These options keep the texture creamy. You can also use ricotta cheese, but blend it well for smoothness. Each substitute will slightly change the flavor, so choose what you like best.
Can I make this cheesecake in advance?
Absolutely! Making the cheesecake a day or two ahead is a great idea. It allows the flavors to meld and improves the texture. Just remember to chill it properly. This makes serving easier and lets you enjoy your time with guests.
You now know how to make a delicious apple cheesecake from scratch. We covered the ingredients, step-by-step instructions, and useful tips. Remember to choose fresh apples and avoid cracks for the best results. Feel free to try different crusts or toppings that make it your own. Store leftovers in the fridge or freeze them for later. This cheesecake is a crowd-pleaser, perfect for any occasion. Enjoy your baking and impress your family or friends with this tasty treat. You have the skills to make something specia

Salted Caramel Apple Cheesecake
Ingredients
- 1.5 cups graham cracker crumbs
- 0.5 cup unsalted butter, melted
- 2 tablespoons light brown sugar
- 16 oz cream cheese, softened at room temperature
- 0.75 cup granulated sugar
- 3 large eggs, at room temperature
- 1 teaspoon pure vanilla extract
- 2 cups apples, peeled and diced
- 0.5 teaspoon ground cinnamon
- 1 cup salted caramel sauce
- 1 serving whipped cream, for optional topping
- 1 serving additional salted caramel sauce, for drizzling
Instructions
- Preheat your oven to 325°F (160°C). Prepare a 9-inch springform pan by lightly greasing the sides with cooking spray or butter.
- In a medium mixing bowl, combine the graham cracker crumbs, melted butter, and brown sugar. Mix well until the mixture resembles wet sand with clumps holding together.
- Press the crumb mixture firmly and evenly into the bottom of the prepared springform pan to create a sturdy crust. Set aside to firm up while you prepare the filling.
- In a large mixing bowl, beat the softened cream cheese using an electric mixer on medium speed until it is completely smooth and creamy, about 2-3 minutes. Gradually add the granulated sugar, continuing to beat until fully combined and fluffy.
- Add the eggs to the cream cheese mixture one at a time, beating on low speed after each addition until just incorporated. Then, add the vanilla extract and mix until combined. Be careful not to overmix.
- Gently fold in the diced apples and cinnamon into the cheesecake mixture using a spatula, ensuring they are evenly distributed without overworking the batter.
- Pour the cheesecake batter over the prepared crust in the springform pan, using a spatula to smooth the top evenly.
- Bake in the preheated oven for approximately 55-60 minutes, or until the center of the cheesecake is set but still slightly jiggly when shaken gently.
- Once baked, turn off the oven and prop the door open slightly. Allow the cheesecake to cool in the oven for about 1 hour. This gradual cooling helps prevent the cheesecake from cracking.
- After cooling, remove the cheesecake from the oven and allow it to cool to room temperature on a wire rack. Once cooled, cover and refrigerate for at least 4 hours—or overnight is best—for it to set properly.
- When ready to serve, drizzle the cheesecake generously with salted caramel sauce and add a dollop of whipped cream on top if desired. For an extra touch, drizzle more caramel over the whipped cream before serving.


![- Strawberries - Blueberries - Kiwi - Mango - Pineapple When making honey lime fruit salad, choose bright and fresh fruits. Fresh strawberries add sweetness, while blueberries offer a burst of flavor. Kiwi adds a tangy kick, and mango brings a tropical twist. Pineapple adds juicy texture and sweetness. Each fruit shines in this salad. - Pure honey - Freshly squeezed lime juice - Lime zest The honey and lime mixture brightens the salad. Use pure honey for a rich flavor. Fresh lime juice offers a zesty taste, and lime zest adds a fragrant note. Mix these ingredients well to create a smooth dressing. This blend enhances the fruits and ties everything together. - Fresh mint leaves for decoration Fresh mint leaves add a pop of color and a refreshing aroma. They make the salad look beautiful and inviting. Just sprinkle them on top before serving. This final touch makes the dish feel special and fun. For the full recipe, check out the details above. Start by cleaning the fruits well. Rinse strawberries in cold water and hull them. Slice them into thin pieces. For blueberries, just rinse them off and set them aside. Peel the kiwi and dice it into small chunks. Next, peel the mango and cut it into cubes. Finally, chop the pineapple into bite-sized pieces. Using fresh fruits makes the salad taste better and look bright. Fresh fruits add flavor and nutrition to your dish. Grab a small bowl and add two tablespoons of pure honey. Next, squeeze two tablespoons of fresh lime juice into the bowl. Then, use a zester to add the zest from one lime. Using a whisk, mix these three ingredients together. You want the honey to blend smoothly with the lime juice and zest. This dressing brings a sweet and tangy flavor to your fruit salad. Now, pour the honey lime dressing over the bowl of fruits. Use a large spoon to gently toss everything together. Be careful! You want to coat the fruits without bruising them. After mixing, let the salad rest for about 10 minutes. This time helps the flavors blend together. Just before serving, stir the salad again. If you wish, add a bit more honey to sweeten it. Enjoy this refreshing dish served in bowls or on a platter. When picking fruits, go for seasonal options. They taste best and are often cheaper. Seasonal fruits are ripe and ready to eat. Off-season fruits can be harder and less sweet. Always check for ripeness. Squeeze the fruit gently; it should feel slightly soft. Look for bright colors, which show freshness. Avoid fruits with bruises or dark spots. To make your salad even better, adjust the sweetness. If you want it sweeter, add more honey. A little goes a long way. You can also add a small pinch of salt. It may seem odd, but salt brings out the natural sweetness. Just a touch can make a big difference. How you serve the fruit salad matters. You can use bowls for individual servings or a platter for a group. A platter looks nice and allows everyone to help themselves. To make it more appealing, use fresh mint leaves. They add color and a fresh scent. Just sprinkle a few on top right before serving. For a full guide on making this dish, check the [Full Recipe]. {{image_4}} You can mix in many fruits for more flavor. Try adding bananas for creaminess. Apples give a nice crunch. You can also use grapes or pomegranate seeds. These fruits add color and taste. They can also change the texture, making it fun to eat. Adding nuts or seeds brings a crunchy twist. Chia seeds are a great choice. They add fiber and healthy fats. Walnuts or almonds give a rich, nutty flavor. Just sprinkle them on top before serving. This will make your salad even more satisfying. You can turn your fruit salad into a meal. Adding protein makes it hearty. Greek yogurt is a tasty option. It adds creaminess and protein. Cottage cheese is another great choice. Both give a nice balance to the sweetness of the fruits. You can serve it in a bowl or mix it right in. Enjoy your Honey Lime Fruit Salad Delight! For the full recipe, check the section above. To keep your Honey Lime Fruit Salad fresh, use airtight containers. These containers help lock in moisture and flavors. Glass or plastic containers work well. If you don’t have these, a bowl covered tightly with plastic wrap can also be a good option. To prevent browning in fruits like apples or bananas, use lemon juice. You can also add extra lime juice to the salad. The acidity slows down oxidation. Keep your fruit salad in the fridge to stay crisp and tasty. For the best taste, eat the salad within three days. After this, the fruits may lose their texture. If you store it properly, it can last up to five days. However, the fresher, the better! Enjoy it while it's full of flavor. For the full recipe, check out the earlier section. Yes, you can use other sweeteners. Some good options are maple syrup and agave nectar. Each sweetener has a unique flavor. Maple syrup adds warmth, while agave is mild. Adjust the amount based on your taste. Use the same amount of these sweeteners as honey. This keeps the balance of flavors intact. You can prepare this salad ahead, but keep some tips in mind. Cut the fruits and store them separately. This helps keep them fresh. Mix the honey lime dressing and store it in the fridge. Combine everything just before serving. This keeps the fruits from getting mushy and preserves the crunchiness. Certain fruits may not mix well with lime. Avoid bananas, as they brown quickly and can turn mushy. Apples may also not hold up well with lime juice. Citrus fruits like oranges can overpower the salad. Stick to fruits that stay fresh and vibrant for the best taste. This blog post showed you how to create a delightful fruit salad. We covered the best fresh fruits like strawberries and mangoes, and the sweet honey-lime dressing. You learned how to prepare and combine the ingredients for a tasty dish. We shared tips on choosing fruits, enhancing flavors, and presentation tricks. In the end, you can make this salad your own by adding nuts or different fruits. With these steps, your salad will be fresh and enjoyable every time. Now, you’re ready to impress with your new skills!](https://joymealplan.com/wp-content/uploads/2025/06/73b51031-810e-4f51-94b6-bb966ad7c4ea-768x768.webp)


![To make classic banana pudding, you need these key ingredients: - 4 ripe bananas, sliced into rounds - 1 cup heavy cream - 1 cup whole milk - 1/2 cup granulated sugar - 1/4 cup cornstarch - 1/4 teaspoon kosher salt - 1 teaspoon pure vanilla extract - 2 large egg yolks - 1 package (approximately 200g) vanilla wafers - Whipped cream for topping (optional) - Additional banana slices for garnish These ingredients create the creamy base and the delightful layers that make banana pudding so special. The ripe bananas add a natural sweetness. The vanilla wafers provide crunch and texture. You can enhance your banana pudding with a few optional ingredients: - A hint of cinnamon for warmth - Chocolate chips for a sweet twist - A splash of rum extract for depth These additions can give your pudding a unique flavor. Experiment with them to find your favorite mix! If you’re missing a few ingredients, don’t worry. Here are some common substitutions you can use: - Use almond milk instead of whole milk for a dairy-free option. - Substitute coconut cream for heavy cream for a tropical flair. - Replace granulated sugar with honey or maple syrup for sweetness. These substitutions will still give you a tasty result. Just remember to adjust measurements based on taste. For the full recipe, check the [Full Recipe]. To start, gather all your ingredients. You need milk, cream, sugar, cornstarch, salt, and eggs. In a medium saucepan, mix the whole milk, heavy cream, sugar, cornstarch, and salt. Use a whisk to blend everything until smooth. Make sure there are no lumps from the cornstarch. Heat this mix over medium heat. Stir it often with a wooden spoon. You want it to thicken and bubble, which takes about 5 to 7 minutes. Next, crack the two large eggs, separating the yolks into a bowl. Whisk the yolks until they look smooth and pale. To temper the yolks, take a few spoonfuls of the hot mix and whisk them into the yolks. This step keeps the eggs from cooking too fast. After that, pour the yolk mix back into the saucepan. Cook for another 2 to 3 minutes while stirring. The pudding should be thick and creamy when done. Remove it from heat and stir in the vanilla extract. Let it cool for about 10 minutes. Now it’s time to build your pudding layers. Start with a large serving dish or individual cups. Place a layer of vanilla wafers at the bottom. Next, add a layer of sliced bananas. Pour a generous amount of pudding over the bananas and cookies. Repeat this layering until you use all ingredients. Make sure the last layer is pudding. This creates a beautiful top. After layering, cover the dish tightly with plastic wrap. This step helps keep the pudding moist. Next, place it in the fridge for at least 4 hours. This time lets the pudding chill and firm up. When you’re ready to serve, add a dollop of whipped cream on top. You can also garnish with extra banana slices for a nice touch. This dessert looks as good as it tastes! If you'd like to see the complete guide, check out the Full Recipe for more details. To get that smooth, creamy texture, follow these tips: - Whisk well: When mixing the milk and cornstarch, make sure to whisk until there are no lumps. - Stir constantly: While cooking the pudding base, stir it continuously to prevent sticking and burning. - Temper the eggs: Slowly add hot mixture to egg yolks. This helps keep them from cooking too fast. - Cool gradually: Let the pudding cool for about 10 minutes before layering. It will thicken more as it cools. To keep your pudding fresh: - Cover tightly: Use plastic wrap to seal the dish. This keeps moisture out. - Refrigerate: Always store it in the fridge. It stays good for 2-3 days. - Layer with care: If you have leftovers, keep layers separate. This avoids mushy bananas. Want to make your banana pudding even better? Try these ideas: - Add spices: A pinch of cinnamon or nutmeg can add warmth. - Use flavored wafers: Try lemon or chocolate wafers for a fun twist. - Incorporate extracts: Add a drop of almond extract for an extra layer of flavor. - Top it off: Fresh berries or nuts can give a nice crunch and taste contrast. For the full recipe, check out the details above! {{image_4}} To make chocolate banana pudding, simply add cocoa powder. Use 1/3 cup of unsweetened cocoa powder. Mix it into the milk mixture after combining the sugar and cornstarch. This gives your pudding a rich chocolate flavor. Layer it just like the classic recipe. The chocolate pairs well with bananas, creating a great dessert. For a nutty twist, add chopped pecans or walnuts. You can mix in 1/2 cup of nuts into the pudding. You can also sprinkle some on each layer. This adds a delightful crunch to each bite. The nuts contrast nicely with the creamy pudding and soft bananas. To create a vegan version, swap dairy for plant-based options. Use almond or coconut milk instead of whole milk and cream. Replace egg yolks with 1/4 cup of silken tofu blended until smooth. Sweeten with maple syrup or coconut sugar. This makes a tasty, dairy-free pudding that everyone can enjoy. Each of these variations adds a new twist to the classic banana pudding. They keep the spirit of the dessert while offering different flavors and textures. For the full recipe, make sure to check out the details above. Banana pudding has a rich history that dates back to the 19th century. This dish first appeared in American cookbooks in the late 1800s. It gained popularity in the Southern states, where fresh bananas were easy to find. The sweet, creamy dessert combined layers of pudding, bananas, and vanilla wafers. This simple yet delicious treat quickly became a staple at family gatherings and potlucks. Over the years, banana pudding has evolved in many ways. In the 1930s, brands like Nabisco made vanilla wafers popular in homes. Many cooks began using these cookies as a key ingredient. Today, you can find various versions, including chocolate and vegan options. Some recipes even add whipped cream or meringue on top for extra flavor and texture. This evolution shows how versatile and beloved banana pudding truly is. In Southern cuisine, banana pudding holds a special place. It represents comfort and warmth. Families often serve it at holidays, birthdays, and reunions. Many people have fond memories of enjoying this sweet treat with loved ones. This dessert is not just a dish; it’s a tradition passed down through generations. The combination of flavors and textures captures the essence of Southern hospitality, making it a cherished part of the culture. Yes, you can use other types of bananas. While ripe Cavendish bananas are common, you can try red or plantain bananas. Each type brings a unique flavor. Red bananas are sweeter and softer. Plantains are firmer and less sweet. Just remember, the texture and taste will change. To keep bananas from browning, you can use lemon juice. Just squeeze a little juice over the banana slices. This helps slow down oxidation. You can also cover the bananas tightly with plastic wrap. Keeping them chilled also helps. Serve the pudding soon for the best look. If you don’t have vanilla wafers, don’t worry! You can use graham crackers or shortbread cookies. Both options add a nice crunch. You can even use sponge cake for a softer layer. Get creative! The pudding will still taste great, no matter what you use. This blog shows you how to make classic banana pudding. We covered key ingredients, optional add-ins, and substitutions. I also shared simple steps for preparing, layering, and chilling the pudding. You learned tips for perfect texture and storing leftovers. Plus, I explored fun variations like chocolate and vegan options. Finally, we discussed the history and cultural roots of this dish. Banana pudding is more than a dessert; it's a beloved tradition. Enjoy creating your own version and sharing it with friends and family.](https://joymealplan.com/wp-content/uploads/2025/06/2270da16-0b21-4017-a800-73ddf1839134-768x768.webp)

