Savory Club Sandwich Pasta Salad Easy and Tasty Recipe

Are you ready to enjoy a fun twist on a classic? This Savory Club Sandwich Pasta Salad blends your favorite club sandwich flavors into a tasty dish. With rotini pasta, chicken, bacon, and fresh veggies, it’s easy to make and great for any meal. Perfect for picnics or quick lunches, this salad is a crowd-pleaser. Let’s dive into this quick and simple recipe that will make your taste buds dance!
Why I Love This Recipe
- Easy to Make: This pasta salad comes together quickly, making it perfect for busy weeknights or last-minute gatherings.
- Flavor Packed: The combination of chicken, bacon, and fresh veggies creates a delightful mix of flavors and textures.
- Customizable: You can easily swap out ingredients based on what you have on hand or your personal preferences.
- Great for Meal Prep: This dish stores well in the fridge, making it an excellent choice for lunches or make-ahead dinners.
Ingredients
Main Ingredients for Club Sandwich Pasta Salad
– 8 oz rotini pasta
– 1 cup cooked chicken breast, diced
– 1/2 cup cooked bacon bits
– 1 cup cherry tomatoes, halved
– 1/2 cup cucumber, peeled and diced
Additional Ingredients
– 1/2 cup sharp cheddar cheese, shredded
– 1/4 cup red onion, finely chopped
– 1/2 cup creamy mayonnaise
– 2 tablespoons Dijon mustard
– 1 tablespoon fresh lemon juice
Seasoning and Garnish
– Salt and freshly cracked black pepper to taste
– Fresh parsley, chopped, for a garnish
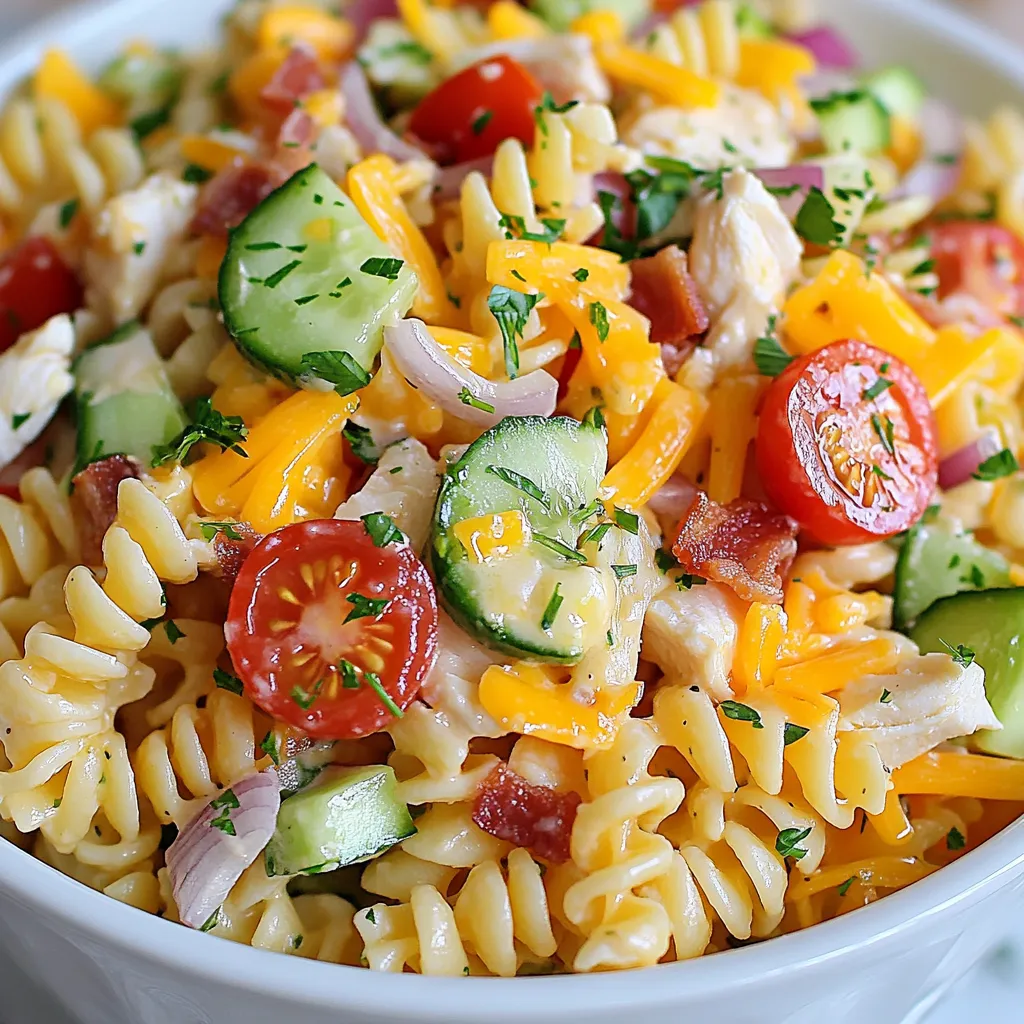
The ingredients for this dish come together in a way that’s truly satisfying. Each one plays a role. For the pasta, I use rotini. Its twirls hold on to the dressing and flavors well. The chicken adds protein, while the bacon bits give a nice crunch. Cherry tomatoes and cucumber provide freshness.
Cheddar cheese adds richness, and red onion gives a sharp bite. The creamy dressing, made with mayonnaise, Dijon mustard, and lemon juice, ties it all together. Don’t forget the salt and pepper. They enhance all the flavors. Lastly, the parsley not only looks pretty but also brightens each bite.
This mix is what makes the Club Sandwich Pasta Salad so tasty. You can see how each ingredient fits into the overall flavor. It’s a great way to enjoy the classic club sandwich in a new form.

Step-by-Step Instructions
Cooking the Pasta
First, cook 8 oz of rotini pasta. Follow the package directions for the best results. You want the pasta to be al dente, which means it should have a slight bite. Once cooked, drain the pasta and rinse it under cold water. This cools the pasta down and stops the cooking process.
Preparing the Salad
In a large bowl, combine the cooled rotini, 1 cup of diced chicken breast, and 1/2 cup of cooked bacon bits. Add 1 cup of halved cherry tomatoes, 1/2 cup of peeled and diced cucumber, 1/2 cup of shredded sharp cheddar cheese, and 1/4 cup of finely chopped red onion. Mix gently to combine all the ingredients. This step helps spread the flavors evenly throughout the salad.
Making the Dressing
In a separate bowl, whisk together 1/2 cup of creamy mayonnaise, 2 tablespoons of Dijon mustard, and 1 tablespoon of fresh lemon juice. Add salt and pepper to taste. Make sure the dressing is smooth and well blended. Drizzle this creamy dressing over the pasta salad and toss everything together. This keeps each bite deliciously coated.
Chilling the Salad
After mixing, taste the salad and adjust seasoning if needed. Cover the bowl with plastic wrap or a lid. Refrigerate for at least 30 minutes before serving. Chilling allows the flavors to meld together, making each bite even tastier.
Serving Suggestions
Just before serving, garnish with freshly chopped parsley for a pop of color. For an attractive display, consider serving the salad in a large bowl or in individual jars. You can also add a slice of tomato or a sprig of parsley on top of each serving for extra flair.
Tips & Tricks
Cooking Tips for Perfect Pasta Salad
To keep your pasta from becoming mushy, cook it al dente. This means the pasta should be firm when bitten. Follow the package instructions closely for timing. After cooking, drain the pasta and rinse it under cold water. This stops the cooking process and cools it down. Rinsing also helps remove extra starch, which can make pasta stick together.
Customizing the Salad
You can easily customize this pasta salad. If you want a lighter option, substitute bacon with turkey bacon. You can also go vegetarian by adding chickpeas or avocado. Feel free to load it up with your favorite vegetables, like bell peppers or spinach. Fresh herbs like basil or dill can bring a nice touch and extra flavor.
Dressing Alternatives
If you want a healthier dressing, consider yogurt-based options. Using Greek yogurt can cut down on calories while still tasting great. You can mix yogurt with Dijon mustard and lemon juice for a tasty twist. This adds creaminess without all the fat of mayonnaise.
Pro Tips
- Cook Pasta Al Dente: Ensure your rotini is cooked al dente for a perfect texture that holds up in the salad. Overcooked pasta can become mushy when mixed with the dressing.
- Use Fresh Ingredients: Opt for fresh vegetables and herbs for the best flavor. Fresh cucumbers and tomatoes enhance the salad’s crunch and brightness.
- Chill for Flavor: Allow the pasta salad to chill in the refrigerator for at least 30 minutes. This resting time helps the flavors meld together beautifully.
- Customize Your Protein: Feel free to swap out the chicken for leftover rotisserie chicken, turkey, or even a plant-based option for a different twist on this classic salad.

Variations
Meat Options
You can switch up the meat in this salad. If you want a different taste, use turkey instead of chicken. Ham is also a tasty choice. For a meatless salad, try adding chickpeas or black beans. They add protein and texture without meat. Either way, you get great flavor!
Cheese Variations
Cheese can change the whole dish. Try using feta for a tangy kick or mozzarella for a creamy texture. If you want a dairy-free option, vegan cheese works well. It melts and blends nicely, making your salad rich and satisfying.
Flavor Enhancements
Adding spices or herbs boosts the flavor. Paprika can add warmth, while dill brings a fresh taste. You can also add fruits like apples or grapes. They add a sweet crunch that contrasts with the savory ingredients. This mix makes every bite exciting and new!
Storage Info
How to Store Leftover Pasta Salad
Store leftover pasta salad in the fridge. Use a tight container to keep it fresh. Glass or plastic containers work well. Make sure to seal it well to prevent air exposure. This helps maintain flavor and texture.
Freezing Tips
Can you freeze Club Sandwich Pasta Salad? Yes, you can freeze it, but it may change texture. To freeze, place the salad in an airtight container. Leave some space at the top for expansion. When ready to eat, thaw it overnight in the fridge. This keeps the salad safe and fresh.
Serving After Storage
To refresh the salad after refrigeration, stir it well. If it feels dry, add a bit of mayo or dressing. You can also squeeze fresh lemon juice for extra zing. Taste before serving to ensure it’s just right. Adjust seasoning if needed, and enjoy!
FAQs
What are the nutritional benefits of Club Sandwich Pasta Salad?
Club Sandwich Pasta Salad is packed with nutrients. The rotini pasta gives you carbs for energy. Chicken breast adds protein, which helps build muscle. Bacon bits offer flavor and some healthy fats. Cherry tomatoes and cucumbers provide vitamins and hydration. Cheddar cheese gives calcium for strong bones. Overall, this salad is a balanced meal.
Can I make this salad ahead of time?
Yes, you can make this salad ahead of time. It tastes even better after chilling. I suggest preparing it a few hours or the night before. Just remember to cover it well. This keeps it fresh and tasty until you’re ready to serve.
How long does Club Sandwich Pasta Salad last in the fridge?
This salad lasts about 3 to 5 days in the fridge. Make sure to store it in an airtight container. If it looks or smells off, don’t eat it. Always trust your senses when it comes to food safety.
Is it safe to leave this salad out at room temperature?
I do not recommend leaving this salad out for longer than two hours. Bacteria can grow quickly in warm temperatures. If it’s a hot day, keep the salad chilled until serving. Use ice packs if you take it on a picnic.
Can I customize the dressing for this recipe?
Absolutely! You can change the dressing to fit your taste. Try using Greek yogurt instead of mayonnaise for a lighter option. Add herbs like dill or basil for extra flavor. The key is to keep it creamy and tasty!
This blog post detailed how to make a tasty Club Sandwich Pasta Salad. You learned about the main and additional ingredients, step-by-step instructions, and tips for perfecting your salad. You can also customize the recipe to fit your taste.
Remember, a well-made pasta salad can impress any crowd. Try out the variations and share this delicious dish. Enjoy your cookin

Club Sandwich Pasta Salad Delight
Ingredients
- 8 oz rotini pasta
- 1 cup cooked chicken breast, diced
- 0.5 cup cooked bacon bits
- 1 cup cherry tomatoes, halved
- 0.5 cup cucumber, peeled and diced
- 0.5 cup sharp cheddar cheese, shredded
- 0.25 cup red onion, finely chopped
- 0.5 cup creamy mayonnaise
- 2 tablespoons Dijon mustard
- 1 tablespoon fresh lemon juice
- to taste salt
- to taste freshly cracked black pepper
- for garnish fresh parsley, chopped
Instructions
- Begin by cooking the rotini pasta according to the package directions. Aim for an al dente texture, then drain the pasta and rinse it under cold water to halt the cooking process and cool it down.
- In a large mixing bowl, combine the cooled rotini, diced chicken, bacon bits, halved cherry tomatoes, diced cucumber, shredded cheddar cheese, and chopped red onion, mixing them gently to combine.
- In a separate mixing bowl, whisk together the mayonnaise, Dijon mustard, and lemon juice until smooth. Season with salt and pepper to taste, adjusting to your preference.
- Drizzle the creamy dressing over the pasta mixture and toss everything together thoroughly, ensuring that all the ingredients are evenly coated in the dressing.
- Sample the salad and adjust the seasoning, if desired, by adding more salt or pepper.
- Cover the prepared pasta salad with plastic wrap or a lid and refrigerate it for at least 30 minutes. This chilling period allows the flavors to meld beautifully.
- Just before serving, sprinkle the pasta salad with freshly chopped parsley to add a vibrant touch and enhance presentation.


![To make garlic roasted green beans, you'll need these simple items: - 1 pound fresh green beans, trimmed and rinsed - 4 large cloves garlic, finely minced - 3 tablespoons extra virgin olive oil - 1 teaspoon freshly grated lemon zest - 1 teaspoon balsamic vinegar - ½ teaspoon red pepper flakes (optional for heat) - Sea salt and freshly ground black pepper to taste - 2 tablespoons finely grated Parmesan cheese (optional) I always prefer fresh green beans for this recipe. They taste better and have a nice crunch. Fresh beans roast evenly and soak up the flavors well. If you can’t find fresh ones, frozen beans work too. Just make sure to thaw and drain them first. They may not be as crisp, but they will still taste great. You can change some ingredients if you need to. If you don’t have garlic, try using garlic powder. Instead of lemon zest, you can use orange zest for a different flavor. If you want a different vinegar, try red wine vinegar. For a dairy-free option, skip the Parmesan cheese or use a vegan cheese instead. These swaps keep the dish tasty and fun! To start, gather your ingredients. You will need: - 1 pound fresh green beans, trimmed and rinsed - 4 large cloves garlic, finely minced - 3 tablespoons extra virgin olive oil - 1 teaspoon freshly grated lemon zest - 1 teaspoon balsamic vinegar - ½ teaspoon red pepper flakes (optional for heat) - Sea salt and freshly ground black pepper to taste - 2 tablespoons finely grated Parmesan cheese (optional) First, preheat your oven to 425°F (220°C). This step is key for crispy beans. Next, take a large mixing bowl and add the green beans. Toss in the minced garlic, olive oil, lemon zest, and balsamic vinegar. If you like a little heat, add red pepper flakes. Season with sea salt and black pepper to taste. Mix everything well. You want each bean coated with flavor. Now, it’s time to roast! Spread the green beans on a large baking sheet. Make sure they lie flat in a single layer. This helps them roast evenly. Place the baking sheet in the oven and roast for 15-20 minutes. Halfway through, give the beans a toss. This ensures they cook evenly. You’ll know they’re done when they’re tender but still have a slight crunch. Once out of the oven, if you like, sprinkle grated Parmesan cheese on top. The heat will melt it slightly, making it even better. Transfer the roasted green beans to a nice serving dish. Serve them warm to your family or guests. They pair well with many main dishes. Try them with grilled chicken or fish. You can also serve them as a stand-alone snack. For the full recipe, please see the earlier section. Enjoy your tasty green beans! To boost the taste of garlic roasted green beans, add a squeeze of lemon. Lemon brings brightness and freshness. You can also use fresh herbs like thyme or rosemary. These herbs add depth and aroma. If you love heat, try adding more red pepper flakes. Just be careful not to overdo it! For the best texture, spread the beans on the baking sheet. Make sure they are in a single layer. This helps them roast evenly. Toss them halfway through cooking to ensure all sides get crispy. If you want them extra crispy, leave them in for a few more minutes. Serve your garlic roasted green beans in a nice dish. You can sprinkle extra Parmesan cheese on top for a gourmet look. Adding a few lemon wedges next to the beans can enhance the presentation. It also invites your guests to add more flavor if they wish. For a pop of color, place fresh herbs on top before serving. This will make your meal look and taste amazing! You can find the full recipe for garlic roasted green beans [Full Recipe]. {{image_4}} You can mix in other veggies with garlic roasted green beans. Carrots, bell peppers, and zucchini work well. Just cut them into similar sizes. This way, they all cook evenly. Toss them with the green beans in the same mix for great flavor. You can also try adding cherry tomatoes for a pop of color and sweetness. Add herbs to change the taste of your garlic roasted green beans. Fresh thyme or rosemary adds a lovely aroma. A sprinkle of smoked paprika gives a warm, savory hint. You can also try a dash of cumin for a unique flavor. These twists make your dish exciting and fresh each time. This recipe is already vegetarian. To make it vegan, simply skip the Parmesan cheese. You can also add nutritional yeast for a cheesy flavor without dairy. It’s a great way to keep it creamy and flavorful. Enjoy these garlic roasted green beans as a side dish or main meal. Each variation keeps it fun and tasty! For the full recipe, check out the detailed instructions provided earlier. After enjoying your garlic roasted green beans, you might have leftovers. Cool the beans down first. Then, place them in an airtight container. They stay fresh in the fridge for about 3-4 days. When ready to eat, check for any signs of spoilage. If they look good, you can enjoy them again! If you have more leftovers than you can eat, freezing is a great option. First, let the beans cool completely. Then spread them on a baking sheet in a single layer. Freeze them for about an hour. This step helps the beans stay separate. After freezing, transfer them to a freezer-safe bag. They can last up to 3 months in the freezer. Label the bag with the date so you know when to use them. Reheating garlic roasted green beans is simple. You can use the oven or a microwave. For the oven, preheat it to 350°F (175°C). Spread the beans on a baking sheet and heat for about 10 minutes. If you use a microwave, place the beans in a safe dish. Heat them for 1-2 minutes, stirring halfway. This method keeps them tasty and warm. For extra flavor, add a splash of olive oil or a sprinkle of salt before serving. Enjoy your meal! To make garlic roasted green beans, start by preheating your oven to 425°F (220°C). In a big bowl, mix 1 pound of fresh green beans with 4 minced garlic cloves, 3 tablespoons of olive oil, 1 teaspoon of lemon zest, and 1 teaspoon of balsamic vinegar. If you like spice, add ½ teaspoon of red pepper flakes. Season with sea salt and black pepper. Toss everything until the beans are well coated. Spread the beans on a baking sheet in a single layer. Roast them for 15-20 minutes, tossing halfway. When they are tender and crisp, serve hot. You can find the Full Recipe for more details. Yes, you can prepare garlic roasted green beans ahead of time. You can trim and wash the green beans and mix them with the garlic and oil. Store this mix in the fridge for up to a day. When you’re ready to eat, just roast them as directed. This makes dinner prep easier, and you can enjoy more time with your guests. Garlic roasted green beans pair well with many dishes. You can serve them alongside grilled chicken or fish for a balanced meal. They also complement pasta dishes, like spaghetti or fettuccine. If you want a vegetarian option, try them with quinoa or rice. Their bright flavor adds a nice touch to any plate. This post covered garlic roasted green beans from ingredients to serving ideas. Fresh or frozen beans work well, and you can swap key ingredients easily. Roasting creates a rich flavor, and adding herbs boosts it even more. Don’t forget about storage; knowing how to keep leftovers can help. Remember, you can customize this dish with other veggies or herbs. Enjoy experimenting with flavors! Roasted green beans can fit any meal.](https://joymealplan.com/wp-content/uploads/2025/07/774fbef7-0e10-49a5-abc6-76b985870023-768x768.webp)


