Savory Miso Ginger Ramen with Jammy Eggs Recipe

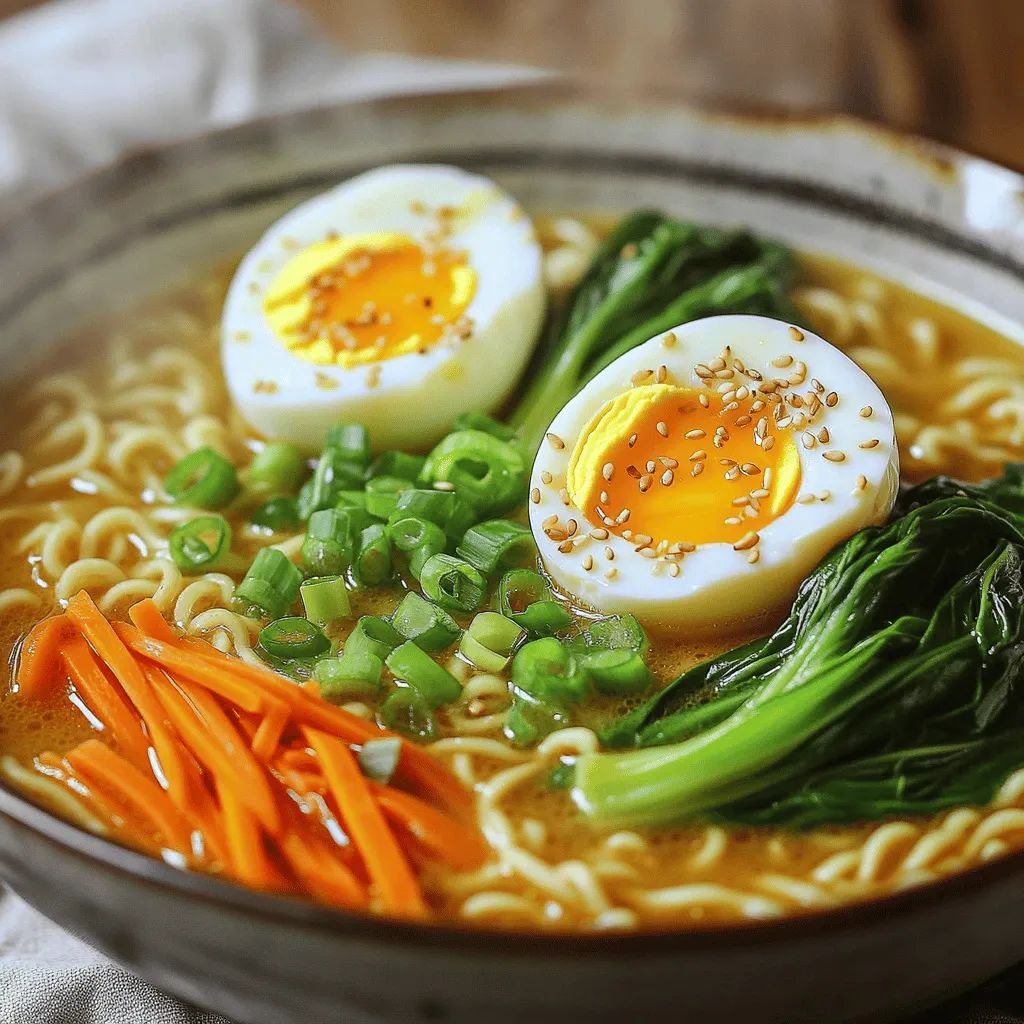
Craving a cozy bowl of ramen? You’re in for a treat! My Savory Miso Ginger Ramen with Jammy Eggs is packed with flavor and easy to make. This recipe combines rich broth, perfectly cooked eggs, and fresh veggies, creating a dish that satisfies any hunger. In this guide, I’ll walk you through every step, making it simple to enjoy a restaurant-quality meal at home. Let’s get started!
Ingredients
List of Ingredients
– 4 cups vegetable broth
– 2 tablespoons miso paste (choose white or yellow for a milder flavor)
– 1 tablespoon soy sauce
– 1 tablespoon fresh ginger, finely grated
– 2 cloves garlic, minced
– 2 packs of ramen noodles (fresh or dried)
– 2 soft boiled eggs (jammy style)
– 1 cup baby bok choy, halved
– 1 carrot, cut into thin julienne strips
– 1 green onion, finely chopped
– 1 tablespoon sesame oil
– Salt and pepper to taste
– Sesame seeds for garnish
Choosing high-quality ingredients makes a big difference. For miso, I like using white or yellow. They both offer a mild taste. Fresh ramen noodles give a better texture than dried ones. If you want a gluten-free option, look for rice noodles.
If you have dietary restrictions, you can replace soy sauce with tamari for a gluten-free option. For the broth, use mushroom broth for a deeper flavor. If you are vegan, swap the eggs with sliced avocado for creaminess. Always pick fresh veggies for the best taste.
Step-by-Step Instructions
Preparing the Broth
1. First, take a large pot and warm up the sesame oil over medium heat.
2. Add the minced garlic and grated ginger. Sauté for about one minute. You want them fragrant but not burnt.
3. Gradually pour in the vegetable broth. Increase the heat and bring it to a gentle simmer.
4. Now, add the miso paste and soy sauce. Stir well until both dissolve into the broth.
5. Let the broth simmer for five to seven minutes. This helps the flavors blend nicely.
Cooking the Jammy Eggs
1. In a small pot, bring water to a rolling boil.
2. Gently add the eggs to the boiling water. Cook them for exactly six to seven minutes. This will give you the jammy yolk.
3. Once done, quickly place the eggs in an ice bath. This stops the cooking. Let them cool for a few minutes before peeling.
Final Assembly of Ramen
1. To your simmering broth, add the halved baby bok choy and julienned carrots. Cook for two to three minutes. The veggies should be tender yet bright.
2. Now, introduce the ramen noodles to the pot. Stir them into the broth. Cook according to the package instructions, usually three to four minutes. They should be al dente.
3. After the noodles are cooked, taste the broth. Adjust the seasoning with salt and pepper if needed.
4. To serve, divide the ramen, bok choy, and carrots into two bowls.
5. Carefully halve the jammy eggs and place them on top of the ramen. Make sure the yolks face up.
6. Finally, garnish each bowl with chopped green onions and sprinkle sesame seeds for extra flavor and crunch.
Tips & Tricks
Achieving the Perfect Jammy Egg
To make a jammy egg, timing is key. For a soft yolk, boil the eggs for 6-7 minutes. If you want a firmer yolk, extend the time to about 8 minutes. Always place the eggs in ice water after boiling. This stops the cooking. It also makes peeling easier. To peel without damage, gently tap the egg on a hard surface. Roll it lightly to crack the shell. Start peeling at the wider end for the best results.
Flavor Enhancements
To boost flavor, add toppings. Sliced radishes, bamboo shoots, or seaweed work well. You can also sprinkle chili flakes for heat. For extra saltiness, a dash of soy sauce works great. Remember, taste your broth before adding more salt. You want a balance of flavors.
Common Mistakes to Avoid
Avoid burning the broth. Keep the heat on medium and stir often. If the broth burns, the flavor can turn bitter. Next, don’t overcook the vegetables. They should be tender but still bright. Cooking them for 2-3 minutes keeps their crunch.

Variations
Protein Additions
You can add protein to your ramen for extra flavor. Chicken, tofu, or shrimp work well. If using chicken, cook it in the broth for about 10 minutes. For shrimp, add them in the last 3 minutes of cooking. Tofu should be cubed and simmered for 5 minutes. Adjust cooking times to ensure all proteins are cooked through without becoming tough.
Vegetarian/Vegan Options
If you want a vegetarian or vegan dish, swap ramen noodles for rice noodles. You can also use vegetable broth instead of chicken broth. For proteins, opt for tofu or tempeh. These options keep the dish flavorful and satisfying without meat.
Broth Variations
Change your broth by using different styles of miso. White miso gives a sweet flavor. Yellow miso has a richer taste. You can also add spices like chili flakes for heat or herbs like cilantro for freshness. Each choice brings unique flavors to your ramen and makes it your own.
Storage Info
Storing Leftovers
To keep your ramen fresh, store it in the fridge. Use airtight containers. This helps prevent the noodles from drying out. Keep the broth and noodles together for best results. If you have extra eggs, store them separately in a small container. They stay fresh longer that way.
Reheating Tips
Reheat your ramen gently on the stove. Pour the broth into a pot and heat it slowly. Add the noodles and vegetables once the broth is hot. This keeps the noodles from getting mushy. If using a microwave, heat in short bursts. Stir often to keep the heat even.
Meal Prepping
You can prep your ramen ahead of time. Cook the broth and store it in the fridge. Prepare the vegetables and keep them separate. Boil the eggs and store them in their shells. This keeps everything fresh. When you’re ready to eat, just combine and heat!
FAQs
Can I use instant ramen for this recipe?
Yes, you can use instant ramen. Instant ramen is quick and easy. It cooks fast and is often cheaper. However, fresh ramen has a better texture. Fresh ramen gives a nice chew and holds broth well. Instant ramen can break down quickly. If you choose instant, cook it for less time. This way, it stays firm.
What can I substitute for miso paste?
If you don’t have miso, try tahini or almond butter. These can add creaminess but may change the taste. You can also mix soy sauce with a little peanut butter. Another option is using vegetable bouillon for saltiness. Each choice brings a different flavor, so taste as you go!
How can I make this dish spicier?
To add heat, try chili oil or hot sauce. You can mix in fresh chili peppers too. Sriracha works great for a quick kick. If you prefer, add red pepper flakes while cooking. Start with a small amount, then taste. Adjust until it reaches your desired spice level.
You now have a complete guide to making delicious homemade ramen. We covered all the essential ingredients and how to choose the best ones. You learned step-by-step instructions for simmering your broth and cooking those perfect jammy eggs. I shared tips to avoid common mistakes and ways to customize your ramen with different proteins and flavors.
Now, you can enjoy a tasty bowl of ramen that fits your needs. Get ready to impress your family or friends with this satisfying meal!


. Enjoy your cooking! Start by washing your vegetables well. Fresh veggies make the dish pop! Dice the mixed peppers into small cubes. Cut the carrot into thin strips, or julienne it. Trim the sugar snap peas and separate the broccoli into small florets. The key is to keep all the pieces similar in size, so they cook evenly. For this recipe, use cooked jasmine rice. Day-old rice works best because it's less sticky. If you need to cook rice, rinse it under cold water until the water runs clear. This step helps remove excess starch. Then, cook it according to package instructions. Once done, let it cool before using. Heat two tablespoons of vegetable oil in a large pan or wok over medium-high heat. Add three minced garlic cloves and one teaspoon of grated ginger. Stir for about 30 seconds until fragrant. Next, toss in the broccoli and stir-fry for two minutes. Now, add the julienned carrots, sugar snap peas, and diced peppers. Stir-fry these for another three to four minutes until they're tender but still crisp. Push the veggies to one side of the pan. Add the cooked rice to the other side. Drizzle two tablespoons of soy sauce and one tablespoon of sesame oil over the rice. Use a spatula to break up any clumps and mix everything well. Finally, add sliced green onions and season with salt and pepper to taste. Cook for two more minutes to let the flavors blend. Serve hot, garnished with sesame seeds and fresh cilantro leaves. For the full recipe, check out the detailed instructions! To make fluffy rice, start with cold, day-old rice. Freshly cooked rice is too moist. Spread it out on a plate to cool and dry. This helps separate the grains. When cooking, use a bit less water than usual. This prevents soggy rice. For the best results, choose jasmine or basmati rice. They have a nice texture and flavor. Avoid sticky rice types for this dish. When you pick vegetables, look for bright colors and firm textures. Fresh veggies taste better and add crunch. Avoid any that look wilted or have brown spots. Store your vegetables in the fridge, but keep them dry. Use airtight bags to prevent moisture. This helps keep them fresh longer. Use them within a week for the best flavor. To get great flavor in your fried rice, use high heat. A hot pan sears the veggies and rice, adding depth. Start with garlic and ginger for aroma. Use soy sauce for a salty kick, but don’t overdo it. You can also add sesame oil for a nutty taste. Mix in the veggies at the right time. This keeps them crisp and colorful. For more ideas, try adding some chili flakes for heat or a splash of lime for brightness. For the full recipe, check out the Rainbow Veggie Fried Rice. {{image_4}} You can easily add protein to your vegetable fried rice. Tofu is a great choice for a plant-based meal. Use firm tofu for the best texture. Just cube the tofu and sauté it until it's golden. If you prefer meat, chicken is also a fantastic option. Use diced chicken breast and cook it until it’s no longer pink. Both options boost the meal’s nutrition and flavor. To keep your dish vegan, skip the chicken and use soy sauce that is gluten-free. Coconut aminos can also be a tasty substitute. For a gluten-free fried rice, make sure to check all sauce labels. You can enjoy this meal without compromising on taste or dietary needs. You can change the flavor of your fried rice easily. To make it spicy, add chili paste or red pepper flakes. For a sweeter taste, try adding a bit of pineapple or a drizzle of sweet soy sauce. Experiment with different herbs like basil or cilantro. Each variant can turn this simple dish into something new and exciting. Feel free to explore these variations to make your vegetable fried rice unique. For the full recipe, check out the Rainbow Veggie Fried Rice. Storing leftover vegetable fried rice is simple. First, let it cool. Place it in an airtight container. You can keep it in the fridge for up to three days. Make sure it’s sealed well to keep out moisture and odors. If you have a lot, divide it into smaller portions. This makes it easy to reheat later. To reheat your fried rice, use a skillet or a microwave. If you use a skillet, add a splash of water. This helps steam the rice and keeps it from drying out. Heat over medium heat for about five minutes. Stir often to warm it evenly. In the microwave, cover the rice with a damp paper towel. Heat for one to two minutes, checking every 30 seconds. You can freeze vegetable fried rice too. Place it in a freezer-safe container. Make sure to leave some space at the top. Rice expands when frozen. It can last up to three months in the freezer. To thaw, move it to the fridge overnight. You can also reheat it straight from the freezer. Just add a few extra minutes to your cooking time. This way, you’ll enjoy that great taste again! The best rice for fried rice is jasmine rice. It has a nice texture and flavor. Day-old rice works best because it dries out a bit. This helps keep the rice fluffy. You can also use long-grain rice if you prefer. Just make sure it's cooked and cooled before frying. Yes, you can use frozen vegetables. They are a quick and easy option. Just make sure to thaw and drain them first. This helps prevent excess water from making your fried rice soggy. Frozen mixes often have a nice variety, too. To make it healthier, add more veggies like spinach or peas. You can also reduce the oil used in cooking. Using low-sodium soy sauce cuts down on salt. Another option is to swap some rice for cauliflower rice. This adds fiber and lowers carbs. Vegetable fried rice has roots in China. It started as a way to use leftover rice and vegetables. Different cultures adapted the dish over time. You can find many versions worldwide, each with unique flavors and ingredients. Yes, you can prepare vegetable fried rice in advance. Cook the rice and veggies, then store them separately. You can mix them just before serving. This keeps everything fresh. It also makes it easy to reheat later. Check out the Full Recipe for more details! Vegetable fried rice offers a tasty, simple meal. We covered essential ingredients, types of rice, and optional flavors. You learned how to prepare veggies, cook rice, and mix everything for the best taste. Remember to store leftovers well and try different proteins or flavors for variety. Whether you prefer tofu, chicken, or vegan options, there’s a fried rice for you. Try these tips to elevate your dish and enjoy!](https://joymealplan.com/wp-content/uploads/2025/06/1a929e2b-4b2d-416b-b92a-3d8add5a3088-768x768.webp)


![- 12 oz cheese tortellini (fresh or frozen) - 1 cup heavy cream - 1/2 cup prepared basil pesto - 1/4 cup finely grated Parmesan cheese, plus extra for garnish - 1 cup cherry tomatoes, halved - 2 cups fresh baby spinach - 2 cloves garlic, minced - 2 tablespoons extra virgin olive oil - Salt and black pepper to taste - Optional garnish: toasted pine nuts Gather these ingredients to make your creamy pesto tortellini. The heart of this dish is the cheese tortellini. It adds richness and texture. Heavy cream makes the sauce smooth and creamy. Basil pesto brings bright flavors that pop. The Parmesan cheese adds a salty kick. Next, you need some extra ingredients. Cherry tomatoes give a sweet burst. Fresh baby spinach adds color and nutrients. Garlic gives a warm, aromatic note. Extra virgin olive oil helps to sauté the garlic. Finally, don't forget your pantry staples. Salt and black pepper enhance all the flavors. If you want a crunchy finish, use toasted pine nuts as a garnish. For the full recipe, follow the steps to bring this delightful dish to life! Start by boiling a large pot of salted water. Once it reaches a rolling boil, add the cheese tortellini. Cook it according to the package instructions until it is al dente. This usually takes around 2 to 4 minutes. After cooking, drain the tortellini in a colander. Remember to save a little pasta water for later, just in case you need it. In a large skillet, heat olive oil over medium heat. Add minced garlic and sauté it for about one minute. You want the garlic to become fragrant but not brown. Next, pour in the heavy cream, stirring it into the oil and garlic. Then, add the basil pesto and mix until it is well combined. Let the sauce warm up on low heat. First, stir in the fresh spinach and half of the grated Parmesan cheese. Cook and stir until the spinach wilts and the cheese melts into the sauce. This creates a rich and creamy base. Now, add the drained tortellini into the skillet. Toss the pasta gently with the creamy pesto sauce, ensuring every piece is well coated. If the sauce feels too thick, add a splash of the reserved pasta water. Finally, mix in the halved cherry tomatoes. Season with salt and black pepper to taste. Allow the dish to warm for another 2 to 3 minutes. For the complete details, check out the Full Recipe. Using fresh tortellini gives you a soft and tender bite. Frozen tortellini works too, but it may be chewier. If you want to adjust the creaminess, add more cream. For a thicker sauce, let it simmer longer to reduce. You can also add a splash of pasta water to change the thickness. For a lovely look, garnish with extra Parmesan cheese and toasted pine nuts. The nuts add crunch and a nice flavor. When plating, scoop the tortellini into bowls. Drizzle some extra pesto over the top for color. This makes your dish pop and look inviting. When sautéing garlic, heat the oil on medium. Add minced garlic and stir for about one minute. Don’t let it brown, or it will taste bitter. To keep pasta texture, avoid overcooking. Cook the tortellini until al dente, so it stays firm when mixed with sauce. Try the full recipe to create this rich and flavorful dish at home! {{image_4}} You can easily add protein to your creamy pesto tortellini. - Grilled chicken or shrimp: These options offer a tasty boost. Cook them separately and mix them in. - Tofu for a vegetarian option: Tofu absorbs flavors well. Sauté it until golden for a nice texture. Adding veggies gives your dish a fresh touch. - Asparagus or bell peppers: These add color and crunch. Sauté them briefly before adding to the sauce. - Seasonal vegetables for freshness: Use what’s in season. Zucchini and peas work well in spring and summer. Experimenting with sauces keeps it interesting. - Alternative pesto options: Try sun-dried tomato or arugula pesto for a new taste. Each brings a unique flavor profile. - Creamy versus non-creamy sauce variations: You can skip the cream for a lighter dish. Just add more pesto and a splash of pasta water. These changes let you make creamy pesto tortellini your own. For the complete recipe, check the Full Recipe section. To keep your creamy pesto tortellini fresh, store it in an airtight container. This helps prevent the dish from drying out. It will stay good in the fridge for about 3 to 4 days. Make sure to label the container with the date you made it. If you want to save your creamy pasta for later, freezing is a great choice. To freeze, place the dish in a freezer-safe container. Leave some space for expansion. It can last up to 2 months in the freezer. When you're ready to eat it, take it out and thaw it in the fridge overnight. To reheat, you can use a microwave or a skillet. If using a skillet, add a splash of water to help it heat evenly. Stir gently until it's hot all the way through. Creamy pesto tortellini pairs well with a fresh salad or warm bread. A simple green salad with vinaigrette is a great match. For reheating, make sure you warm it gently. This keeps the flavors intact. Enjoy your creamy delight with your favorite sides! For the full recipe, check out the [Full Recipe]. You can make this dish vegan by swapping dairy ingredients. Here are some great substitutes: - Use vegan tortellini made from plant-based ingredients. - Replace heavy cream with coconut cream or cashew cream. - For Parmesan, try nutritional yeast or a store-bought vegan cheese. These swaps keep the flavor tasty and rich while removing all animal products. You will enjoy a creamy, satisfying meal without losing the essence of the dish. Yes, you can use store-bought pesto in this recipe. It saves time and still tastes great. However, homemade pesto has unique benefits: - You can control the ingredients for freshness. - You can adjust flavors to your liking. - Homemade pesto often tastes brighter and more vibrant. If you have the time, I recommend making your own for the best flavor. Pair this dish with side dishes and drinks that enhance its taste. Here are some ideas: - A simple arugula salad with lemon vinaigrette. - Garlic bread for a crunchy side. - A glass of chilled white wine like Pinot Grigio. These choices complement the creamy, rich flavor of the tortellini. They make for a delightful meal experience. For the full recipe, check out the instructions above! This blog post covered how to make a tasty creamy pesto tortellini. We discussed the key ingredients like cheese tortellini, heavy cream, and basil pesto, plus optional veggies and proteins. I shared simple steps and helpful tips for the best outcome. You can enjoy this dish any way you like, with fresh veggies or proteins. Remember, your choices make it your own. Whether you serve it to family or friends, it’s sure to please!](https://joymealplan.com/wp-content/uploads/2025/07/0fb47cb4-74c6-4375-a4d7-53564a398b2f-768x768.webp)
