Savory Slow Cooker Moroccan Chickpeas Easy Recipe

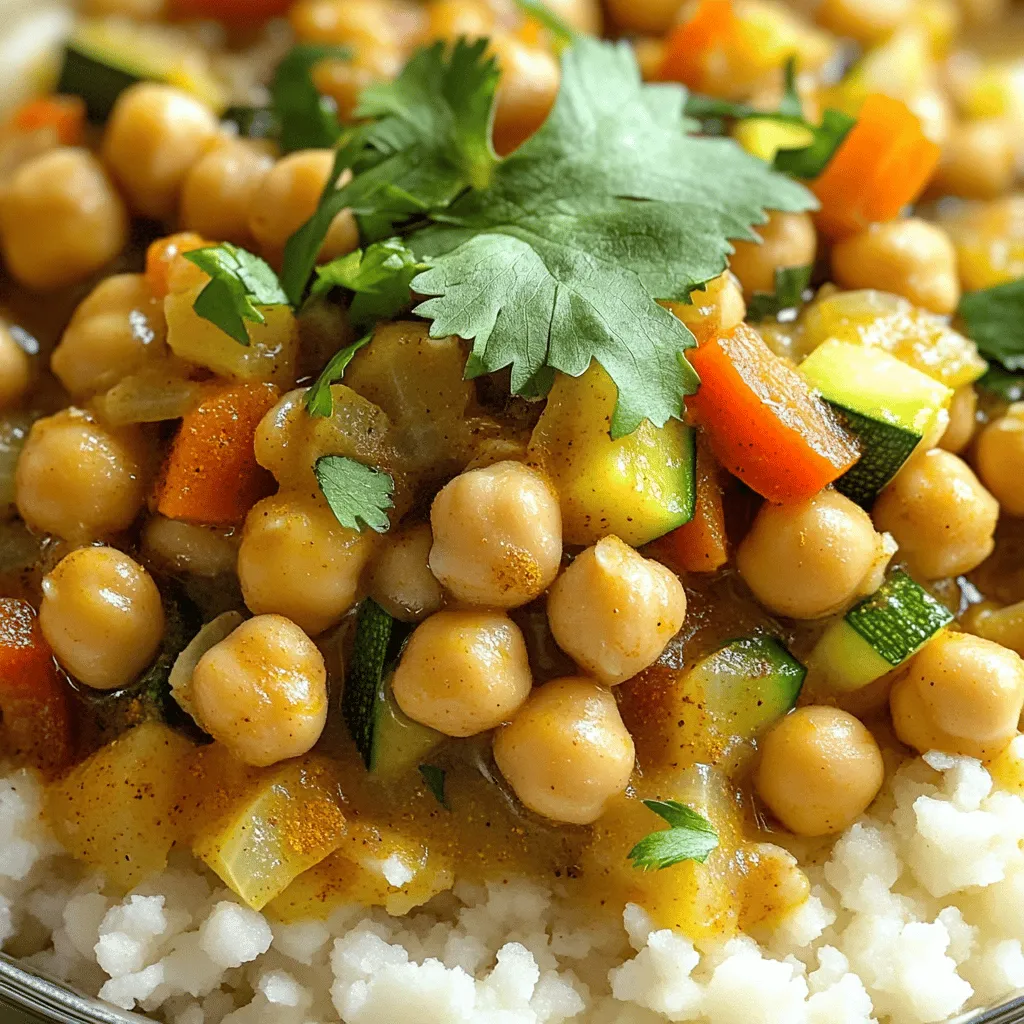
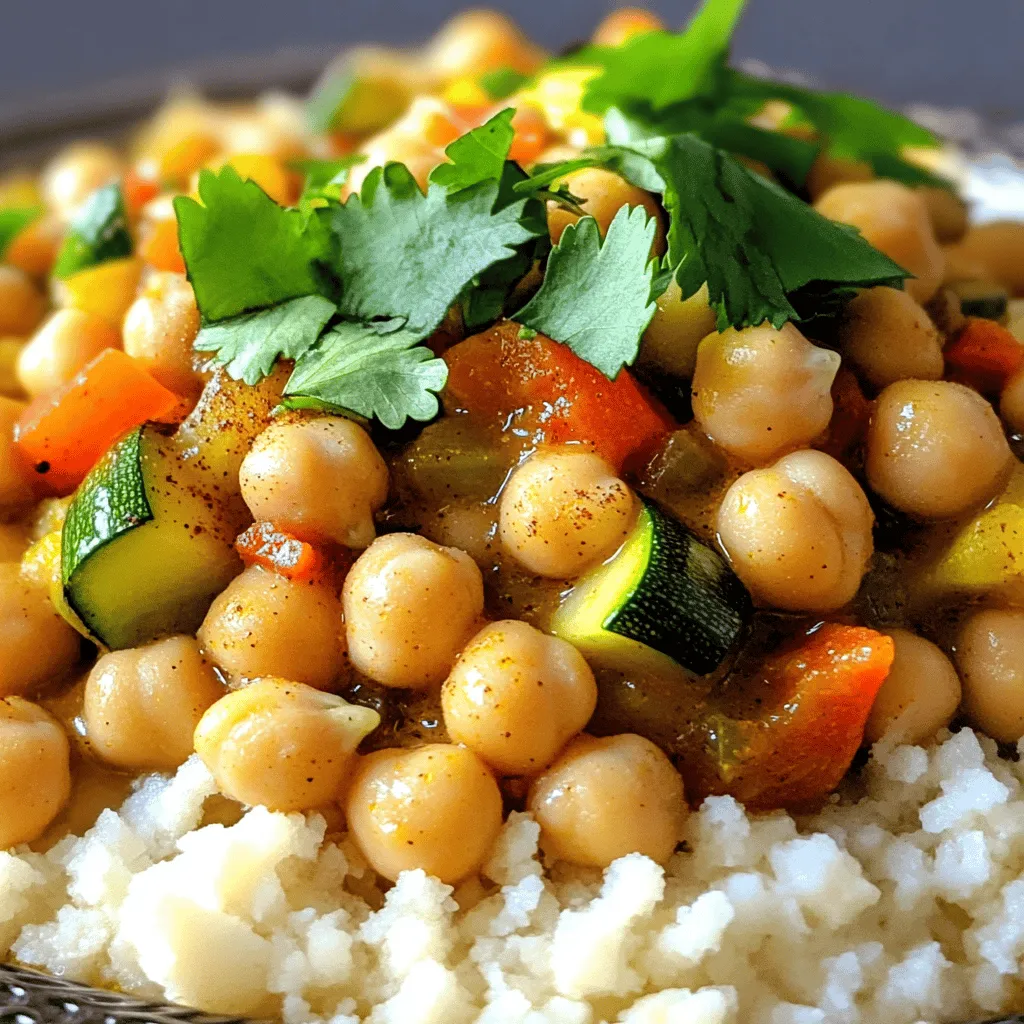
Are you ready to spice up your dinner plans? Let me guide you through making Savory Slow Cooker Moroccan Chickpeas! This easy recipe is packed with flavor and warmth, perfect for busy weeknights. With a few simple ingredients and a slow cooker, you can create a hearty meal that everyone will love. Let’s jump into the vibrant world of Moroccan cuisine and make a dish that’s both healthy and delicious!
Ingredients
List of Ingredients
– 2 cans (15 oz each) chickpeas, well-drained and rinsed
– 1 large onion, finely chopped
– 3 cloves garlic, minced
– 1 red bell pepper, diced
– 2 medium carrots, diced
– 1 zucchini, chopped into bite-sized pieces
– 1 can (14 oz) diced tomatoes, undrained
– 2 cups vegetable broth
– 2 tablespoons tomato paste
– 1 tablespoon ground cumin
– 1 tablespoon ground coriander
– 1 teaspoon ground cinnamon
– 1 teaspoon smoked paprika
– 1 teaspoon turmeric
– 1/2 teaspoon cayenne pepper (adjust for your desired level of spiciness)
– Salt and pepper to taste
– 2 tablespoons olive oil
– Fresh cilantro or parsley, chopped, for garnish
– Cooked couscous or rice, for serving
Proper Measurements
Using the right amounts of each ingredient matters. Measure carefully to ensure balance. Too much spice may overpower the dish. Too little can leave it bland. Stick to the recipe for a great outcome.
Notes on Ingredient Quality
Fresh ingredients make a big difference. Use ripe vegetables for the best flavor. Choose good-quality canned chickpeas; they should be firm and not mushy. Look for low-sodium vegetable broth to control salt levels. Fresh herbs add brightness, so pick them last for your garnish. For a richer taste, opt for extra virgin olive oil. This enhances the dish’s overall flavor. Remember, quality matters!
Step-by-Step Instructions
Preparing the Base
Start by heating 2 tablespoons of olive oil in a large skillet over medium heat. Once hot, add 1 large onion, finely chopped. Sauté the onion for about 5 minutes. You want it to turn soft and fragrant. This step builds a great flavor base for your dish.
Adding Vegetables
Now, it’s time to add more flavor. Toss in 3 cloves of minced garlic and 1 diced red bell pepper. Also, add 2 medium diced carrots and 1 chopped zucchini. Cook these for another 5 minutes, stirring often. You want the veggies to begin softening. This mix gives your dish a nice color and taste.
Transferring to Slow Cooker
Once the veggies are ready, carefully transfer them to your slow cooker. Add 2 cans of well-drained chickpeas and 1 can of undrained diced tomatoes. Pour in 2 cups of vegetable broth and 2 tablespoons of tomato paste. Stir all the ingredients well to combine. This ensures every bite is tasty.
Seasoning the Dish
Next, it’s time to add the spices. Sprinkle in 1 tablespoon of ground cumin, 1 tablespoon of ground coriander, 1 teaspoon of ground cinnamon, 1 teaspoon of smoked paprika, and 1 teaspoon of turmeric. For a kick, add ½ teaspoon of cayenne pepper. Season with salt and pepper to taste. Mix everything together to spread the flavors evenly.
Cooking Times
Cover the slow cooker with its lid. Set it to low heat and let it cook for 6-8 hours. For a quicker meal, set it to high heat for 3-4 hours. The longer it cooks, the better the flavors blend. You want the chickpeas to be tender and delicious.
Final Adjustments and Serving
After cooking, give the dish a good stir. Taste it, and if needed, adjust the seasoning with more salt or pepper. Serve the Moroccan chickpeas over warm cooked couscous or rice. Garnish with chopped fresh cilantro or parsley. This adds a pop of color and freshness.
Tips & Tricks
Enhancing Flavor
To enhance flavor, I recommend using fresh spices. Fresh spices pack a bigger punch than old ones. Try toasting whole spices like cumin and coriander before adding them. This brings out their oils and aromas. You can also add a splash of lemon juice just before serving. It brightens the dish and balances the flavors nicely.
Common Mistakes to Avoid
One common mistake is not rinsing chickpeas. Canned chickpeas can have a salty film. Rinsing helps remove this and improves taste. Another mistake is overcooking. Keep an eye on cooking time. If you cook too long, the chickpeas might turn mushy.
Sautéing for Depth of Flavor
Sautéing vegetables adds depth to your dish. I like to sauté onions until they are soft and sweet. Adding garlic and peppers creates a great base. This step is key for rich flavor. Don’t skip it! Once you transfer everything to the slow cooker, the flavors meld beautifully. For the best results, always sauté before slow cooking.

Variations
Adding Protein Options (Meat or Tofu)
You can boost the protein in your Slow Cooker Moroccan Chickpeas by adding meat or tofu. For meat lovers, chicken or lamb works well. Cut the meat into small pieces and add it at the same time as the vegetables. This way, the meat cooks and soaks up all the rich flavors. If you’re vegetarian or vegan, try using firm tofu. Cube it and add it in with the chickpeas. This adds a nice texture and makes the meal more filling.
Spice Level Adjustments
Adjusting the spice level is easy. If you like it hot, increase the cayenne pepper. Start with a small amount, then taste and add more as needed. You can also add fresh chilies for a different kick. On the other hand, if you prefer mild flavors, skip the cayenne altogether. You can still enjoy the warmth of spices like cumin and coriander without the heat.
Vegetarian and Vegan Alternatives
This recipe is already vegetarian and can easily be made vegan. Use vegetable broth instead of chicken broth, which is already in the recipe. If you want more depth, add a splash of soy sauce or a bit of miso paste. This will add a umami flavor that enhances the dish. Fresh herbs also brighten up the meal. You can use mint or parsley for a refreshing twist.
Storage Info
Refrigeration Guidelines
Once your Slow Cooker Moroccan Chickpeas cool, store them in an airtight container. They last about 4-5 days in the fridge. Make sure to let them cool completely before sealing. This helps keep the flavors fresh and avoids sogginess.
Freezing Instructions
If you want to save some for later, freezing works great! Portion the chickpeas into freezer-safe bags or containers. They can be frozen for 3-4 months. When you’re ready to eat, just thaw them overnight in the fridge. This keeps them tasty and easy to reheat.
Reheating Tips
To reheat, you can use the stove or microwave. On the stove, add a splash of water and heat over low until warm. In the microwave, heat for 1-2 minutes, stirring halfway through. If the chickpeas seem dry, add a bit of broth or water for moisture. Enjoy your meal just like the first time!
FAQs
What can I serve with Slow Cooker Moroccan Chickpeas?
You can serve Slow Cooker Moroccan Chickpeas with several delicious sides. Here are some great options:
– Warm couscous
– Fluffy rice
– Quinoa
– Flatbread
– Fresh salad
Each of these pairs well and adds extra flavor. Couscous absorbs the spices nicely, while rice offers a simple base. You can also add a dollop of yogurt for creaminess.
How to make this dish even spicier?
To spice things up, you can use these tips:
– Increase cayenne pepper in the recipe.
– Add fresh chopped chili peppers.
– Use spicy paprika instead of smoked paprika.
– Top with hot sauce before serving.
Adjust the spice to your taste. Enjoying the heat can make this dish even better!
Can I prepare this recipe in advance?
Yes, you can prepare this recipe in advance. Here’s how:
– Chop all the vegetables and store them in the fridge.
– Mix the spices together ahead of time.
– Combine everything in the slow cooker the night before.
Just set the slow cooker in the morning, and you’ll have a warm meal waiting for you!
Is Slow Cooker Moroccan Chickpeas healthy?
Yes, Slow Cooker Moroccan Chickpeas are quite healthy. They are packed with:
– Protein from chickpeas
– Fiber for digestion
– Vitamins from the veggies
This dish is low in fat and high in nutrients. It’s a fantastic choice for a balanced meal.
How to use leftovers creatively?
Using leftovers can be fun! Here are some ideas:
– Make a chickpea salad with fresh greens and dressing.
– Blend into a soup for a creamy texture.
– Stuff into pita bread with veggies for a sandwich.
– Add to tacos for a flavorful twist.
These ideas can keep your meals exciting and tasty throughout the week. Enjoy your Slow Cooker Moroccan Chickpeas!
We covered the key ingredients and measurements needed for Slow Cooker Moroccan Chickpeas. You learned how to prepare your base, add vegetables, and adjust spices for amazing flavor. Remember to avoid common mistakes and enhance taste with sautéing. Explore variations with proteins or spice levels to fit your palate. Lastly, store and reheat leftovers properly for enjoyment later. Slow Cooker Moroccan Chickpeas offer abundant flavor and flexibility. Dive in and enjoy your tasty, healthy meal!


![When making easy chicken fajitas, you need fresh and simple ingredients to bring out the best flavors. Here’s the detailed list: - 2 boneless, skinless chicken breasts, thinly sliced into strips - 1 red bell pepper, sliced into thin strips - 1 green bell pepper, sliced into thin strips - 1 medium onion, sliced into thin rings - 3 cloves garlic, minced - 2 tablespoons olive oil - 1 teaspoon chili powder - 1 teaspoon ground cumin - 1 teaspoon smoked paprika - Salt and freshly ground black pepper, to taste - Juice of 1 fresh lime - Flour tortillas, for serving - Fresh cilantro, chopped, for garnish - Sour cream and salsa, for serving (optional) - You can swap chicken for shrimp or beef if you prefer. - Use corn tortillas if you want a gluten-free option. - Lemon juice can replace lime juice for a different zing. - Look for high-quality chili powder and smoked paprika for a rich taste. - I trust McCormick and Penzeys for spices that boost flavor. - Fresh herbs like cilantro add a nice touch, so always use fresh when possible. For more details on how to prepare your ingredients and cook this dish, check the Full Recipe. To start, prepare your chicken and veggies. Take the two boneless, skinless chicken breasts. Slice them into thin strips. Next, grab one red bell pepper, one green bell pepper, and one medium onion. Slice these into thin strips and rings, respectively. Now, let’s marinate the chicken. In a large bowl, mix the sliced chicken with minced garlic, olive oil, chili powder, cumin, smoked paprika, lime juice, salt, and pepper. Toss everything well. Make sure the chicken is coated evenly with the spices. Let the chicken marinate for at least 15 minutes. You can refrigerate it for up to 2 hours for more flavor. When you are ready to cook, heat a large skillet on medium-high heat. Add the marinated chicken to the skillet. Cook it for about 5 to 7 minutes. Stir occasionally until it reaches an internal temperature of 165°F (75°C). After the chicken is cooked, add the sliced peppers and onion to the skillet. Sauté the mixture for another 5 to 7 minutes. Cook until the veggies are tender but still crunchy. Taste and adjust the seasoning with salt and pepper if needed. Now, let's assemble the fajitas. Start with warm flour tortillas. Place a generous portion of the chicken and vegetable mix in the center of each tortilla. For a lovely presentation, serve the fajitas on a bright platter. Stack the tortillas neatly on the side. Arrange toppings like sour cream and salsa in small bowls. This makes it colorful and inviting. When serving, don’t forget the garnishes. Sprinkle freshly chopped cilantro on top. This adds a fresh touch and enhances the flavor. Enjoy your easy chicken fajitas! For the full recipe, check out [Full Recipe]. To make your chicken fajitas burst with flavor, try these cooking tips: - Use a cast-iron skillet. This tool holds heat well and gives a nice sear to the chicken. - Preheat your pan. A hot pan helps to cook the chicken fast and keeps it juicy. - Don’t overcrowd the pan. Cook in batches if needed. This helps the chicken brown instead of steam. - Add a splash of broth. If the chicken seems dry, add a little chicken broth while cooking. Pair your chicken fajitas with these tasty sides: - Mexican rice. It adds a nice, filling touch. - Refried beans. They give a creamy texture and flavor. - Guacamole. This creamy dip adds richness to the meal. For extra flavor, consider these enhancers: - Squeeze fresh lime juice. It brightens the dish and adds a zesty kick. - Top with sliced avocado. This adds creaminess and balances the spices. - Drizzle with hot sauce. It brings heat and excitement to each bite. Explore the [Full Recipe] for detailed steps on creating this quick dinner. {{image_4}} You can change up the protein in your fajitas. Try shrimp or beef for a new twist. You can even use tofu or tempeh for a plant-based option. Each protein brings a different flavor, so have fun with it. For seasoning, you can mix things up too. Use taco seasoning for a spicier kick. You might enjoy adding lime zest for a fresh taste. Try using garlic powder or onion powder for extra flavor. Each option can make your dish unique. If you want to keep it low-carb, use lettuce wraps instead of tortillas. It gives you a crunchy bite and cuts down on carbs. You can also find low-carb tortillas at the store. For gluten-free options, use corn tortillas. They taste great and work well with the filling. If you're dairy-free, skip the sour cream and use avocado instead. It adds creaminess and flavor without the dairy. To keep your chicken fajitas fresh, store them in an airtight container. Make sure to separate the chicken from the tortillas and toppings. This helps keep everything tasty. You can refrigerate them for up to three days. If you want to save them longer, freeze the chicken and veggies in a freezer-safe bag. They can last for up to three months in the freezer. When you’re ready to eat, thaw them in the fridge overnight. To reheat, use a skillet over medium heat. This method keeps the chicken juicy and the veggies crisp. You can also microwave them, but be careful not to overcook. The expected shelf life for your chicken fajitas is about three days in the fridge. In the freezer, they last about three months. Always check for signs of spoilage before eating. If you see any off smells, discoloration, or mold, it’s best to toss the leftovers. Keeping track of freshness helps you enjoy your meal safely. What is the best way to marinate chicken for fajitas? To marinate chicken for fajitas, mix olive oil, lime juice, and spices. Use chili powder, cumin, and smoked paprika for a great flavor. Combine these in a bowl, add the chicken, and coat it well. Let it marinate for at least 15 minutes. Longer marinating, up to 2 hours, gives better taste. Can I prepare chicken fajitas ahead of time? Yes, you can prepare chicken fajitas ahead of time. Marinate the chicken and store it in the fridge. You can also slice the vegetables early. Just keep them in a sealed container. When you're ready, cook everything up quickly. This makes weeknight meals super easy! What toppings are best for chicken fajitas? Great toppings for chicken fajitas include fresh cilantro, sour cream, and salsa. You can also add sliced avocado, shredded cheese, or jalapeños for extra flavor. These toppings add color and taste, making your fajitas even better. What to do if the chicken is tough or dry? If your chicken is tough or dry, try cooking it at a lower heat next time. Overcooking can dry it out. Also, make sure to marinate the chicken well. This helps keep it juicy. If it happens, serve with a sauce or salsa to add moisture. How to avoid soggy tortillas? To avoid soggy tortillas, warm them briefly in a pan. This keeps them soft but not wet. You can also heat them in the oven wrapped in foil. Serve the hot filling right away to keep your tortillas crisp. How to add more spice to the dish? To add more spice, include extra chili powder or a pinch of cayenne pepper. You can also add sliced jalapeños to the mix. If you want heat at the table, serve hot sauce on the side. Adjust spice levels to suit your taste. Chicken fajitas are a tasty and fun meal to make. You learned about the right ingredients, how to cook them, and tips for perfect fajitas. Whether you want to change the protein or try new spices, options are endless. Store leftovers well to enjoy later. Keep these tips in mind for your next cooking adventure. Enjoy your delicious fajitas with family and friends!](https://joymealplan.com/wp-content/uploads/2025/06/5a93604c-472d-424a-a3e8-bce972c2f096-768x768.webp)

 for all the details! {{image_4}} You can switch up the protein in Chicken Alfredo Stuffed Shells easily. Ground turkey or beef works well. Both give a rich taste and fit well in the shells. If you want a lighter option, ground chicken is great too. For vegetarian options, you can use mushrooms or spinach. They add flavor and nutrients without meat. Tofu is also a good choice. It soaks up the sauce nicely and adds protein. You can play with the sauce to create different flavors. Try adding garlic or herbs to the Alfredo sauce. This gives it a fresh taste. You might also enjoy a white wine cream sauce for a twist. Adding roasted vegetables to the sauce works wonders too. Think peppers, zucchini, or even spinach. This makes the dish colorful and healthy. Cheese can change the whole vibe of your dish. You can mix in different cheeses like fontina or gouda. These cheeses melt beautifully and add a new flavor. If you want a lighter option, try part-skim mozzarella. For those who avoid dairy, vegan cheese is a great alternative. Look for brands made from nuts or soy. They can also melt well and taste great. To store Chicken Alfredo stuffed shells in the fridge, let them cool first. Place them in an airtight container. Keep them in the fridge for up to three days. For best freshness, cover the top with a bit of extra Alfredo sauce. This keeps the shells moist and tasty. To freeze stuffed shells, first let them cool completely. Then, place them in a single layer on a baking sheet. Freeze until solid, about two hours. After that, pack them in a freezer-safe container or bag. They can last for up to three months in the freezer. When you’re ready to eat, thaw them in the fridge overnight. Reheat in the oven at 350°F (175°C) for about 25 minutes. Cover with foil to avoid drying out. Enjoy your delicious meal again! Can I use non-dairy substitutes? Yes, you can! Use non-dairy cheese and a plant-based Alfredo sauce. This keeps the dish creamy without dairy. How long does it take to cook from frozen? If you cook from frozen, add about 15 to 20 minutes to the baking time. This ensures everything heats through well. What can I serve with Chicken Alfredo Stuffed Shells? These shells pair great with a fresh green salad or warm garlic bread. Both options add balance to your meal. Why are my shells falling apart? Overcooking the pasta shells can cause this. Make sure to cook them just until al dente. How can I prevent the filling from spilling out? Don’t overfill the shells. Fill them just enough, but leave some space at the top. This helps keep the filling secure. What's the best way to know when it's fully cooked? Check if the cheese on top is bubbly and golden brown. You can also insert a knife to see if it’s hot inside. Can I make this dish ahead of time? Absolutely! You can prepare the shells and store them in the fridge. Just bake them when you're ready to eat. For details, check the Full Recipe. In this article, we explored how to make Chicken Alfredo Stuffed Shells. We covered the key ingredients, including pasta shells, chicken, and cheeses. I shared clear steps for preparation, filling, and baking. We also discussed tips for perfecting your dish and variations to suit your taste. Remember, cooking is fun and can be creative. Don't hesitate to try new flavors or ingredients. Enjoy your delicious stuffed shells and share them with friends and family!](https://joymealplan.com/wp-content/uploads/2025/07/ca290995-1373-40bc-abd5-a22e15d03aa0-768x768.webp)


